
Integrate Zoho Books with WhatsApp
Using WhatsApp for communication offers an easy way to send messages to your customers and vendors with a personalized touch. By integrating Zoho Books with WhatsApp, you can send notifications for invoices, sales orders, payment receipts, customer statements, quotes, retainer invoices, credit notes, and sales receipts to your customers, and vendor statements to your vendors.
Once you enable WhatsApp in Zoho Books, you need to purchase credits to send notifications to your customers and vendors. Learn more about WhatsApp Instant Messaging (IM) Credits.
Prerequisites:
- Once you set up this integration, Zoho will become your Business Service Provider (BSP). Ensure your WhatsApp Business account is not associated with other BSPs.
- The phone number you want to use to set up this integration must be valid and owned by you. If it is associated with any other BSPs, WhatsApp Personal or WhatsApp Business accounts, you may lose your existing chats.
- You should have a verified Facebook Business Manager account.
Connect to WhatsApp
To send WhatsApp notifications to your customers and vendors, you must connect Zoho Books to WhatsApp first. Here’s how:
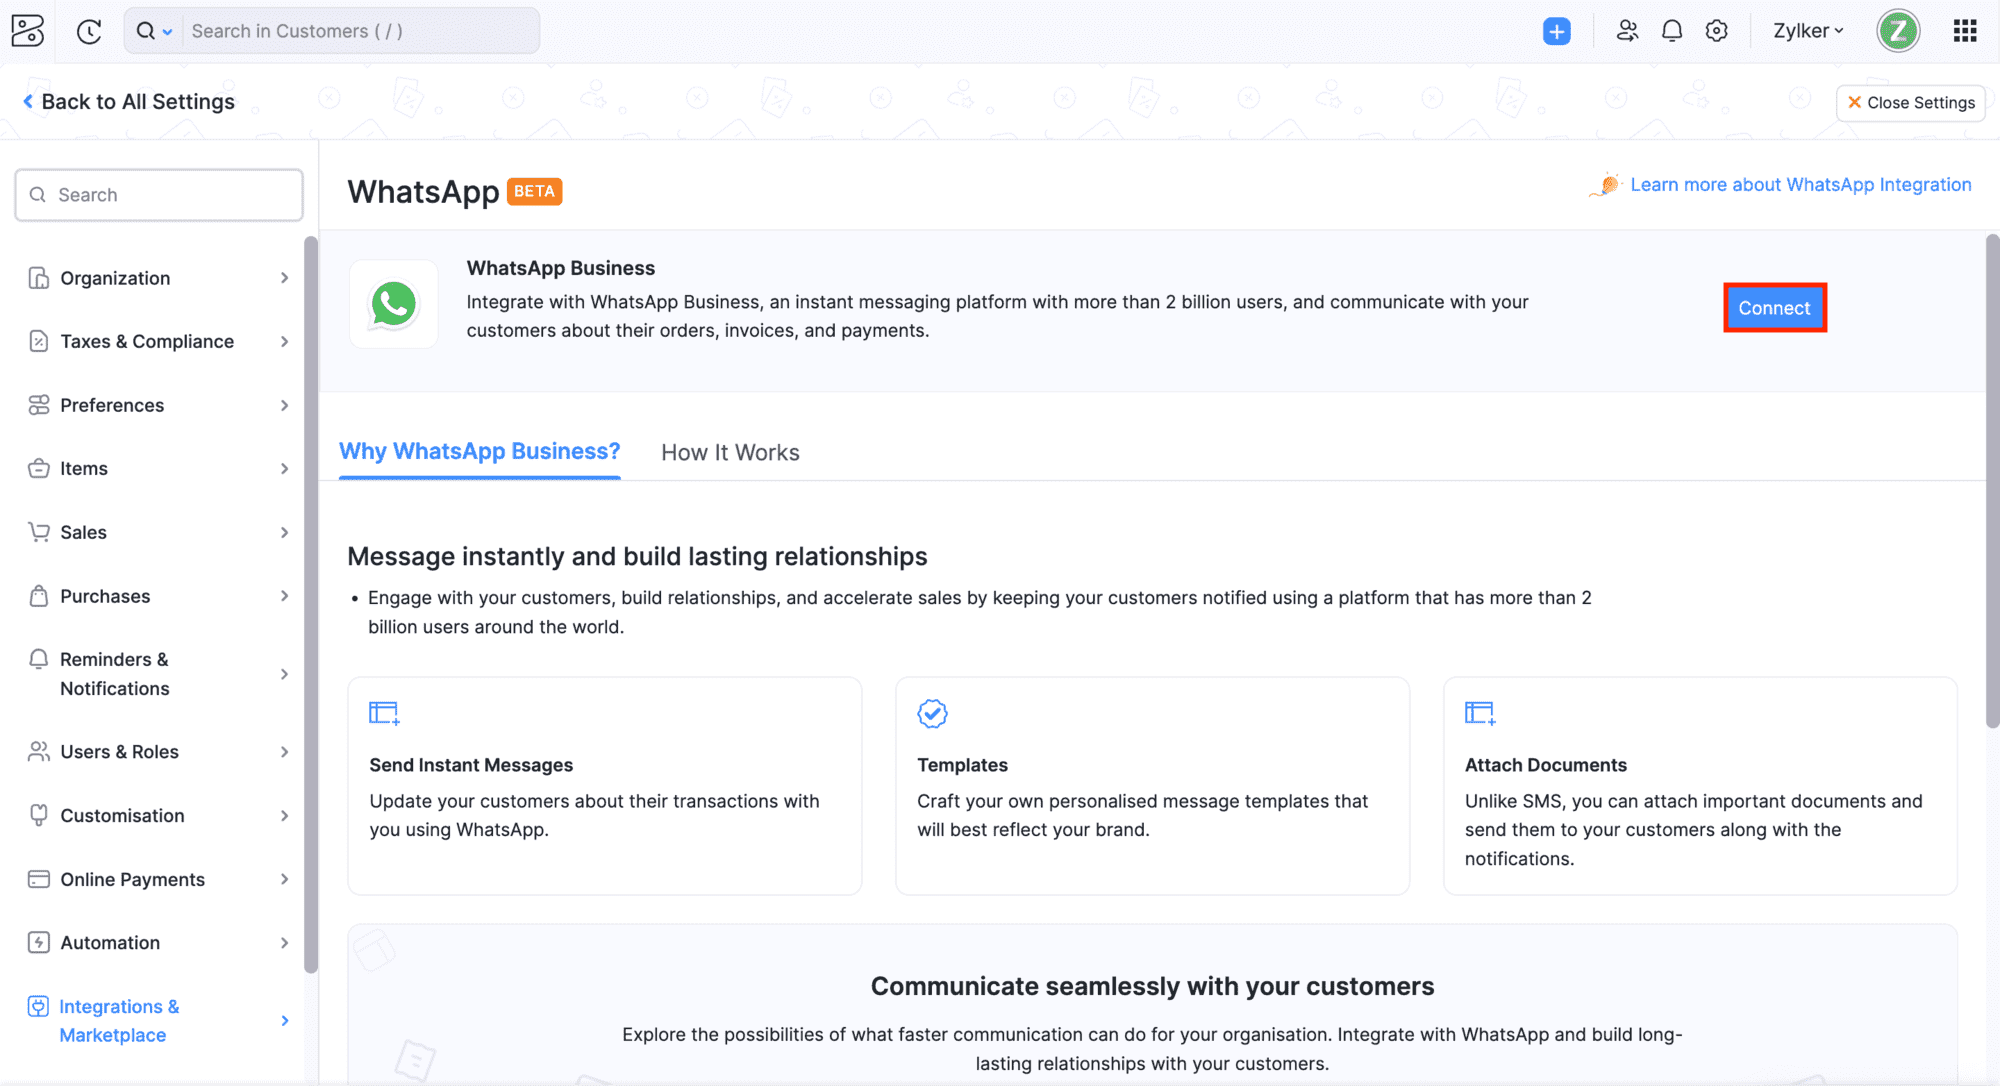
Go to Settings and then Integrations & Marketplace.
Navigate to WhatsApp and click Connect near WhatsApp Business.
In case you have an existing WhatsApp Business account, the Set up WhatsApp Business pop-up will appear.
Click Use the existing WhatsApp Business account registered with Zoho and select the account from the dropdown to continue using the existing WhatsApp account that is integrated with other Zoho apps. (or)
Click Connect a new WhatsApp Business account with Zoho to connect a new WhatsApp Business account.
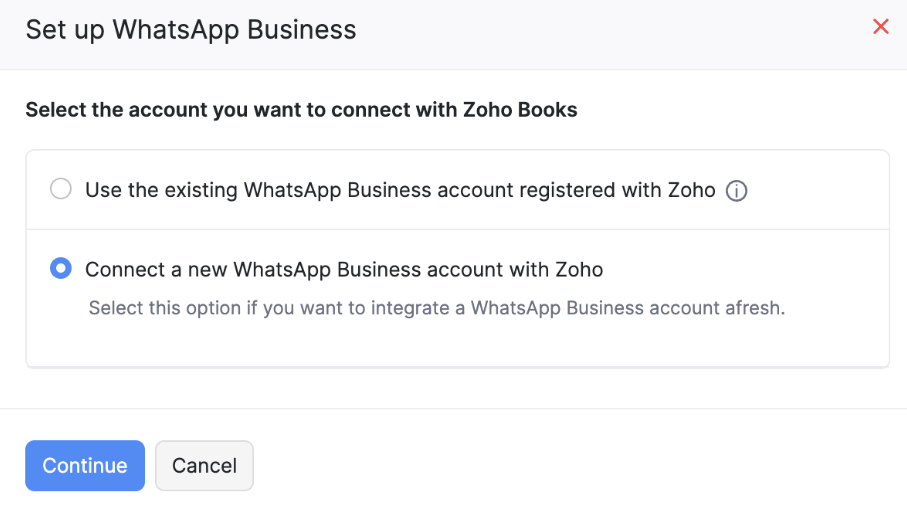
Click Continue.
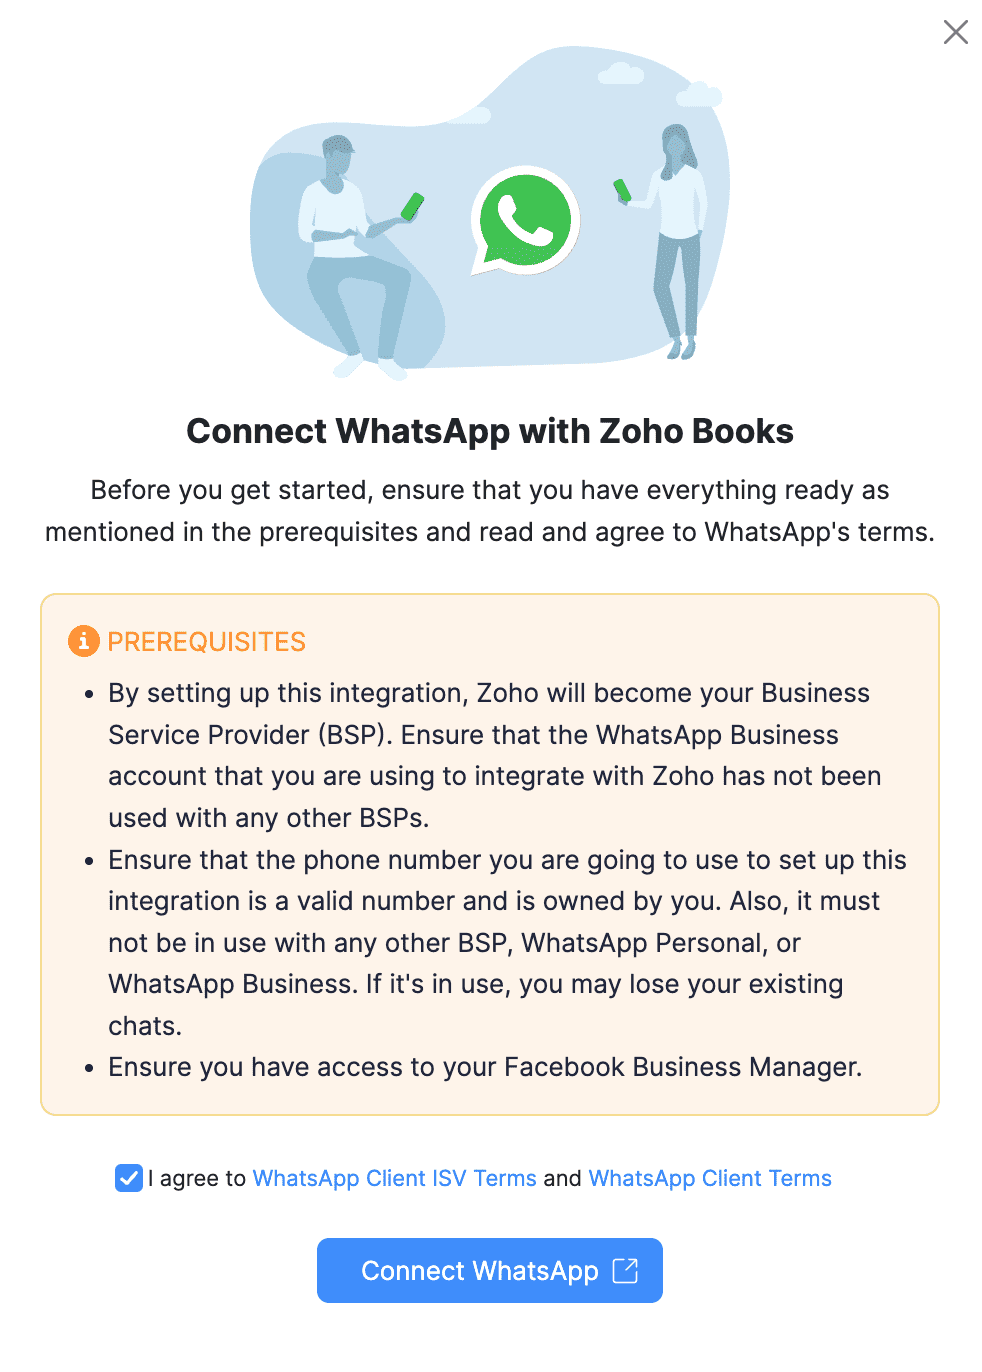
Read and agree to the terms in the Connect WhatsApp with Zoho Books pop-up.
Click Connect WhatsApp and you will be redirected to the Facebook Login page.
Enter the registered Email Address or Phone Number and Password and click Log in.
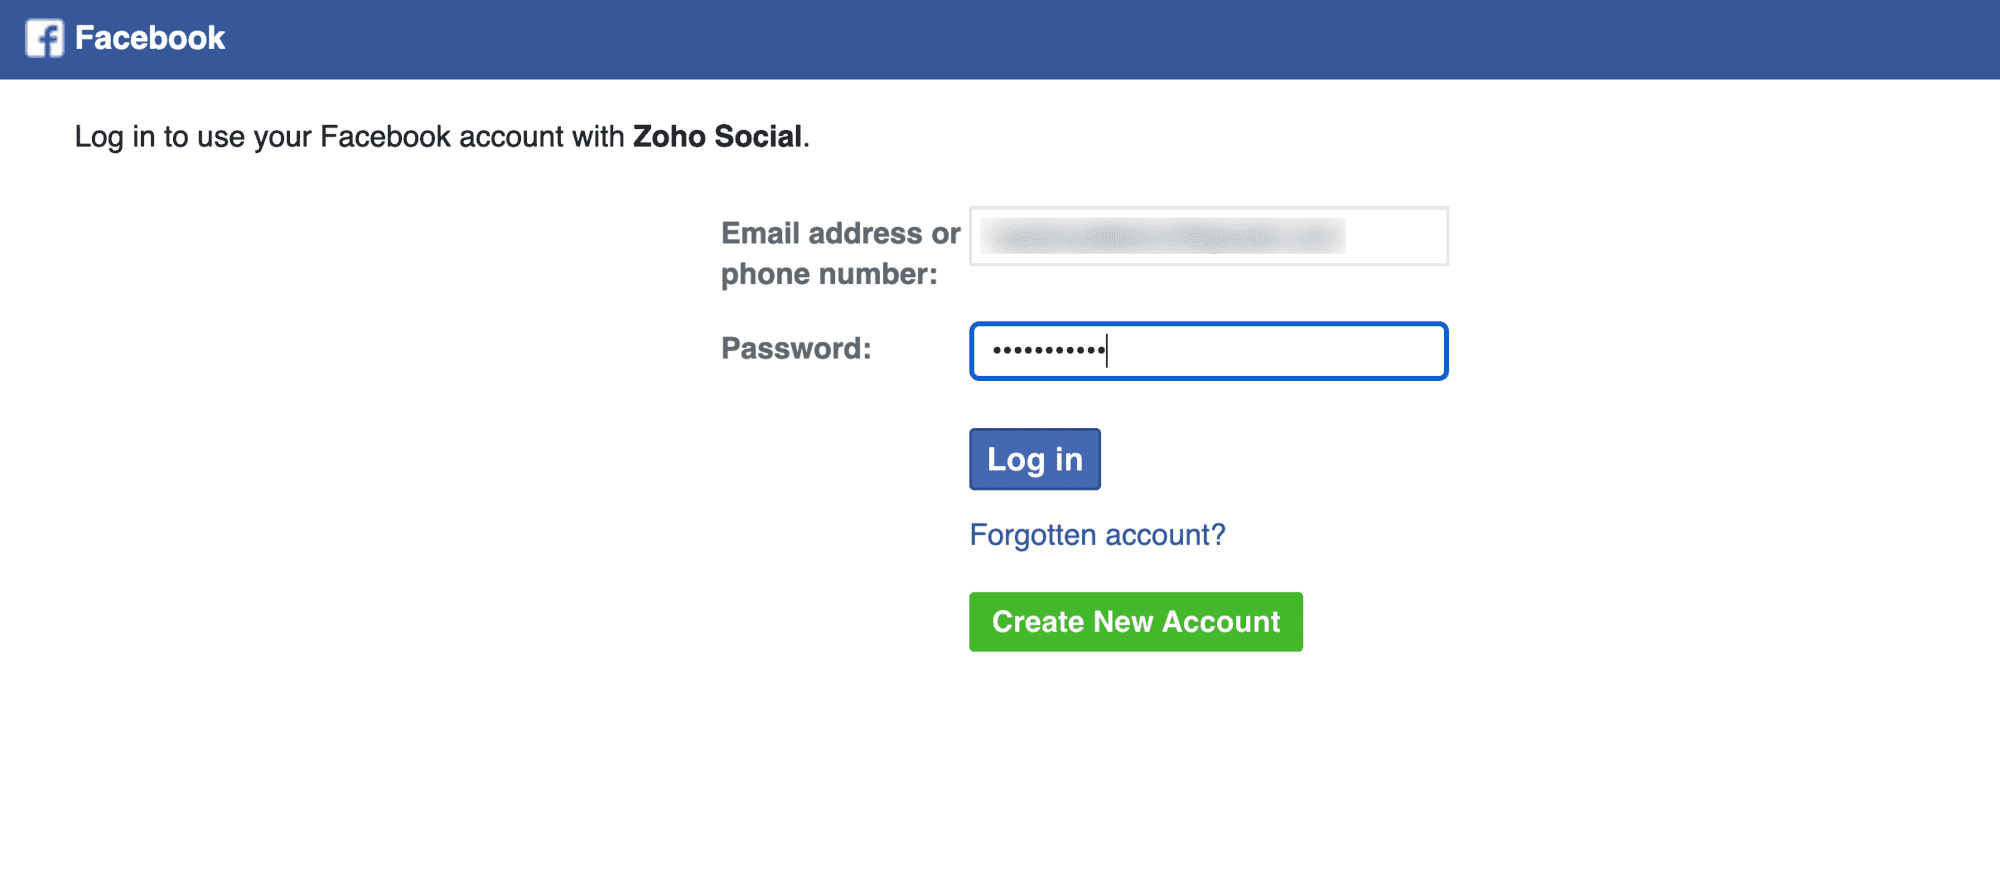
Insight: If you don’t have a Facebook account, create one by clicking Create New Account.
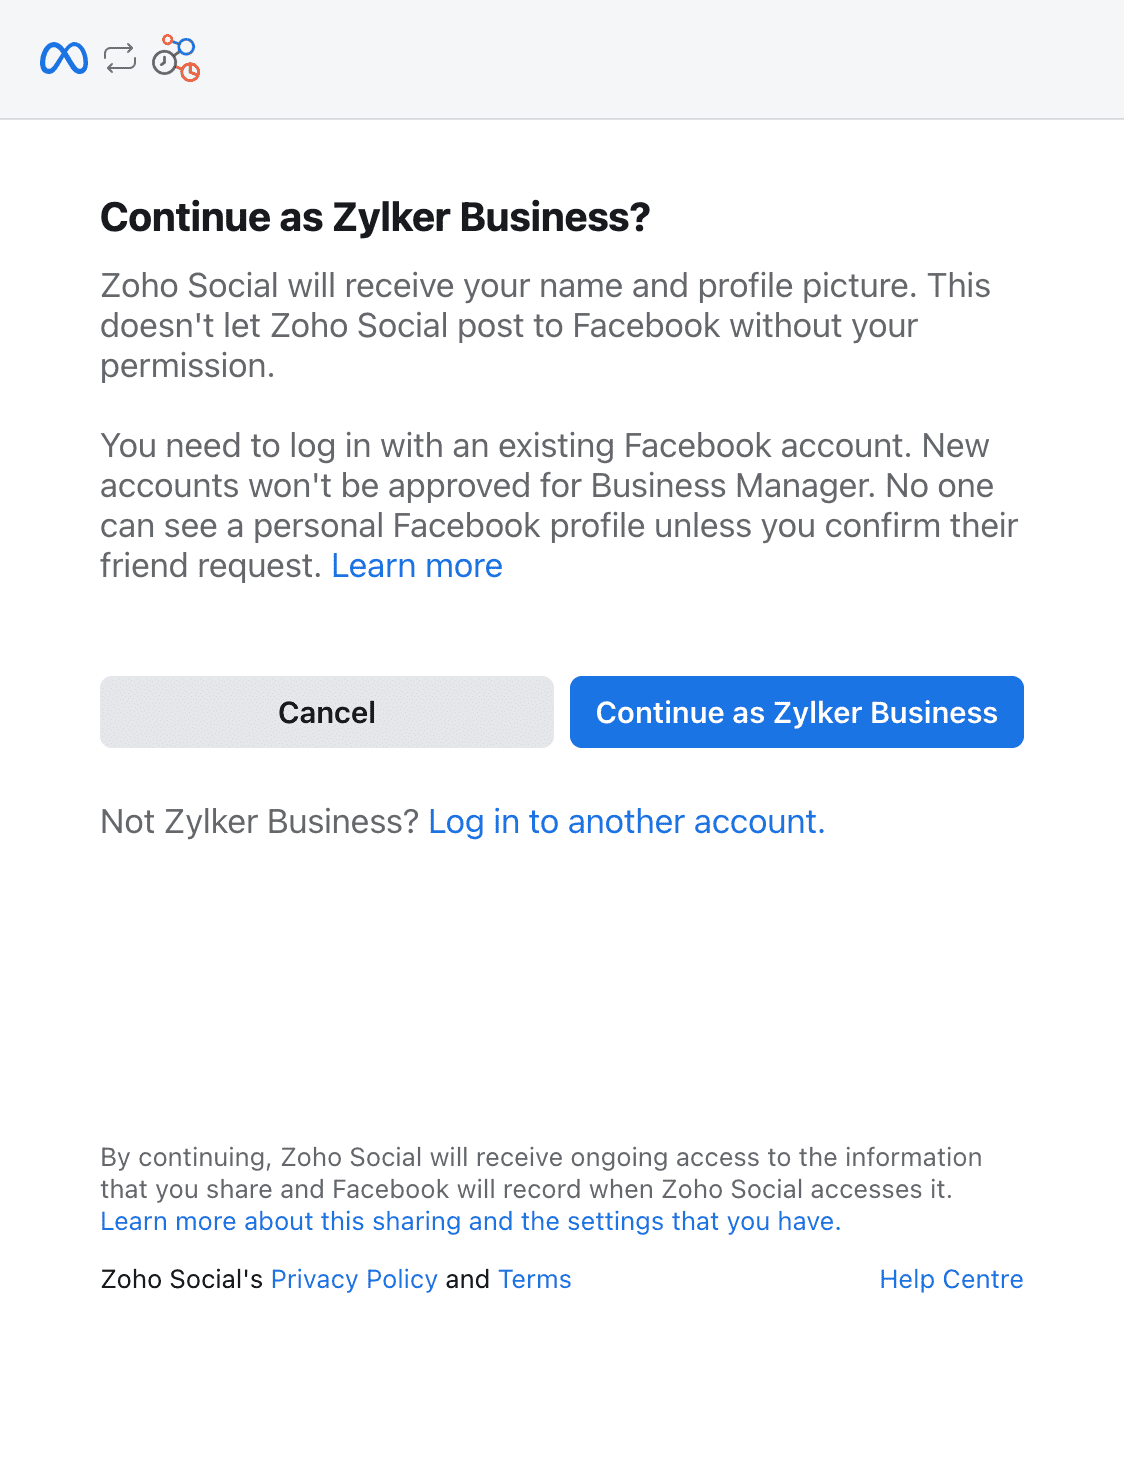
Verify your account and click Continue as ‘Your Account Name’ on the next page. If you want to log in with another account, click Log in to another account.
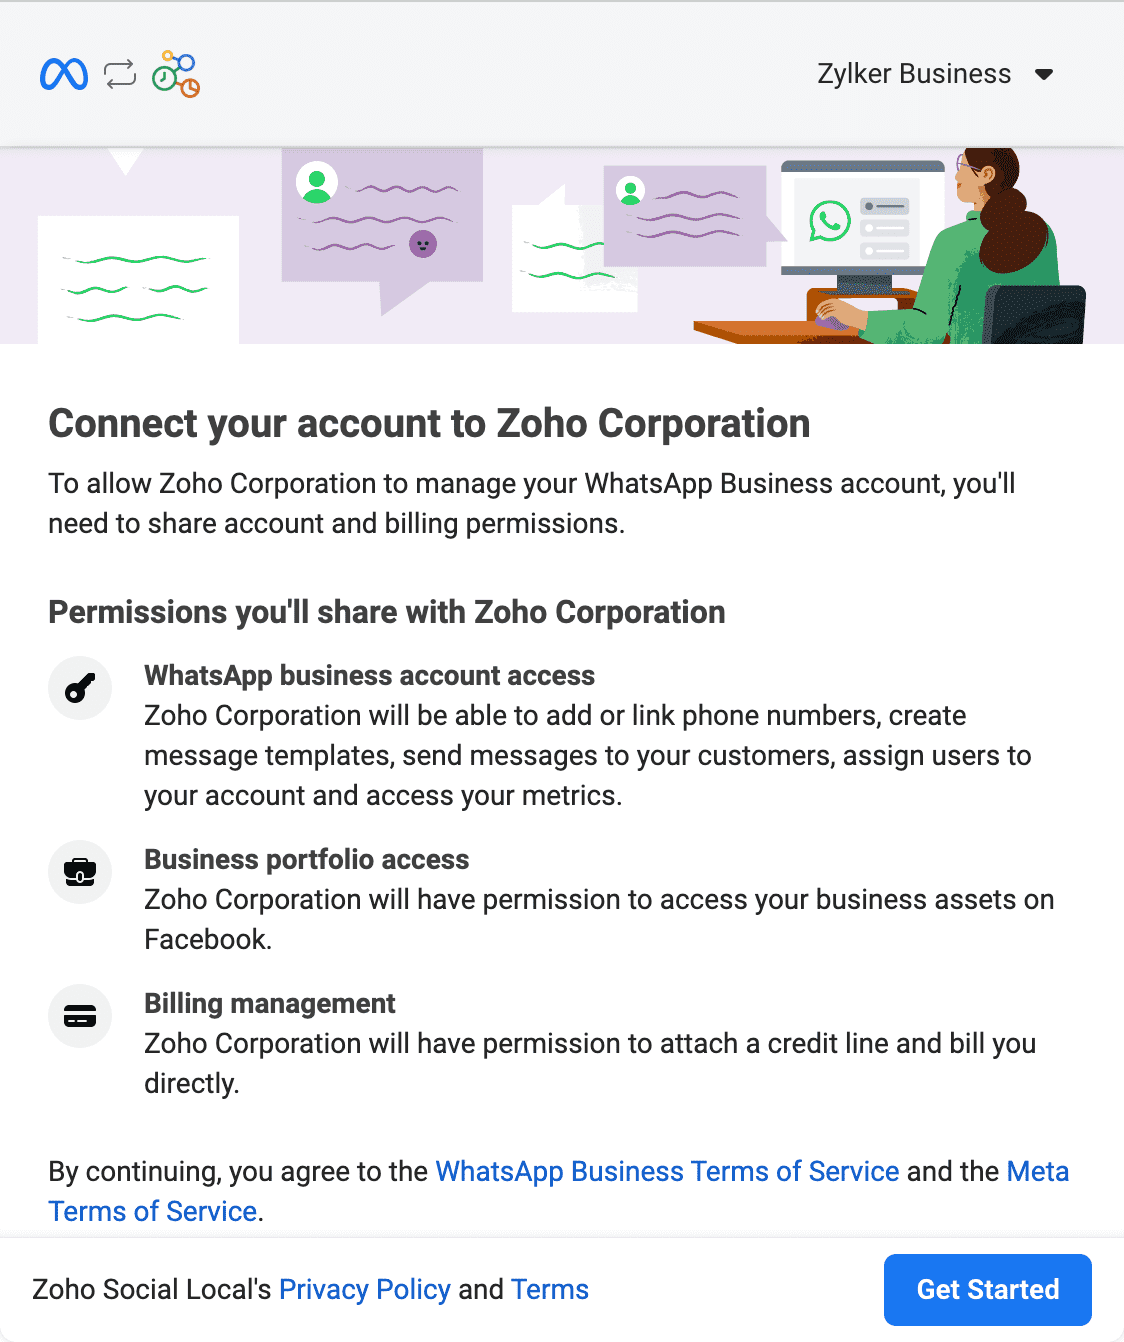
Read through all the WhatsApp Business Terms of Service and the Meta Terms of Service and click Get Started.
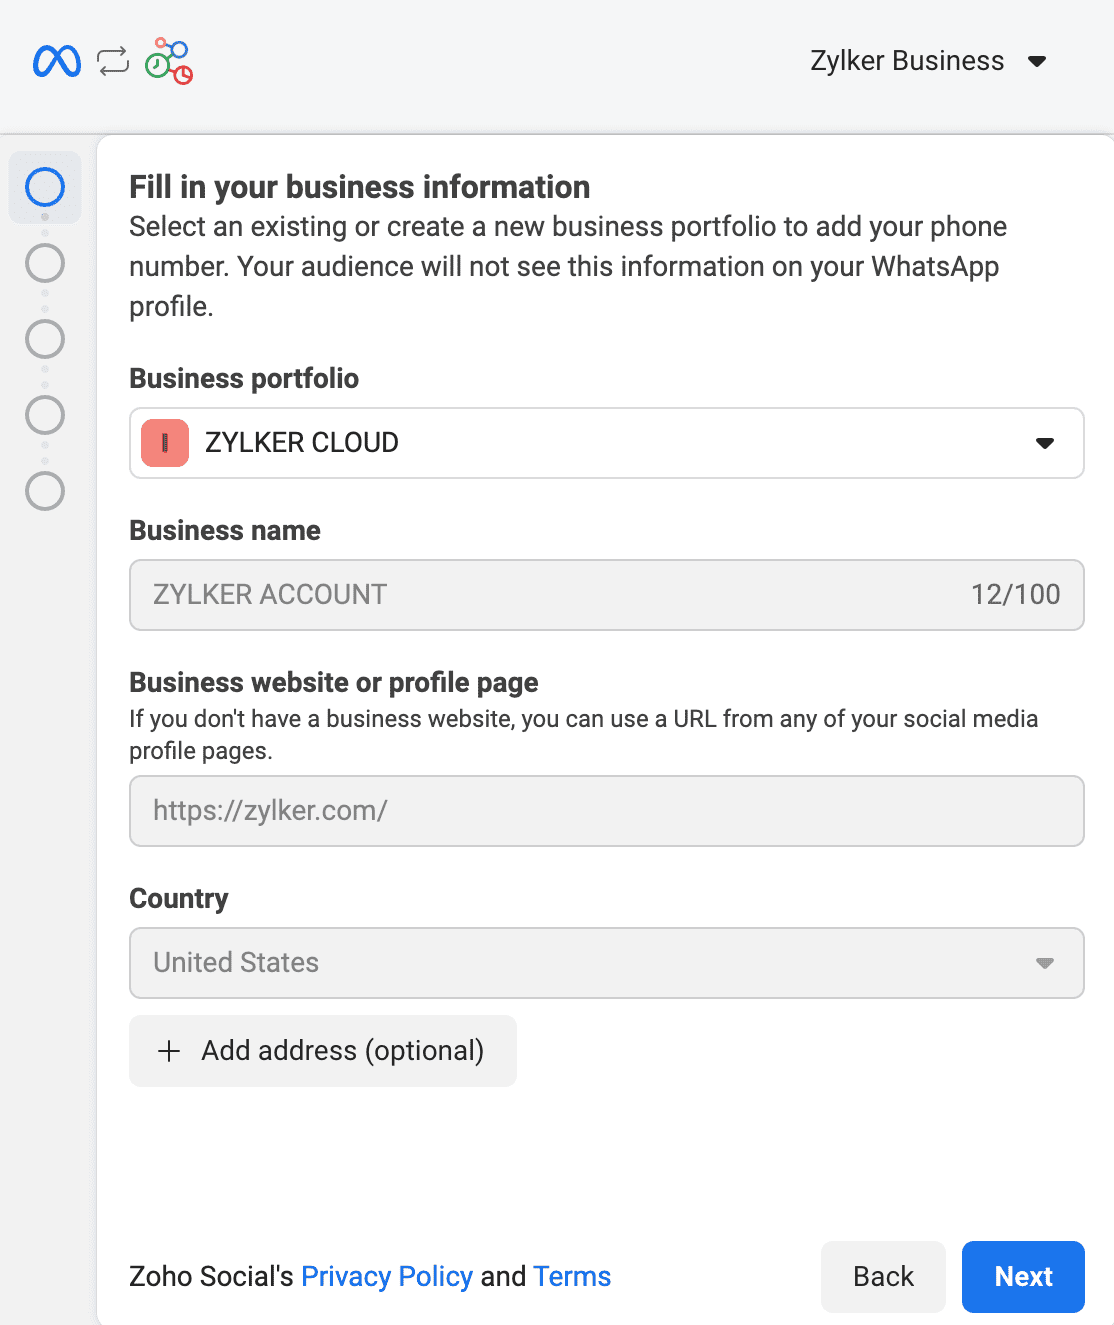
Fill in your Business Details and click Next.
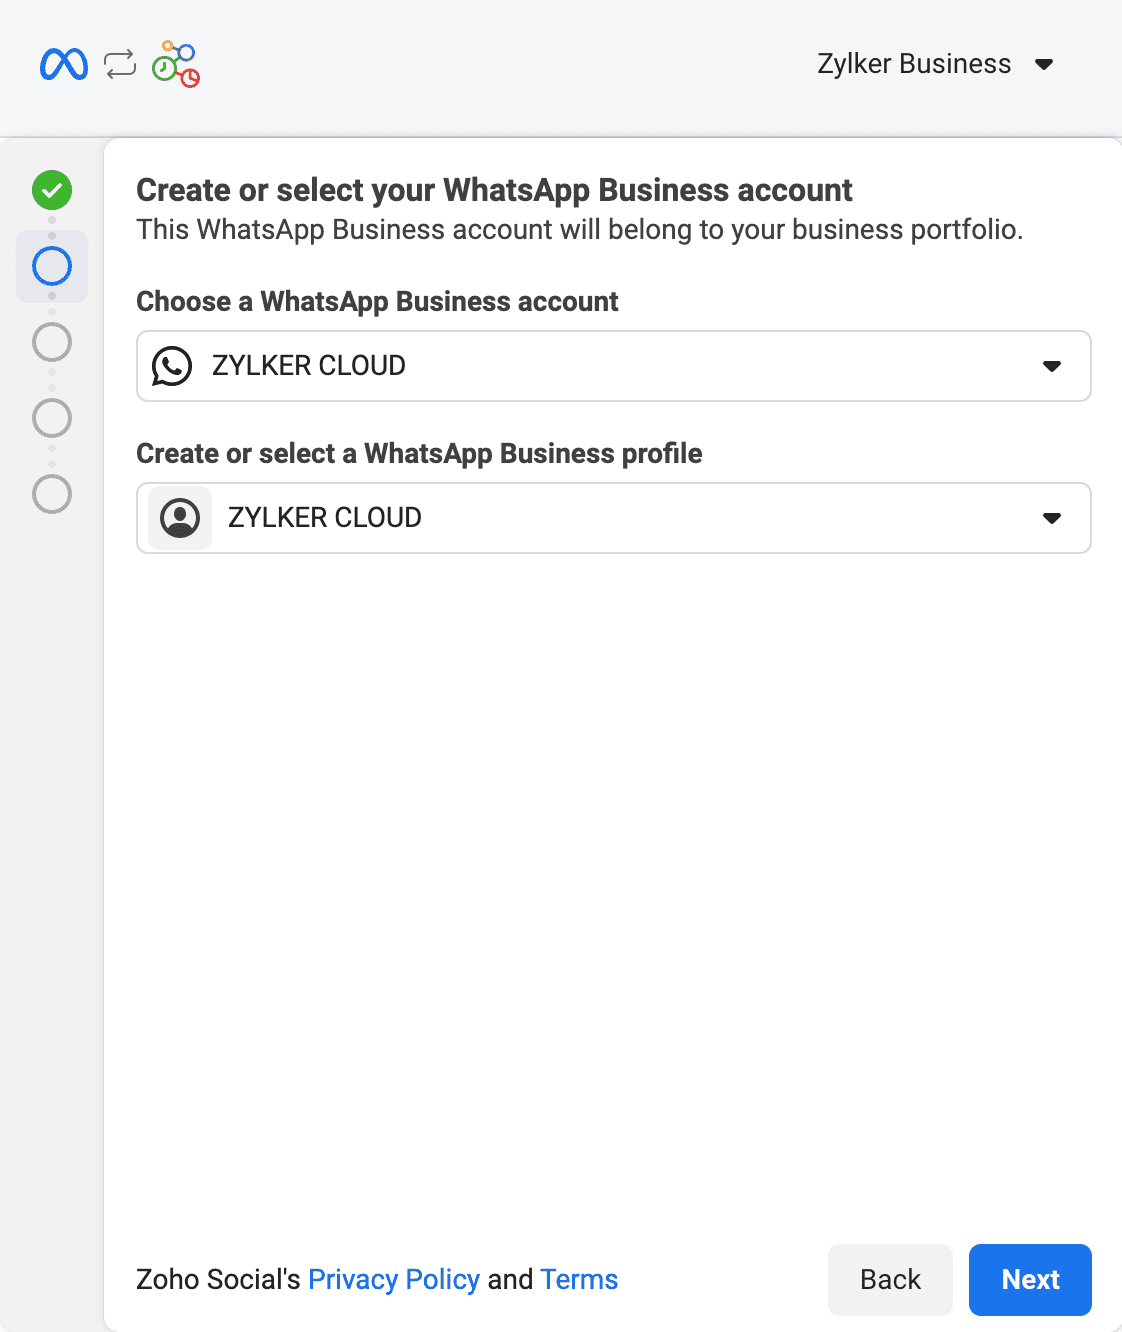
Select a WhatsApp Business account and WhatsApp Business Profile on the following page.
Insight: If you don’t have one, select Create a WhatsApp Business account and Create a new WhatsApp Business Profile from the dropdown.
Click Next and click Finish on the page that follows.
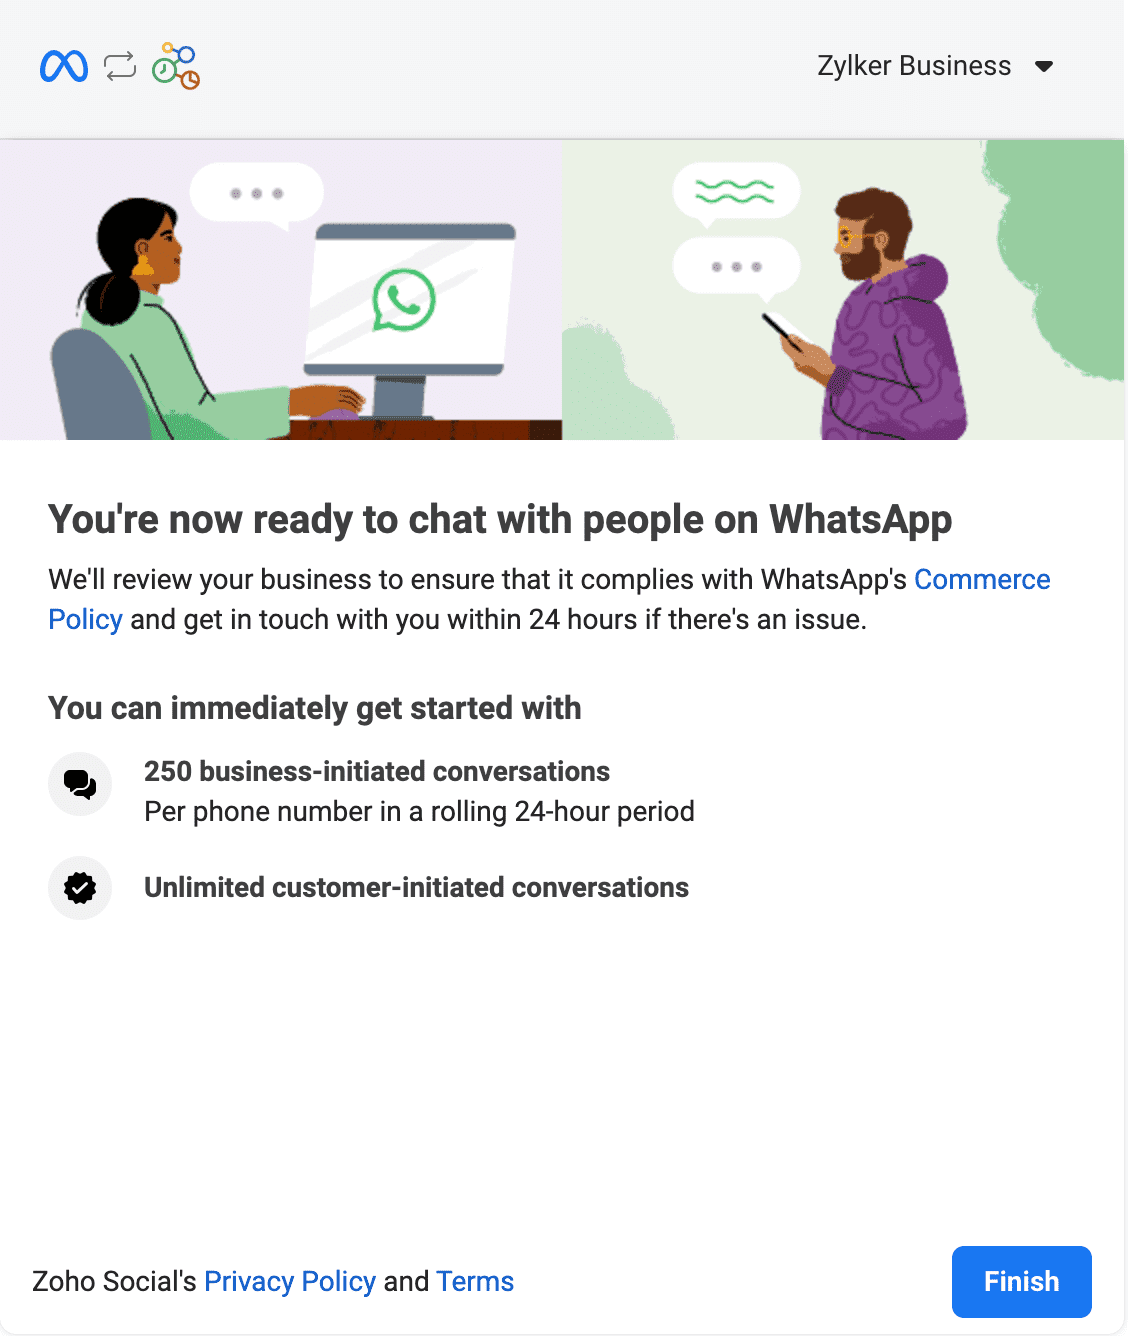
Your Zoho Books organisation will be connected with WhatsApp.
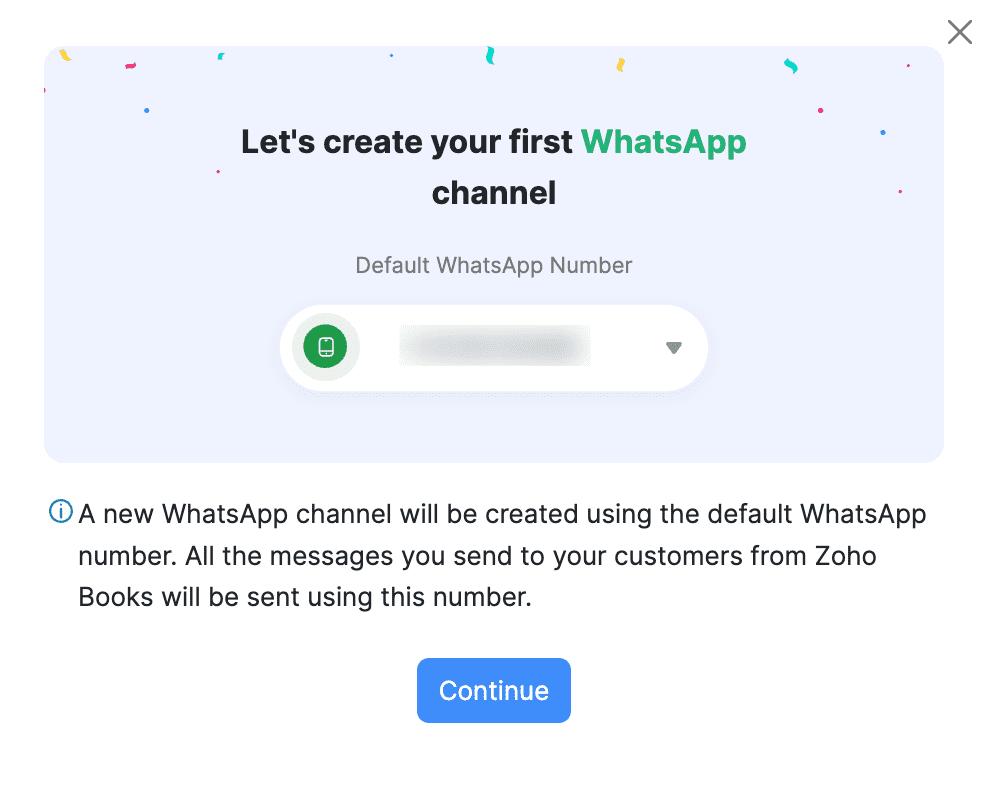
Click Continue in the Connected to WhatsApp pop-up.

Check the Default WhatsApp Number from which the WhatsApp messages will be sent to your customers and click Continue.
Manage Multiple WhatsApp Communication Channels
In Zoho Books, you can configure multiple WhatsApp communication channels to manage your business conversations effectively. You can assign different WhatsApp Business phone numbers for customer and vendor communications, as well as for different message categories under each communication channel. This helps you easily organize and track conversations in your WhatsApp Business account.
To configure multiple WhatsApp channels:
- Go to Settings.
- Select WhatsApp under Integrations & Marketplace.
- In the next page, under Default WhatsApp Business Number, click Configure Channels.
- In the Configure the Default WhatsApp Number pop-up, under Customer Communication, fill in the following fields:
- Apply the Same Number Across Categories: Choose Yes to use the same phone number to send utility and marketing notifications to your customers. Choose No to use different phone numbers to send the notifications.
- Select the required phone numbers for the Utility and Marketing categories.
- Click Save.
Pro Tip:
If you send both utility and marketing notifications from the same phone number, customers might mark it as spam if they receive too many marketing notifications. This can block your utility notifications too. To avoid this, use separate numbers to send utility and marketing notifications. This way, your customers will keep receiving utility notifications hassle-free.
- Under Vendor Communication, select the phone number you want to use to send utility notifications to your vendors.
- Click Save.
- Only the numbers verified by WhatsApp Business will be listed in the pop-up. However, if there are additional WhatsApp Business phone numbers that you want to use in Zoho Books, you must verify them. Here’s how:
- Click Verify Phone Numbers.
- In the following pop-up, select the number you want to verify.
- Click Send OTP. You can also choose to get the OTP via call.
- Enter the OTP you received and click Verify.
- Once the number is verified, click Back and select the verified phone number.
- Click Save.
The WhatsApp communication channel will be set up and the WhatsApp notifications that you send to your customers and vendors will be sent from these phone numbers.
You can either buy credits in the next step or also do it once you have created templates for WhatsApp notifications.
Configure Templates
To send notifications through WhatsApp, create a template in Zoho Books and get it approved by the WhatsApp Business team.
Create Templates
To create a template:
- Go to Settings.
- Select WhatsApp under Integrations & Marketplace.
- In the Message Templates section, select the respective module (for example, Customers) for which you want to create a template.
- In the next page, click + New Template in the top right corner.
- In the Create WhatsApp Template page, fill in the following details:
- Enter the Template Name, and select the required Template Category. The Template Category could either be Utility or Marketing. Learn more about Template Categorization.
- Enter the content to be included in the Header section, or select Attachment Message as the Message Type, and select the required Attachment Type. The available attachment types are Dynamic and Static.
- If you’ve selected the Dynamic attachment type, the transaction related document will be automatically sent to the contact persons.
- If you’ve selected the Static attachment type, upload the required Attachment you wish to include in the message template. Note that you can create static message templates only for the Customers module.
- Click the dropdown next to Language to select the preferred language in which you can send messages to your contact persons.
- Edit the content under the Message Content field if required. You can insert placeholders by clicking the dropdown next to Insert Placeholders.
- Enter the content to be included in the Footer section.
- In the Call-to-Action Buttons section, enter the Button Text, select the required Type (phone number or URL), and enter the Value of the CTA. Click + New Button to include additional CTAs in your template. You can create upto two CTAs for a message template.
- Click Save.
The template will be created and sent for approval to Meta. Once Meta approves your template, you can use it to send notifications to your contact persons.
Note: Here are some points to keep in mind while you create a WhatsApp message template:
- You can include a header if required for the Text Only Message type, or include attachments for the Attachment Message type.
- You can either use static or dynamic attachments in your message template.
- You can only use one placeholder in the Header field.
- You cannot use any placeholders in the Footer field.
- The footer should have only one line of text and should not contain any emojis.
- When you add CTAs to the message template, you can include one URL, one phone number, or both.
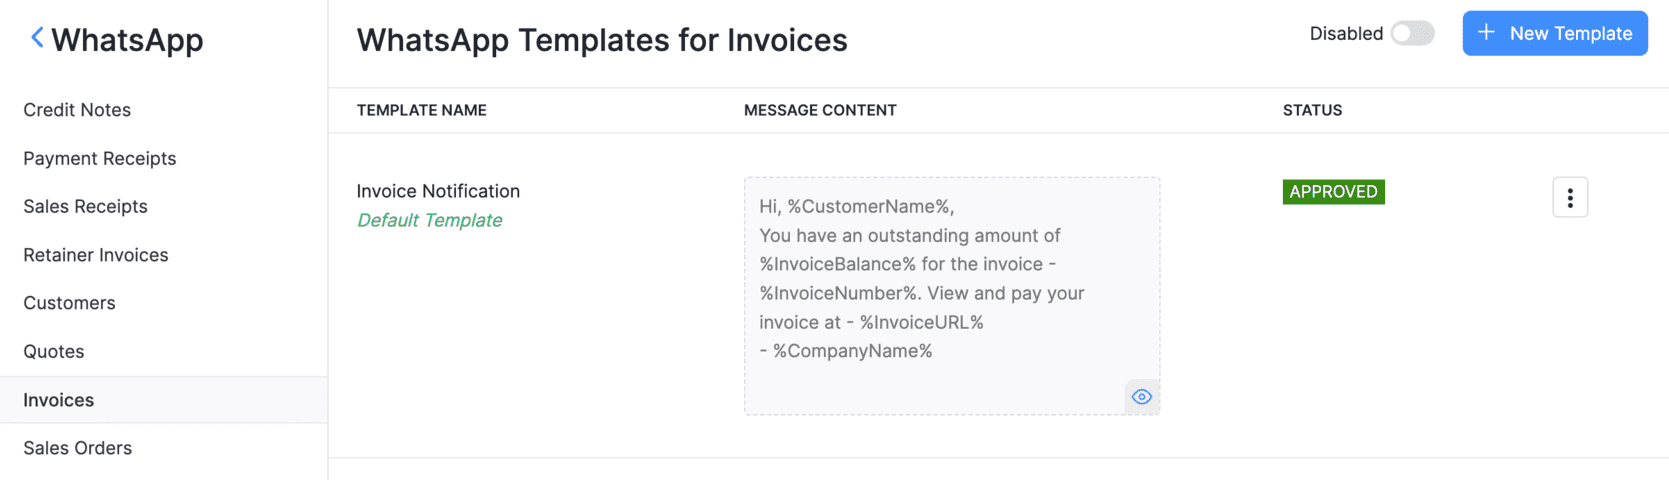
Template Approval
Once you create a template, it will be sent for approval. It can take up to 24 hours for the WhatsApp team to approve it. The status of the approval will be displayed on the list page.
A template can have the following statuses:
| Status | Description |
|---|---|
| Approved | The WhatsApp Business team approved the template and it can be sent to customers. |
| Rejected | The WhatsApp Business team rejected the template. Edit and resumbit the template for approval. Learn why templates get rejected. |
| Pending Approval | The template has been sent to the WhatsApp Business team and is awaiting approval. It could take upto 24 hours for the status to be updated. |
| Deletion in Progress | The WhatsApp Business team is evaluating your request to delete a template. |
| Deletion Failed | The template was not deleted due to network issues. Initiate the delete process once again. |
| Deleted | The WhatsApp Business team has deleted the template. This action cannot be undone. |
Other Actions
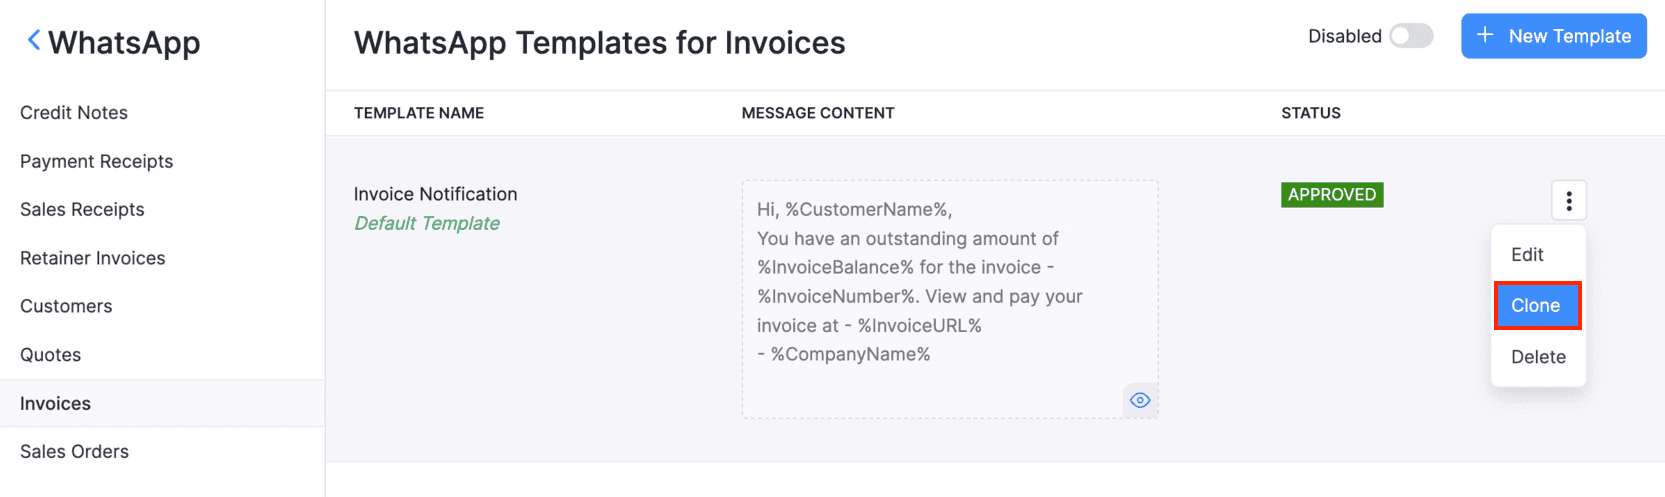
Clone Template
If you want to create a template similar to an existing template, you can clone it. Here’s how:
Go to Settings, navigate to Integrations & Marketplace, and click WhatsApp.
Select the module under Message Templates.
Click the More icon next to the template you want to clone and select Clone.
Edit the necessary details in the following Clone WhatsApp Template pop-up, and click Save.
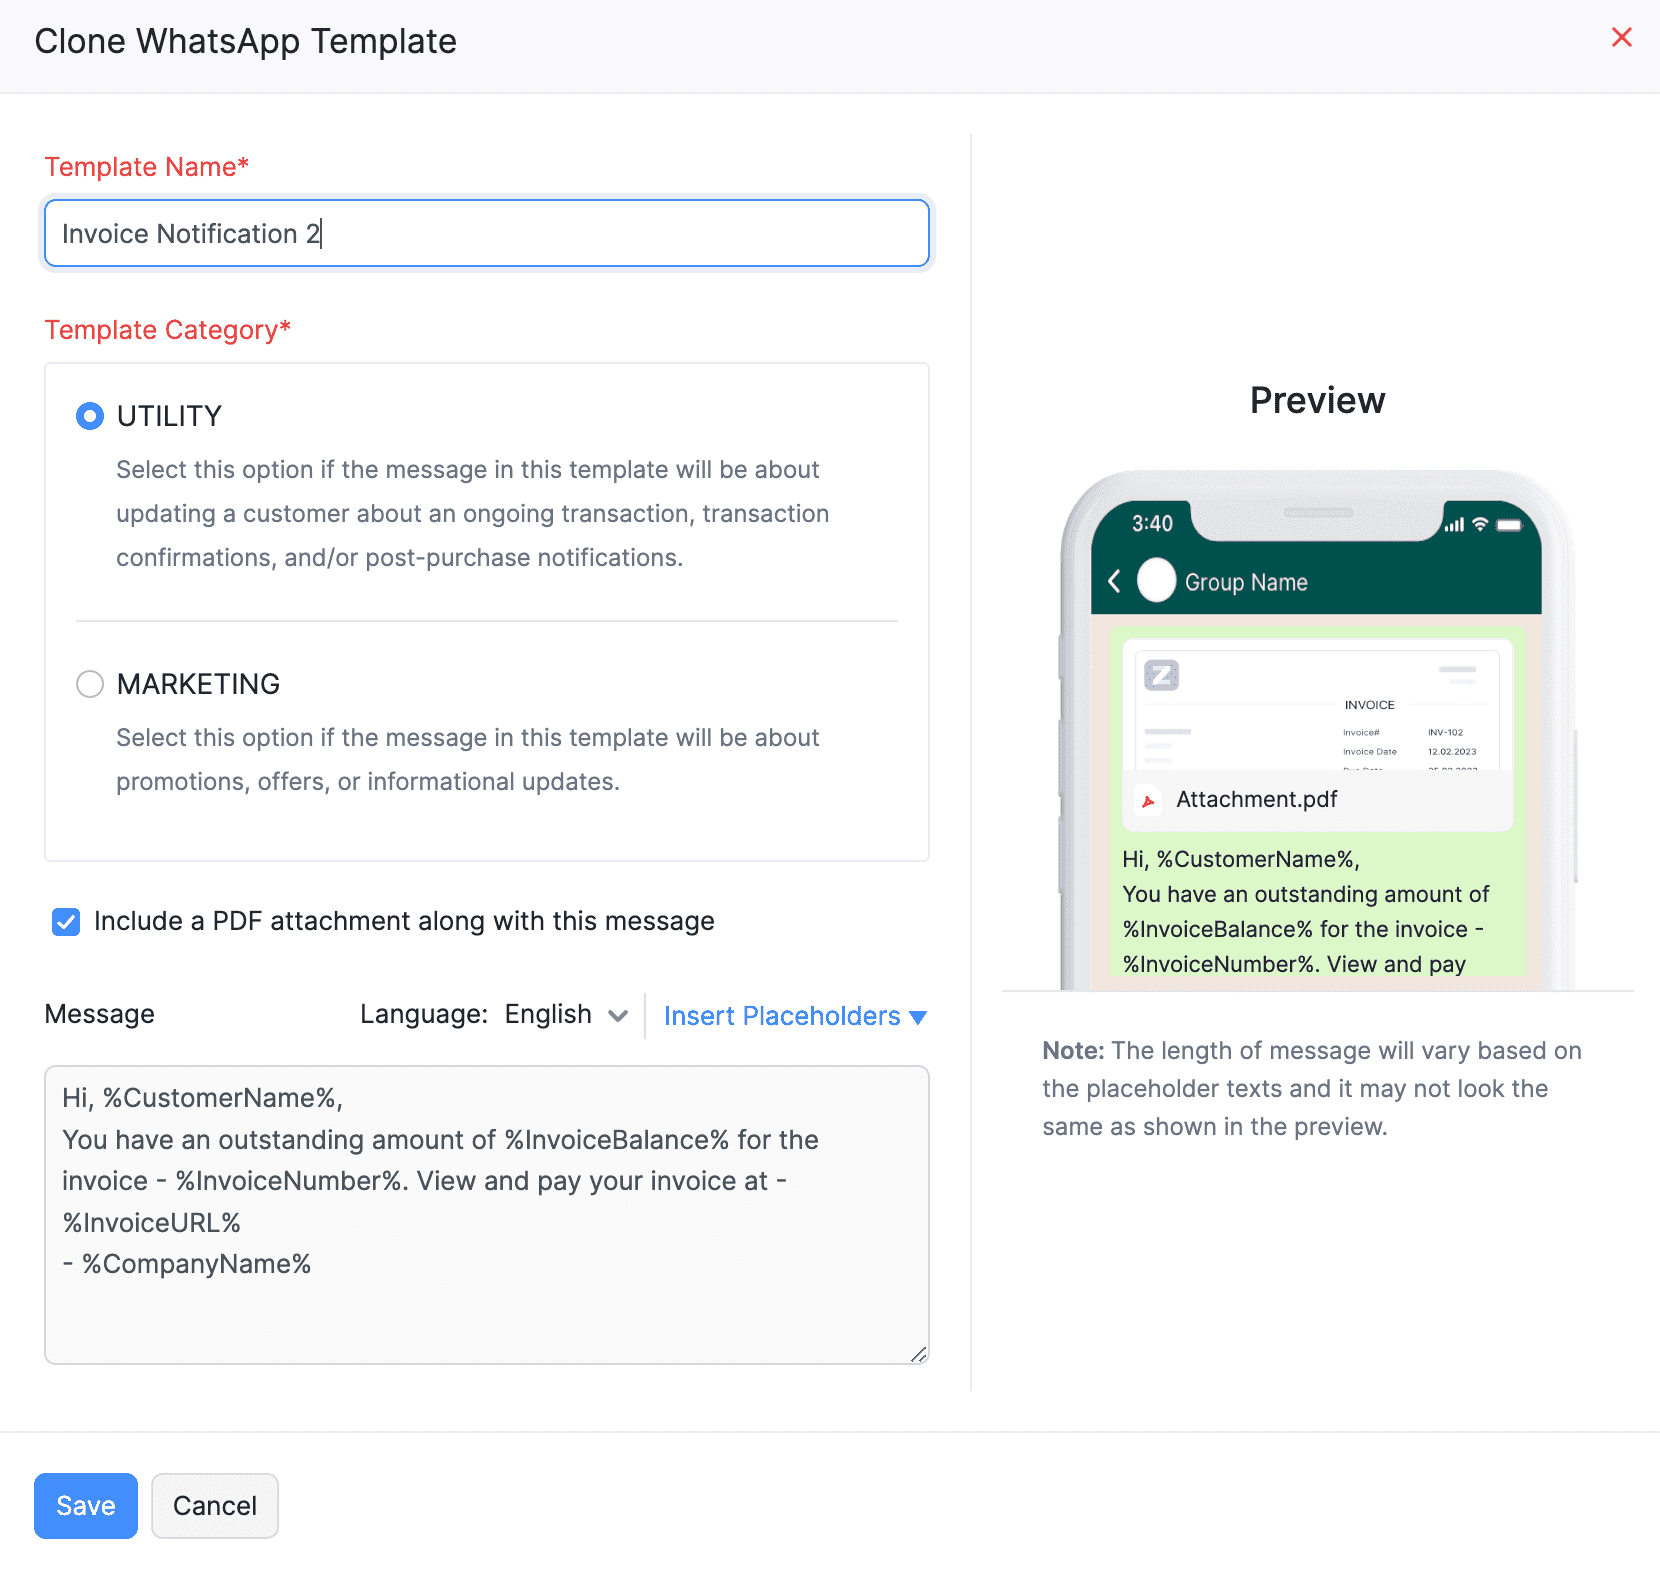
The new cloned template will be sent for approval to the WhatsApp Business team and can be used once approved.
Set Template as Default
If you want a template as your default choice, you can set that template as default. To do so:
Go to Settings, navigate to Integrations & Marketplace, and click WhatsApp.
Select the module under Message Templates.
Click the More icon next to the preferred template and select Set As Default.
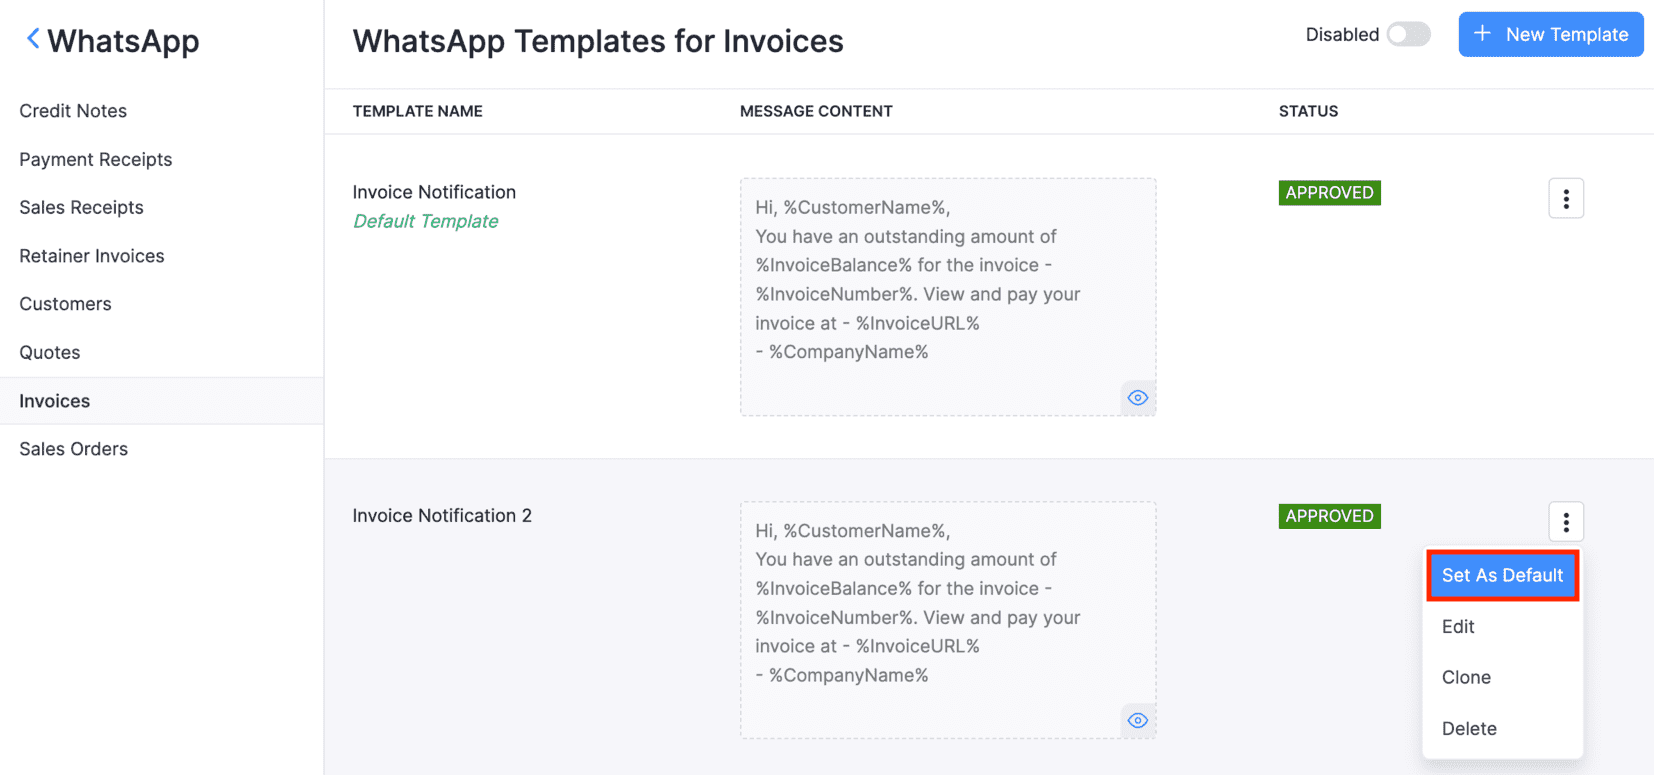
The default template will be auto-populated in the Template Name field when you try to send WhatsApp notifications.
Delete Template
You can delete a WhatsApp template if you do not require it.
Warning: Deleting a template is permanent and cannot be undone. However, you can create a new template again and send it to the WhatsApp Business team for approval.
To delete a template:
- Go to Settings, navigate to Integrations & Marketplace, and click WhatsApp.
- Select the module under Message Templates.
- Click the More icon next to the template that you want to delete.
- Click Delete from the dropdown to proceed.
A request will be sent to the WhatsApp Business team to delete the template, which will subsequently be deleted.

Enable WhatsApp
Enable WhatsApp for Sales Transactions
Once you set up templates, enable the modules for which you’d like to send WhatsApp notifications. To do this:
Go to Settings, navigate to Integrations & Marketplace, and click WhatsApp.
Slide the toggle button next to the respective modules.
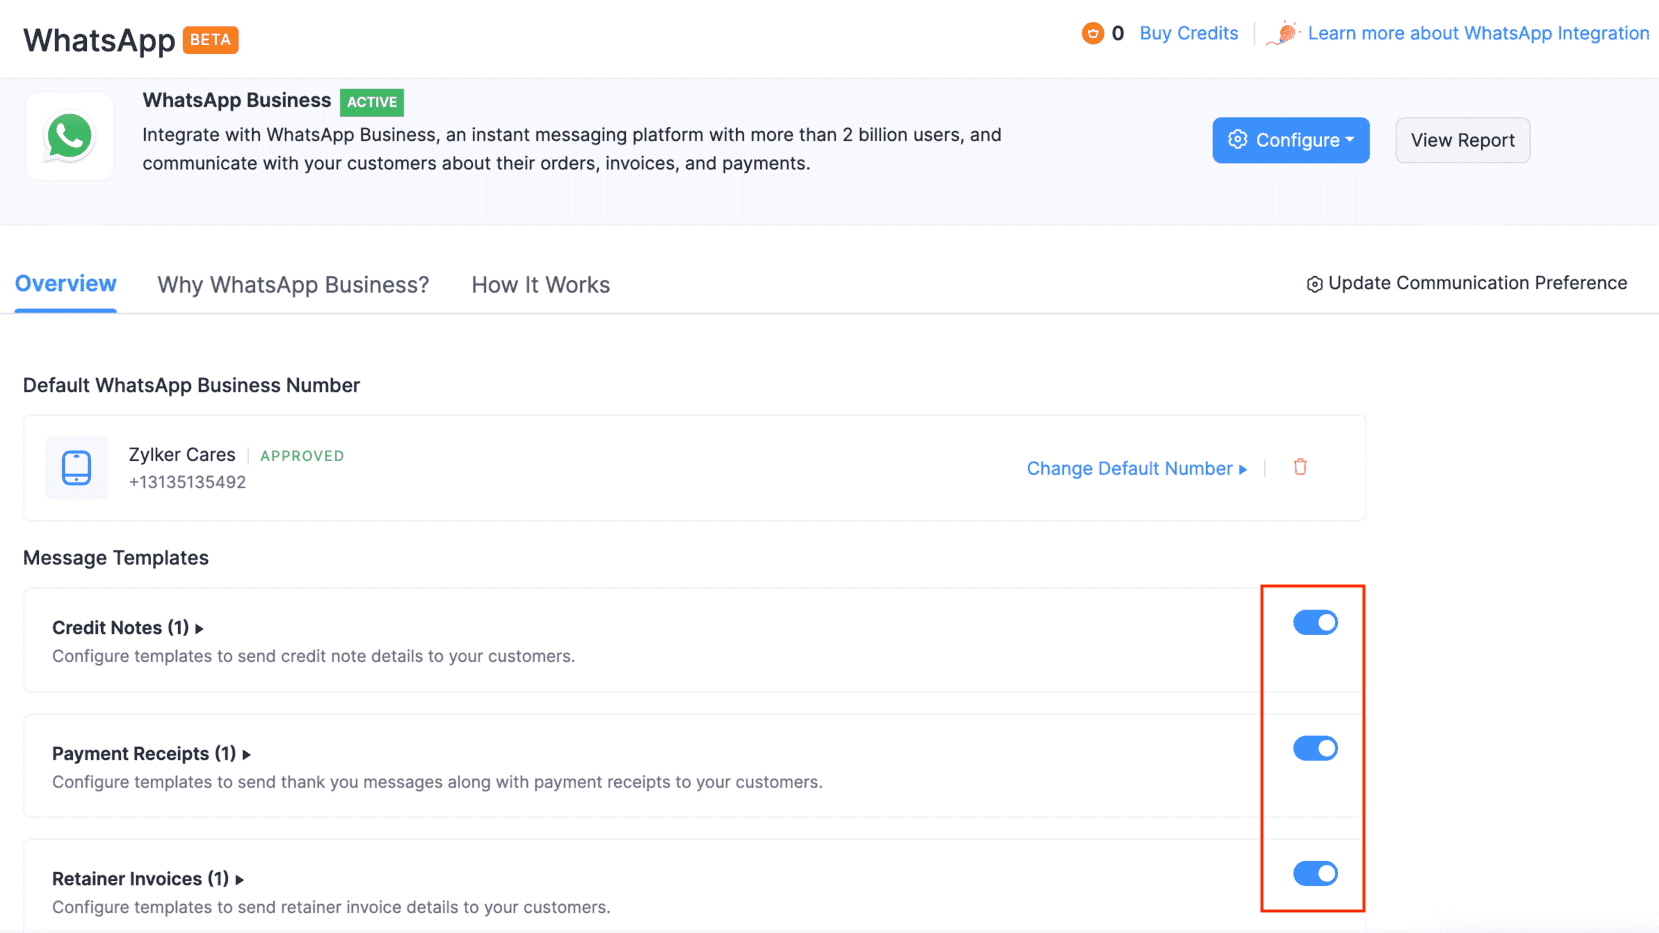
You’ll be able to send notifications through WhatsApp for the modules that you’ve enabled.
Enable WhatsApp for Customers and Contact Persons
To send notifications to your customers through WhatsApp, you’ll have to enable WhatsApp for them. Here’s how:
Go to Sales on the left sidebar and select Customers.
Select the customer for whom you want to enable WhatsApp messaging.
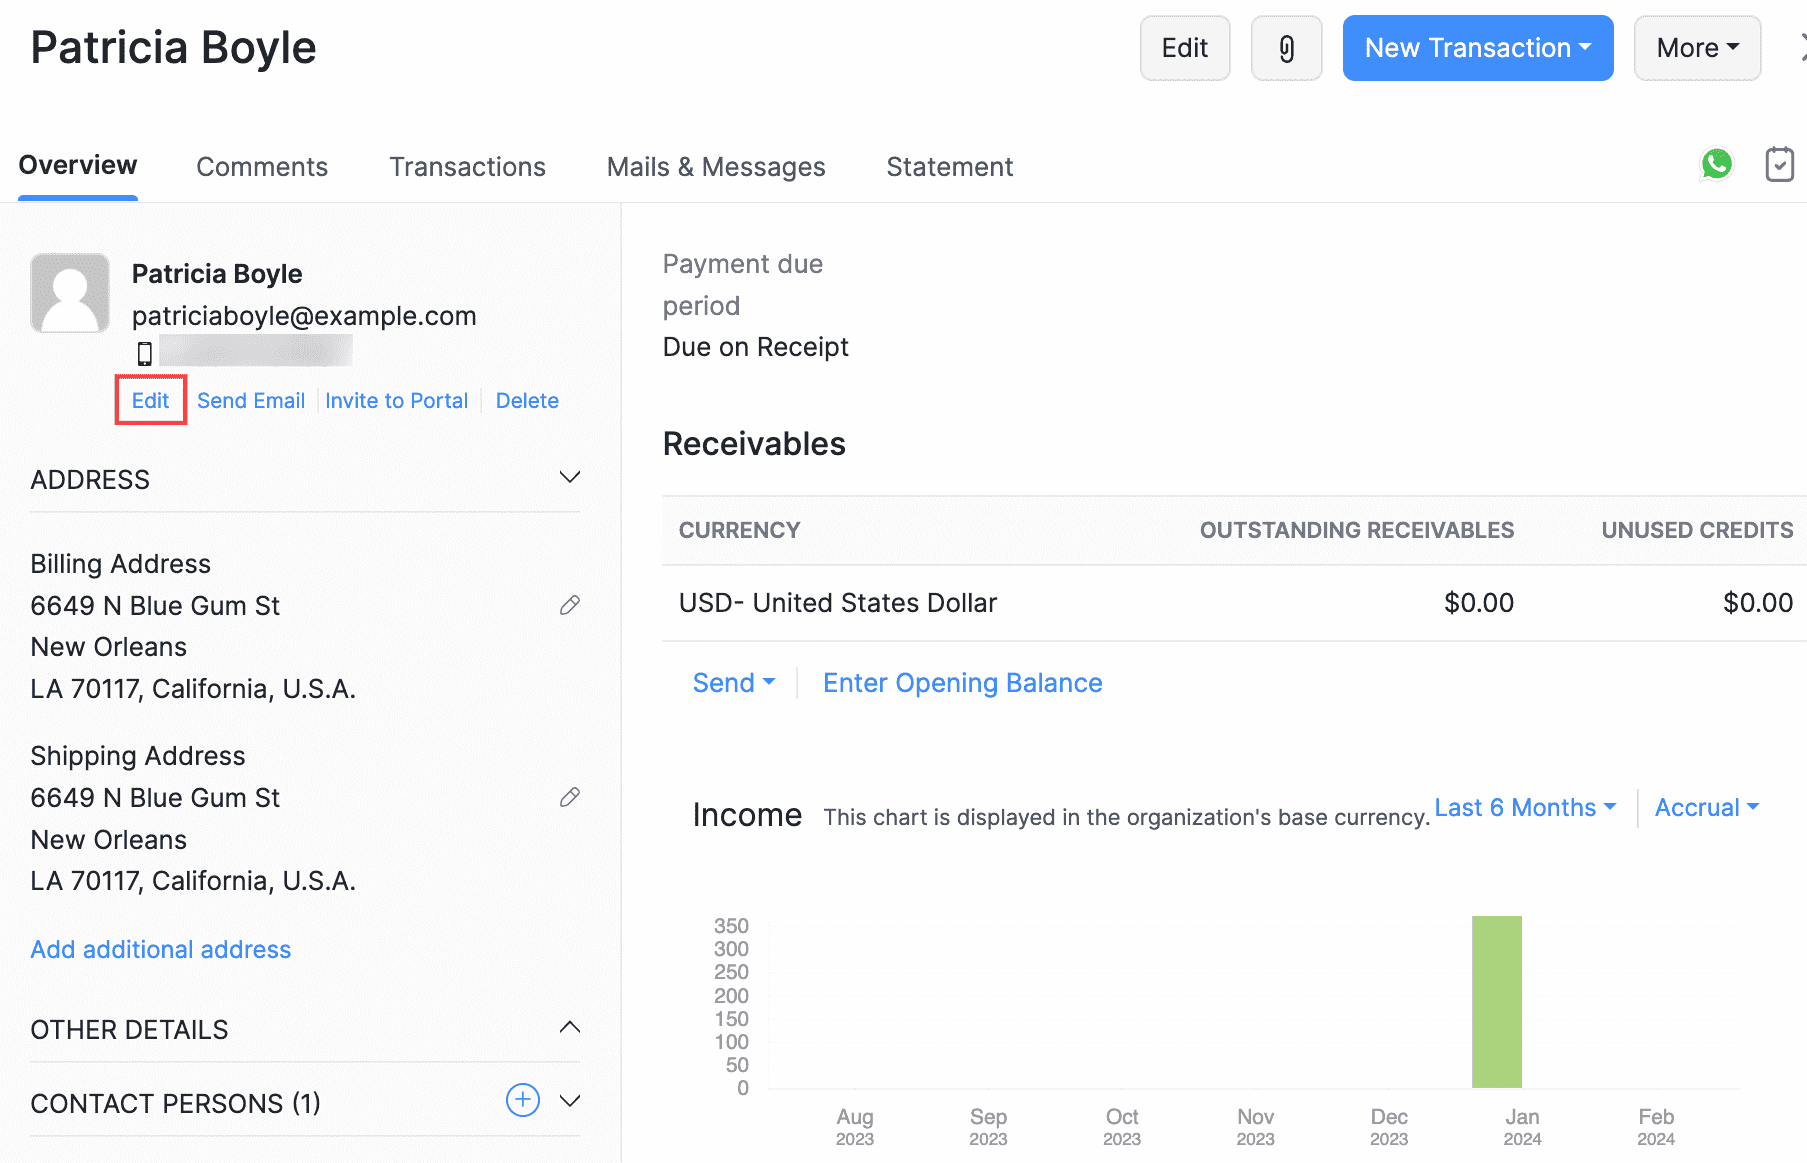
To enable it for the primary contact:
Click Edit in the Overview section.
(or)
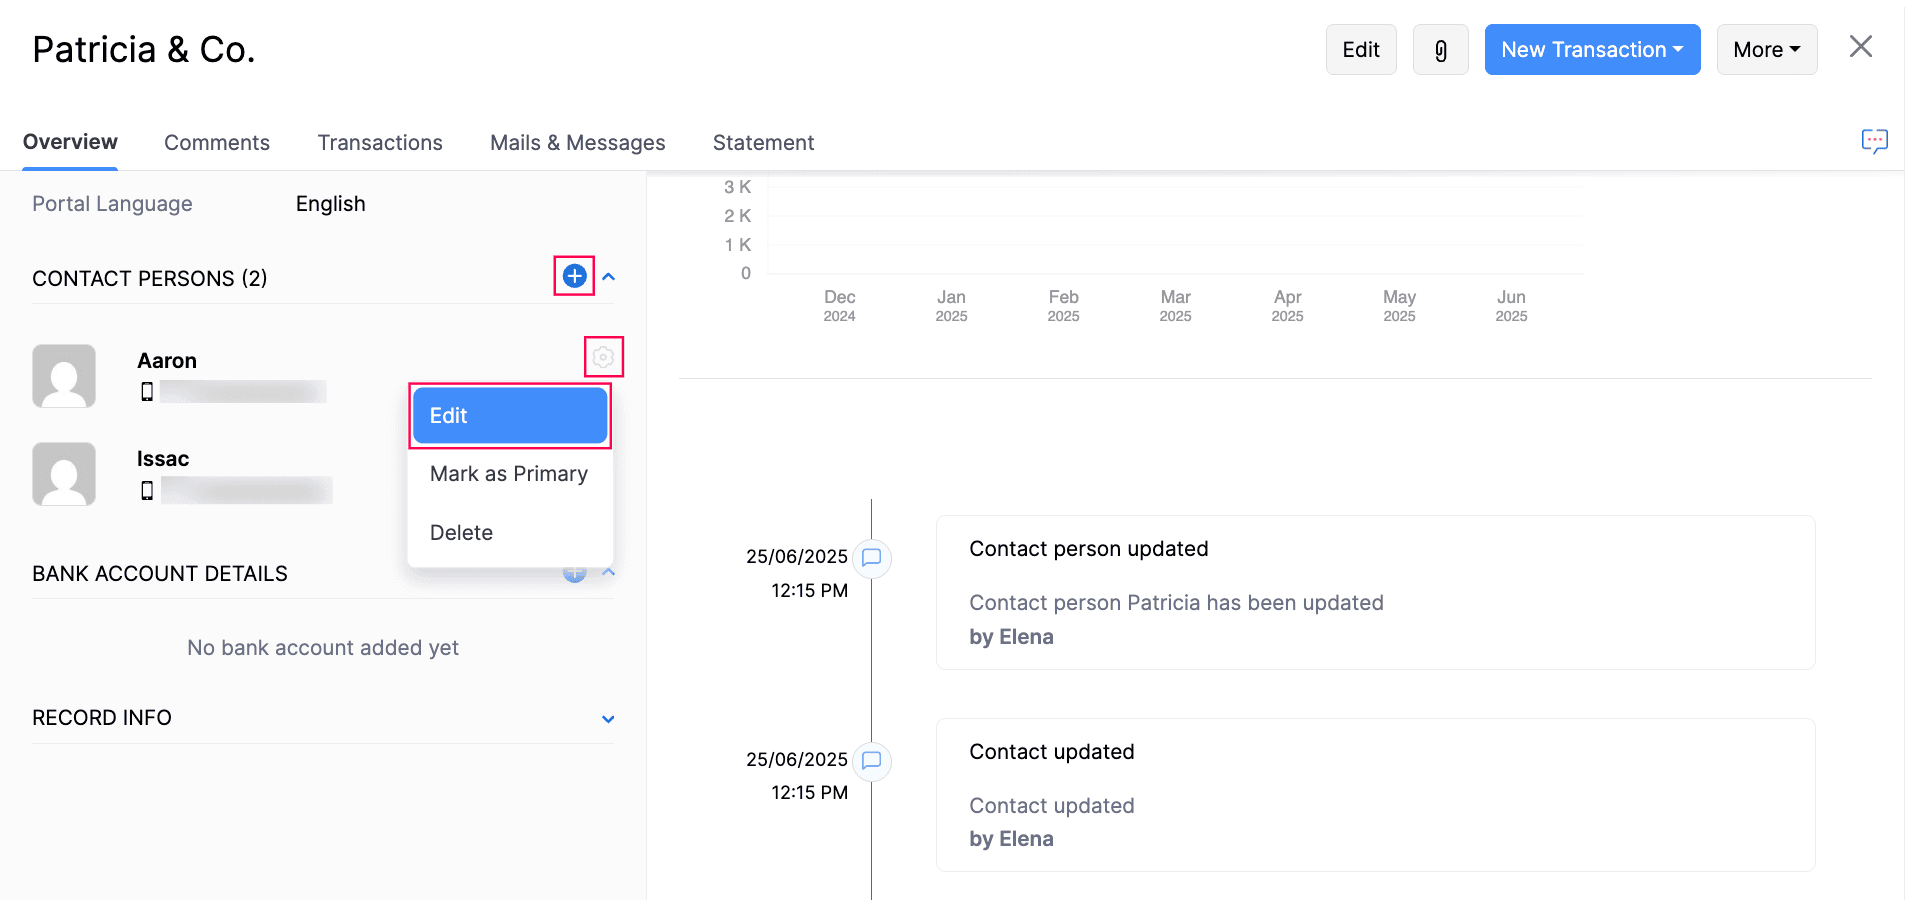
To enable it for the contact person:Scroll down and click the Gear icon next to the contact person and select Edit.
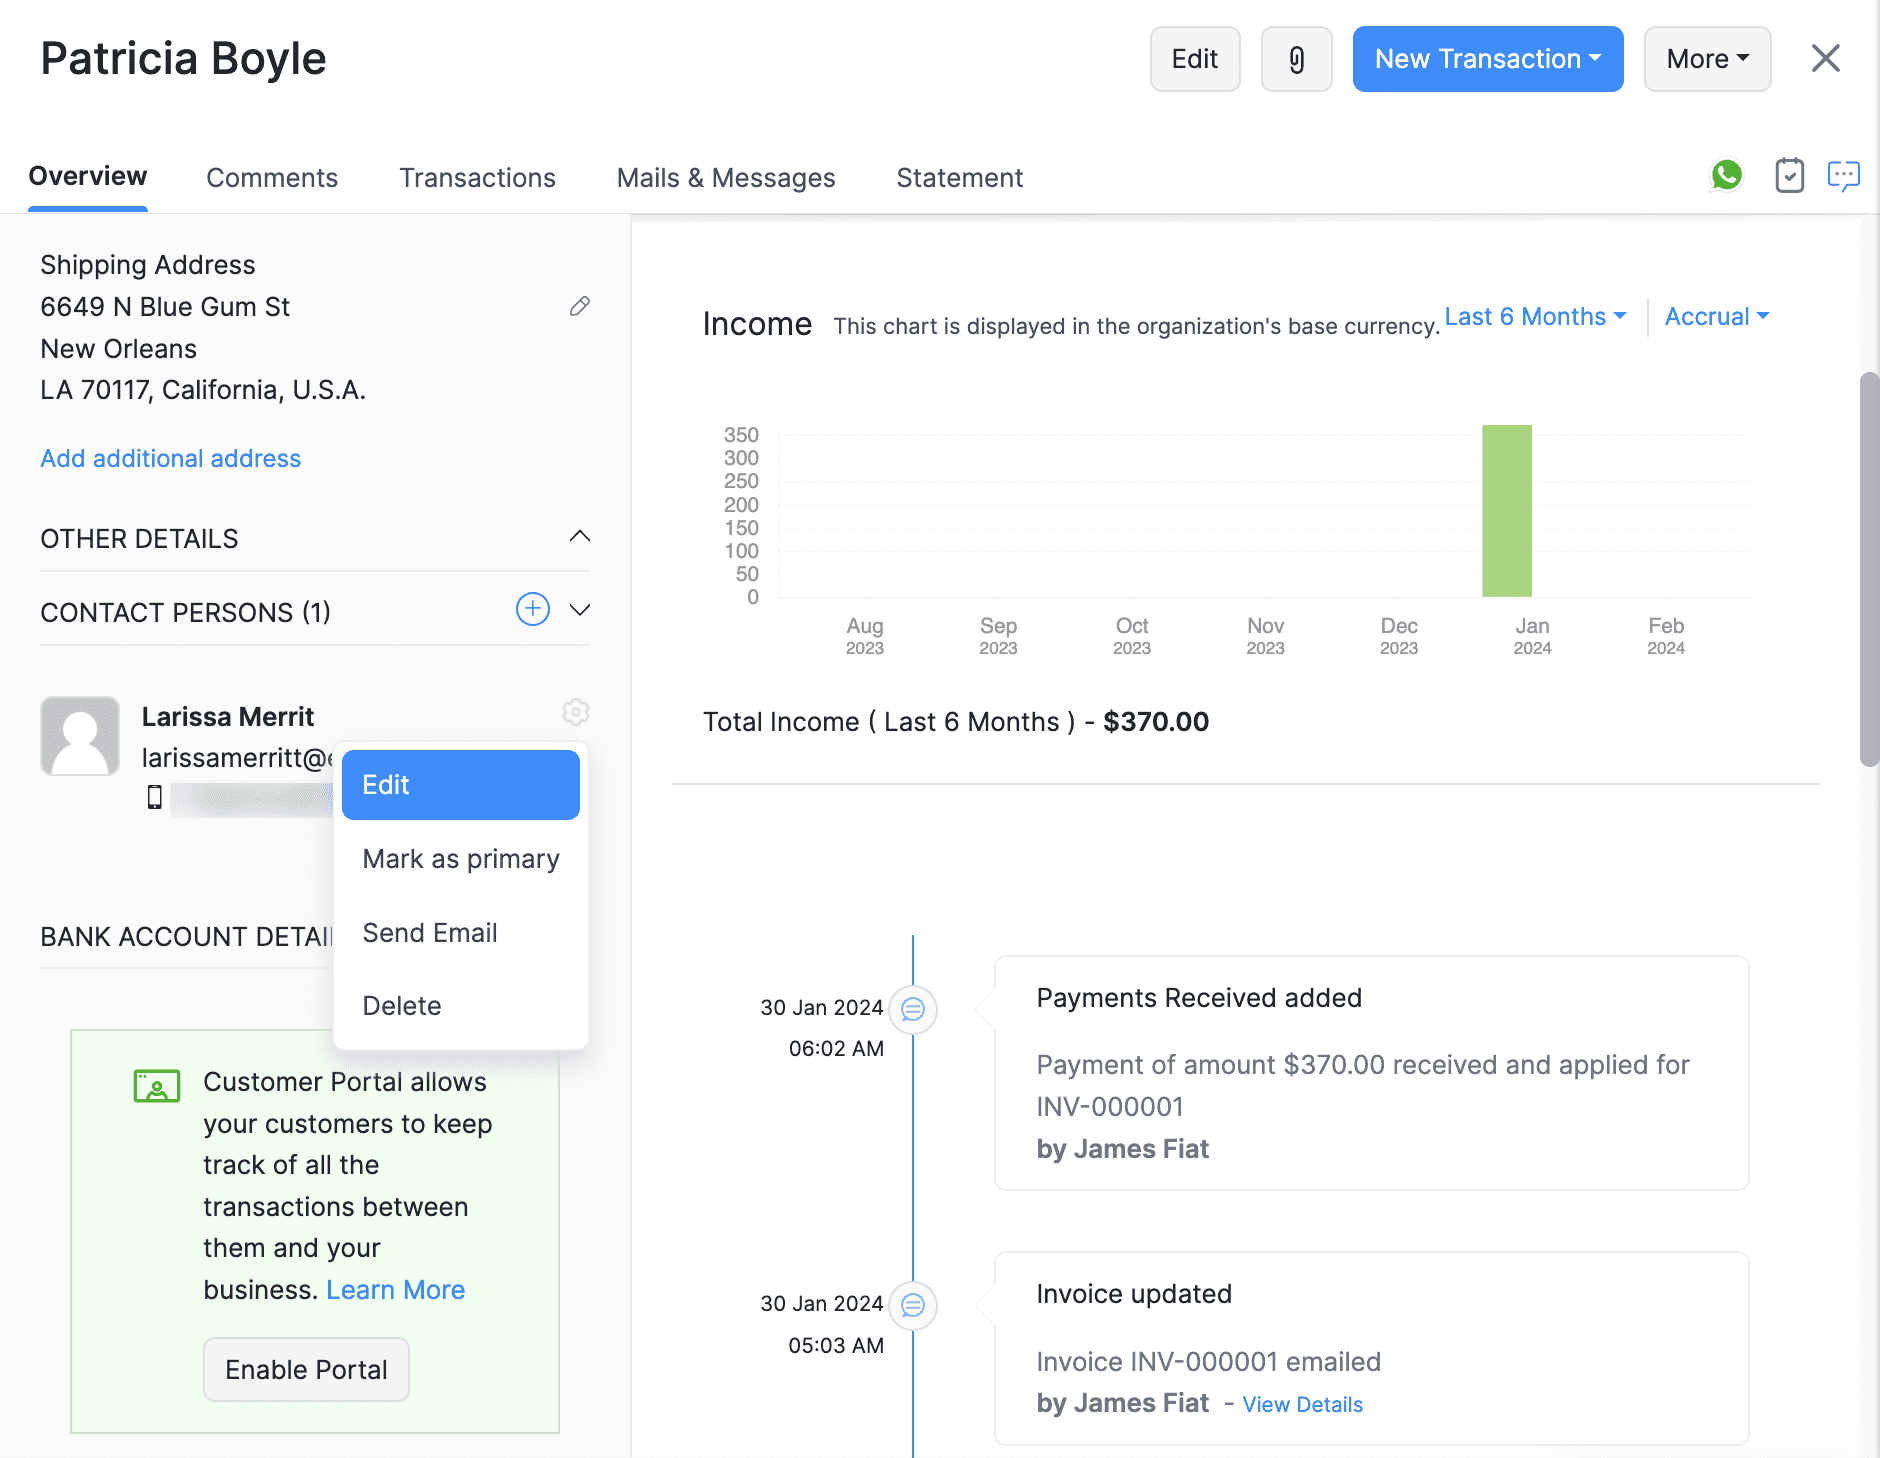
Ensure that the customer’s phone number is right and begins with a proper country code.
Mark the option WhatsApp under Communication Channels.
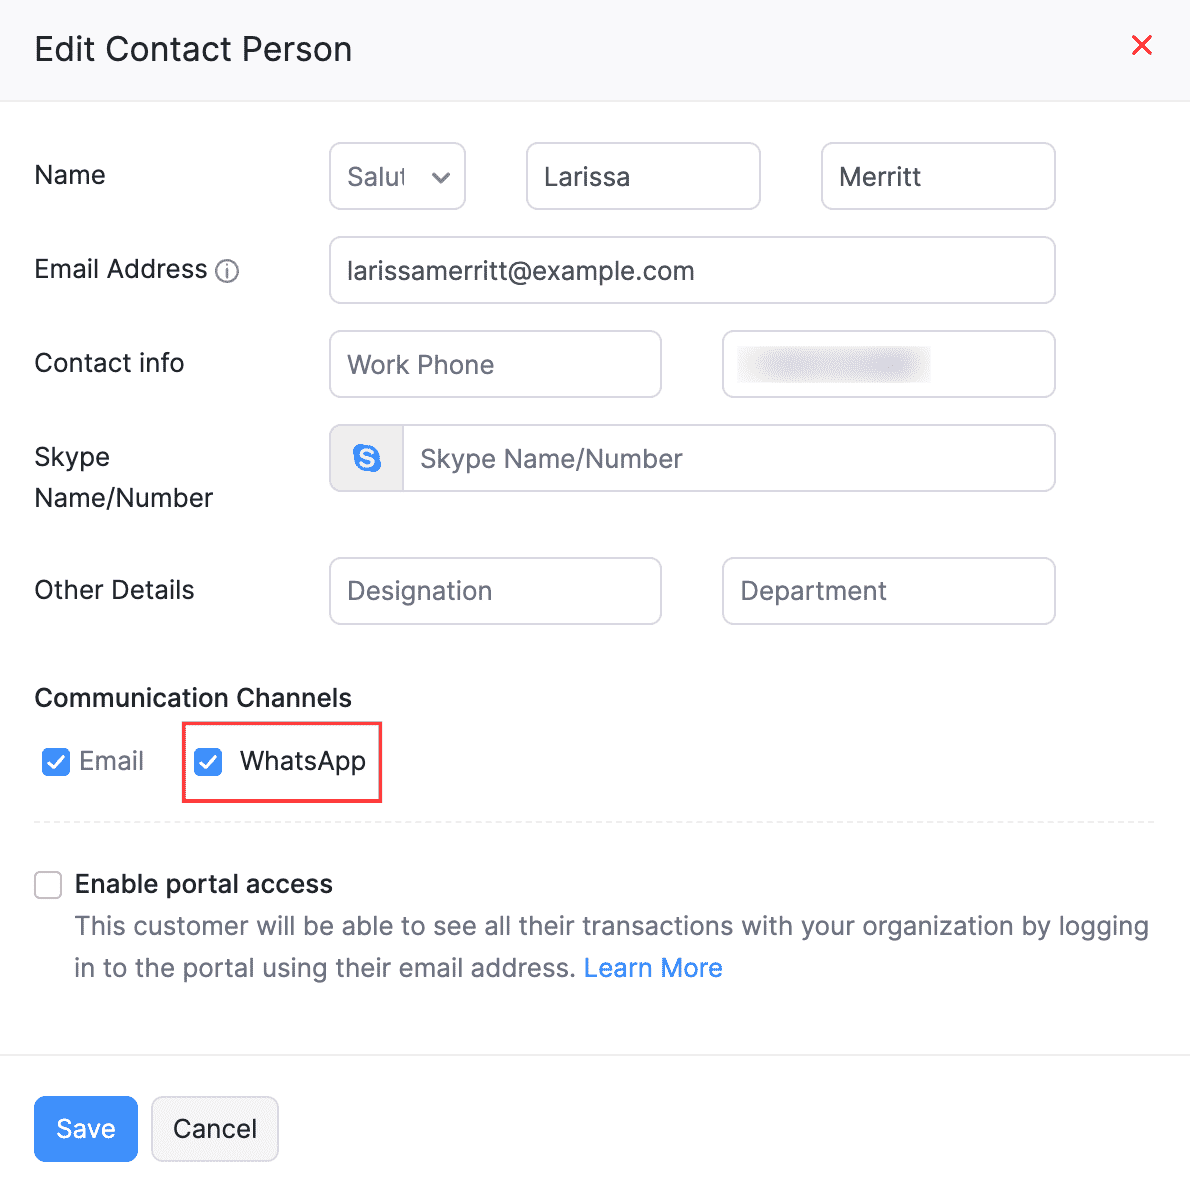
Click Save, and WhatsApp will be enabled for the primary contact or contact person.
Enable WhatsApp for Customers in Bulk
You can enable WhatsApp messaging for contacts in bulk in two ways. You can do it for:
- All primary contacts and contact persons
- Specific primary contacts and contact persons
To enable it for all the primary contacts and contact persons:
Go to Settings, navigate to Integrations & Marketplace, and click WhatsApp.
Click Update Communication Preference on the right, next to the gear icon.

In the pop-up that follows, click:
- Only Primary Contacts if you want to send WhatsApp notifications only to the primary contacts.
- All Contacts and Contact Persons if you want to send WhatsApp notifications to all contact persons, including the primary contact.
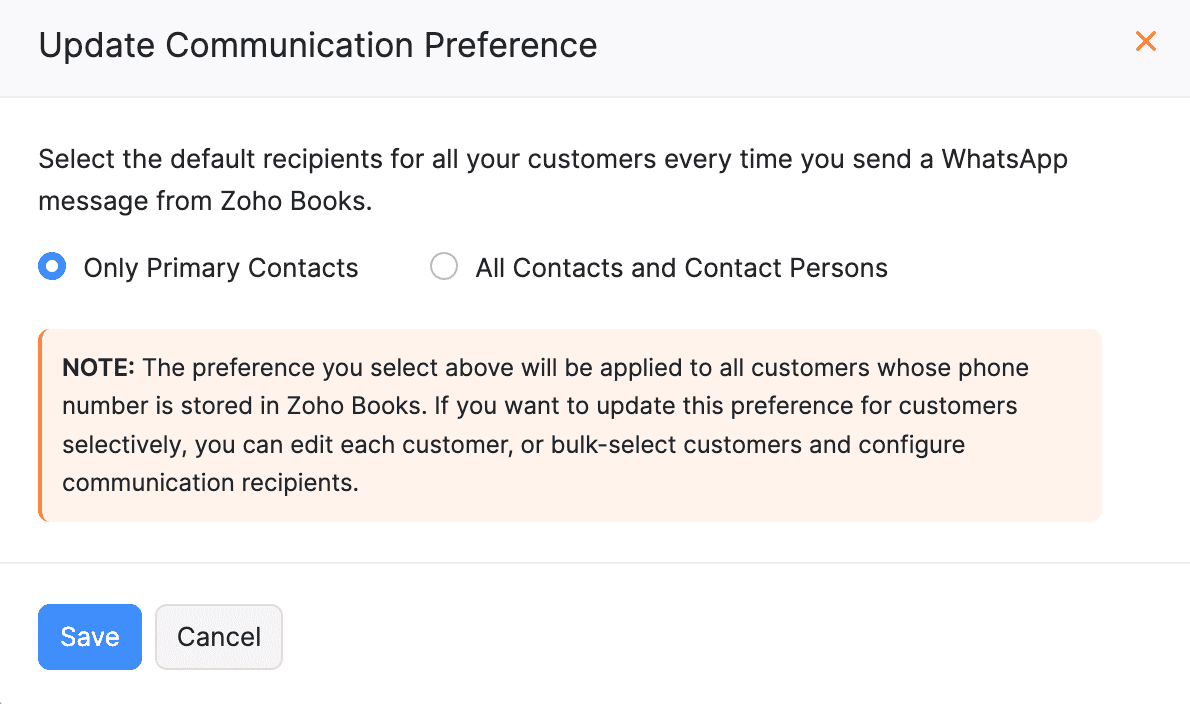
Click Save.
To enable it for specific primary contacts and contact persons:
Navigate to Customers under Sales.
Select the customers you want to send notifications via WhatsApp and click Configure Communication Preferences at the top.
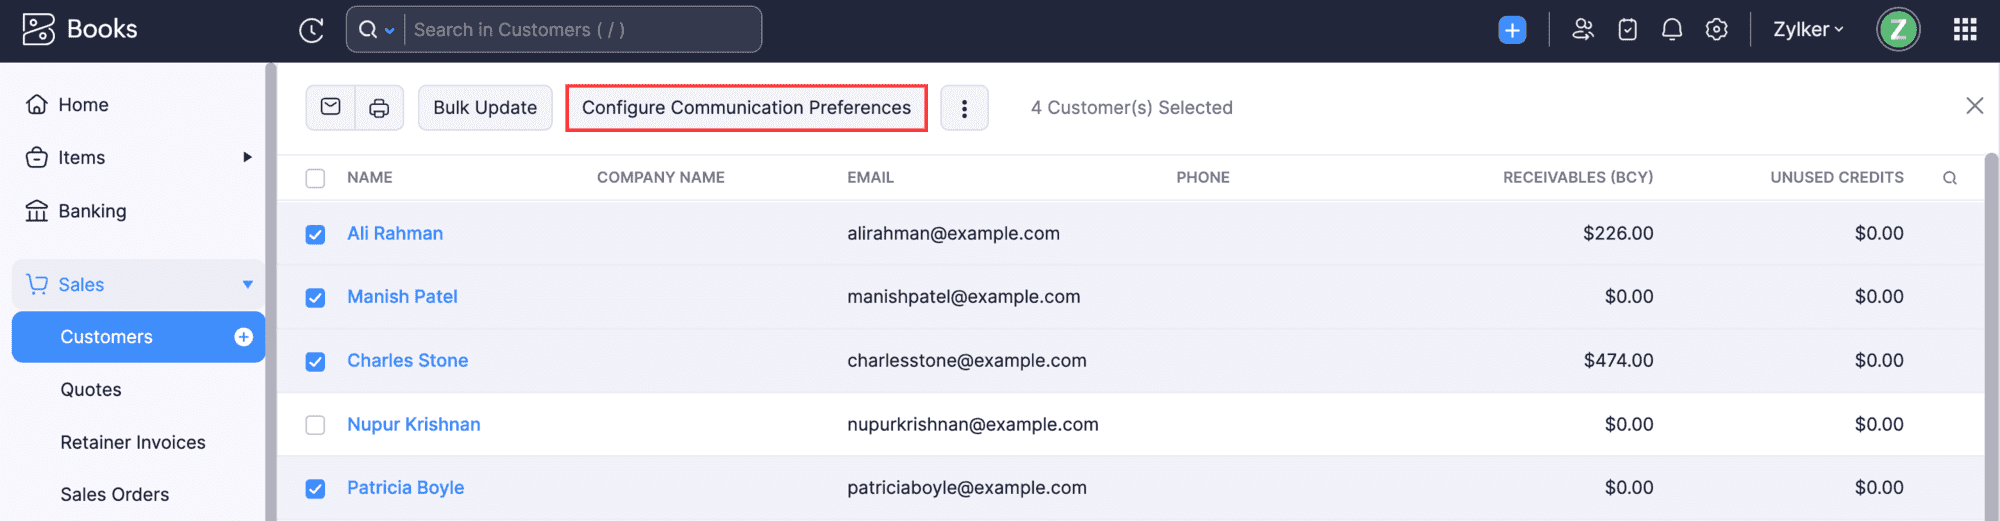
Configure the default recipients for the WhatsApp channel type in the pop-up that follows.
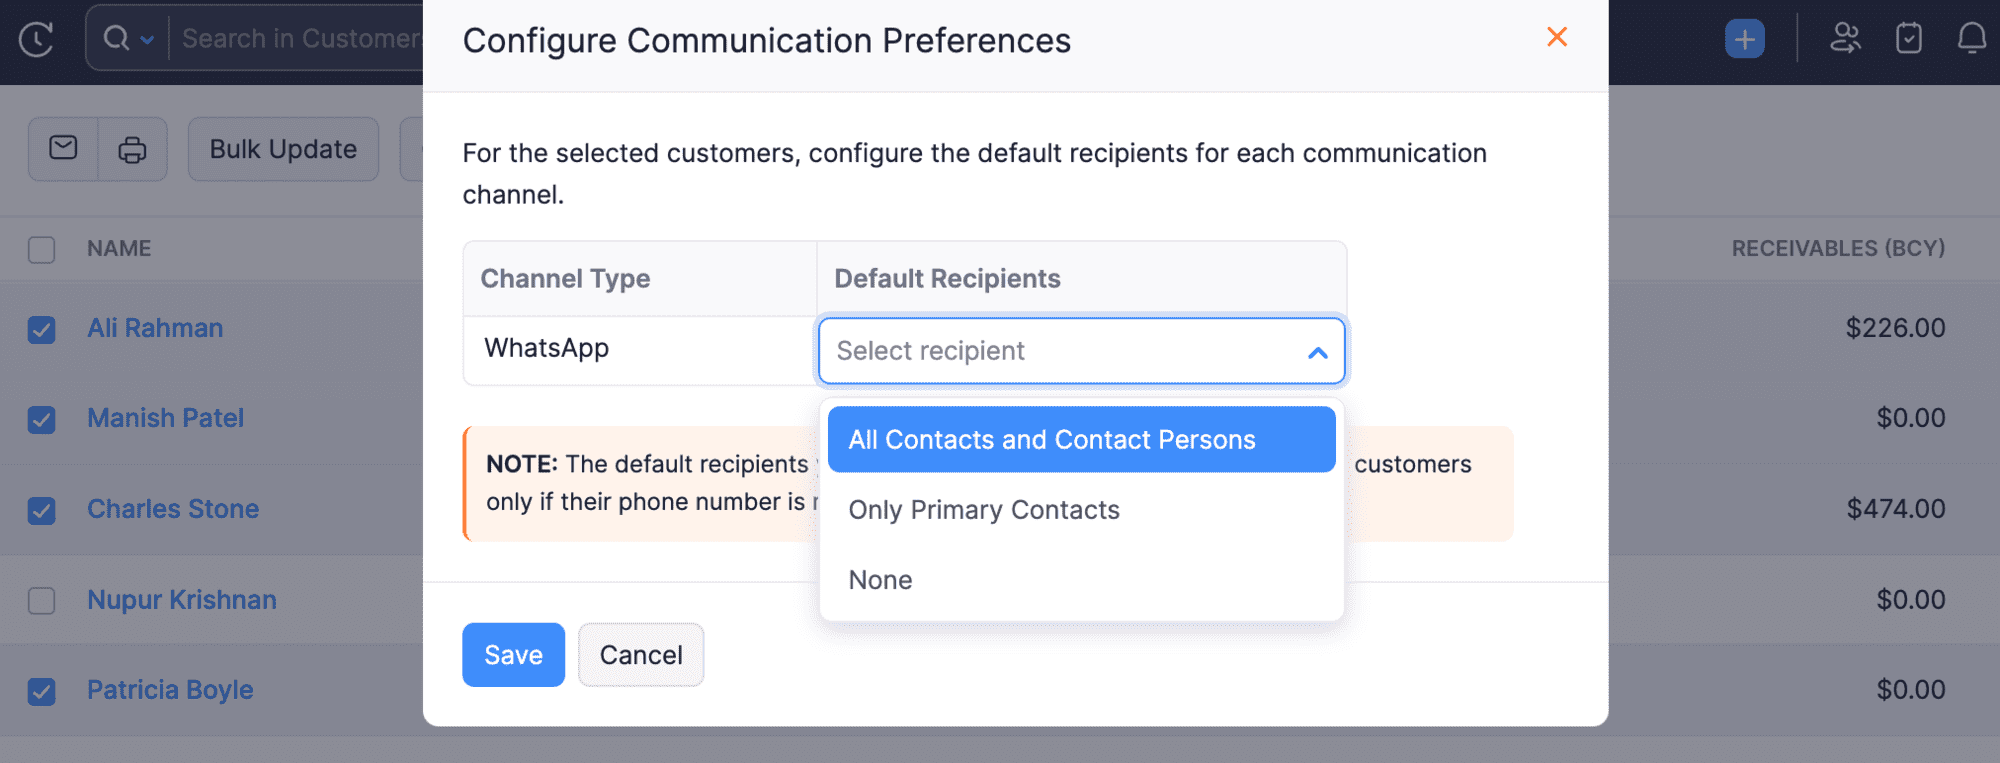
Click Save.
The WhatsApp notification will now be sent to the selected contacts.
Enable WhatsApp for Vendors
To send vendor statements through WhatsApp, you’ll have to enable WhatsApp for your vendors. Here’s how:
Prerequisite:
Ensure that you’ve provided your vendor’s phone number with a ‘+’ followed by the country code to enable WhatsApp for them.
Go to Purchases on the left sidebar and select Vendors.
Select the vendor to enable WhatsApp, and in the Details page, click Edit in the top right corner.
- To create a new vendor and enable WhatsApp for them, click + New in the top right corner of the List page and enter the required details.
In the next page, check WhatsApp next to Communication Channels.
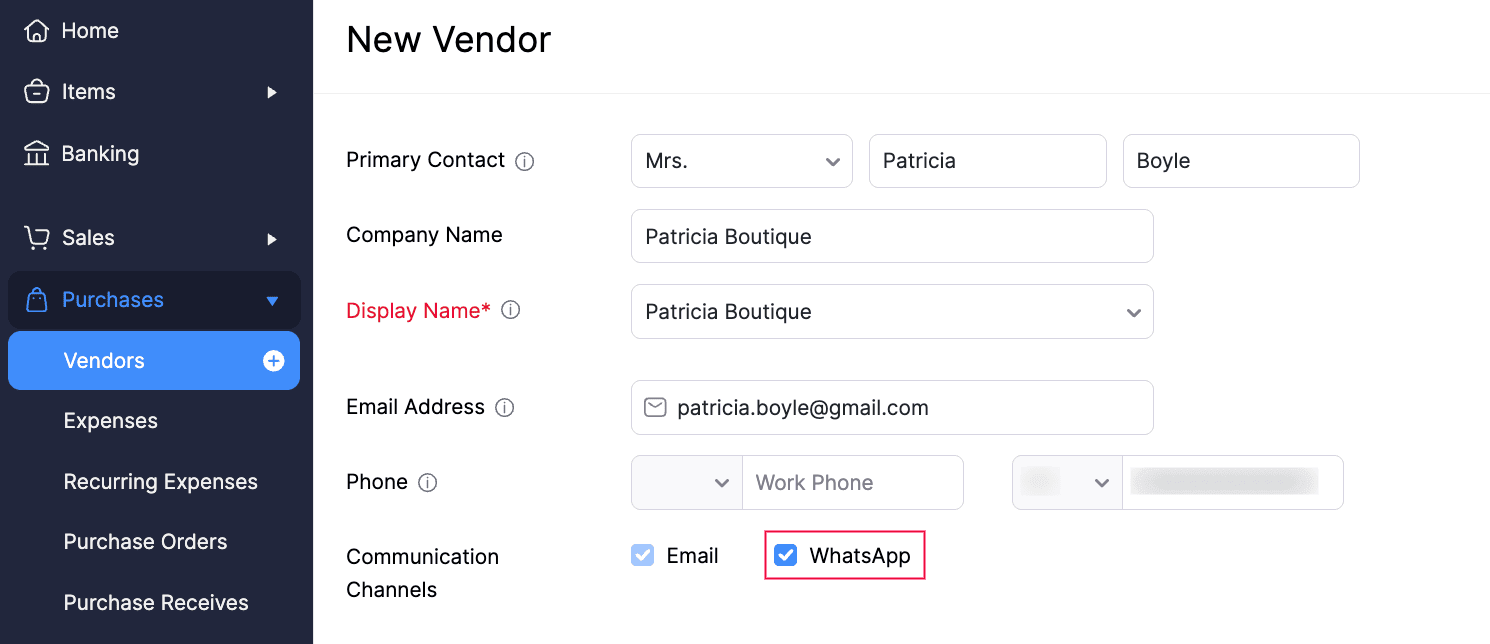
Click Save.
WhatsApp will be enabled for the respective vendor.
You can also enable WhatsApp for vendors in bulk. To do this:
Go to Purchases on the left sidebar and select Vendors.
Select the vendors for whom you want to enable WhatsApp.
Click the More icon at the top of the List page and select Configure Communication Preferences from the dropdown.
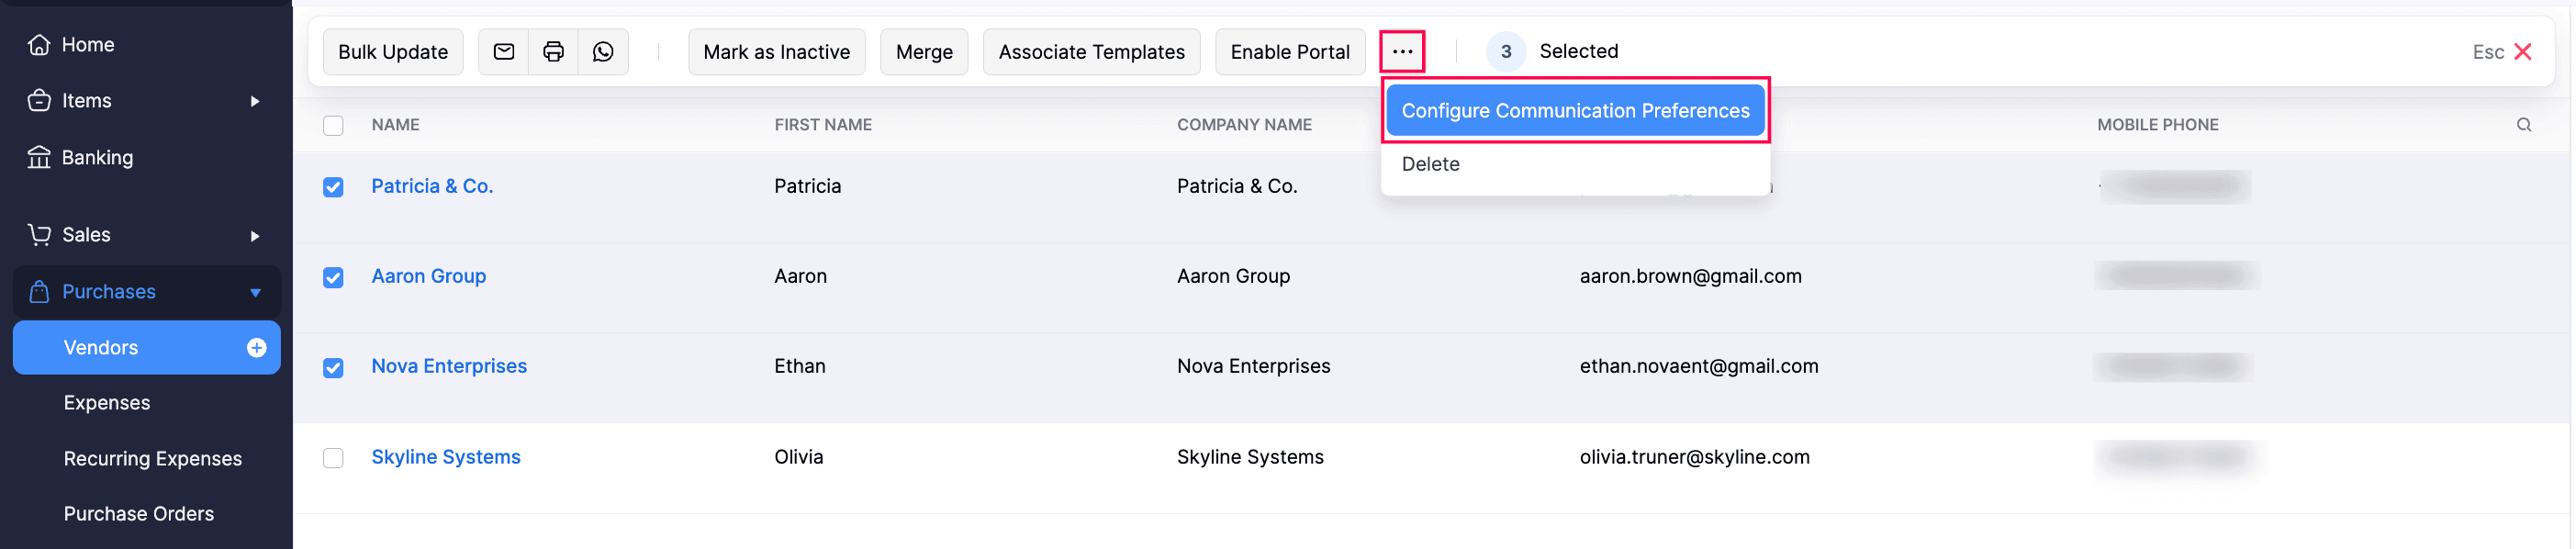
In the Configure Communication Preferences pop-up, choose if you want to enable WhatsApp only for the vendors as well as their contact persons.
Click Save.
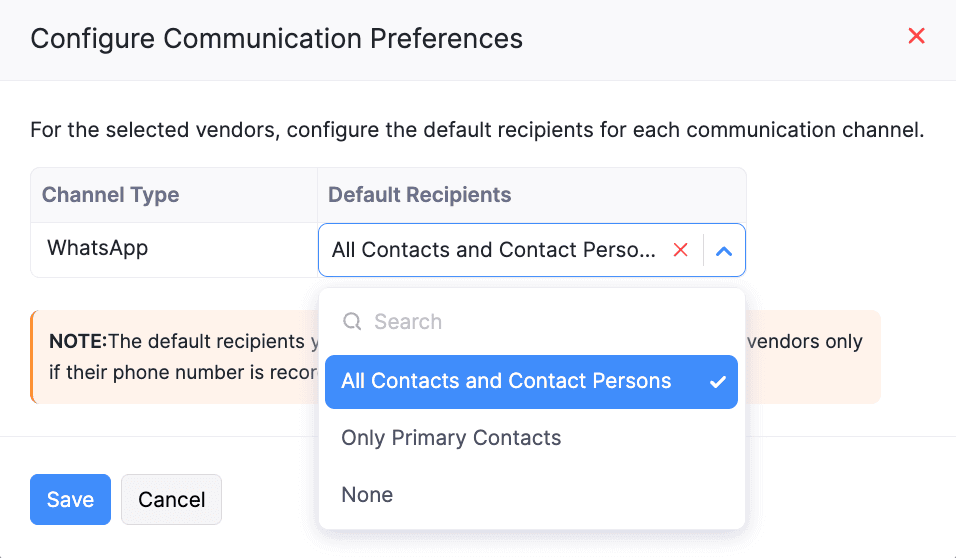
WhatsApp will be enabled for the selected vendors, based on chosen preferences.
Enable WhatsApp for Vendor’s Contact Persons
Once you’ve enabled WhatsApp for your vendors, you can also enable WhatsApp for their contact persons.
Prerequisite:
Ensure that you’ve provided phone numbers for the contact persons with a ‘+’ followed by the country code to enable WhatsApp for them.
To enable WhatsApp for a vendor’s contact person:
Go to Purchases on the left sidebar and select Vendors.
Select the vendor for whose contact persons you want to enable WhatsApp.
In the vendor’s Details page, under Contact Persons, click the Gear icon next to the required contact person, and select Edit from the dropdown.
- To add a new contact person and enable WhatsApp for them, click the Add icon next to Contact Persons.
In the following pop-up, check WhatsApp next to Communication Channels.
Click Save.
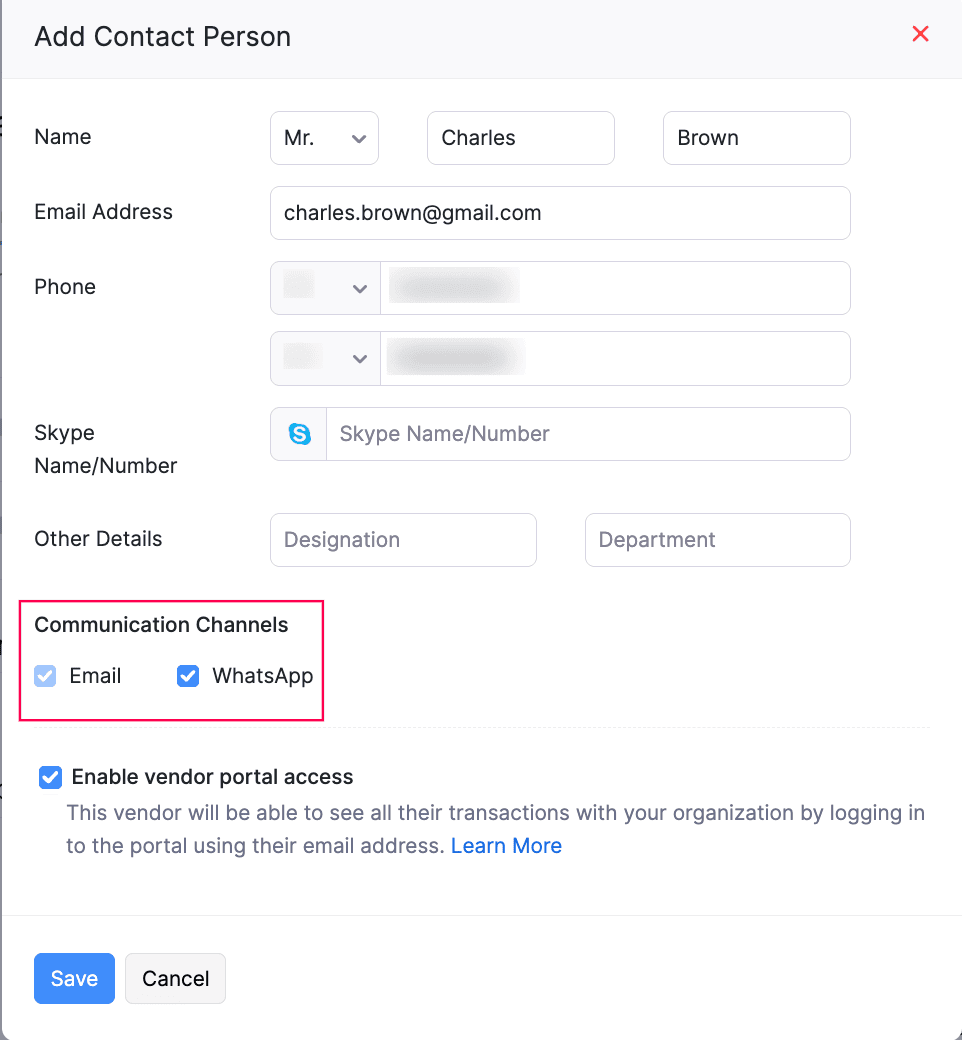
WhatsApp will be enabled for the vendor’s contact persons.
Manage WhatsApp Credits
WhatsApp Instant Messaging (IM) Credits
Once you enable WhatsApp in your Zoho Books organisation and create templates, you’ll have to purchase IM (Instant Messaging) credits to send notifications through your WhatsApp Business account. Learn more about how credits work.
Buy IM Credits
To buy WhatsApp IM credits in Zoho Books:
- Go to Settings.
- Select WhatsApp under Integrations and Marketplace.
- Click Buy IM Credits at the top of the WhatsApp configuration page.
- In the Buy IM (Instant Messaging) Credits pop-up, enter the number of IM credits you want to purchase. The price for one IM credit will be displayed next to the field.
- Click Calculate Payment. The total amount (including tax) will be displayed.
- Click Make Payment.
You’ll be redirected to the payment gateway, where you can make payment for the IM credits you want to purchase. Once done, the credits will be added to your organisation. You can also buy credits from the Zoho Store.
Note: The amount used to purchase IM credits for WhatsApp may vary, depending on the currency you use for the purchase.
IM Credits Usage Report
In Zoho Books, you can view and keep track of your IM (Instant Messaging) credits usage directly from the Reports module. This helps you monitor and manage your IM credits efficiently.
To view the IM Credits Usage report:
- Go to Reports on the left sidebar.
- Select IM Credits Usage under Activity.
You can view the details of the IM credits you had used for your WhatsApp Business account.
WhatsApp Notifications Report
In Zoho Books, you can view and monitor the WhatsApp notifications you send to your customers and vendors, along with their statuses.
To view the WhatsApp Notifications report:
- Go to Reports on the left sidebar.
- Select WhatsApp Notifications under Activity.
You can view the list of WhatsApp notifications sent to your customers and vendors. To filter this report based on customer and vendor communications:
Go to Reports on the left sidebar.
Select WhatsApp Notifications under Activity.
In the WhatsApp Notifications page, click the Contact Type dropdown at the top of the page, and select if you want to filter the report with Customers, Vendors, or both.
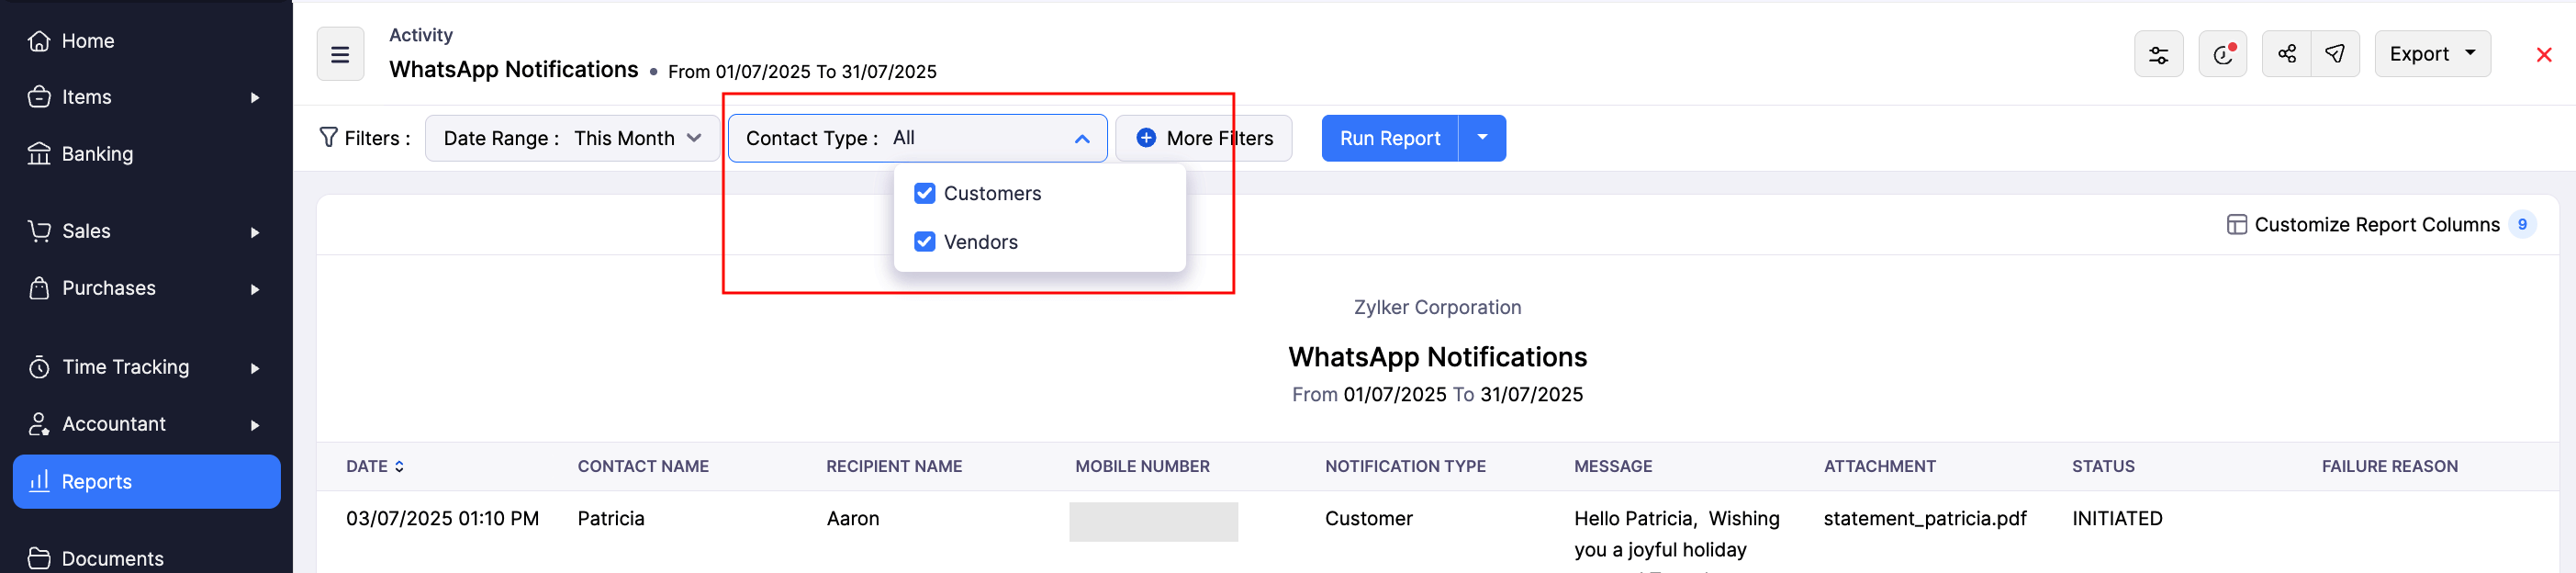
Click Run Report.
The report will be displayed, based on chosen preferences.
To customise this report:
- In the WhatsApp Notifications page, select the Date Range for which you want to generate the customised report.
- Click + More Filters at the top of the page.
- In the dropdown that appears, apply the required filters.
- Click Run Report.
The custom report will be generated, based on chosen preferences. Subsequently, you can view the original report again. You can also schedule, export, or share the custom report.
Send Notifications through WhatsApp
Send Invoice Notifications
Go to Sales and select Invoices.
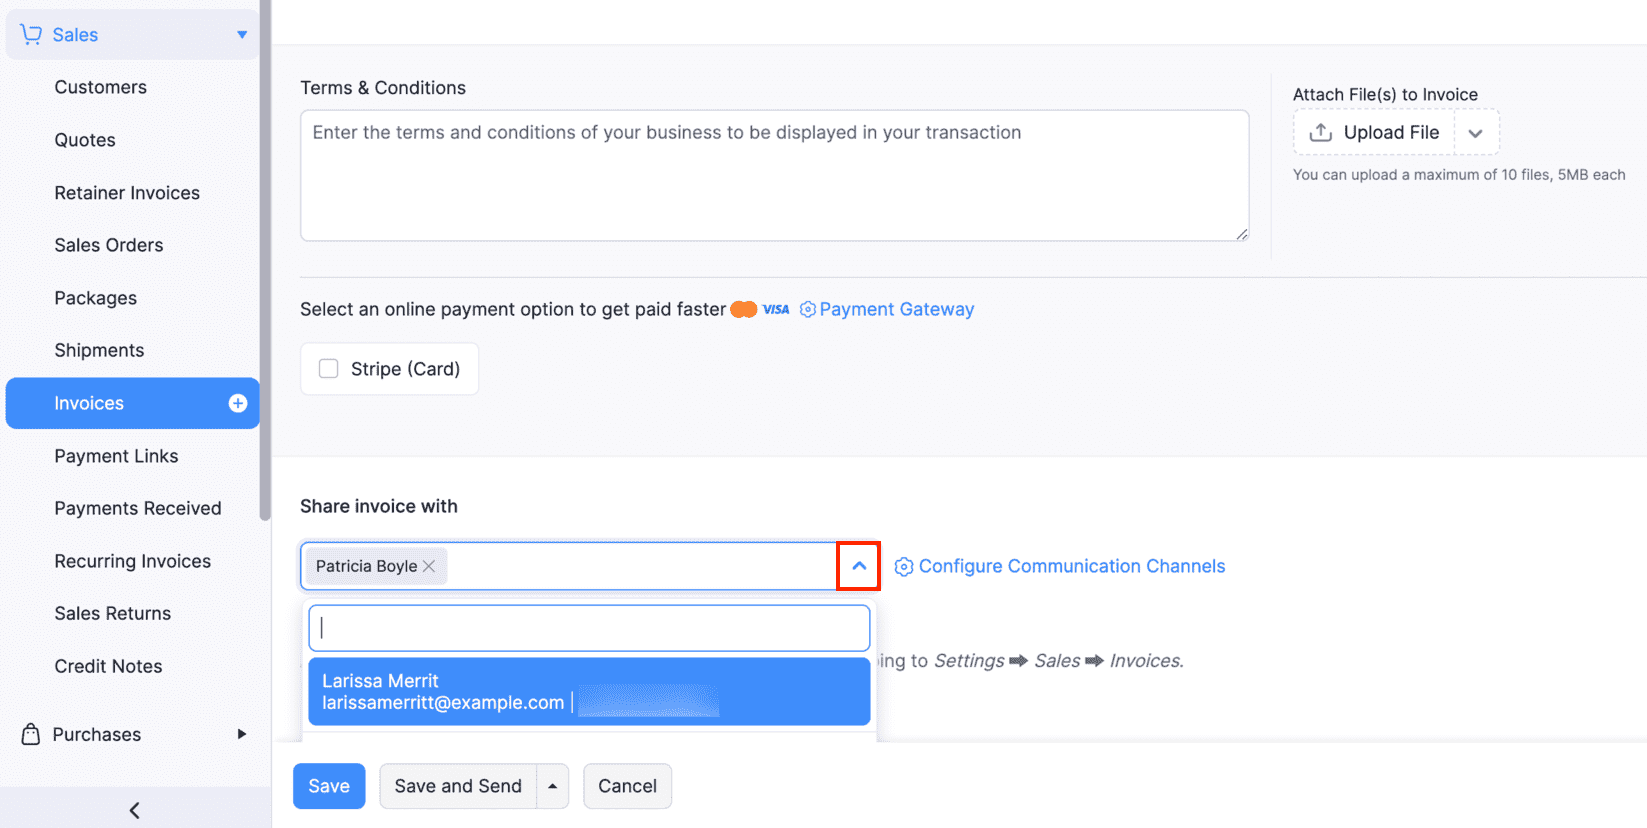
Click + New at the top-right corner and enter the necessary details.
Select the contact persons to whom you want to share the invoice details from the Share invoice with dropdown and click Save and Send.
In the screen that follows, verify the Message Template and Contacts, and click Send.
The invoice notification will be sent to the respective contacts.
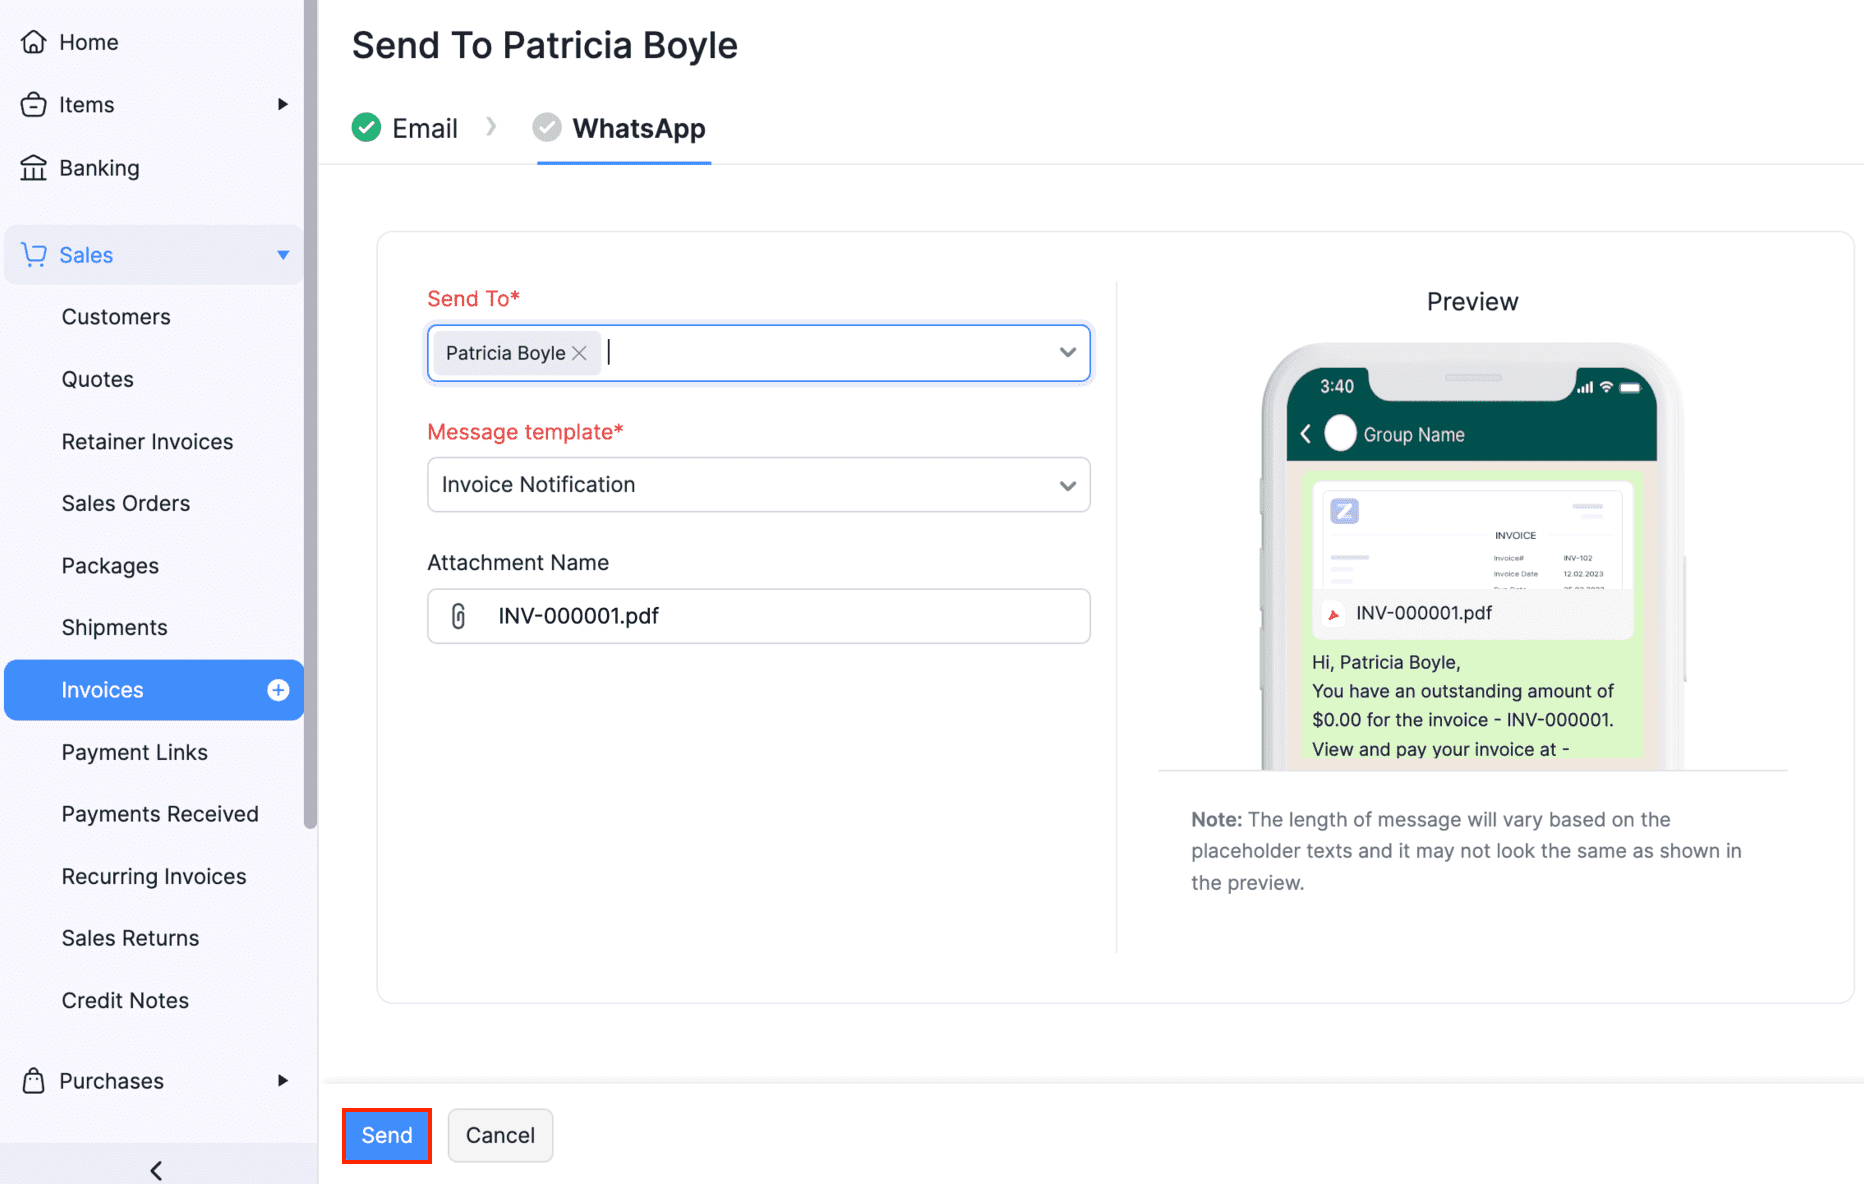
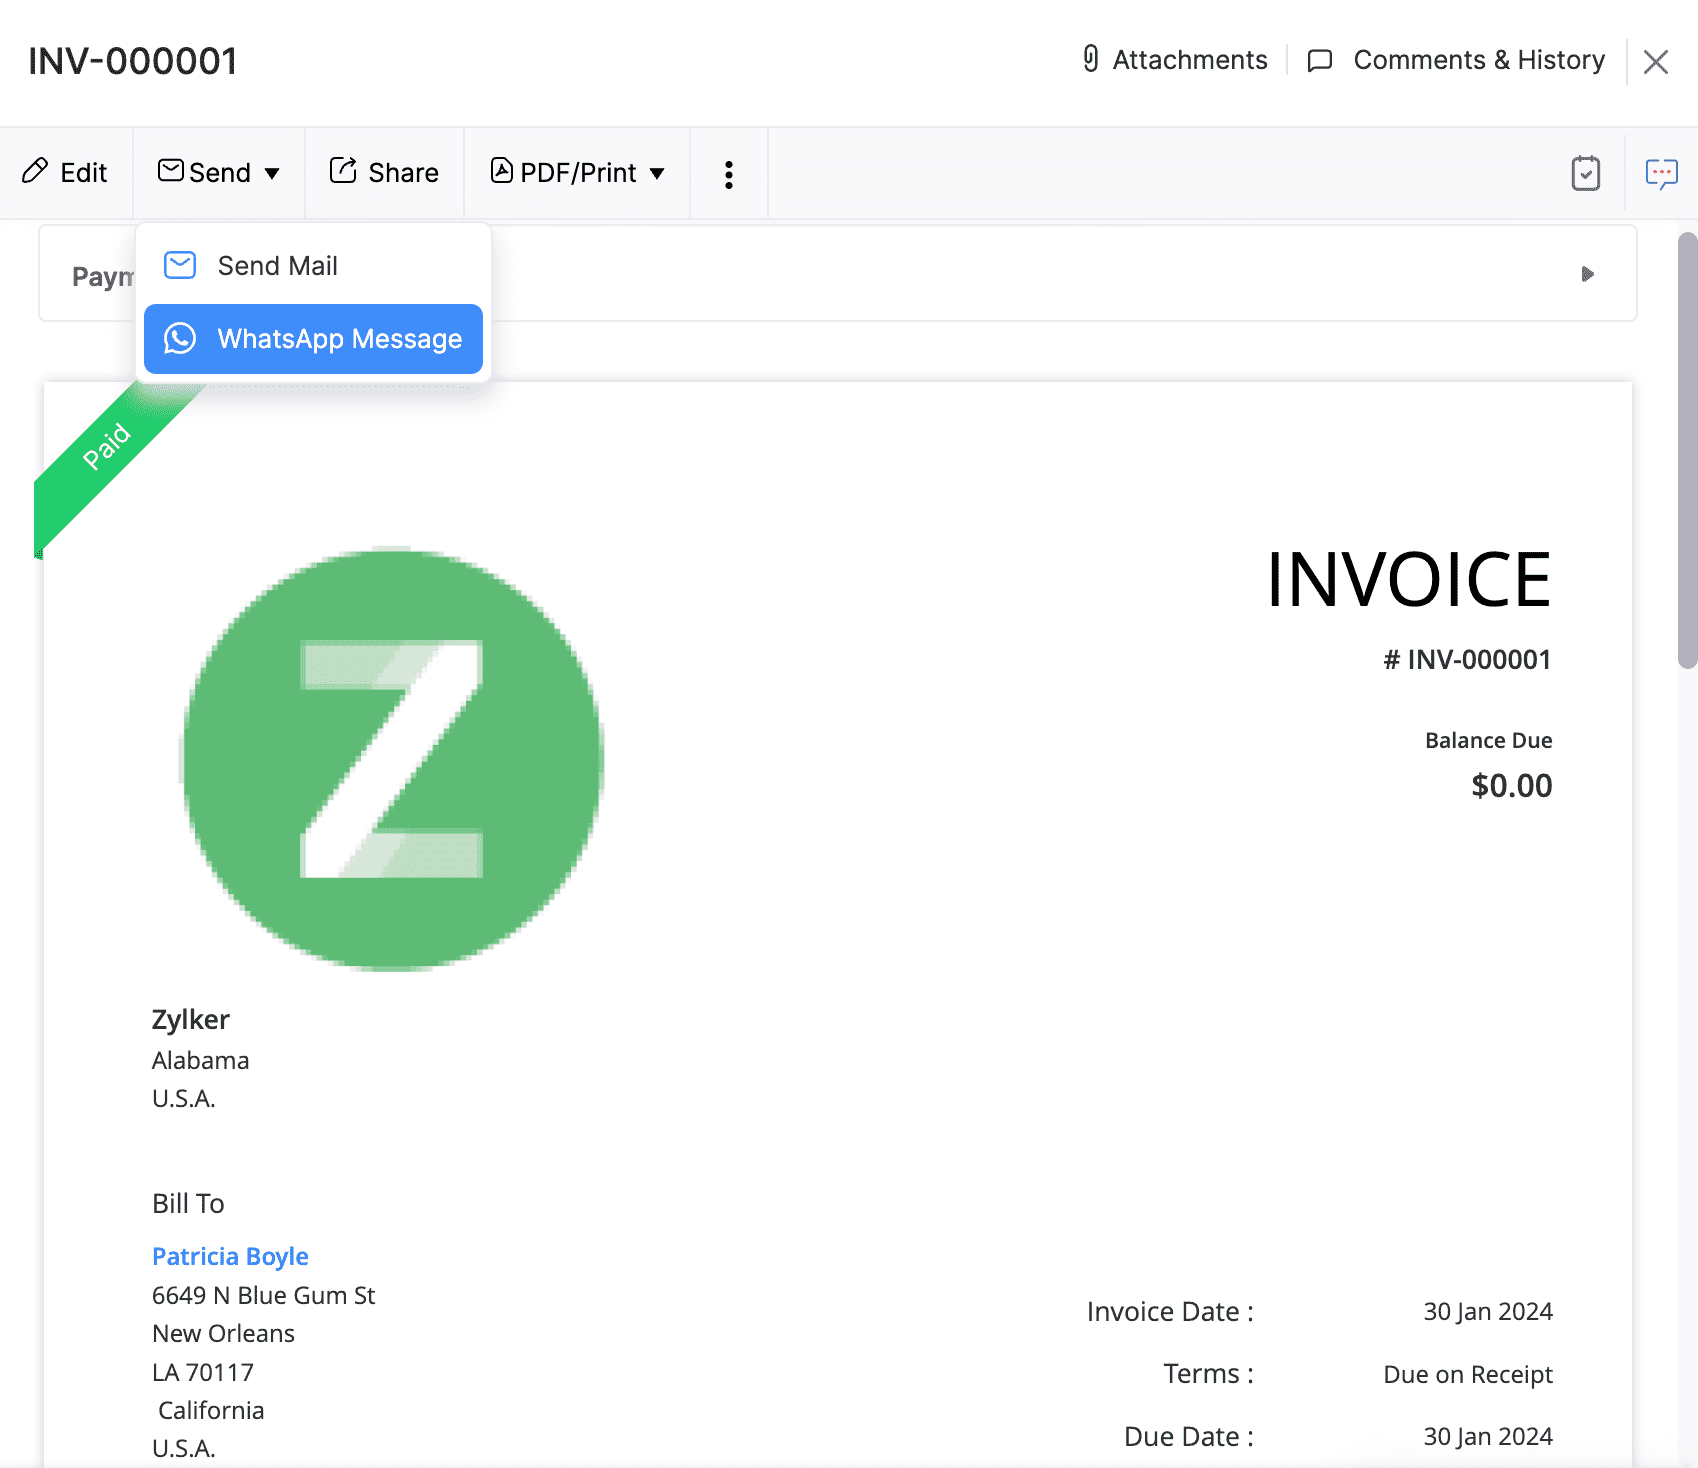
To send a WhatsApp notification for existing invoices:
Go to Sales and navigate to Invoices.
Select the invoice for which you want to share the invoice details.
Select WhatsApp Message from the Send dropdown.
The contact person and the message template will be auto-populated in the following Send WhatsApp Message pop-up.
Click Send.
The invoice details will be sent to the respective contact person via WhatsApp. Similarly, you can send notifications for Sales Orders, Estimates, Retainer Invoices, and Sales Receipts.
Send Reminders on WhatsApp
To send reminders on WhatsApp, you should create a template for Payment Reminders. To do this:
Go to Settings, navigate to Integrations & Marketplace, and click WhatsApp.
Create a template for this module.
Once the template is approved from Meta’s end, slide the toggle button next to WhatsApp Templates for Payment Reminders to enable it.
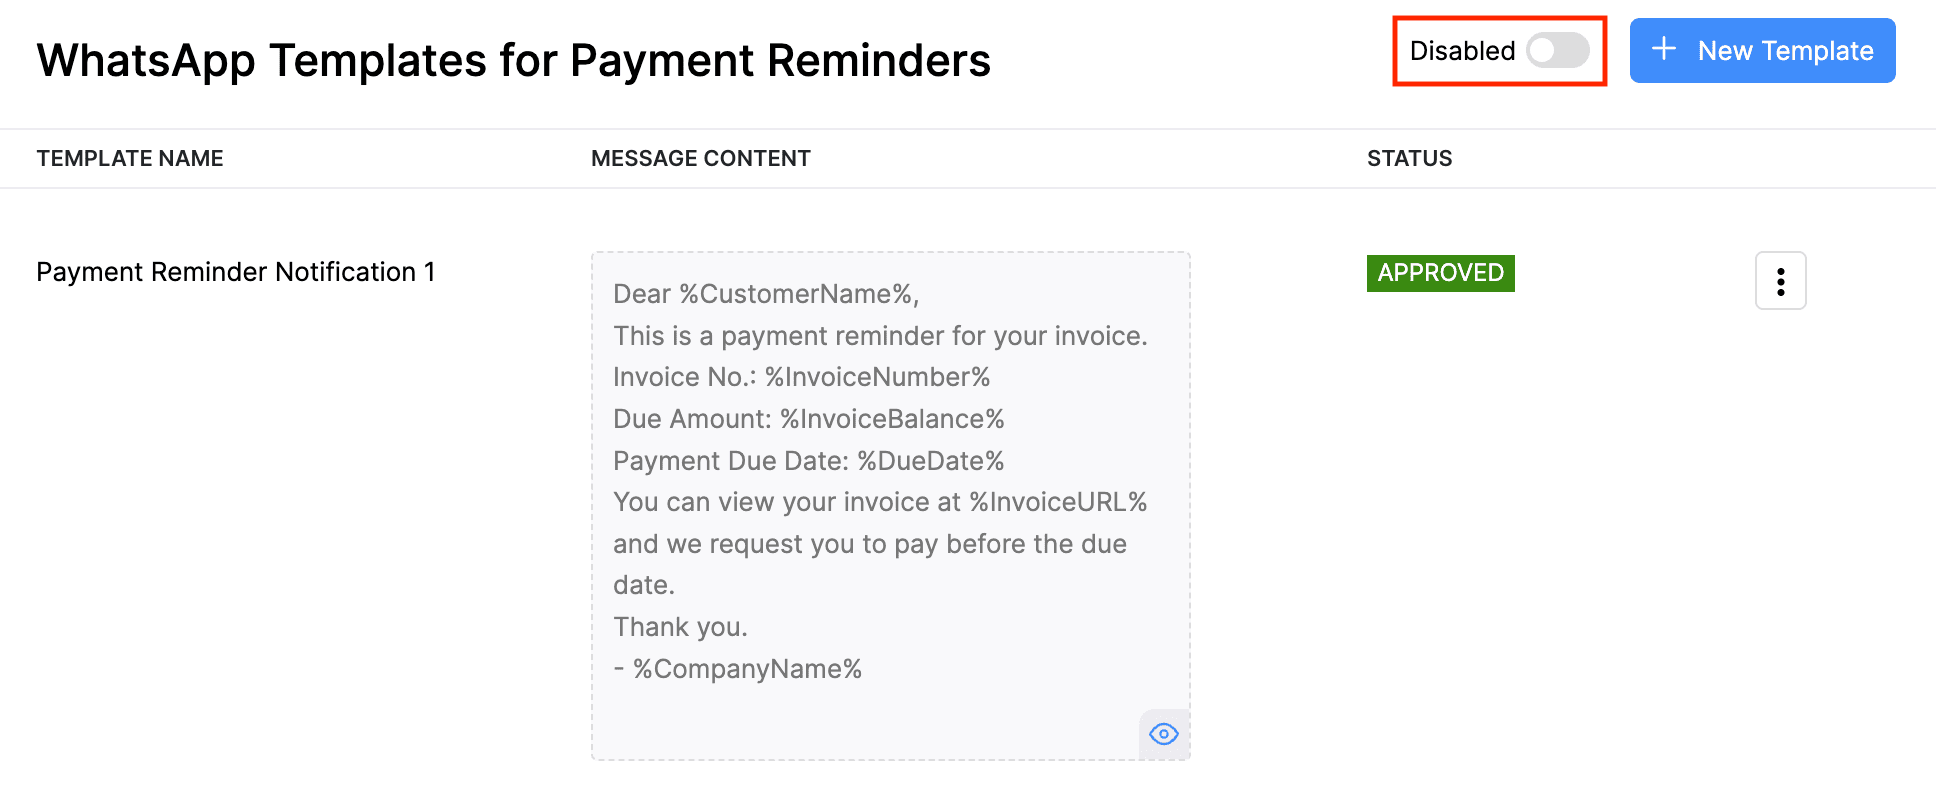
Now you will be able to use this template and send payment reminders on WhatsApp.
To send payment reminders on WhatsApp:
Go to Invoices on the left sidebar.
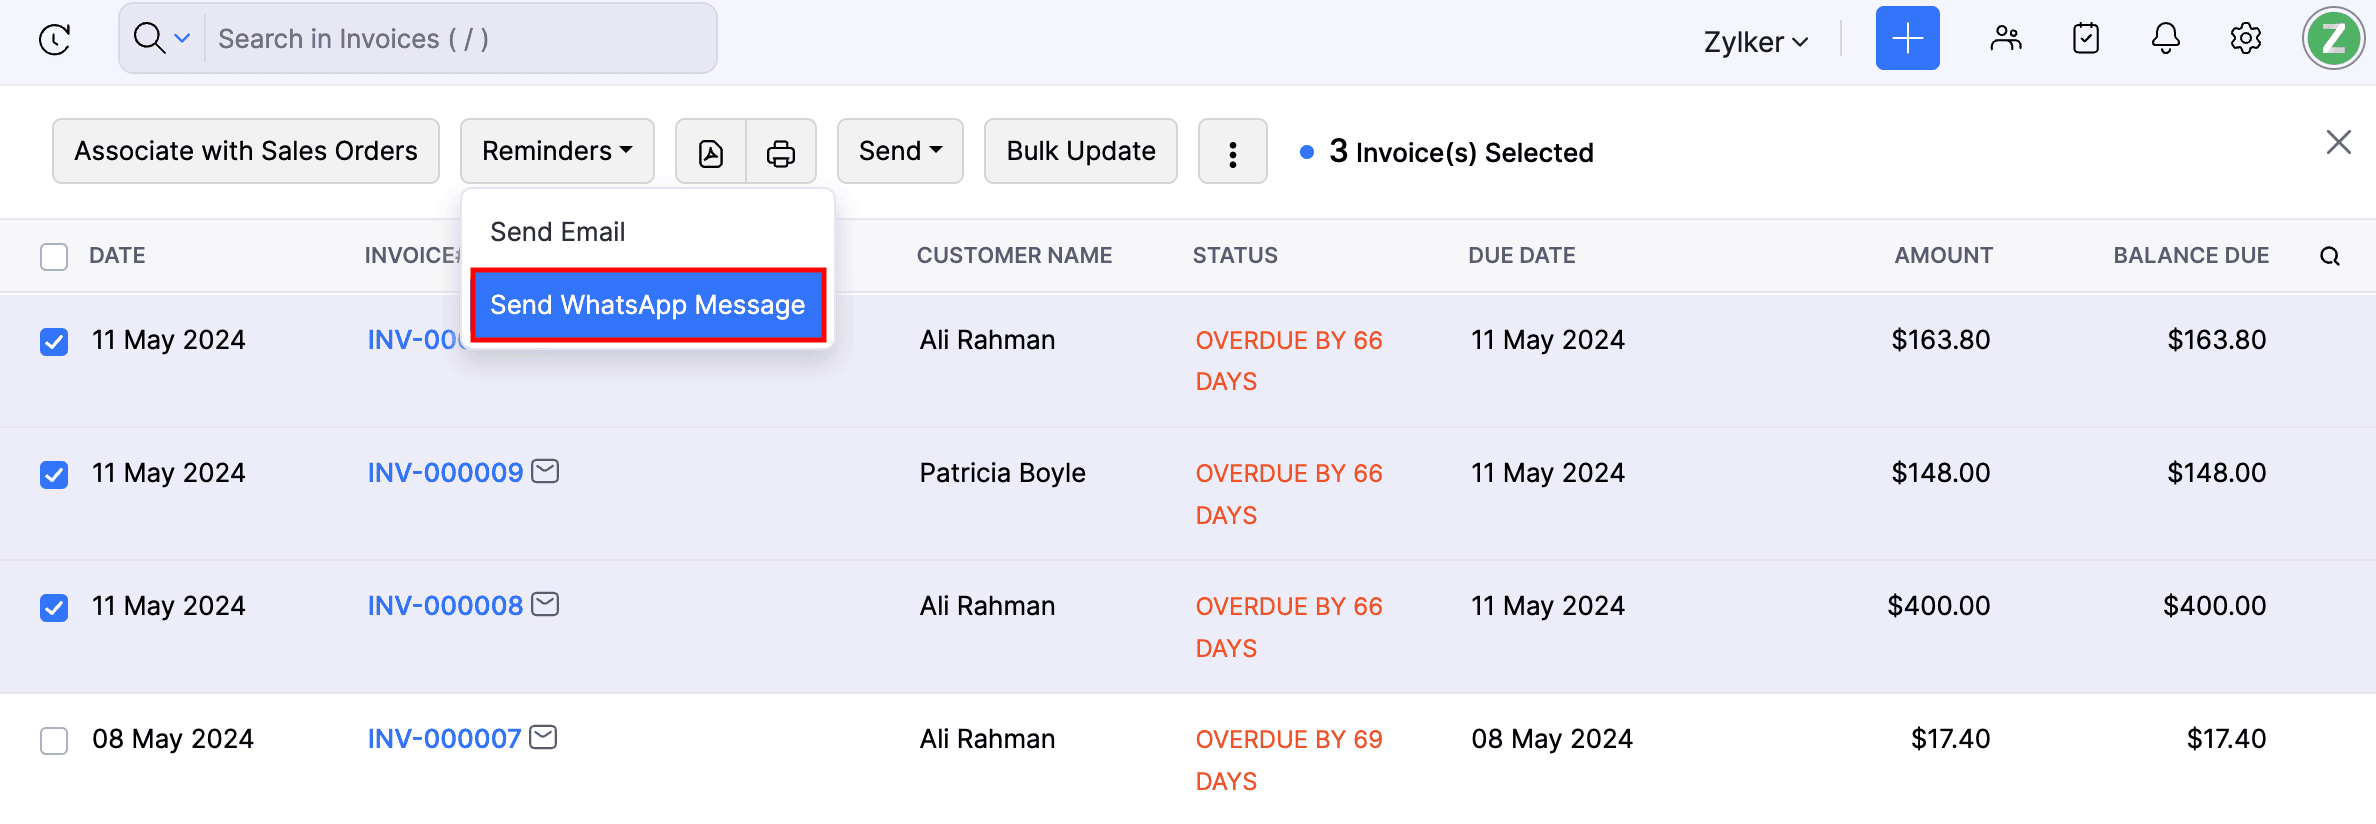
Select the invoice for which you want to send the Payment Reminder notification.
Click Reminders and select Send WhatsApp Message from the dropdown.
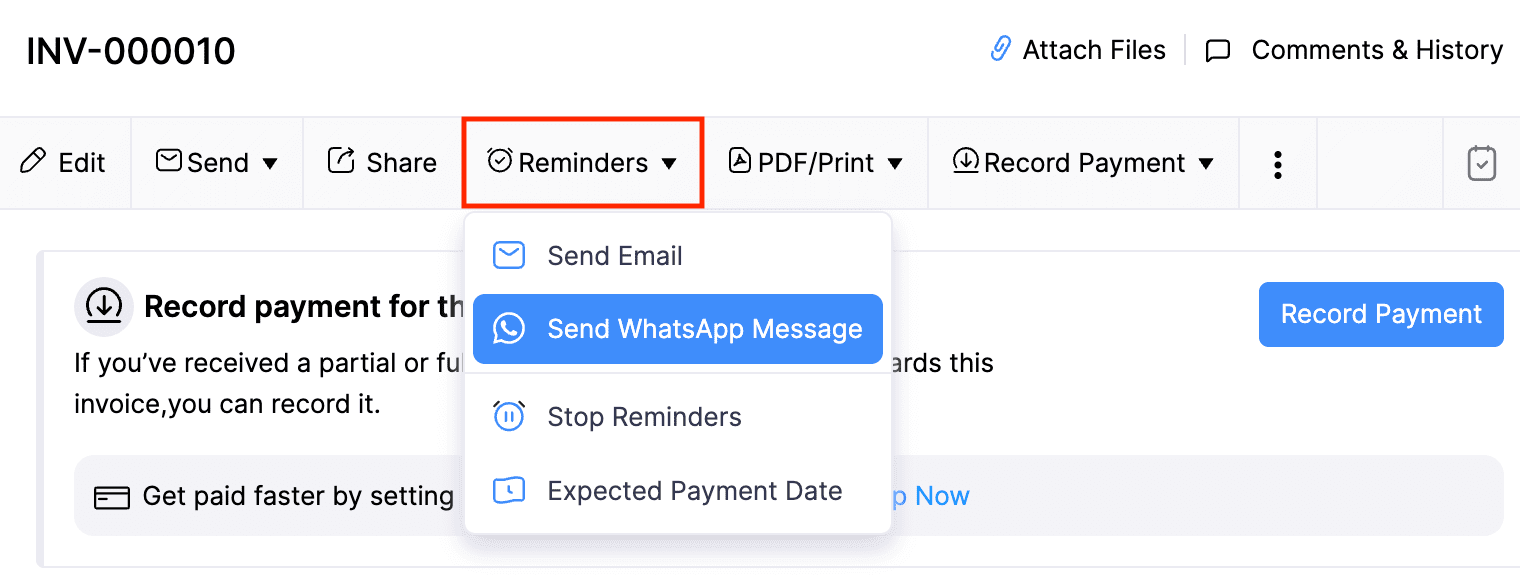
Select the Message Template in the pop-up that follows and click Send.
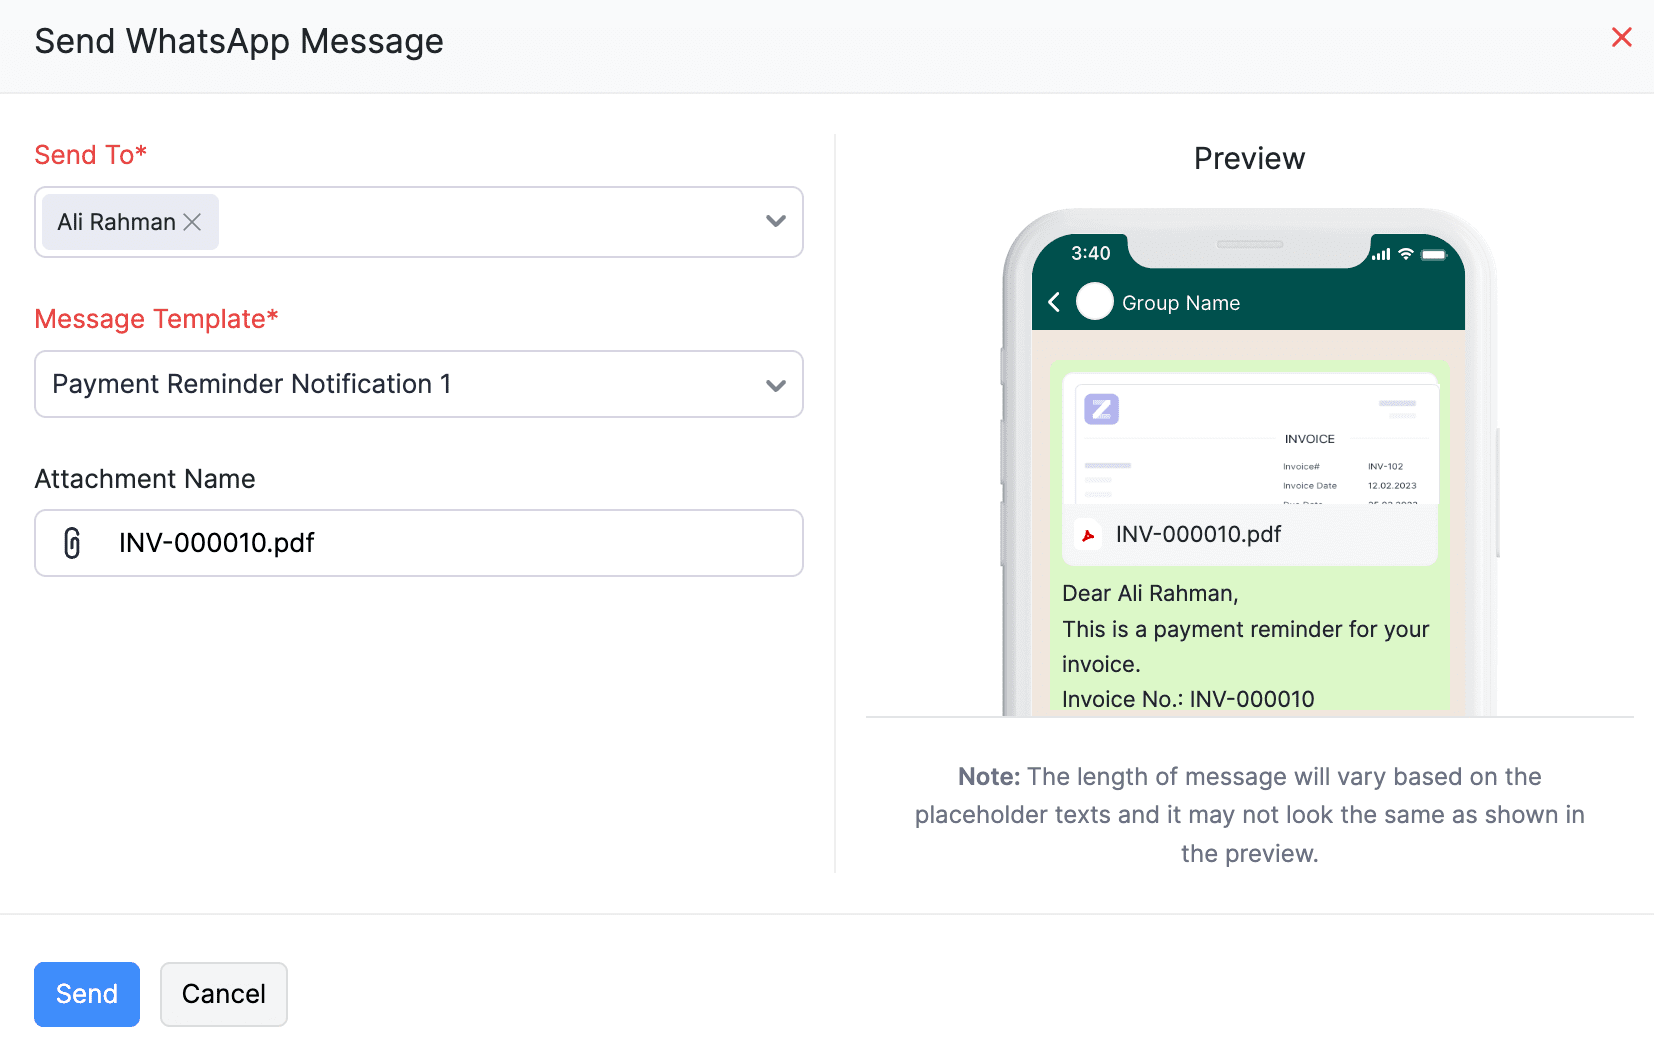
The payment reminder notification will be sent to the customer via WhatsApp.
To send payment reminders in bulk:
Select the overdue invoices.
Click Reminders and select Send WhatsApp Message.
Select the Message Template in the pop-up that follows and click Send.
The payment reminder notifications for the selected overdue invoices will be initiated, and you will be notified once they are sent to the customers.
You can also send automated payment reminder notifications through WhatsApp. Here’s how:
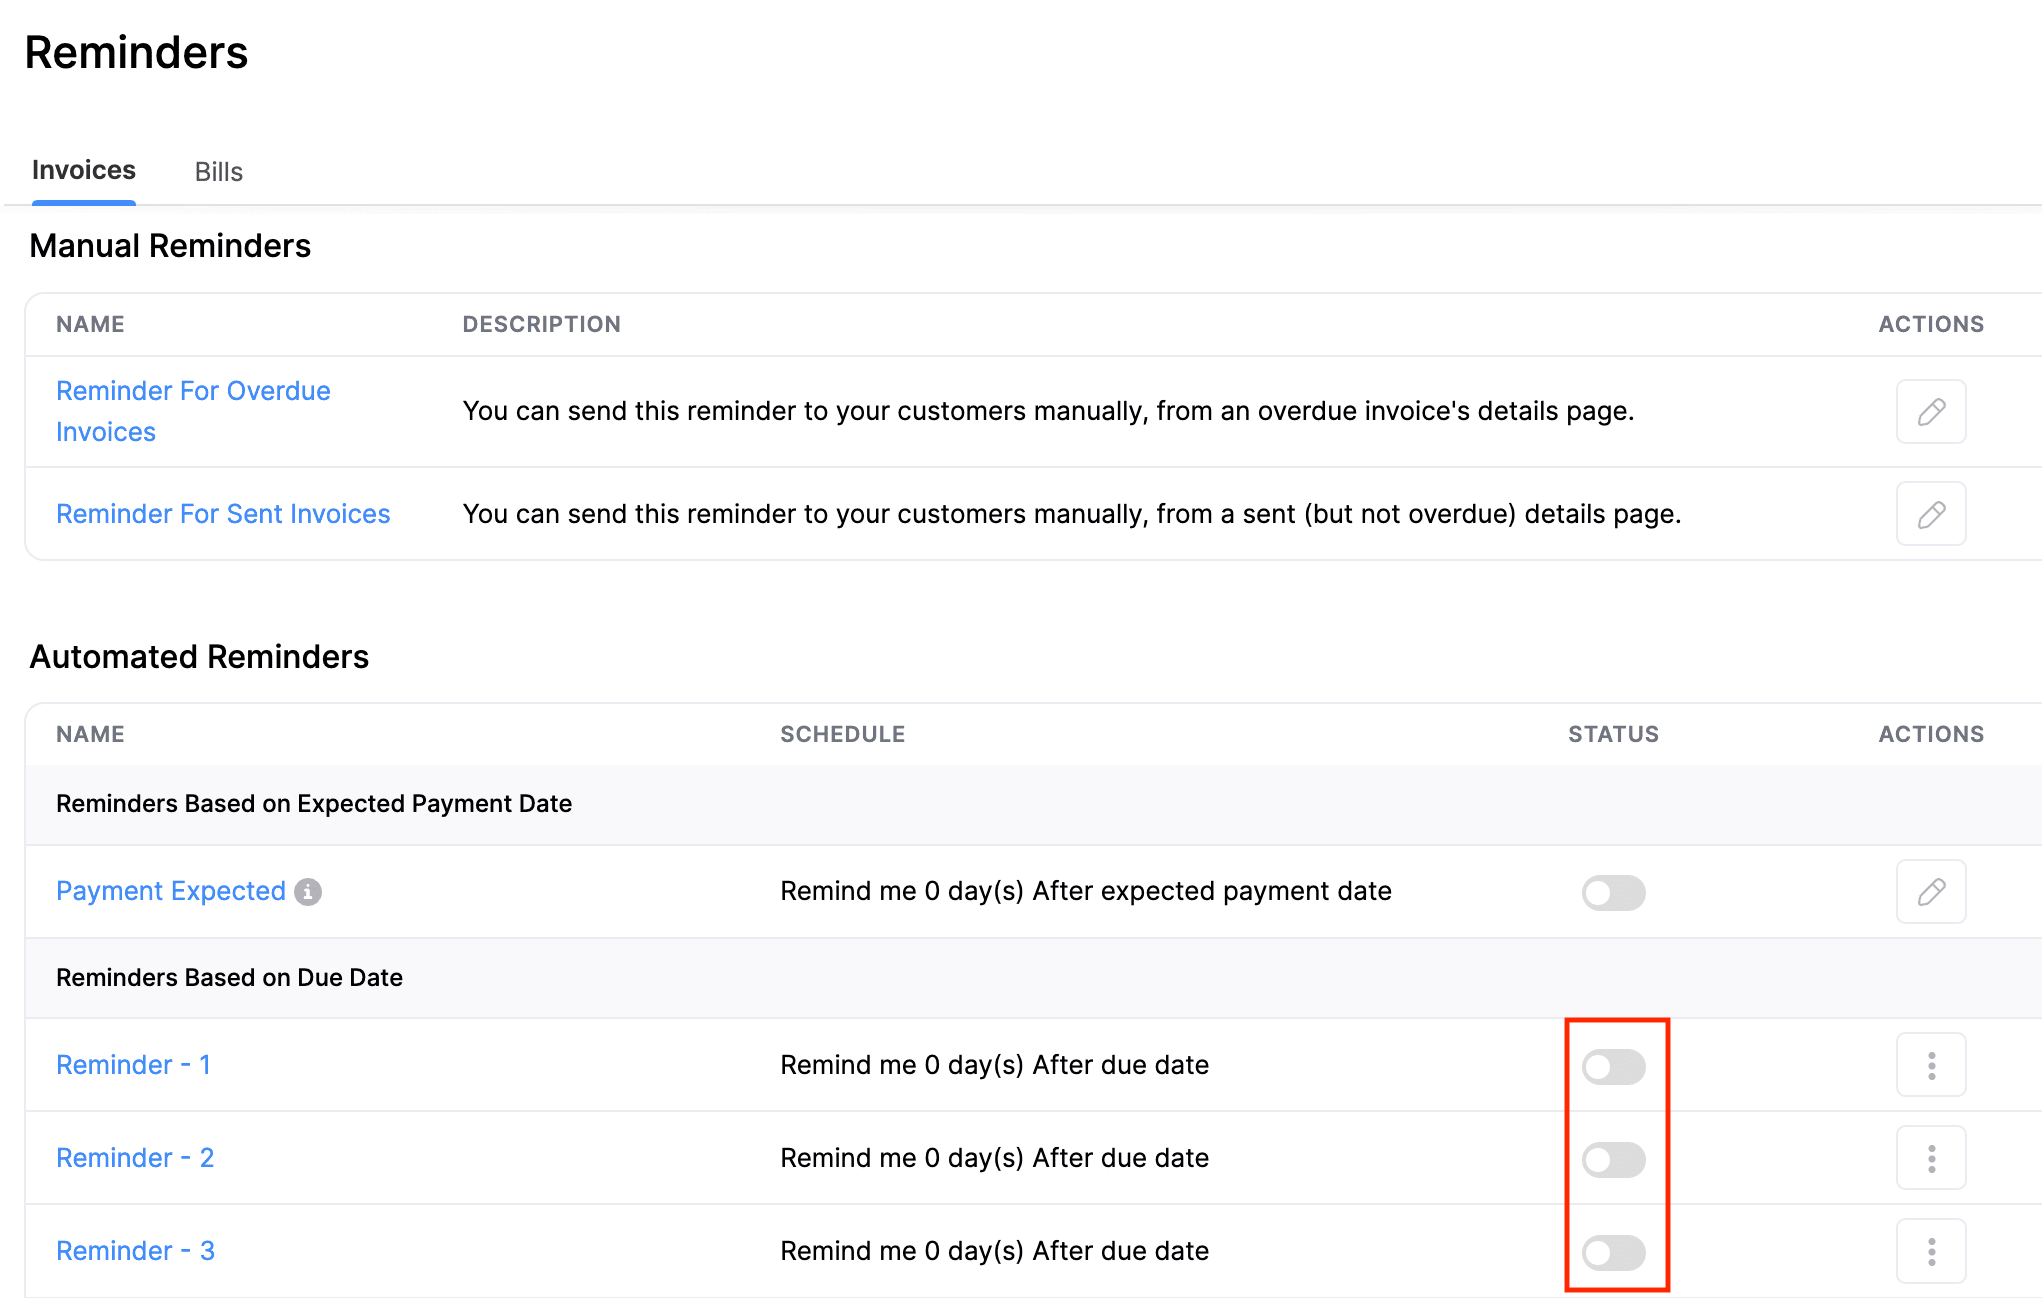
Go to Settings, navigate to Reminders & Notifications, and select Reminders.
In the Automated Reminders section, slide the toggle under the Reminders Based on Due Date section for the reminders that you want to send to your customers.
In the next pop-up, switch to the WhatsApp tab.
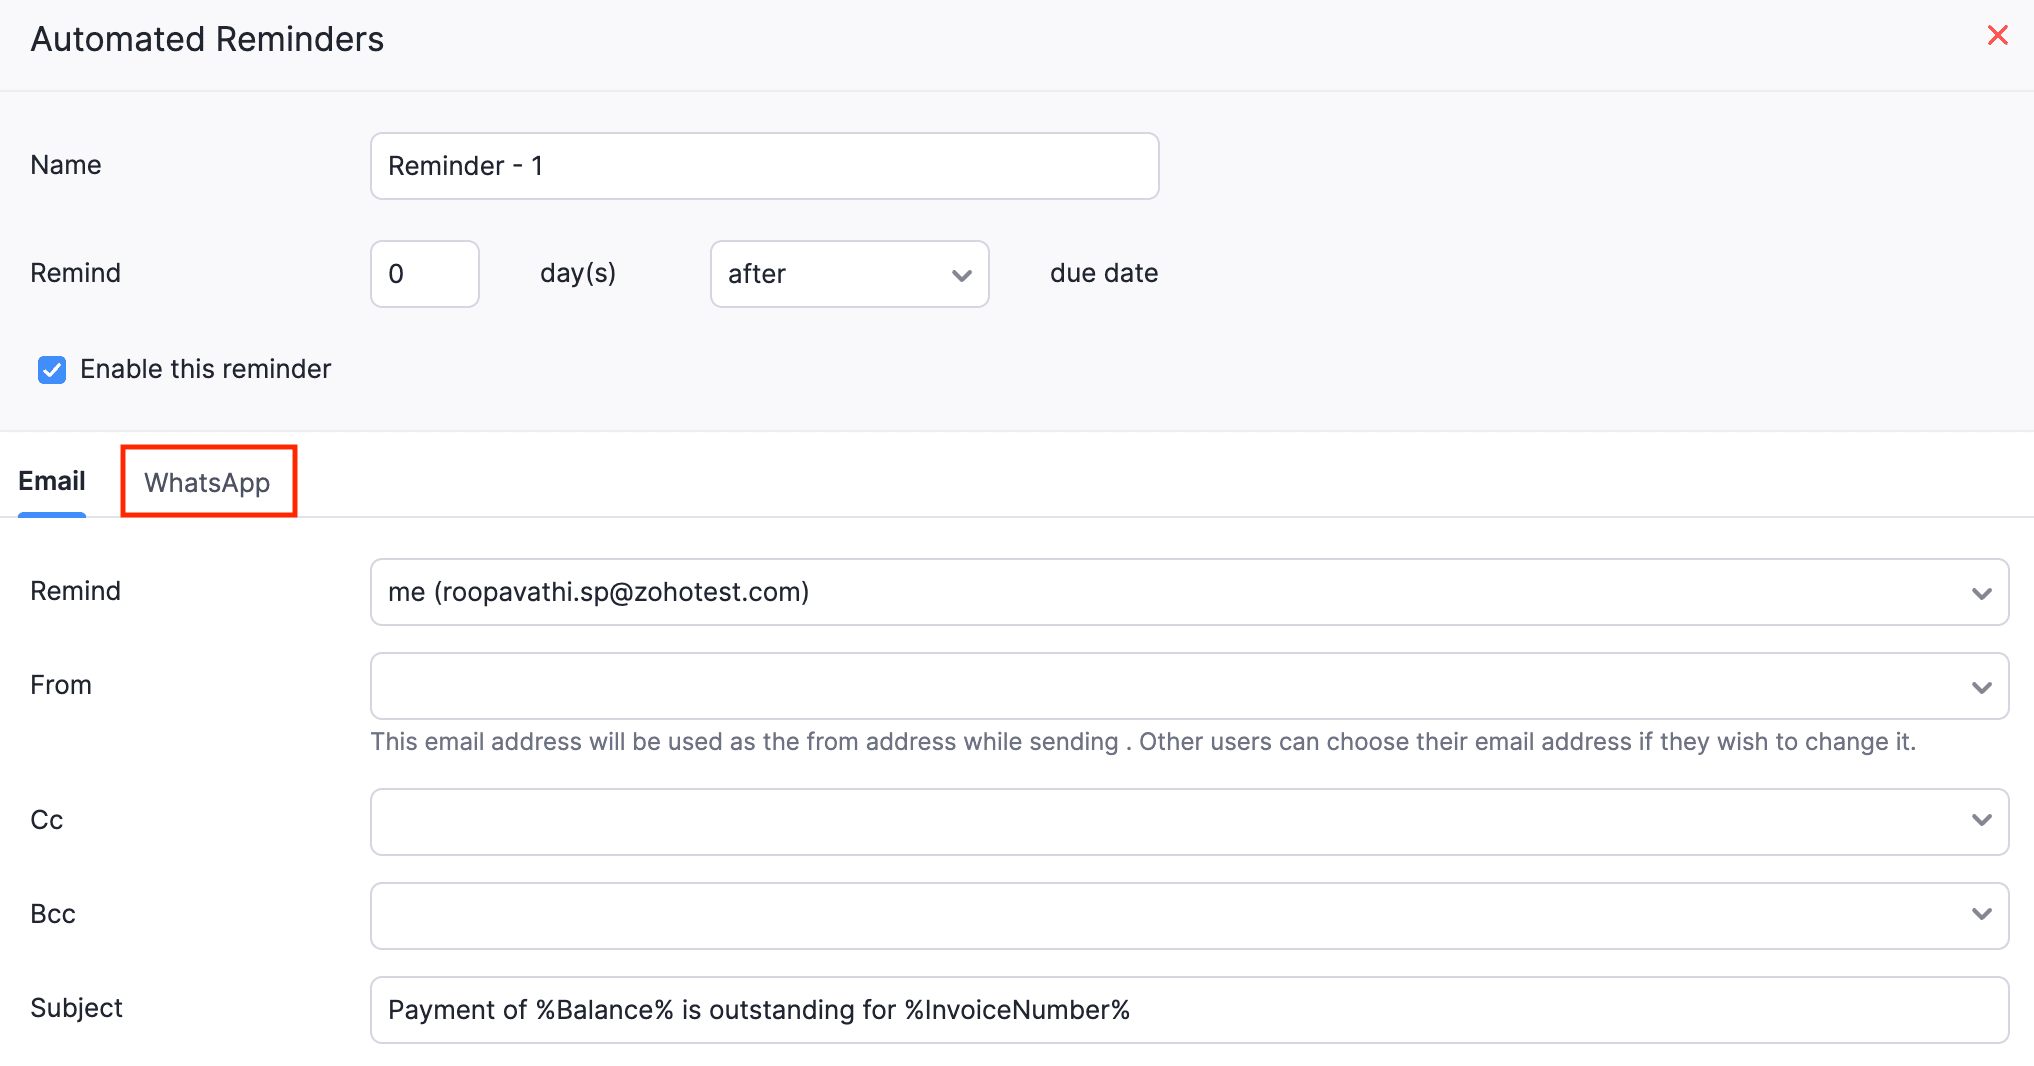
Slide the Enable WhatsApp notification for this reminder toggle.
Select the Message Template for the notification.
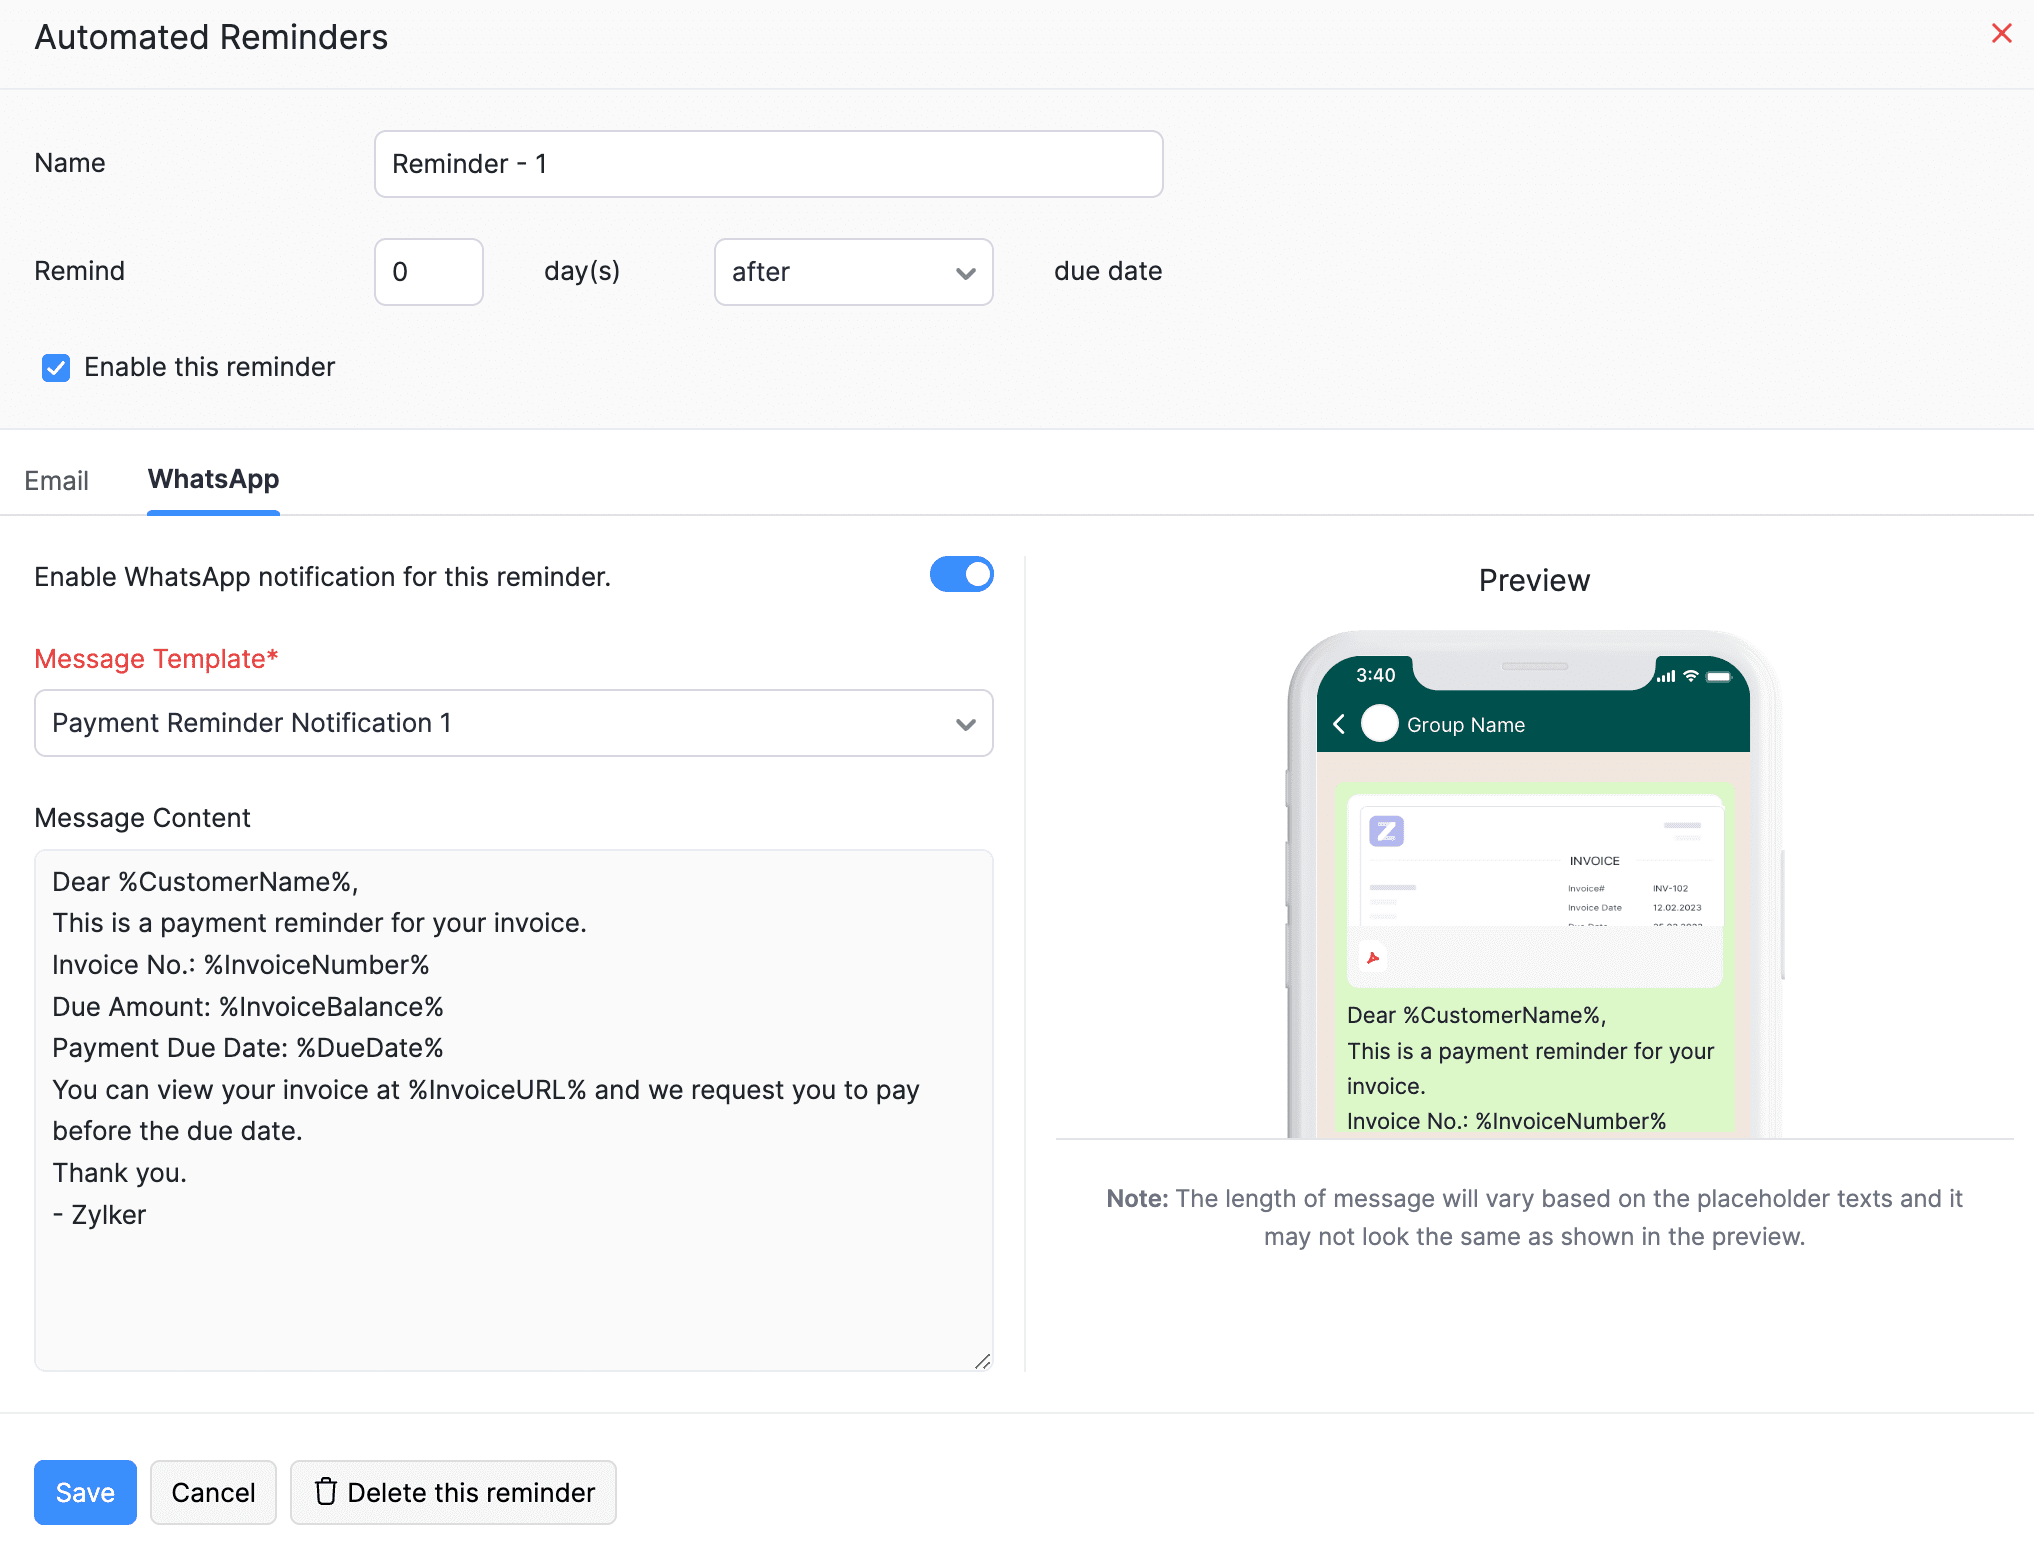
Click Save.
The automated reminders will be sent to the selected customers through WhatsApp.
Note: The Automatic Reminders will be sent to the customers only if WhatsApp Communication Channel is enabled at the customer and transaction level.
Send Payment Receipts
Go to Sales and select Payments Received.
Click New at the top-right corner and enter all the necessary details.
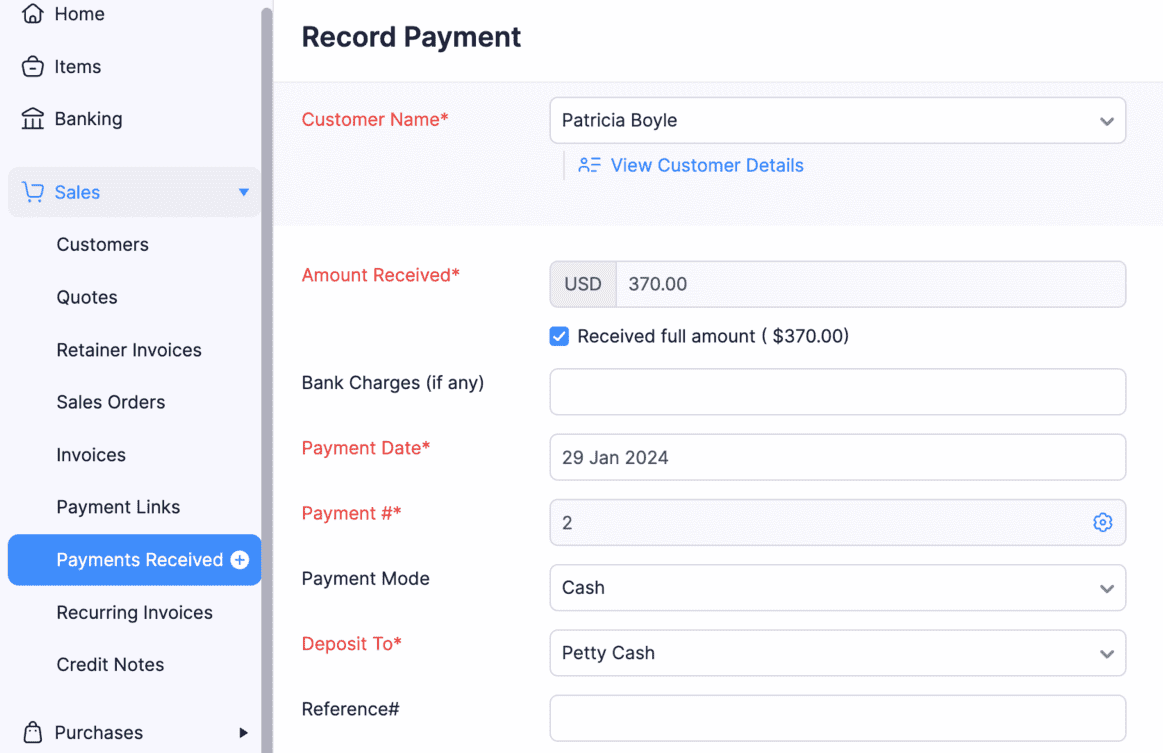
Select the contact person to whom you want to share the payment receipt details from the Share payment receipt with dropdown.
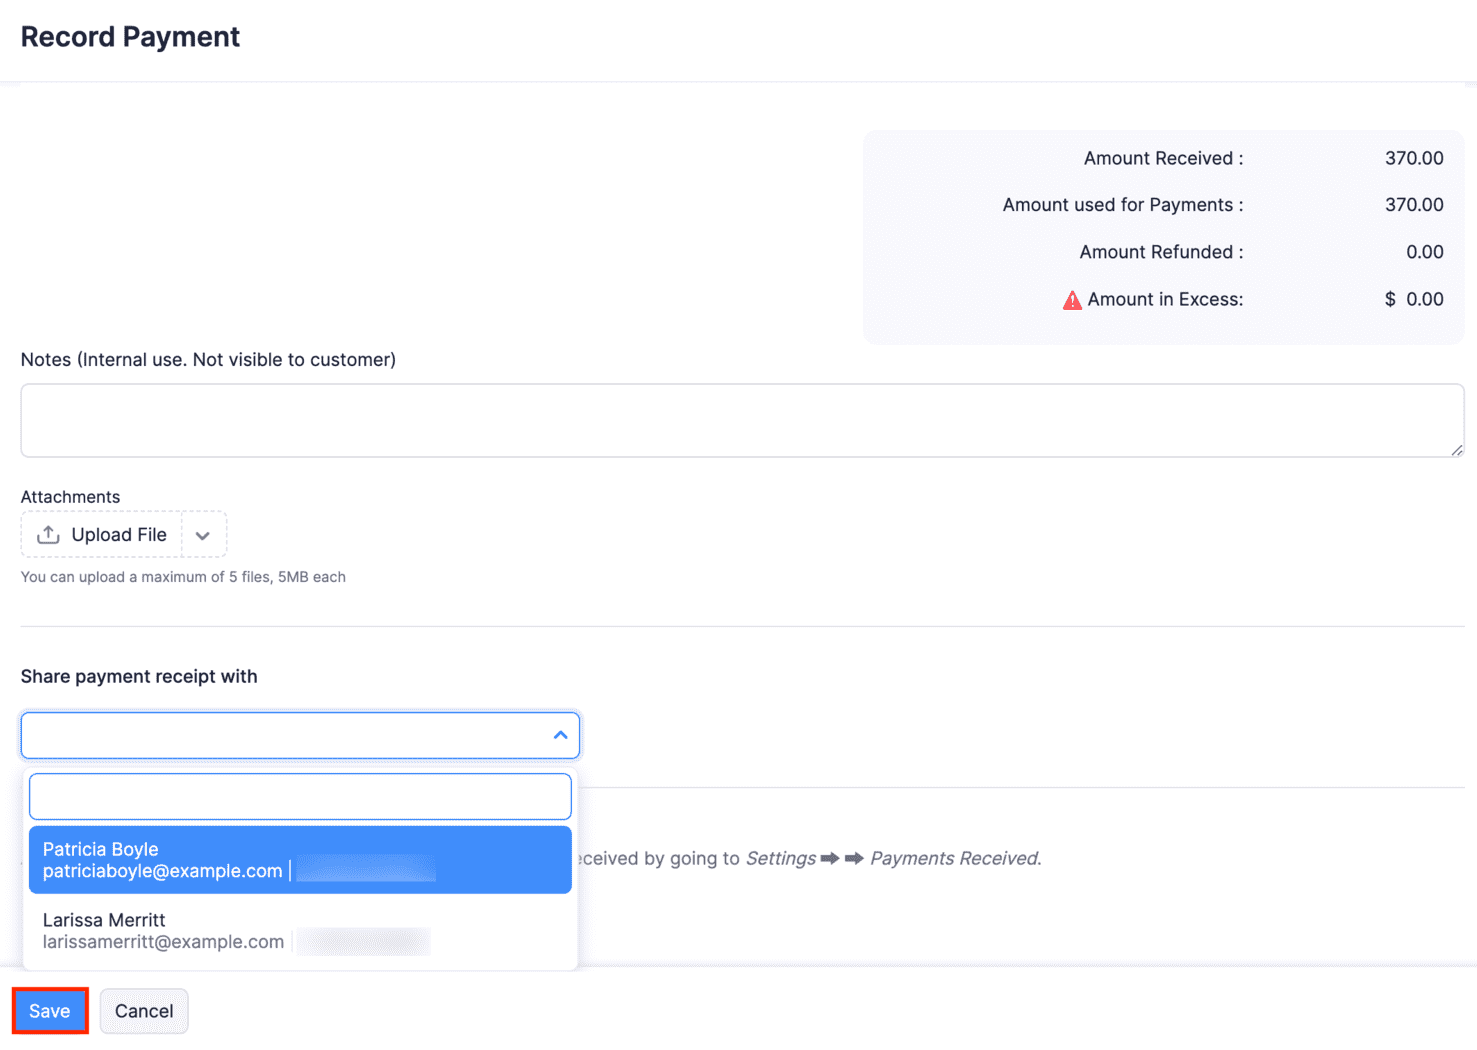
Click Save, and the WhatsApp notification with the payment receipt details of the payment amount and the invoice number will be sent to the respective contact person.
To share existing payment receipts via WhatsApp:
Go to Sales and navigate to Payments Received.
Select the payment for which you want to share the payment receipt.
Click the dropdown next to Send and select WhatsApp Message.
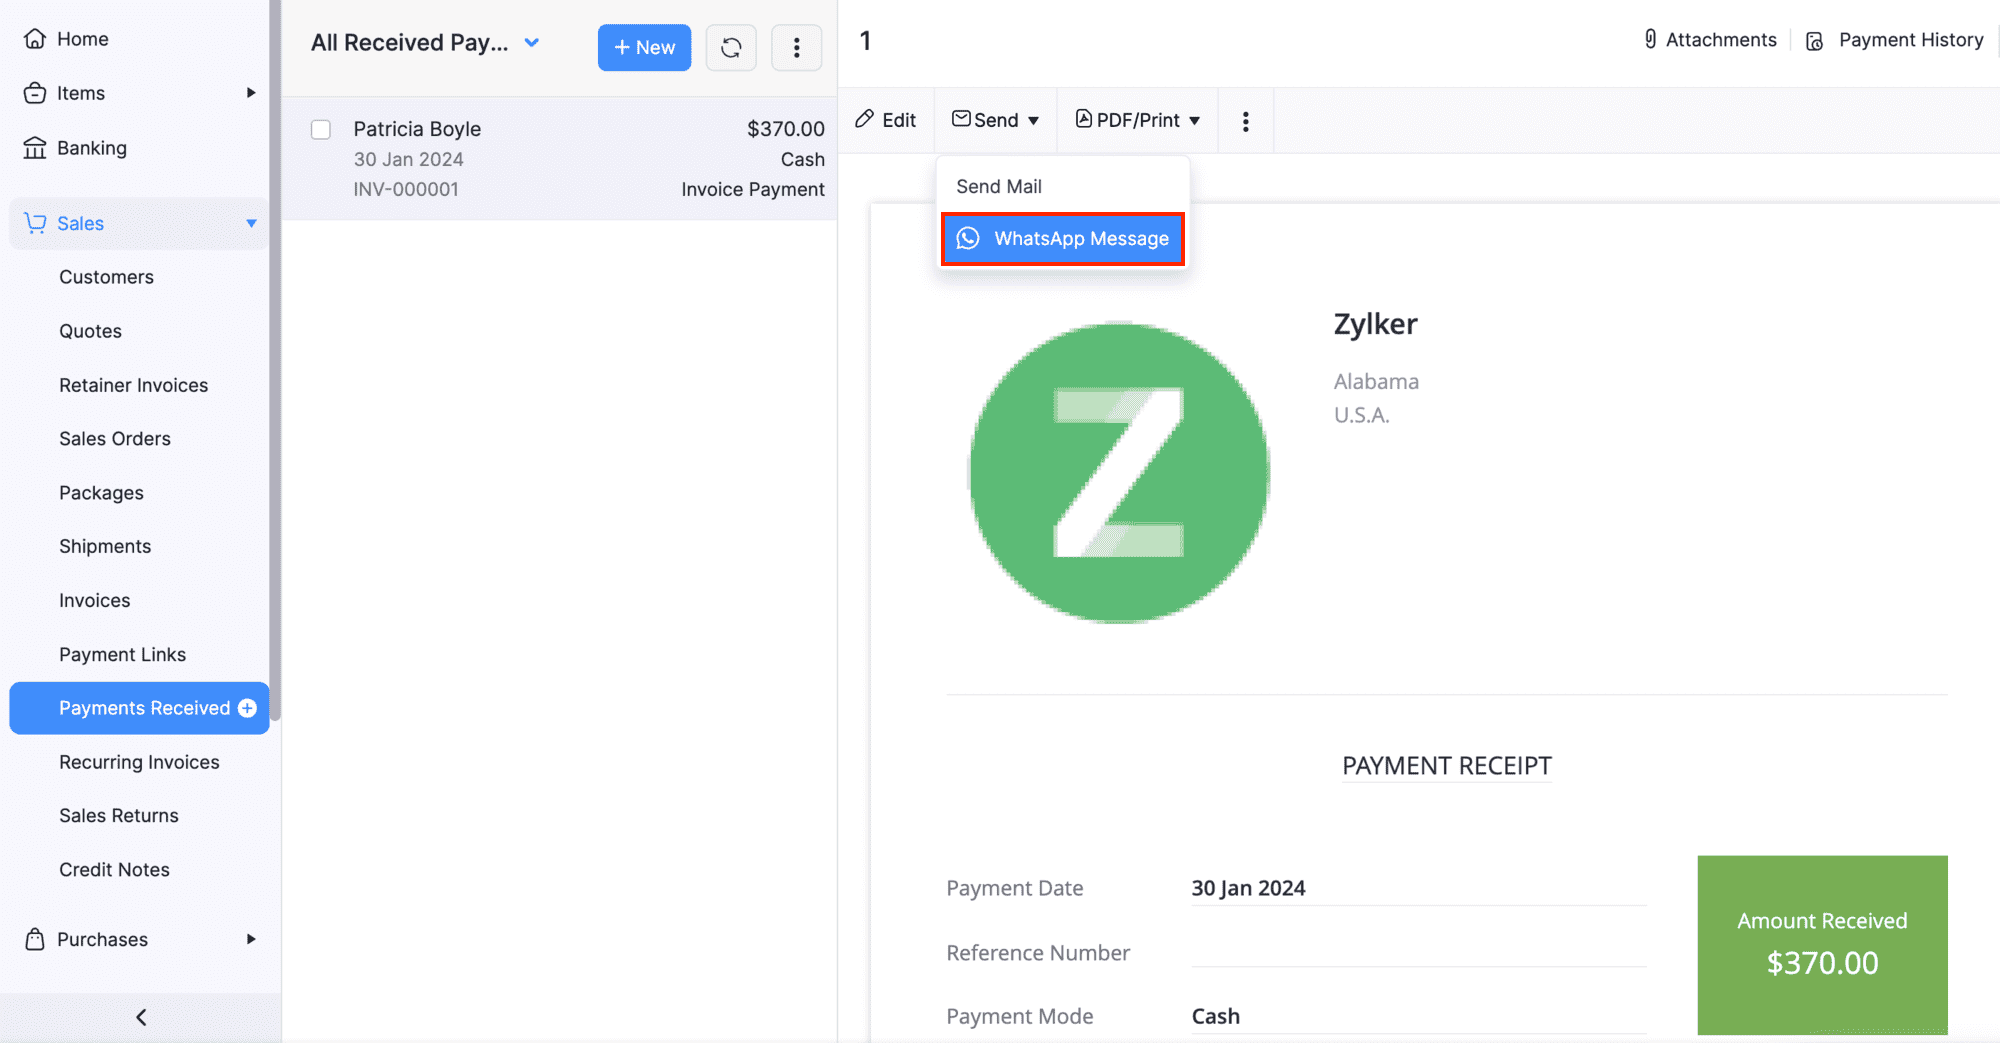
The contact person and the message template will be auto-populated.

Click Send, and the WhatsApp notification with the payment receipt details will be sent to the respective contact person.
Send Customer Notifications
You can send marketing notifications to your customers regarding promotions, offers or any other informational updates along with the customer statement using this feature.
Go to Sales and navigate to Customers.
Select the customer to whom you want to send the WhatsApp notification.
Click Send dropdown in the Receivables section, and select WhatsApp Message.
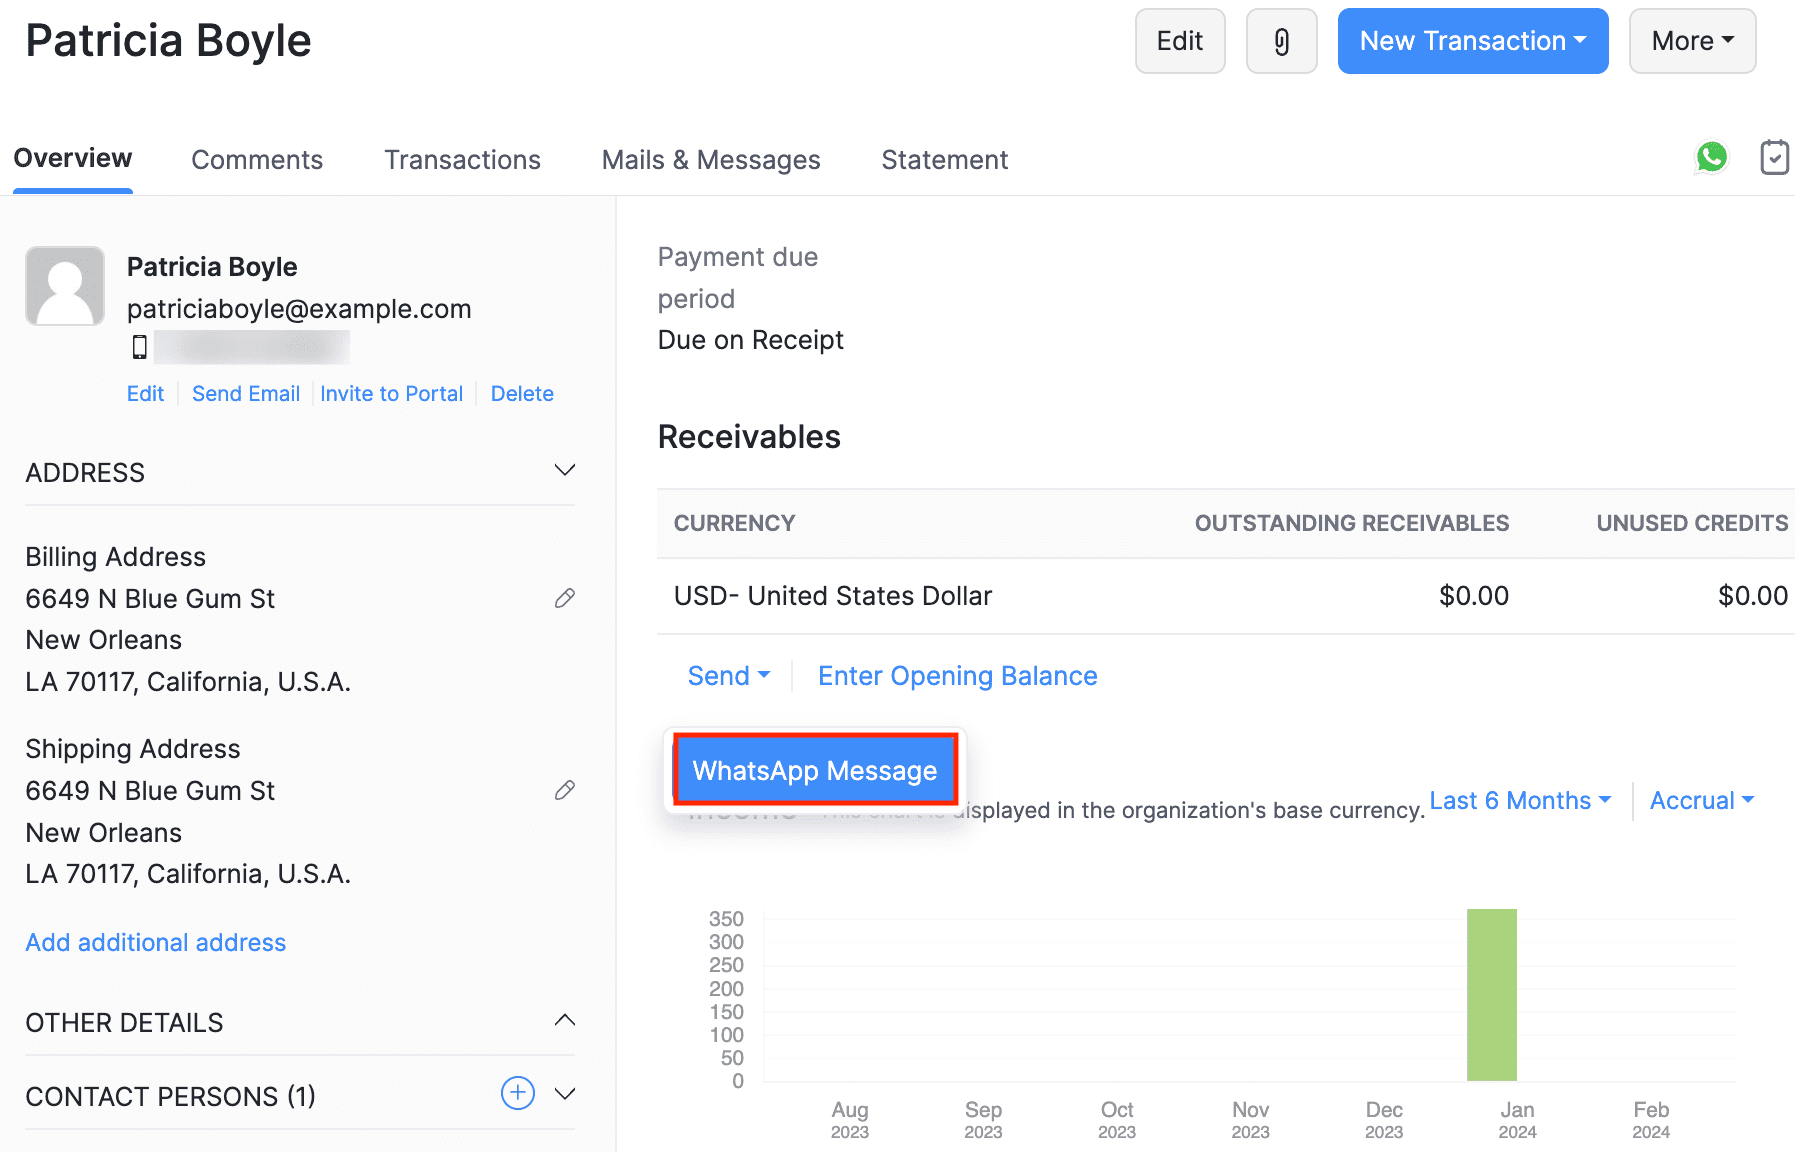
The contact person and the message template will be auto-populated in the following Send WhatsApp Message pop-up.
Click Send, and the WhatsApp notification will be sent to the respective contact person.
To send only the customer statement:
Select a customer and switch to the Statement tab.
Click Share via and select WhatsApp from the dropdown.
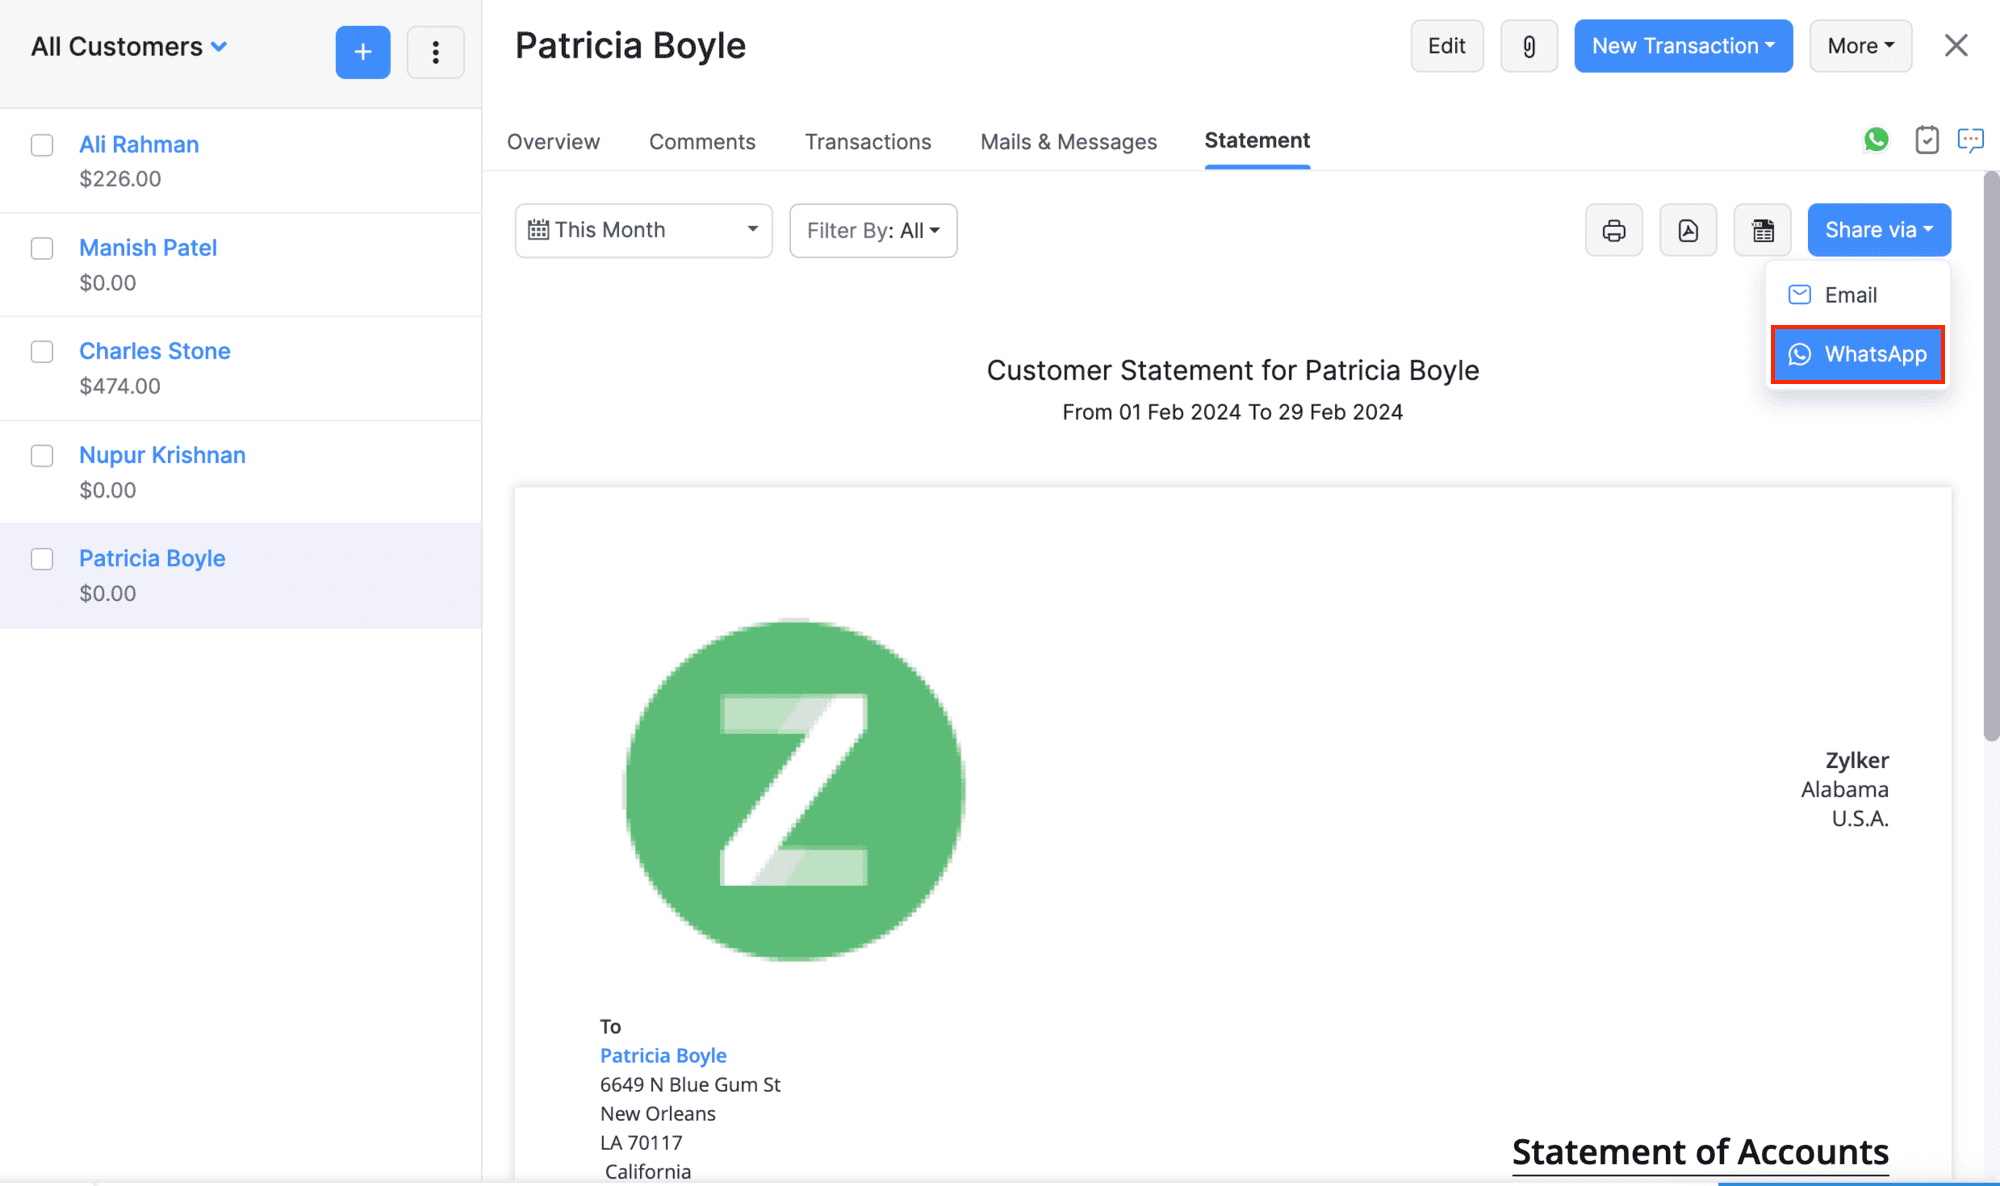
The contact person and the message template will be auto-populated in the following Send WhatsApp Message pop-up. You can also add other contact persons or replace the templates if required.
Click Send.
The customer statement will be sent to the respective contact person.
Sending Bulk WhatsApp Notifications
Zoho Books allows you to send WhatsApp notifications to multiple customers at a time.
Note: The bulk WhatsApp notifications will only be sent to the contacts selected in the particular transaction level.
To send bulk WhatsApp notifications:
Go to Invoices on the left sidebar.
In the list page, select the invoices you want to send through WhatsApp.
Click Send and select WhatsApp Message from the dropdown.
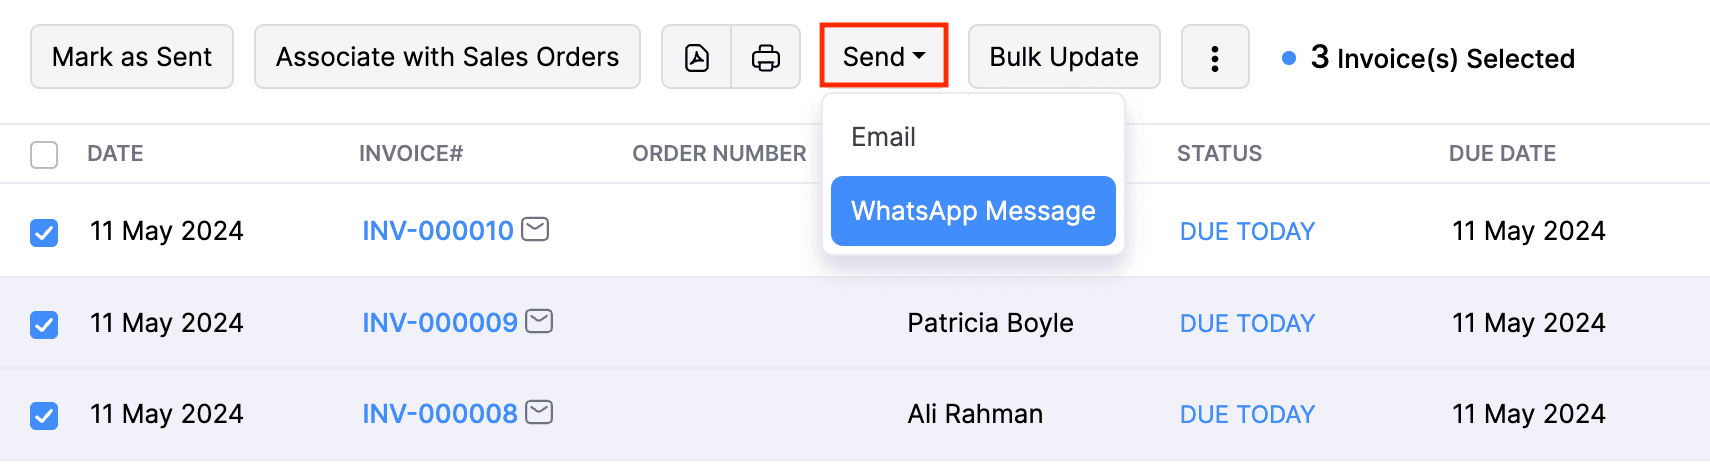
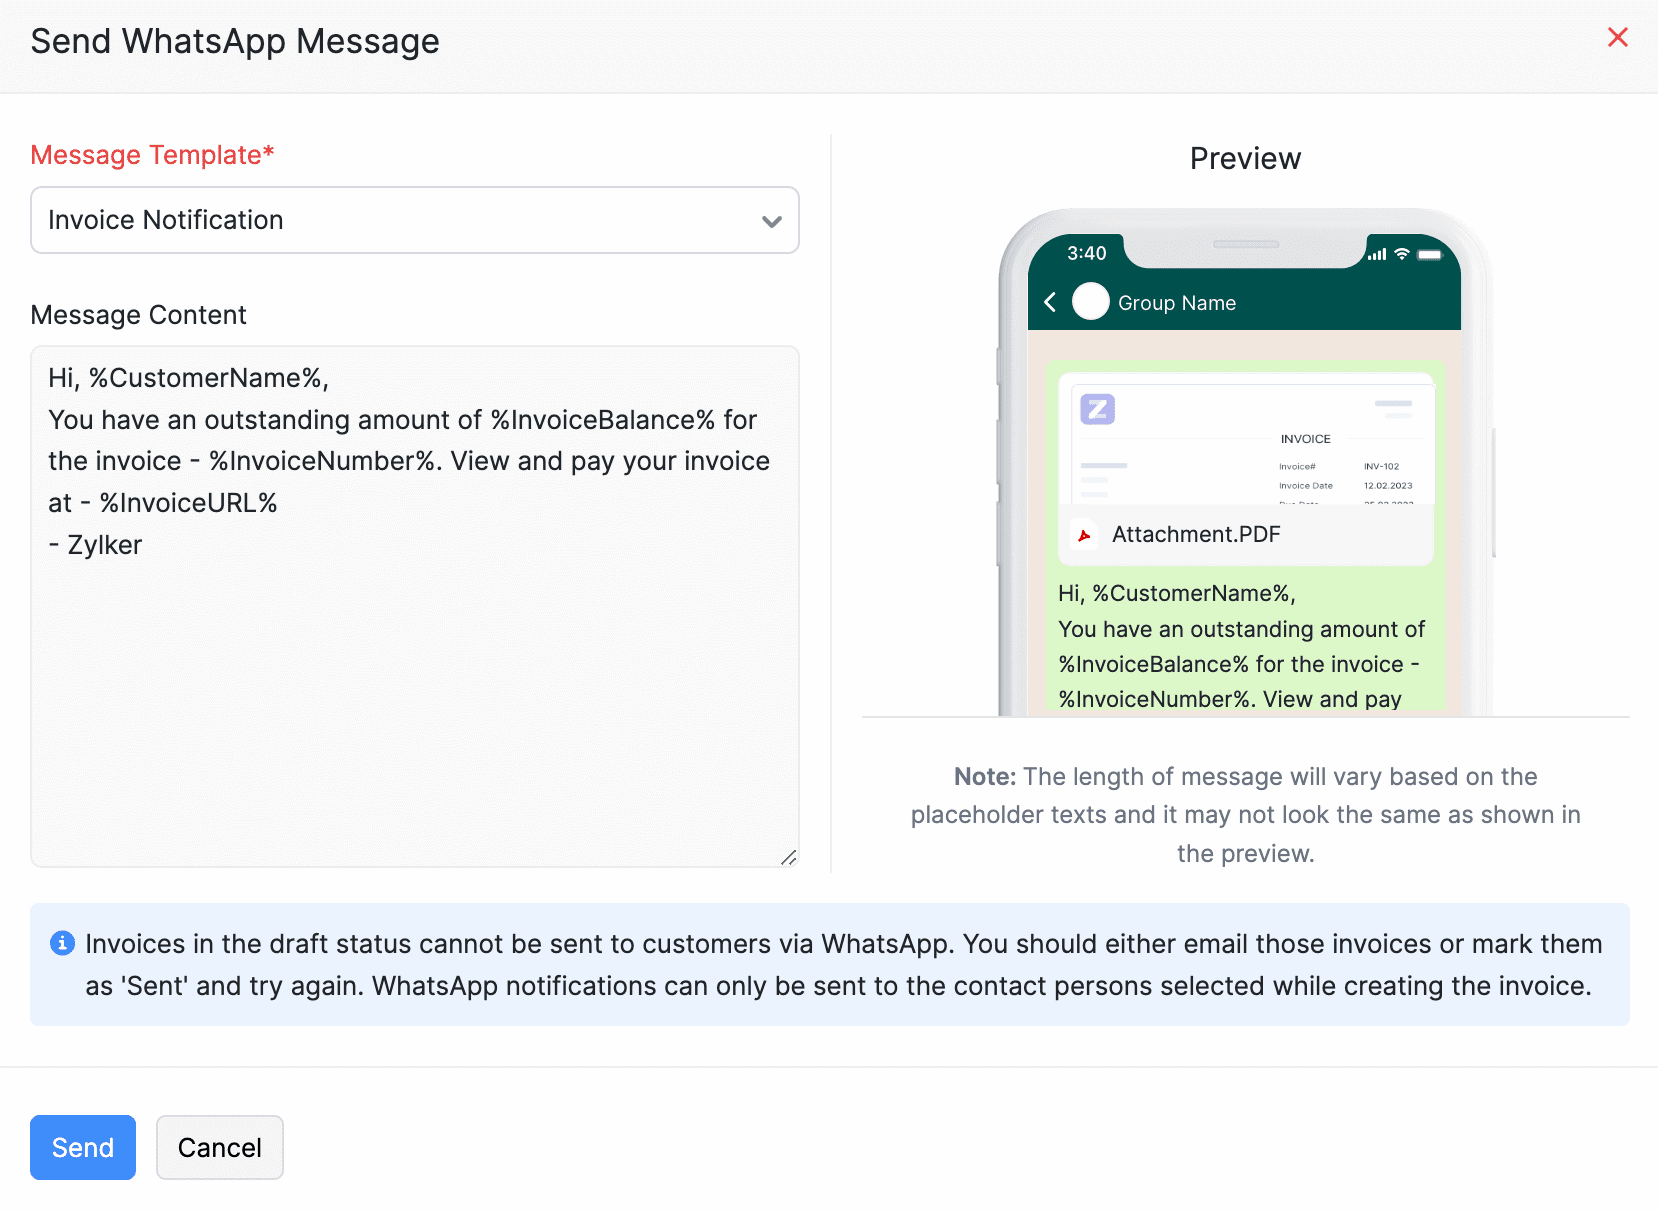
In the next page, choose a Message Template for the notification.
Click Send.
The bulk WhatsApp messages for the selected invoices will be initiated, and you will be notified once they are sent to the customers. Similarly, you can send bulk notifications for Sales Orders, Estimates, Retainer Invoices, and Sales Receipts.
WhatsApp bulk notifications will not be sent if:
- The transactions are in the draft status.
- The WhatsApp communication channel is not enabled at the customer level and the transaction level.
Send Vendor Notifications
Prerequisite:
Before you send WhatsApp notifications to your vendors, ensure that you’ve created templates for them.
Once you’ve created WhatsApp templates for vendors and they are approved by Meta, you can send WhatsApp notifications to your vendors and their contact persons. Here’s how:
Go to Purchases on the left sidebar and select Vendors.
Select the vendor to send WhatsApp notifications.
In the vendor’s Details page, under Payables, click the Send dropdown and select WhatsApp Message.
In the Send WhatsApp Message pop-up, fill in the required details and click Send.

The WhatsApp notification will be sent to the respective contact persons.
To send vendor statements via WhatsApp notifications:
Select a vendor, and in the vendor’s Details page, navigate to the Statement tab.
Click Share via in the top right corner and select WhatsApp in the dropdown.
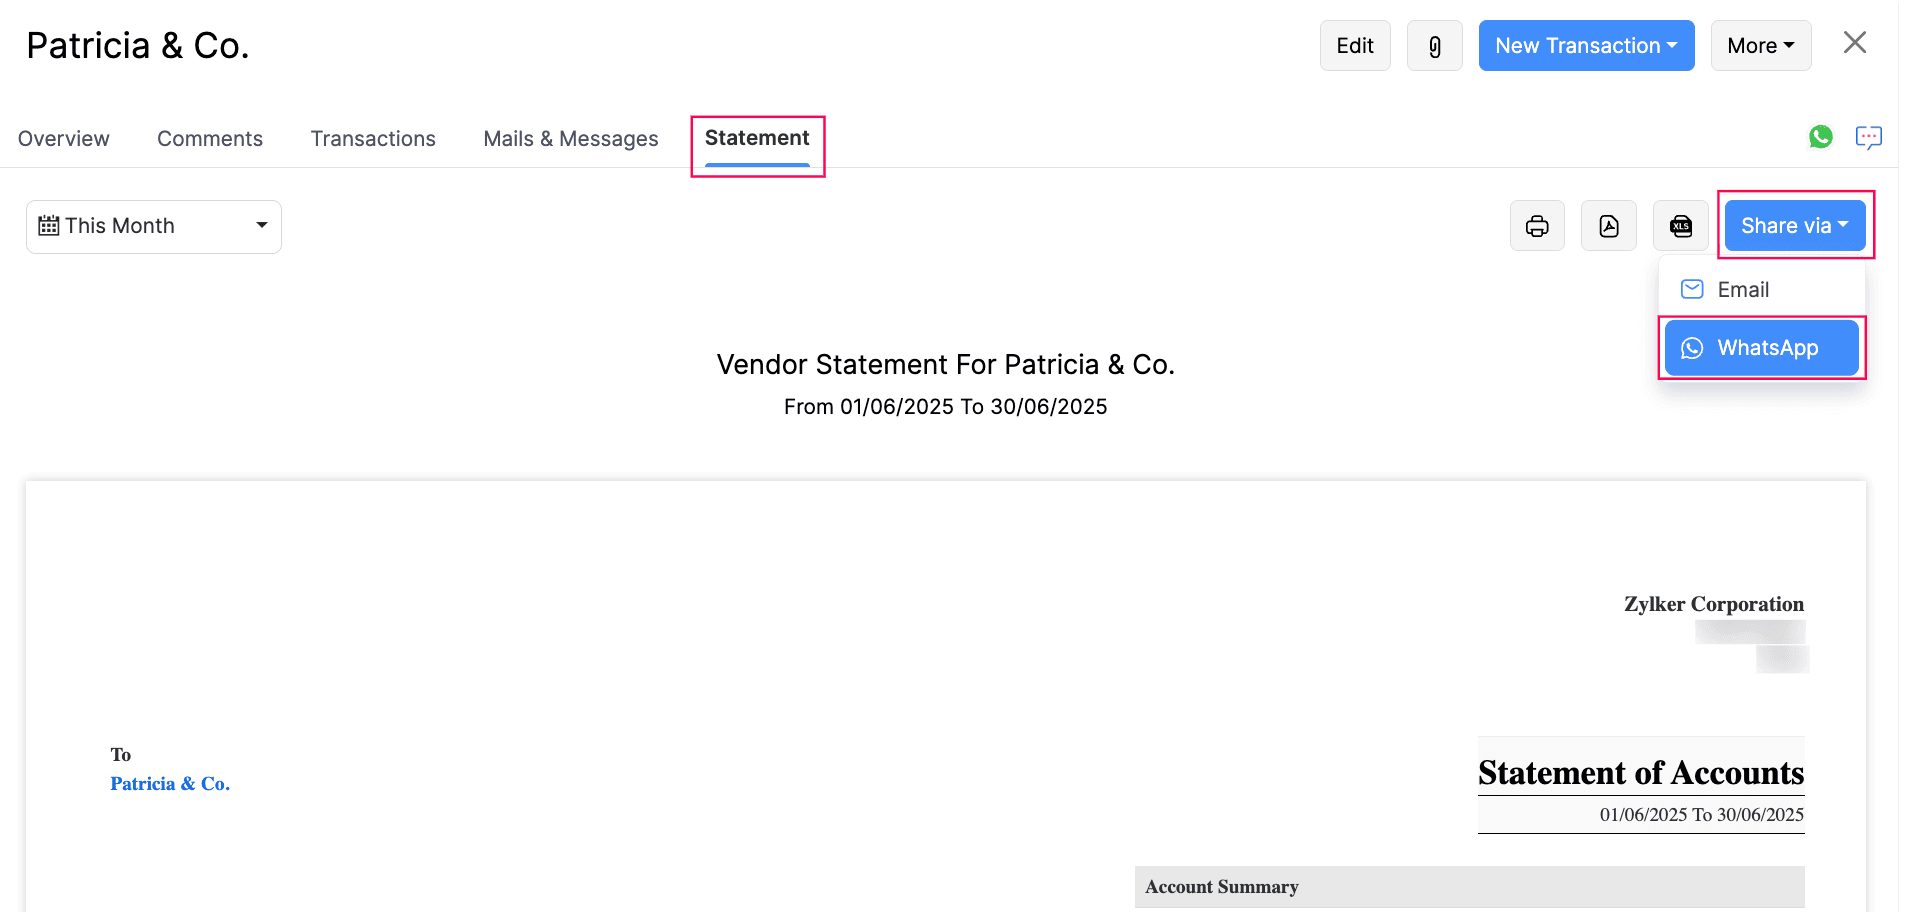
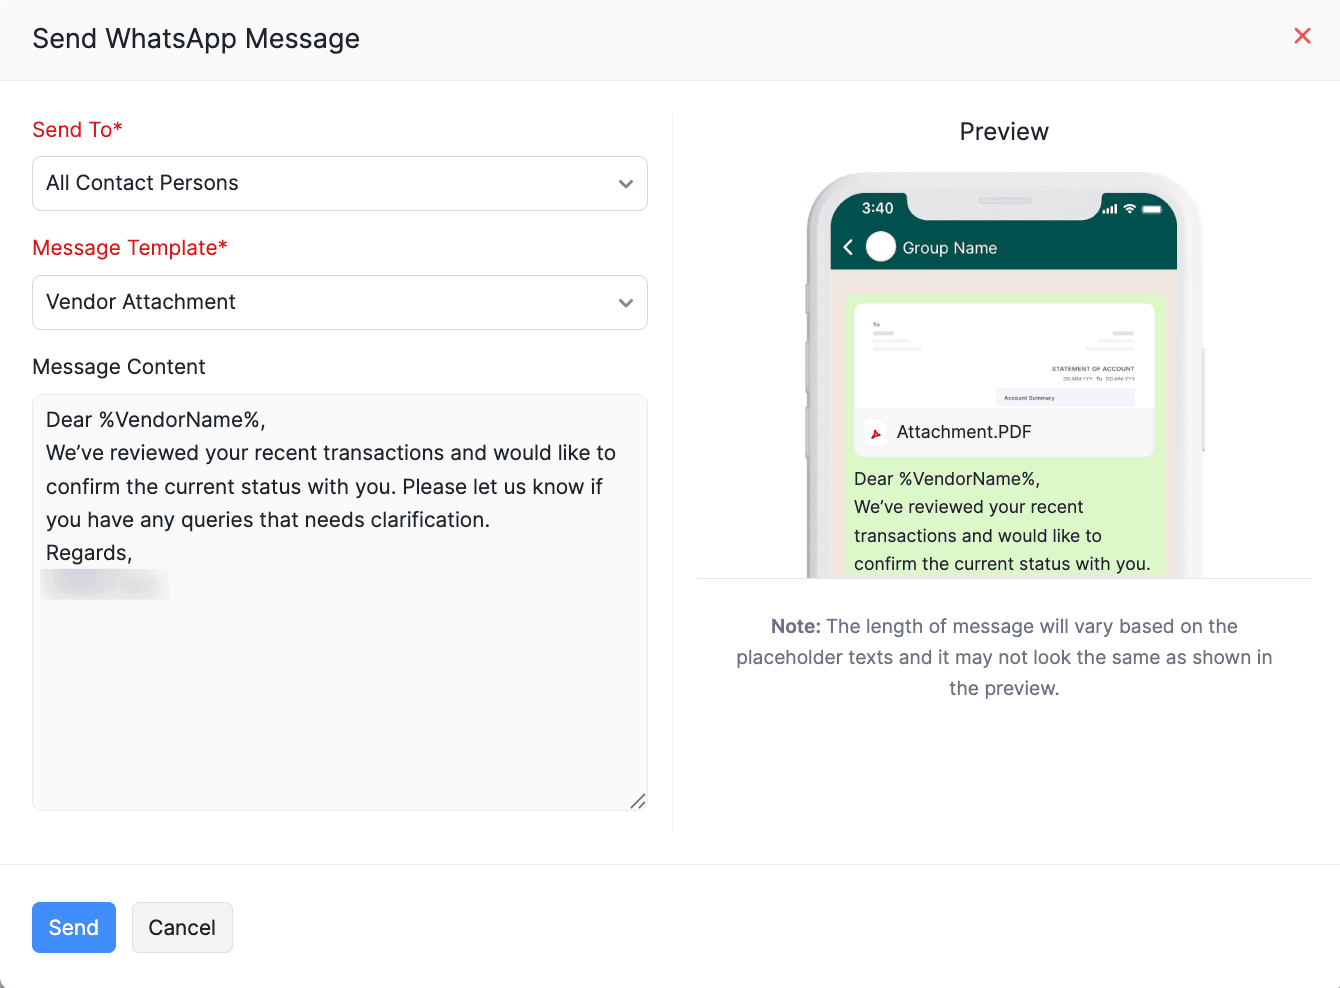
In the Send WhatsApp Message pop-up, fill in the required details and click Send.
The vendor statement will be sent to the respective contact person.
Send Vendor Notifications in Bulk
You can send WhatsApp notifications to your vendors and their contact persons in bulk. Here’s how:
Go to Purchases on the left sidebar and select Vendors.
Select the vendors to send WhatsApp notifications, and click the WhatsApp icon at the top of the List page.

In the Send WhatsApp Message pop-up, choose the required Message Template and click Send.
WhatsApp notifications will be sent in bulk for the selected vendors and their contact persons.
View Sent WhatsApp Notifications
You can view the sent WhatsApp notifications at three different levels. Here’s how:
At Transaction Level
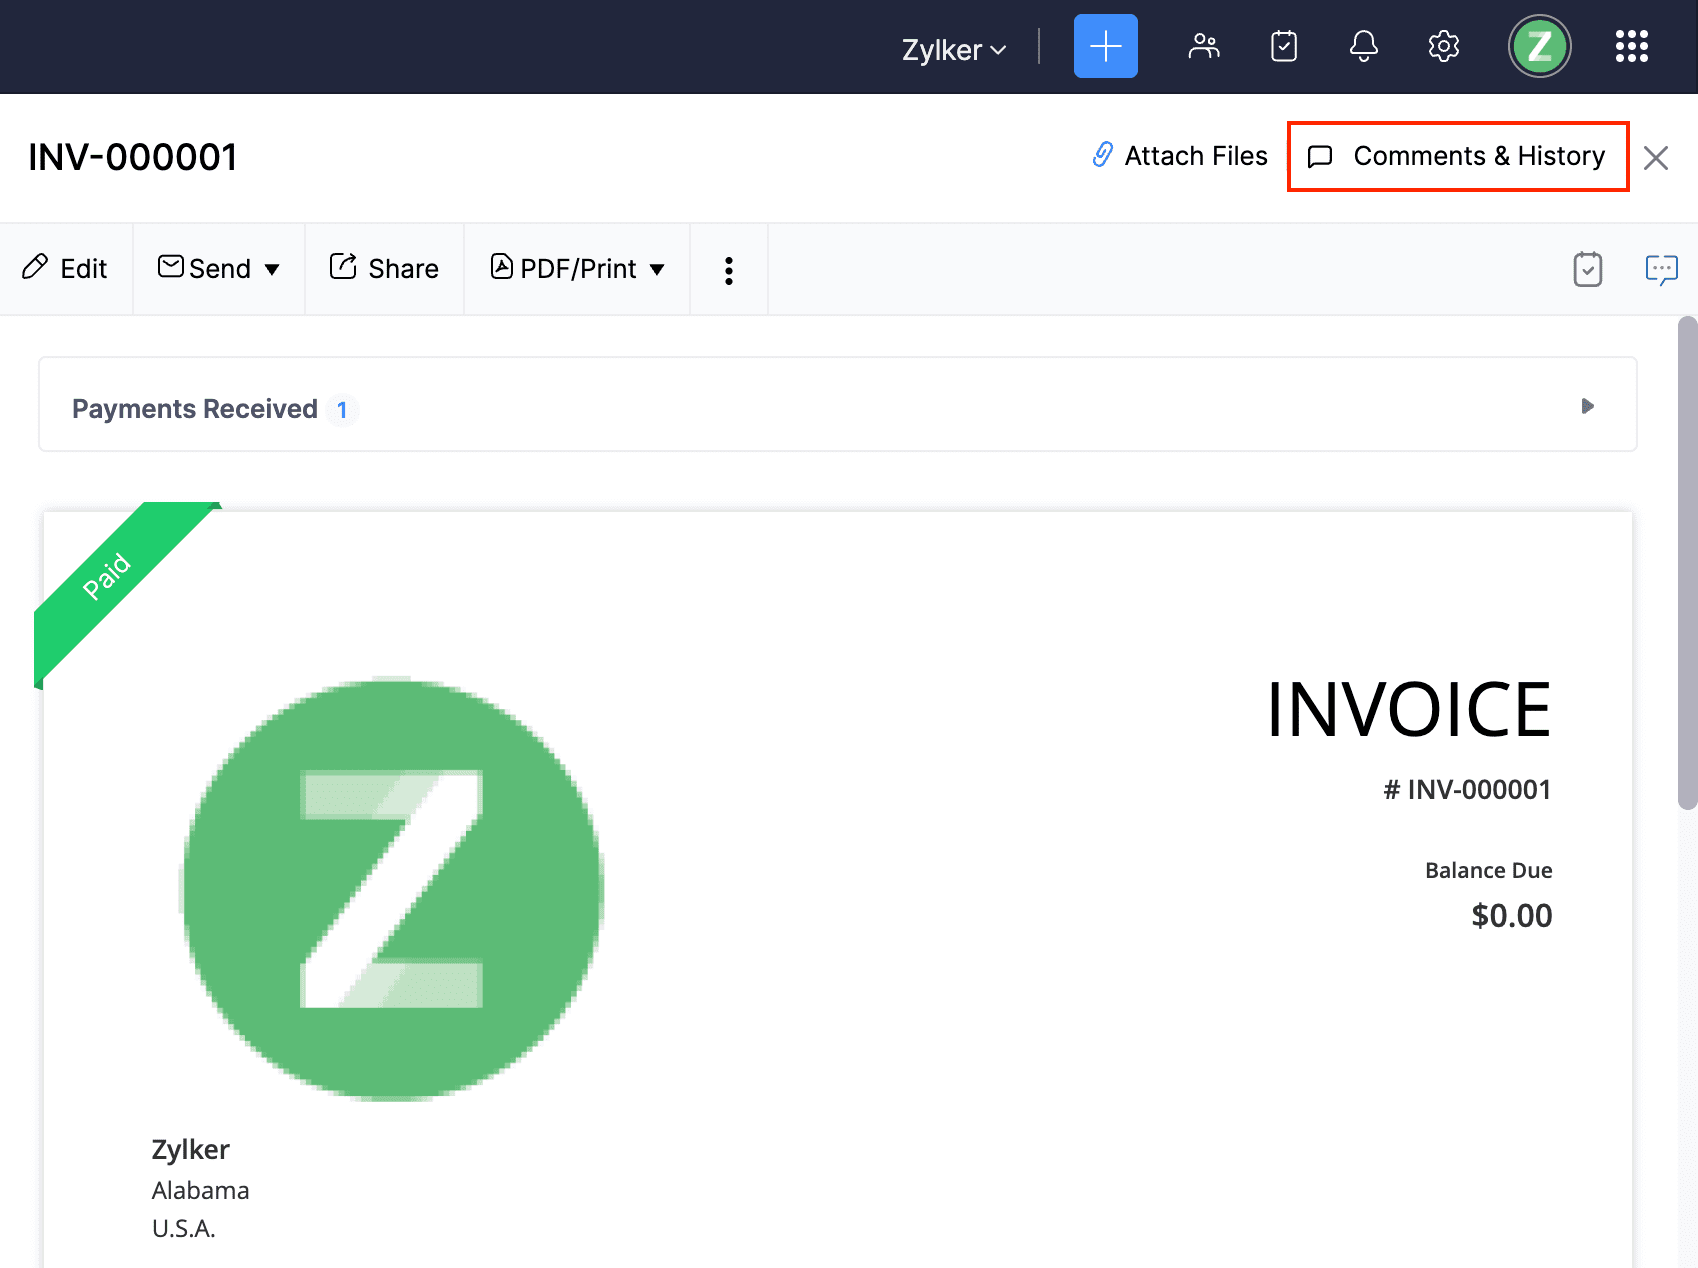
Click the respective transaction in the Invoices or any other module.
In the details page, click Comments & History at the top-right corner.
Click Show Details given below the particular notification for which you want to view the customer’s name, phone number, and the status of the WhatsApp message.
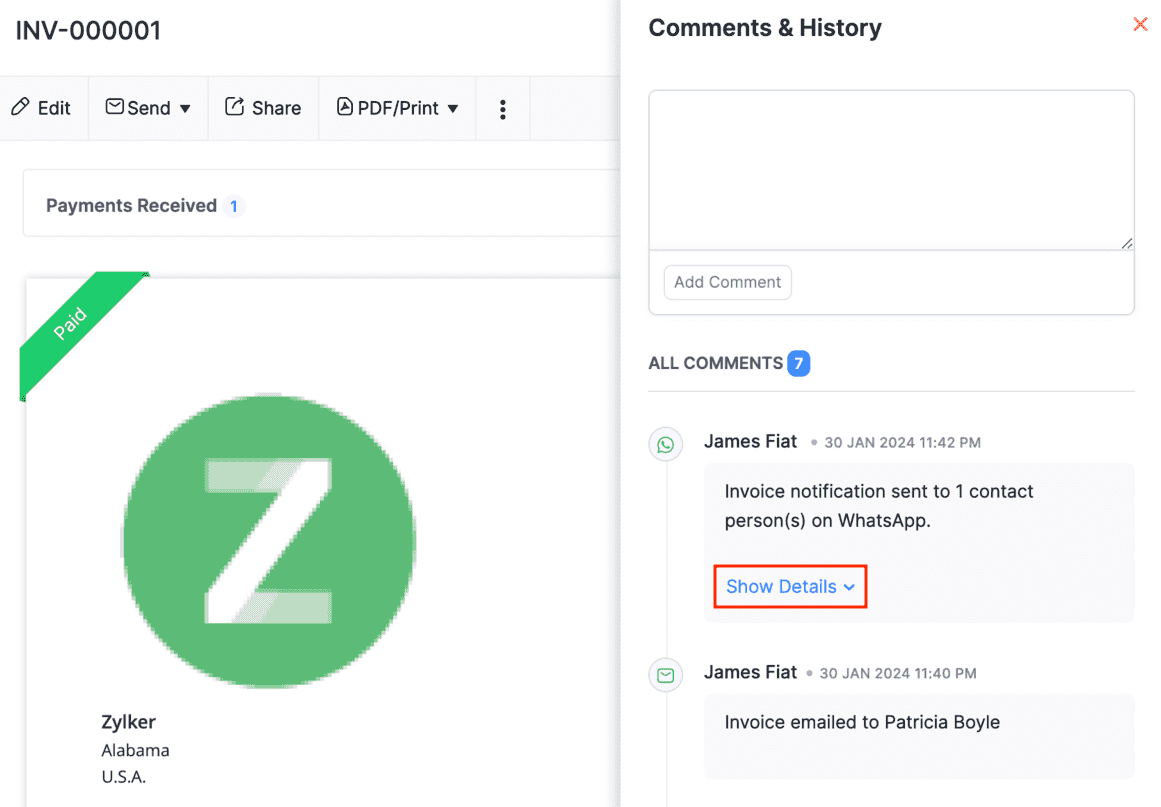
Click the customer name in the details table, and you will be redirected to the details page with their WhatsApp chat screen displayed.
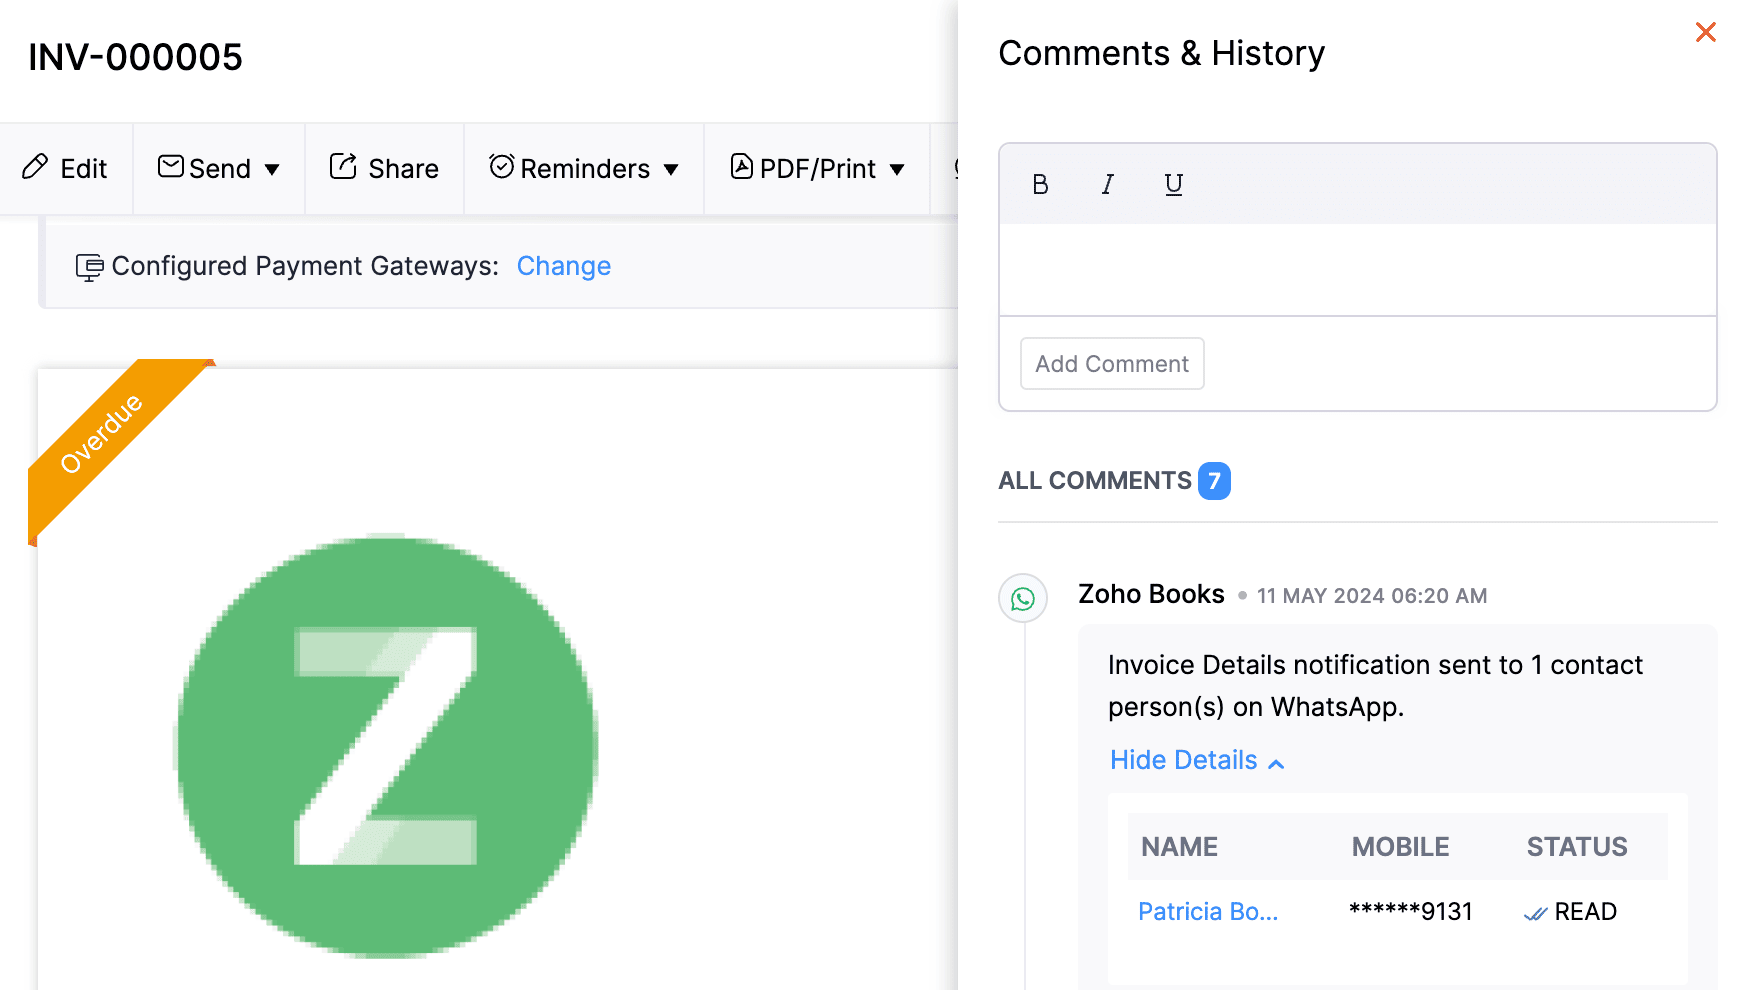
The particular notification message will be highlighted, and you can continue chatting with the customer if required.
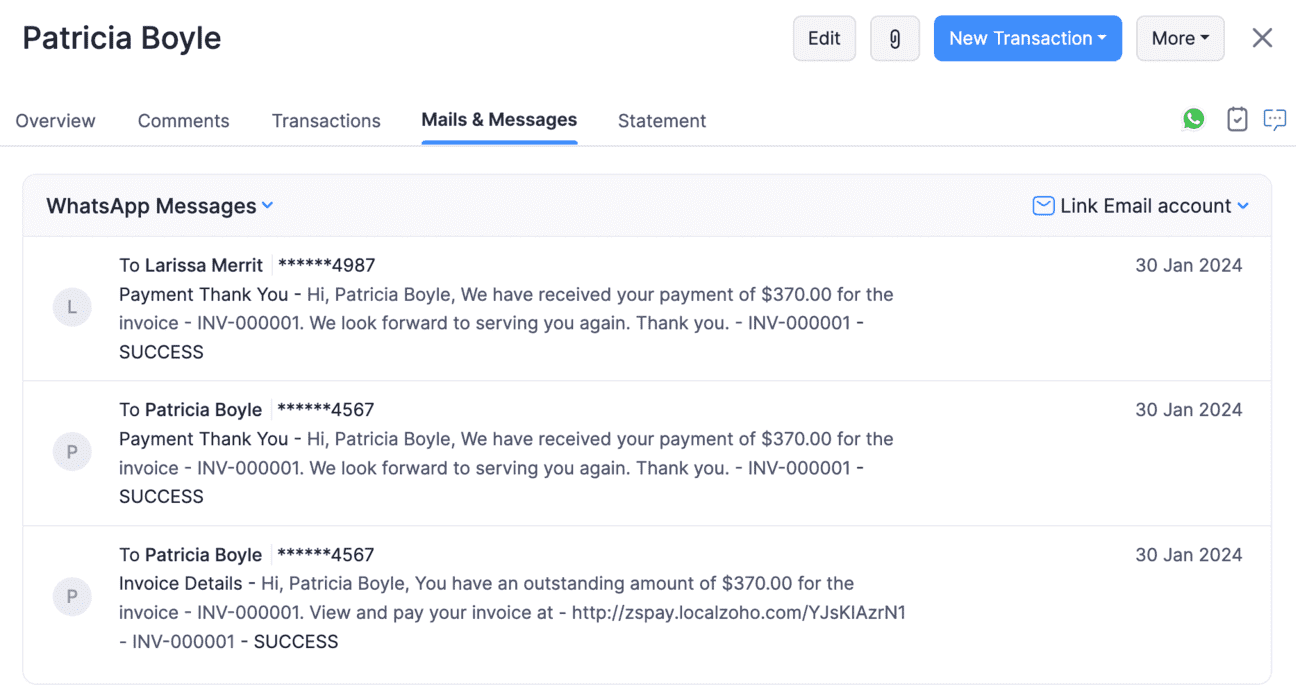
At Customer and Vendor Levels
Click the customer or vendor whose WhatsApp notification messages you want to view.
Navigate to the Mails & Messages tab.
Click the dropdown next to System Mails and select WhatsApp Messages.
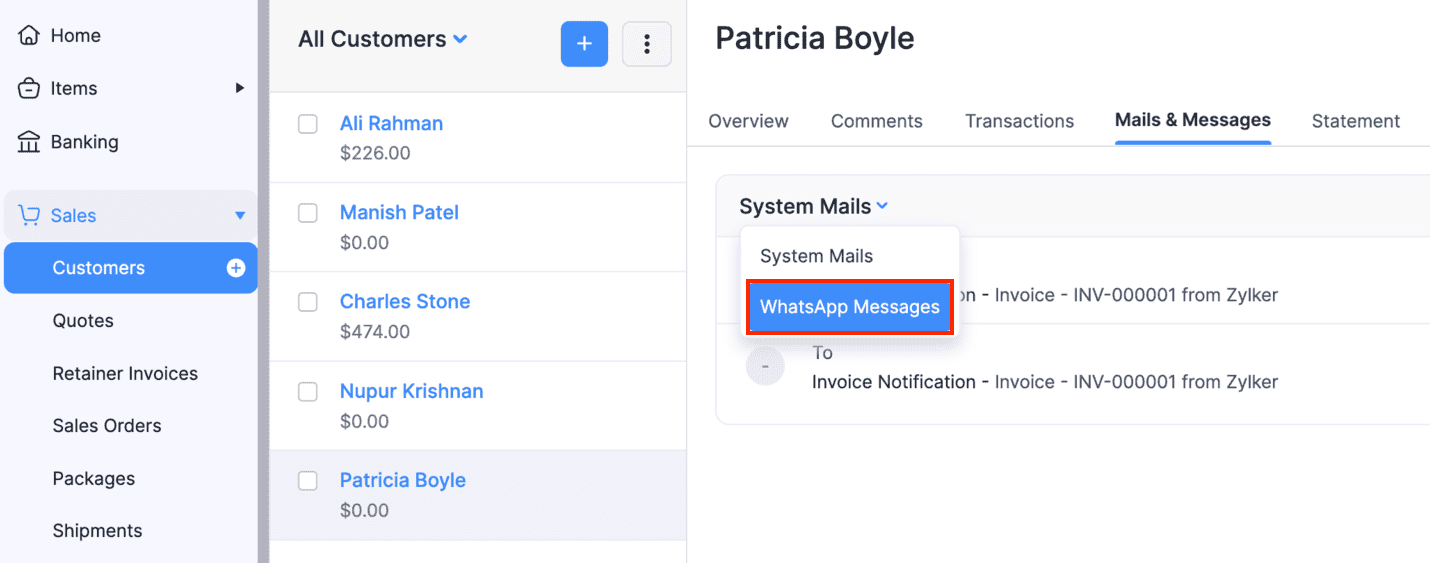
You can view all the WhatsApp notifications and their statuses sent to this customer.
At Organization Level
Navigate to Reports on the left sidebar.
Scroll down to Activity and click WhatsApp Notifications.
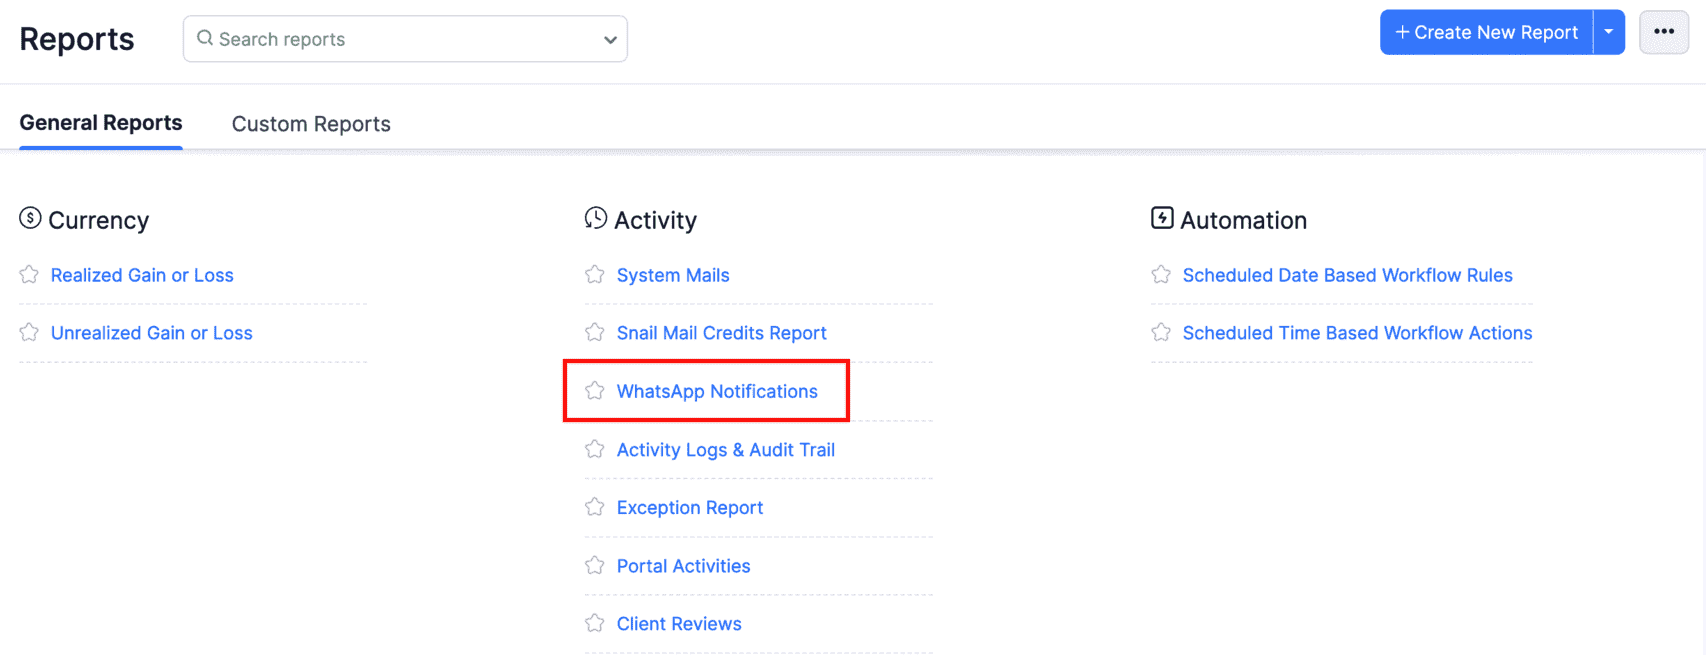
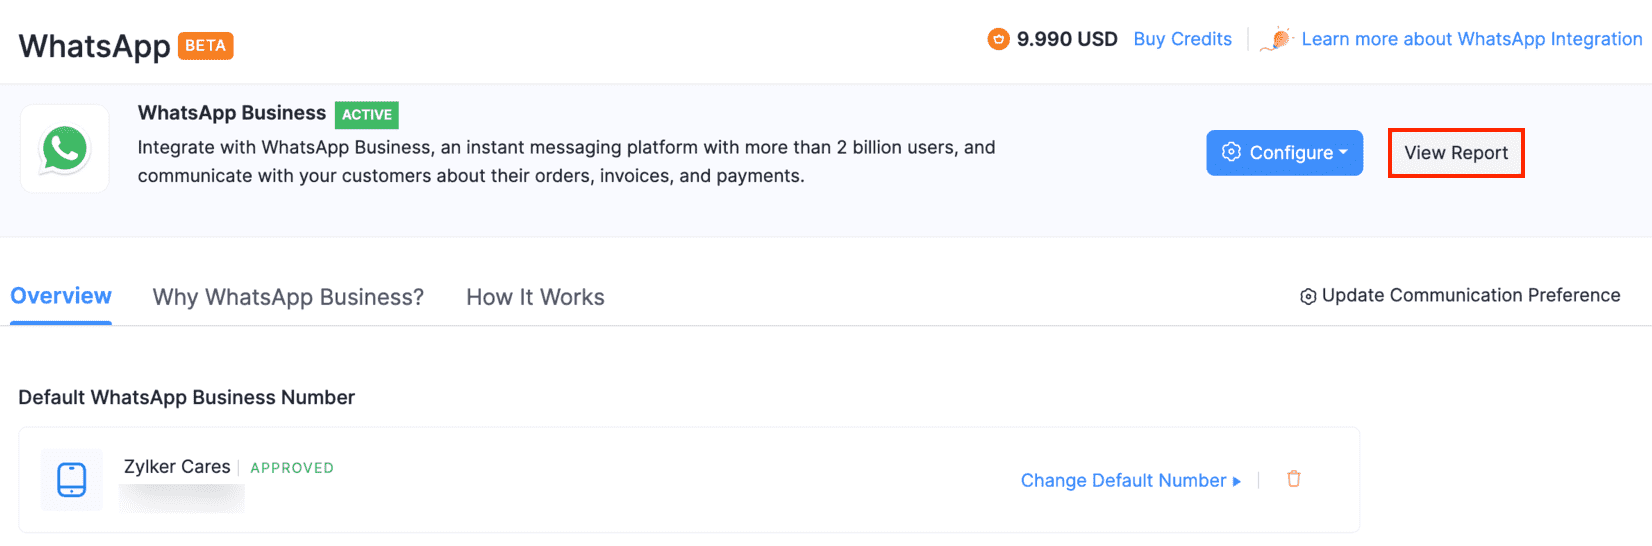
You can also click View Report on the WhatsApp configuration page and view all the WhatsApp notifications sent from your organisation.
Get Notified for Incoming WhatsApp Messages
You can get notified in Zoho Books when your customer sends a message on WhatsApp. Here’s how you can enable notifications:
Go to Notifications (Bell icon) at the top-right of Zoho Books.
Click the Gear icon in the Notifications section.
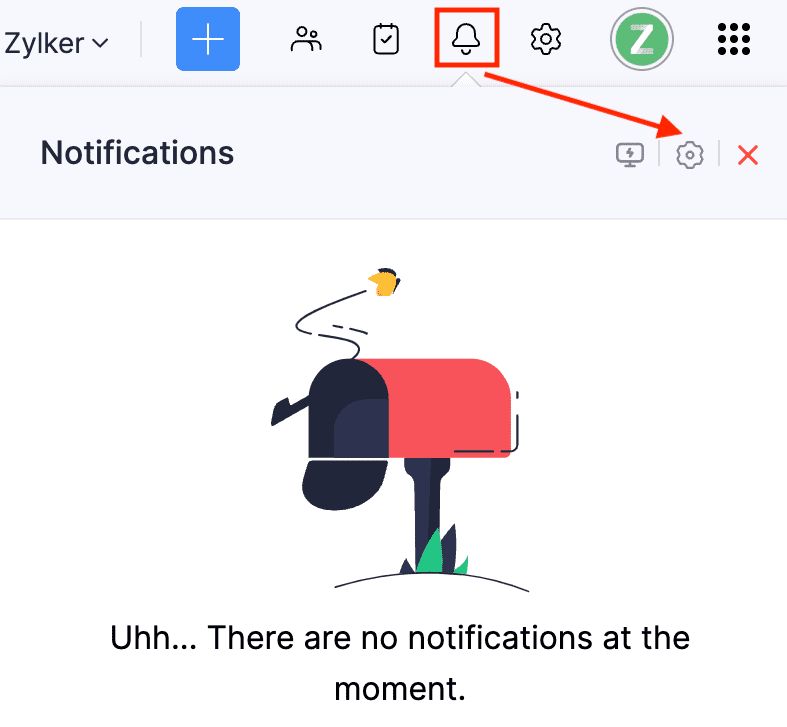
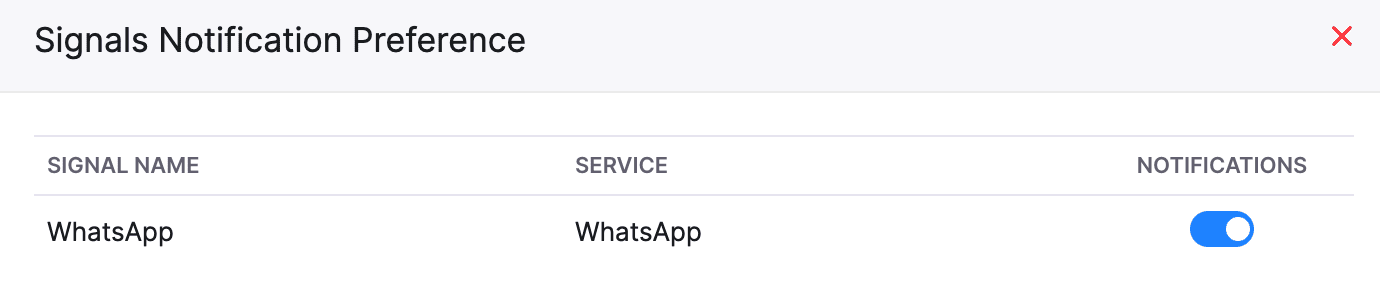
Slide the toggle to enable WhatsApp notifications.
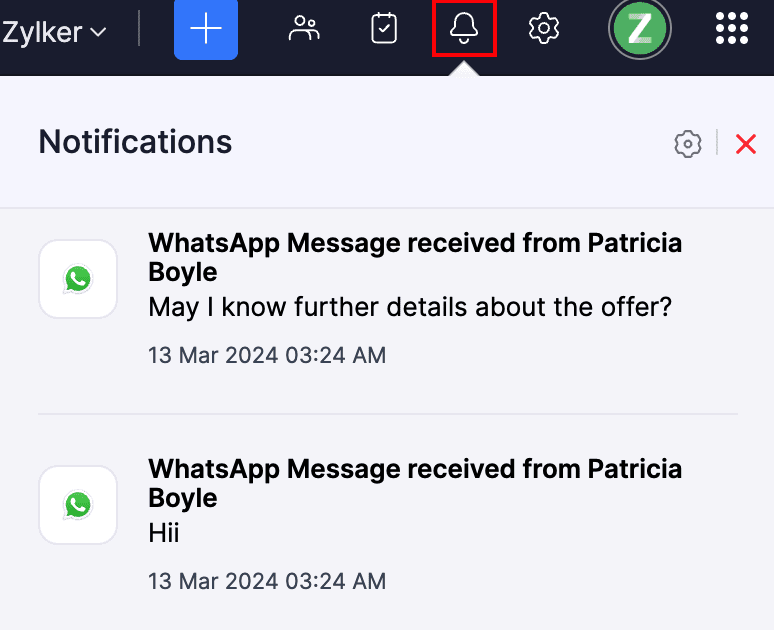
You will now receive notifications in Zoho Books for the incoming WhatsApp messages.
You can view them in the Notifications section at the top of Zoho Books.
Manage User Permissions
If you want the other users in your organisation to manage customer and vendor communications, you’ll have to configure necessary permissions for them. Here’s how:
Go to Settings.
Select Roles under Users & Roles.
Click New Role in the top right corner to create a new role, or click Edit to update the existing one to provide permissions.
Under Contacts, click More Permissions next to Customers and Vendors, and select Communication from the dropdown.
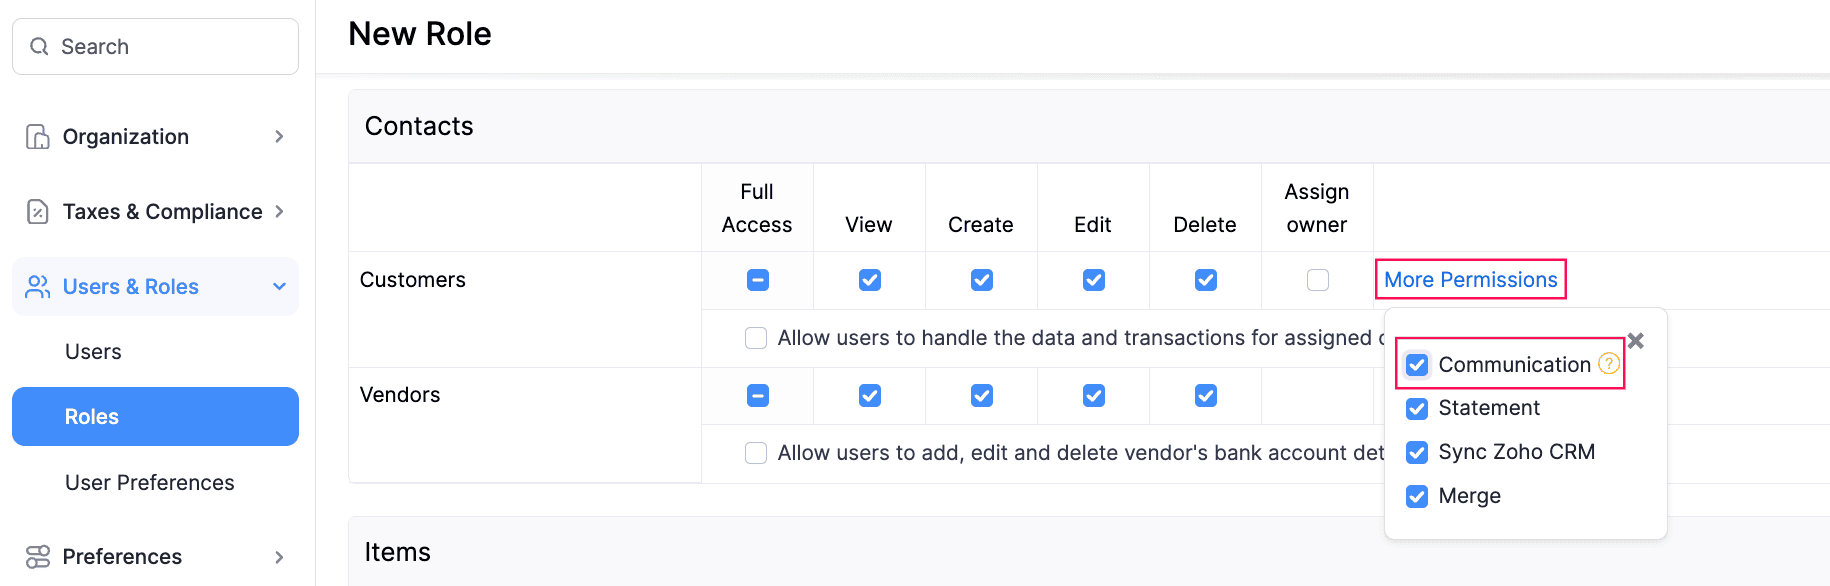
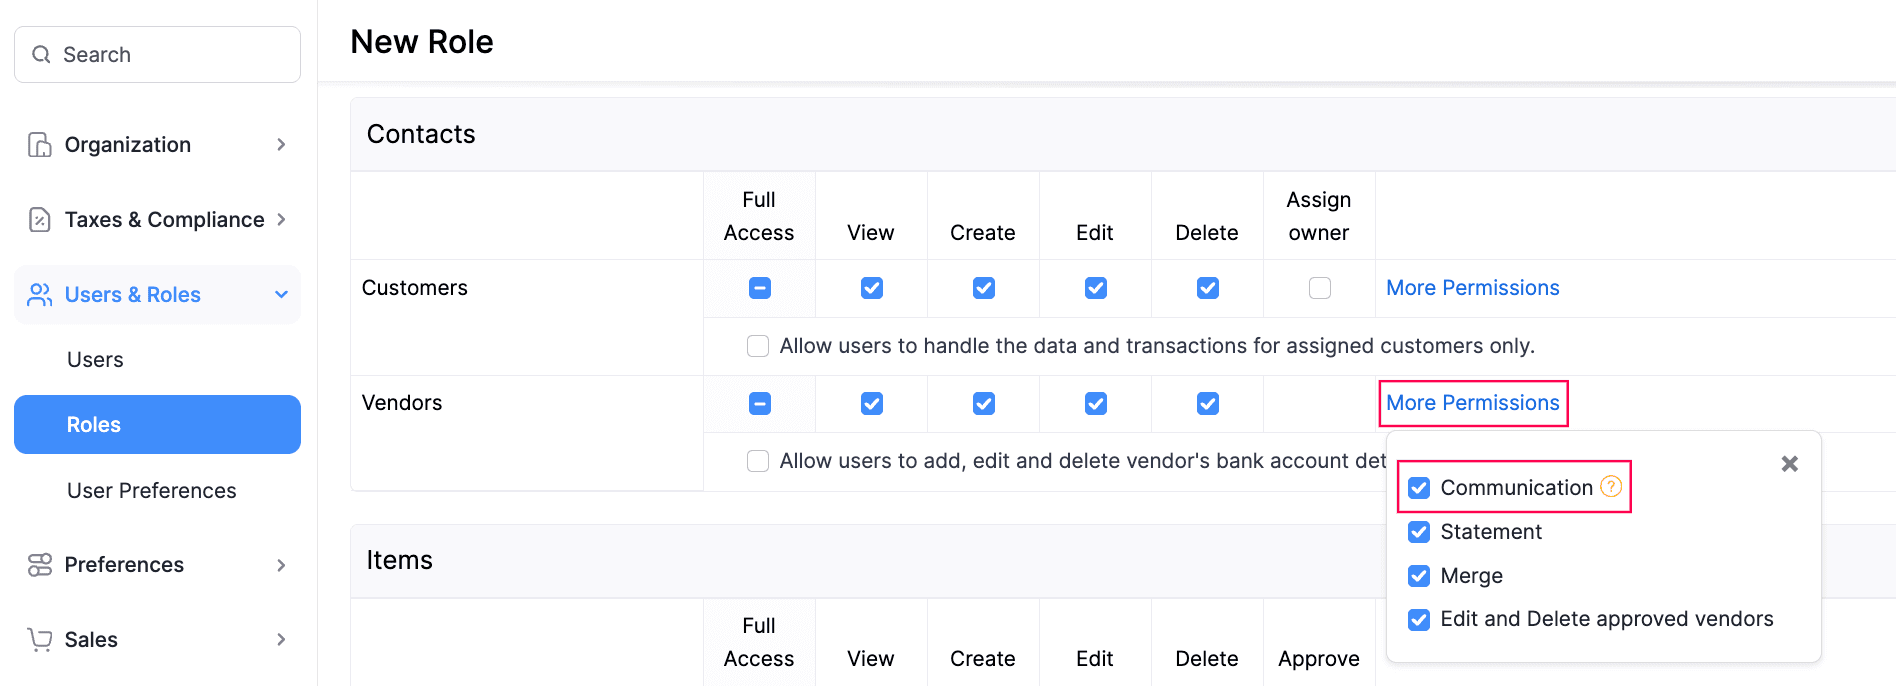
Click Save.
Once this role is assigned to a user, they will be able to access the WhatsApp chats based on the permissions provided.
Note:
With these permissions, the users can chat with customers and vendors using the WhatsApp Business common chat window.
Chat With Customers and Vendors
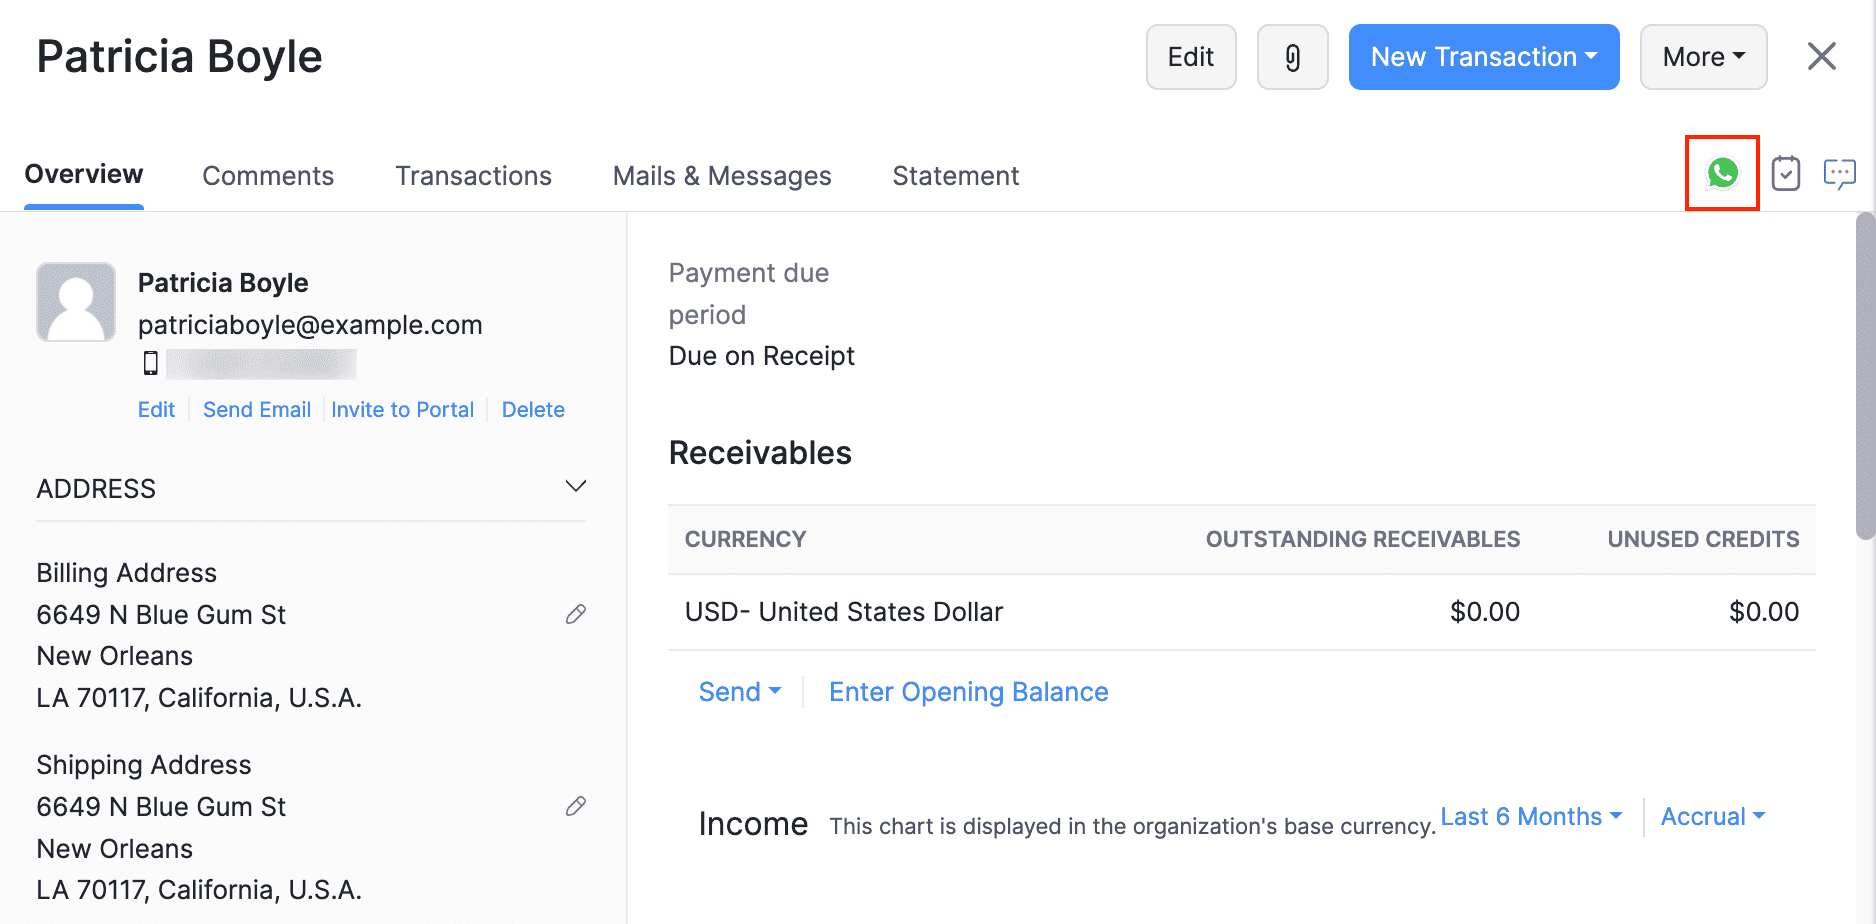
To chat with a customer or a vendor via WhatsApp in Zoho Books:
Go to Sales and navigate to Customers. Or, go to Purchases on the left sidebar and select Vendors.
Click the customer or vendor you want to chat with.
Click WhatsApp at the top right in the Overview section.
Click ‘+’ to start a new chat.
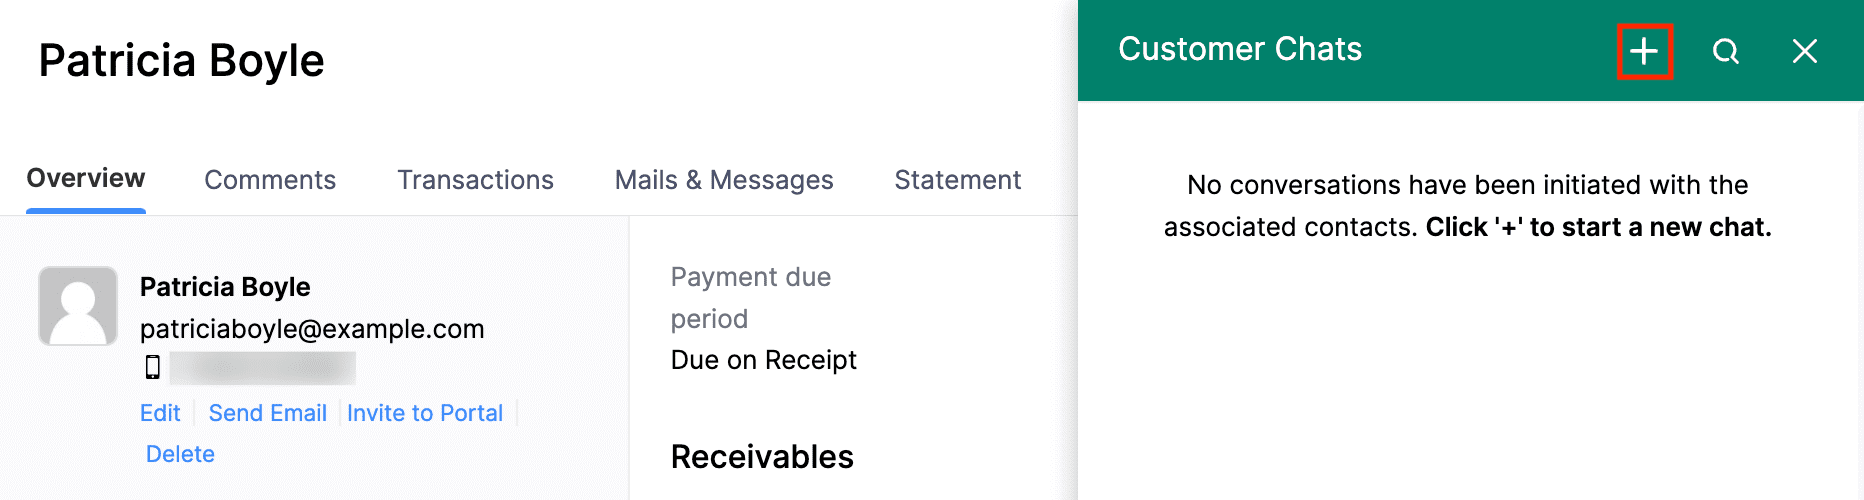
All the contacts for whom you’ve enabled WhatsApp Notifications will be listed.
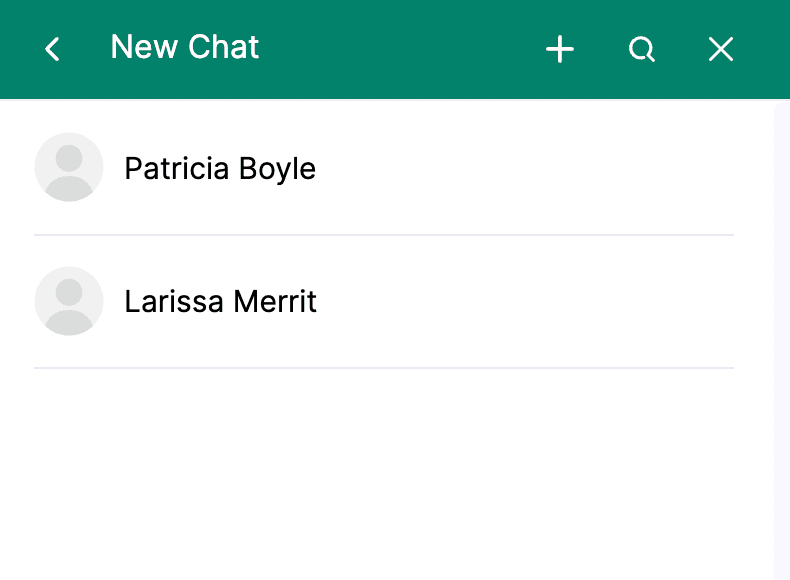
Select the contact with whom you want to chat.
Initiate the chat by sending a notification template.
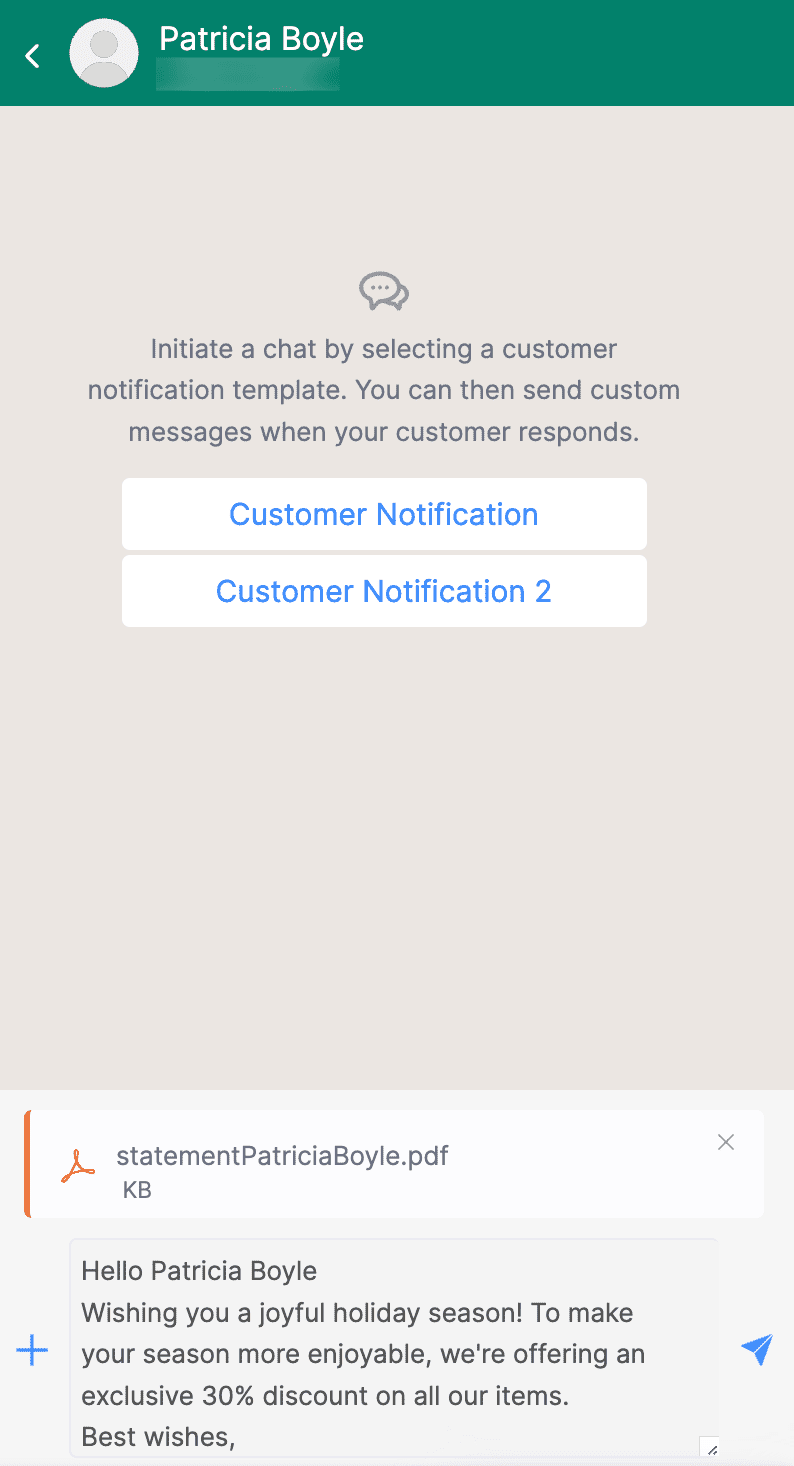
Send replies and attachments to follow up as soon as your customer or vendor responds.
Note:
You can only send predefined notification templates until your customer or vendor responds.
Insight:
You can add an attachment by clicking the + icon. Note that you can only send one attachment at a time, and the supported file formats are JPG, JPEG, PNG (up to 5MB), and PDF (up to 10MB).
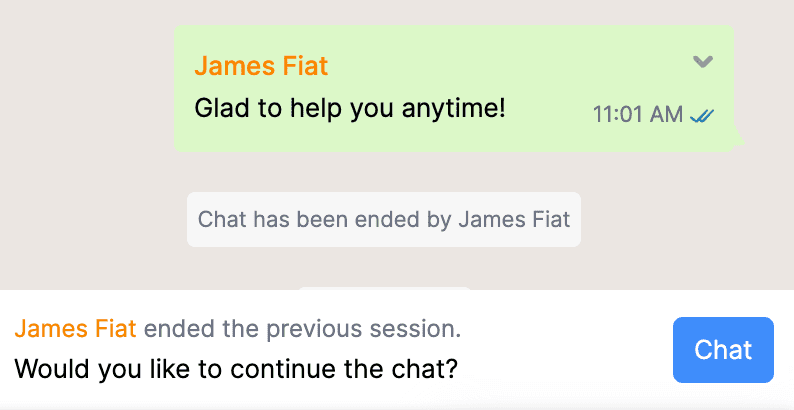
- Once the conversation with a customer or a vendor is over, click the More icon at the top-right corner of the chat screen and select End Session.
- Click End Session in the confirmation pop-up that follows.
The session will end. You can click Chat to continue if your session has not expired.
Note:
The chat session will expire if there’s no activity for 24 hours** from the last message. Once it has expired, you must reinitiate the conversation by clicking Initiate Chat and sending a notification template as usual.
Take Over Customer and Vendor Chats
The users with the Customer Communication and Vendor Communication permissions can initiate chat with your customers or vendors. However, only one user can chat with your customer or vendor at a time.
Insight:
To enable communication preferences for other users in your organisation, go to Settings, select Roles under Users & Roles, and edit the required role.
You can enter the chat if another user is chatting with the customer or vendor, and if they face any queries of your expertise, click Take Over at the bottom of the chat screen.
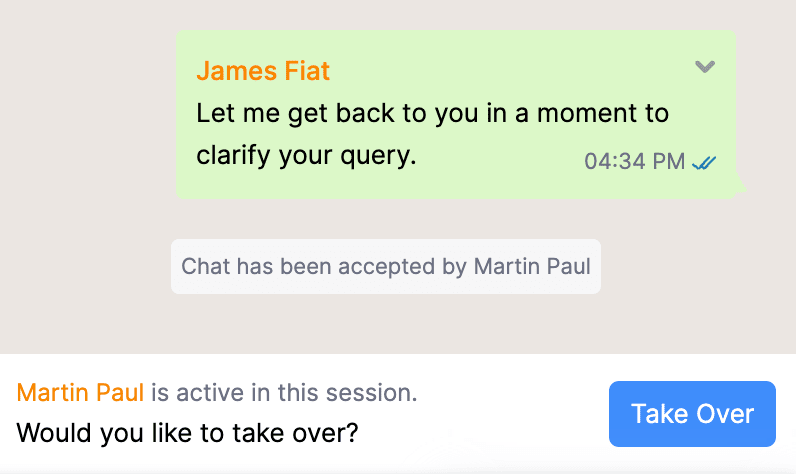
You can now continue to chat with the respective customer or vendor. Other users cannot chat with them until they take over the chat.
Note:
The customer or vendor won’t be notified when a user takes over their chat.
Common Chat Window
You can chat with a customer or vendor from Zoho Books at the organisation level using the common chat window.
Click the WhatsApp icon in the top right corner of any page in Zoho Books to open the common chat window. From the All Chats dropdown, select and view Customer Communication or Vendor Communication.
You can also filter chats by selecting the Utility or Marketing category to view the notifications sent to your customers under each category. For vendors, the Utility notifications are displayed by default.
To add an unknown number in the chat window as a customer or contact person:
Open the chat of the unknown number that you want to add to you organisation and click Add.
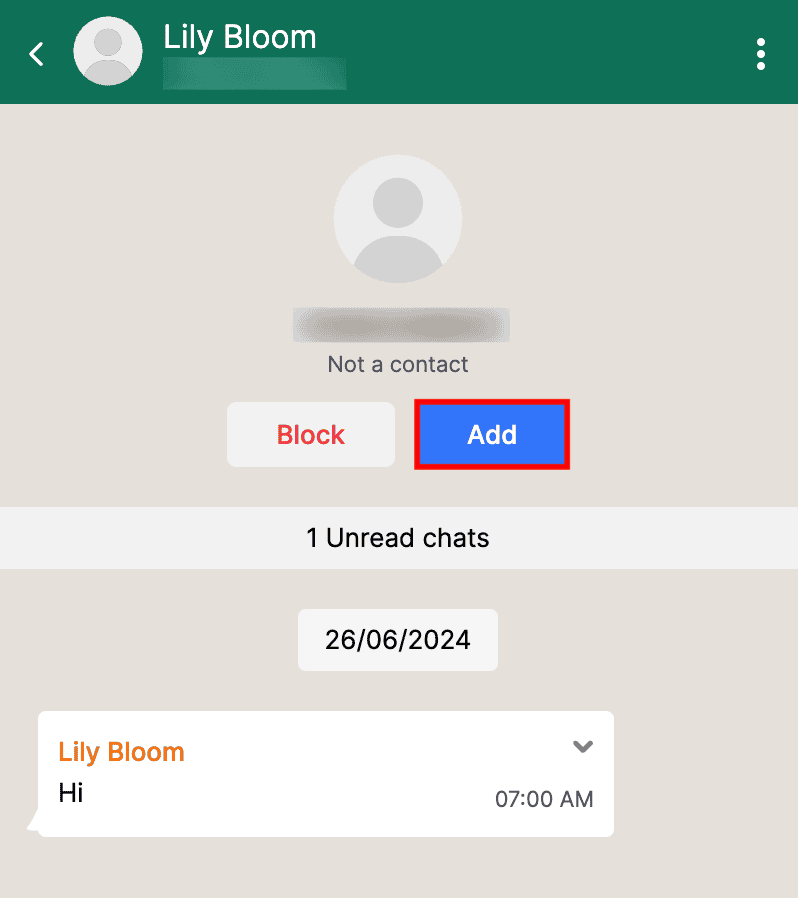
In the pop-up that appears, select if you want to add the unknown number as a contact person to an existing customer, or create a new customer.
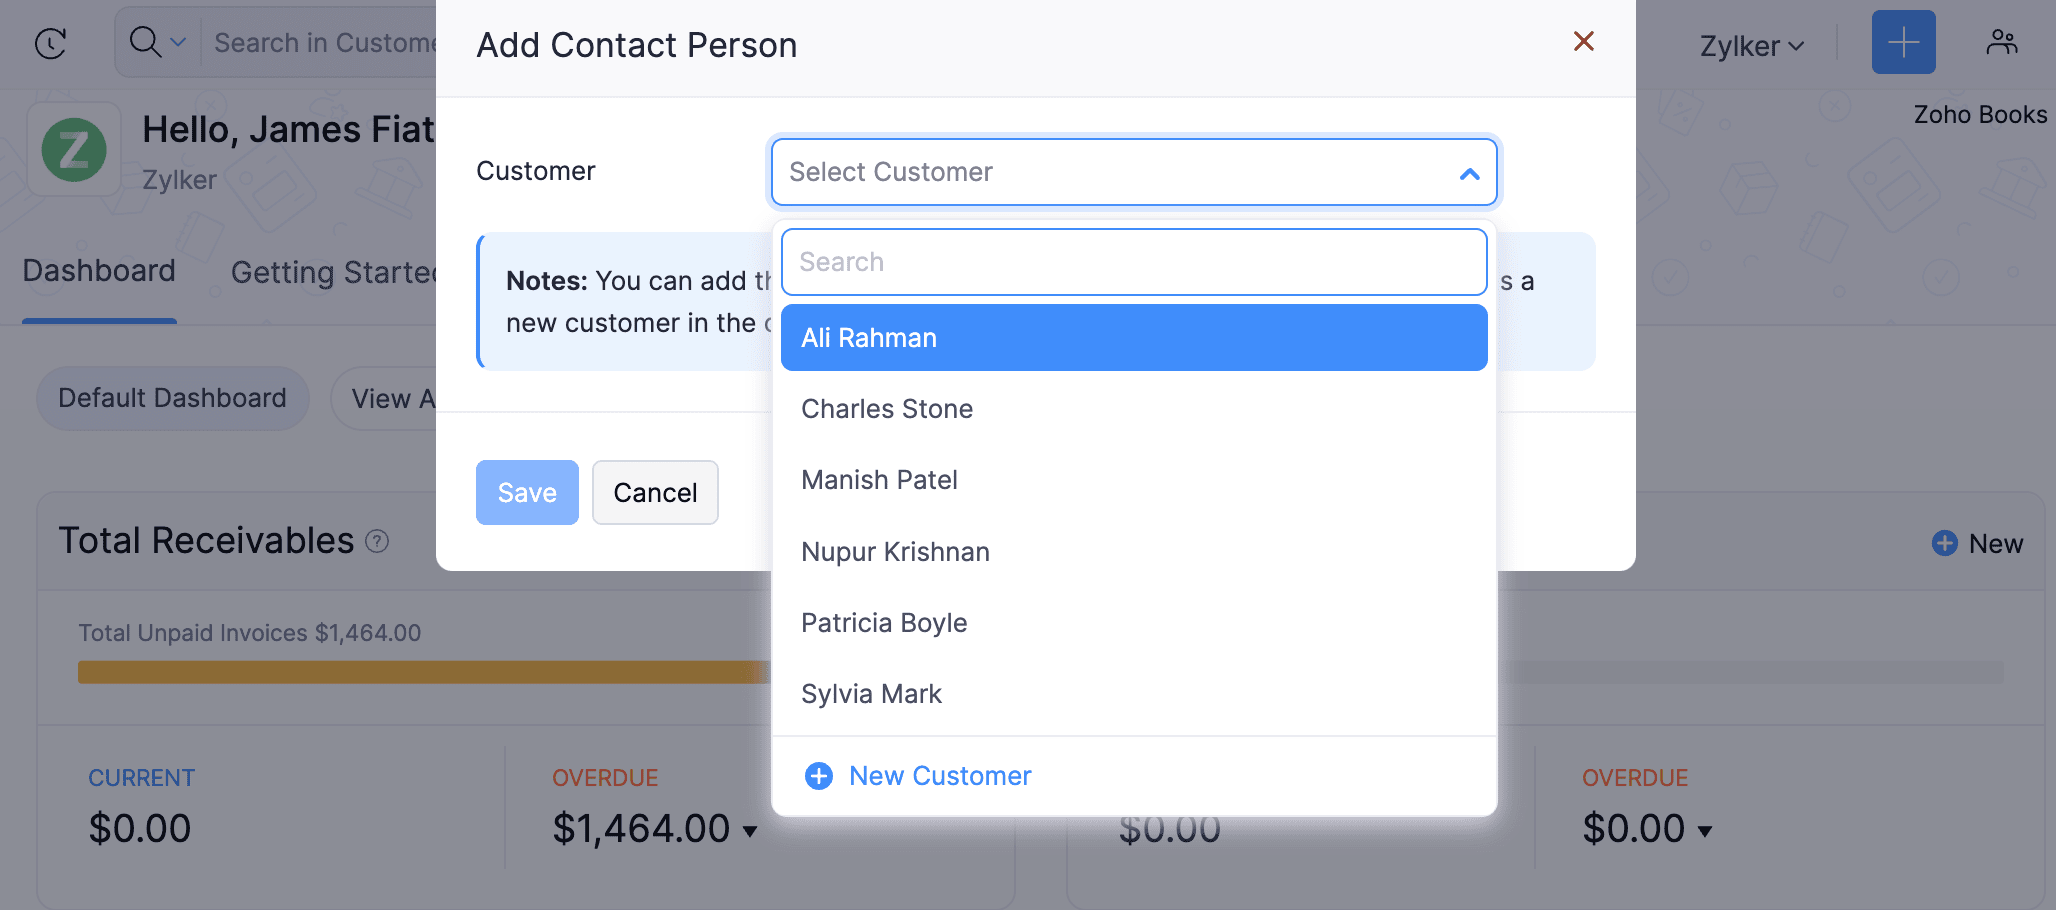
Fill in the required details and click Save.
The unknown number will now be a contact person or customer in your organisation.
Note: You can only send custom messages to unknown numbers.
Other Actions
Create Workflow Actions
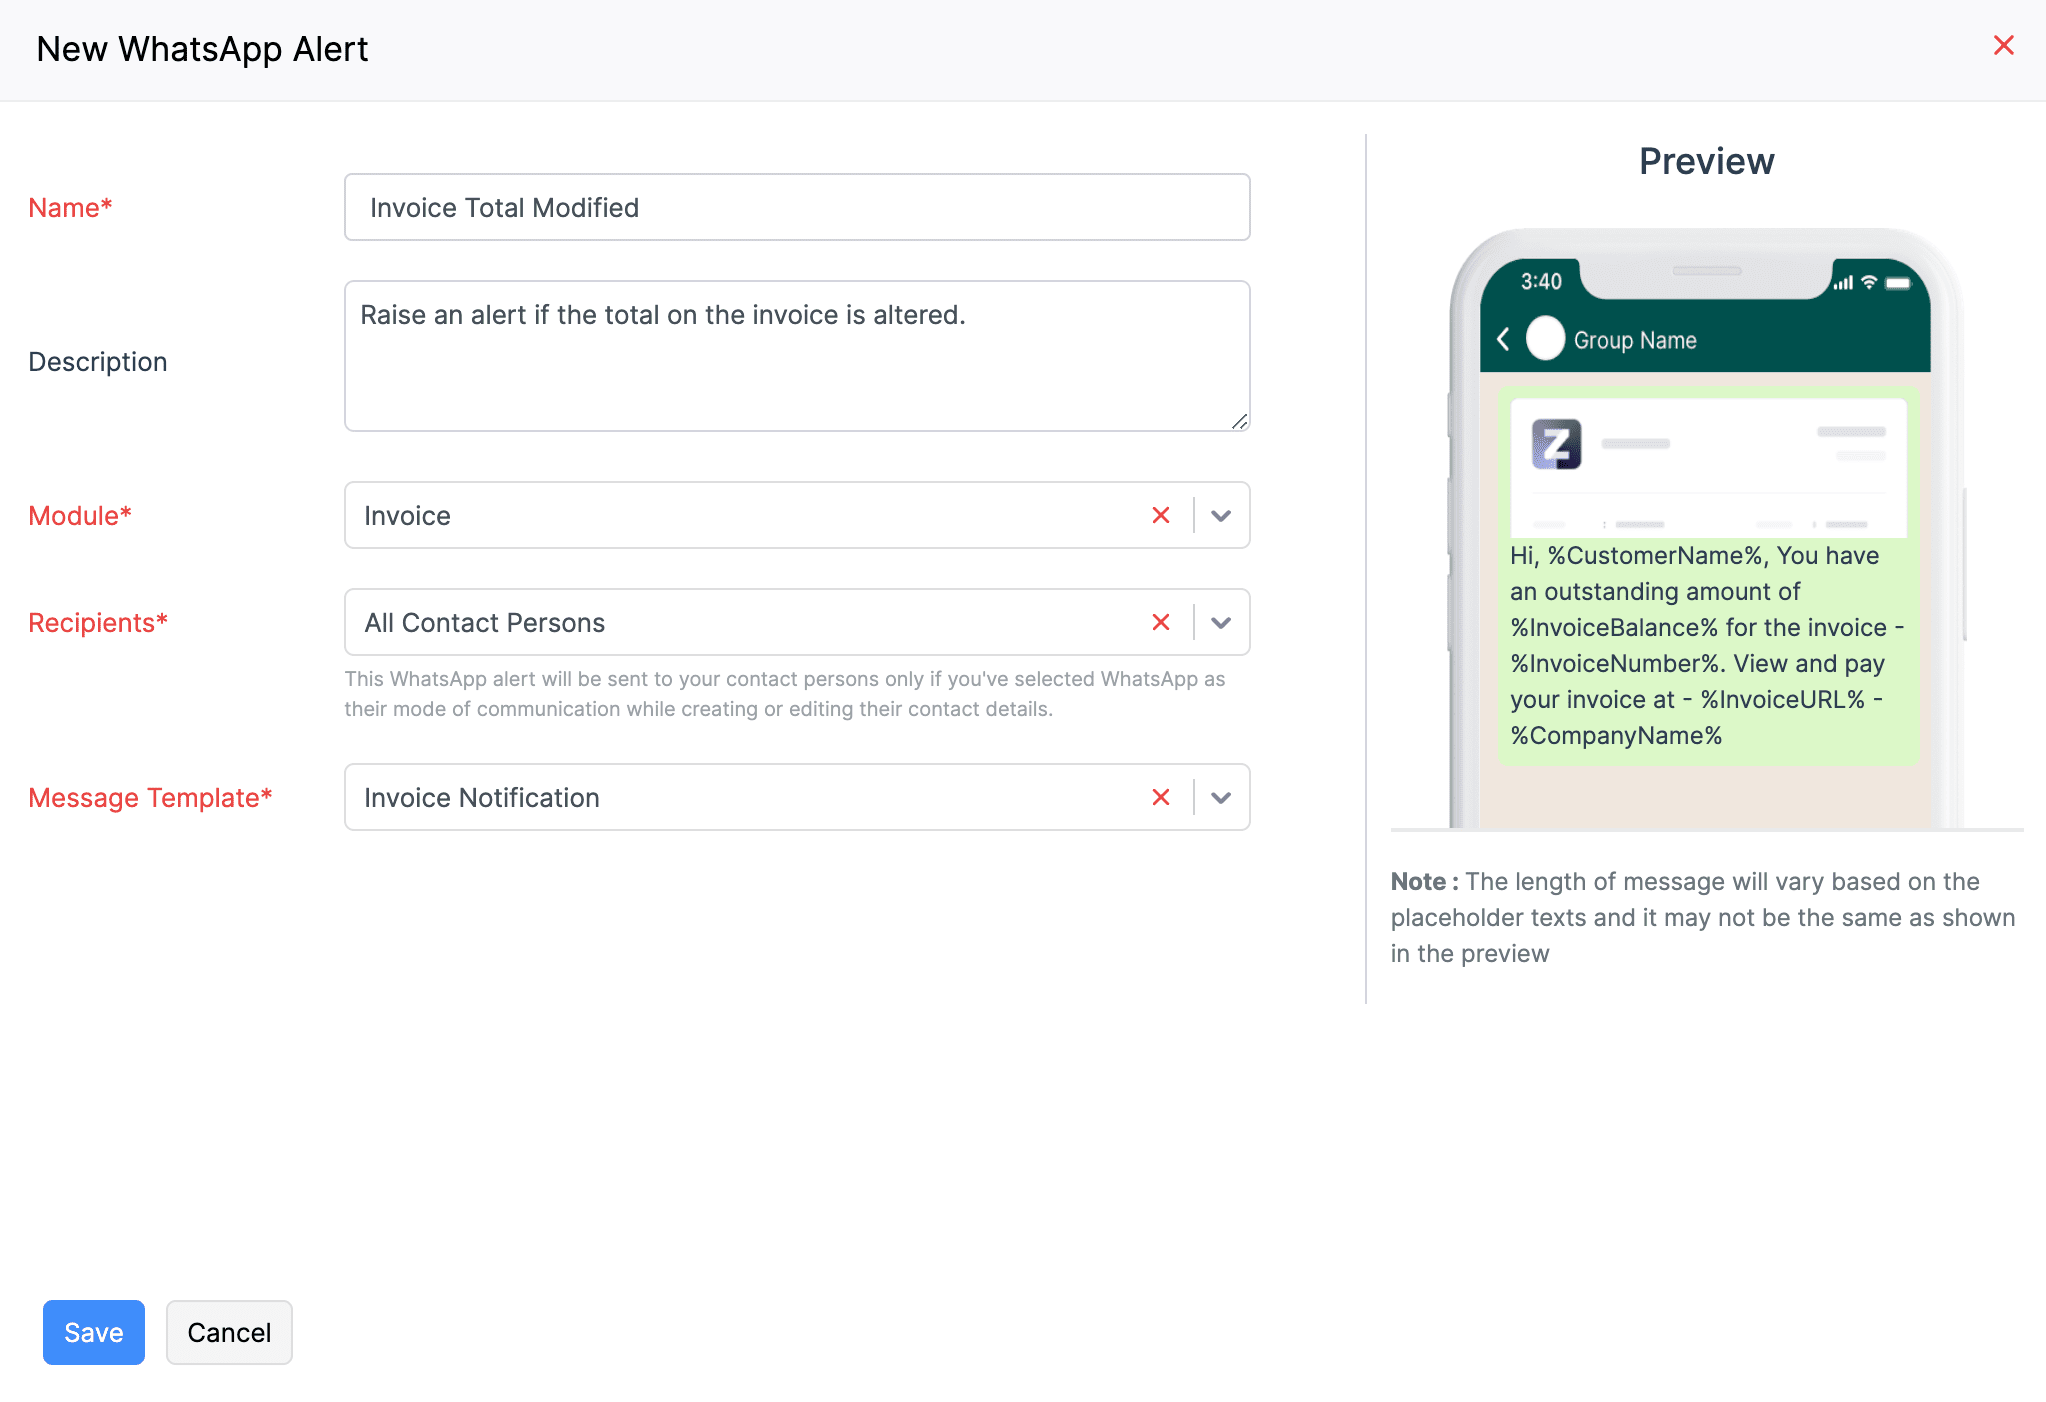
Users can create workflow actions in Zoho Books to automate various tasks. When integrated with WhatsApp, users can create WhatsApp Alerts to notify the customers and vendors.
Scenario: Patricia wants to notify her customers via WhatsApp when changes are made to the invoice’s total. To simplify the process, she creates a workflow action to send a WhatsApp alert when the invoice total is modified.
You can create a workflow action for WhatsApp and associate it with a workflow rule or vice-versa. To do this,
Go to Settings, navigate to Automation, and click Workflow Actions.
Navigate to WhatsApp Alert under Workflow Actions and click + New WhatsApp Alert.

Enter the necessary details to create a WhatsApp alert and click Save.
Once you create an alert, you can add it to a workflow rule.
Mark WhatsApp Inactive
If you want to disable the WhatsApp integration temporarily, you can mark it as inactive. Here’s how:
Go to Settings, navigate to Integrations & Marketplace and click WhatsApp.
Click Configure and select Mark as Inactive from the dropdown.
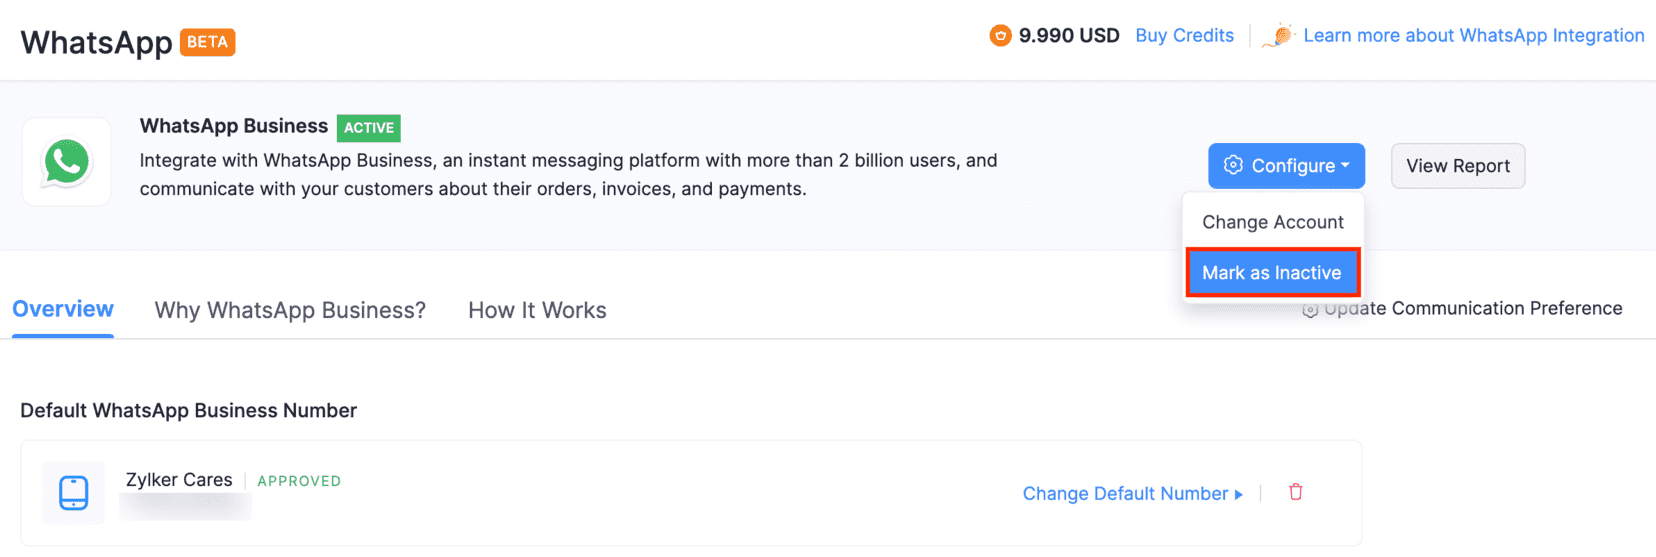
WhatsApp will be disabled for your organisation. You can enable this anytime by clicking Mark as Active from the Configure dropdown.
Change Default WhatsApp Number
To change the default WhatsApp number, you must first delete the existing WhatsApp channel. To do this,
Go to Settings, navigate to Integrations & Marketplace, and click WhatsApp.
Click the Delete icon in the Default WhatsApp Business Number section.
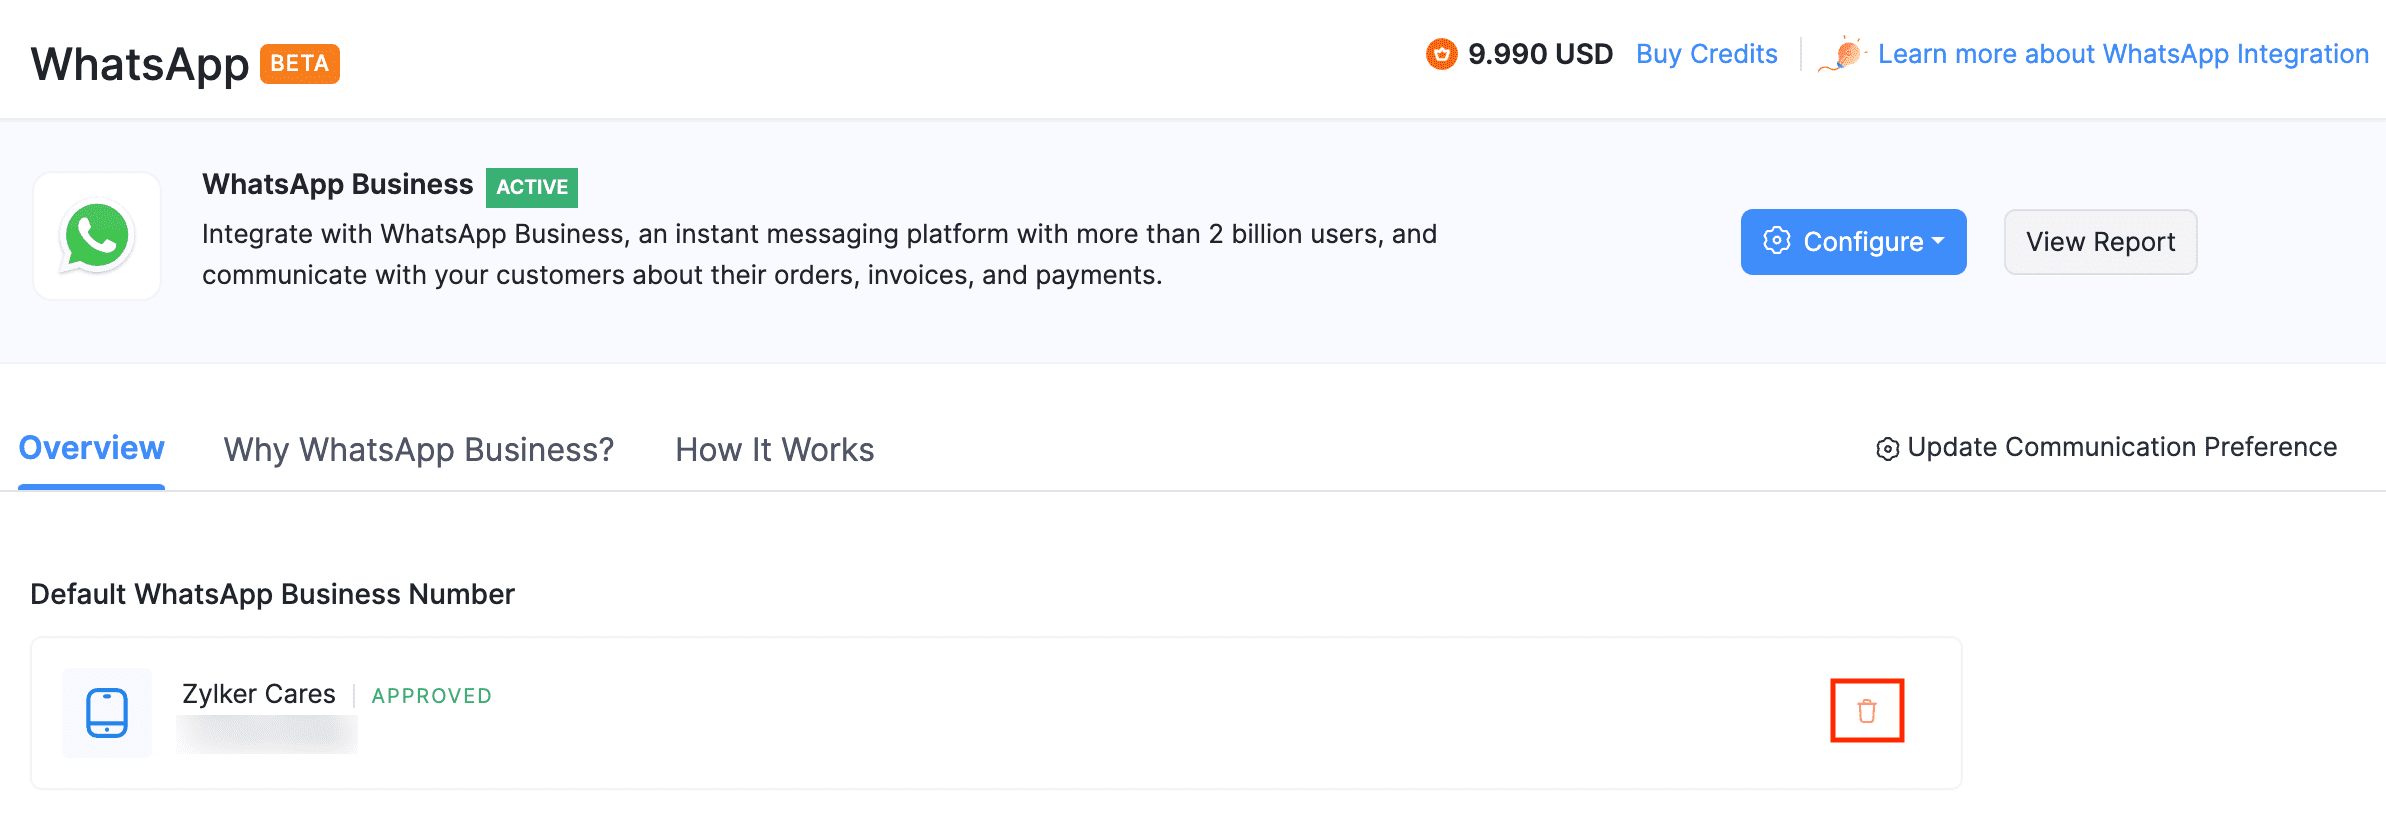
Click Delete in the following confirmation pop-up. The WhatsApp number associated with Zoho Books will be deleted.
Once the existing channel is deleted, you can set up a WhatsApp channel with the new phone number.
To do this,
Click Set Default Number in the Default WhatsApp Business Number section.
Select the number you want to set as the default WhatsApp number from the pop-up that follows and click Continue.
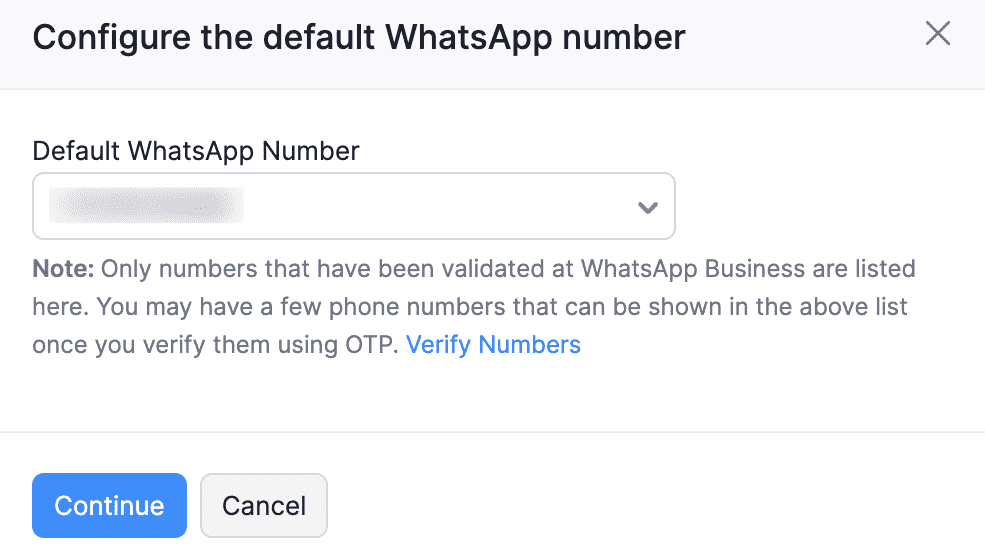
If you haven’t verified the WhatsApp Business number, it will not be listed in the pop-up. In that case, click Verify Numbers.
Select the desired number and click Send OTP to verify the number. You can also choose to get the OTP via call.
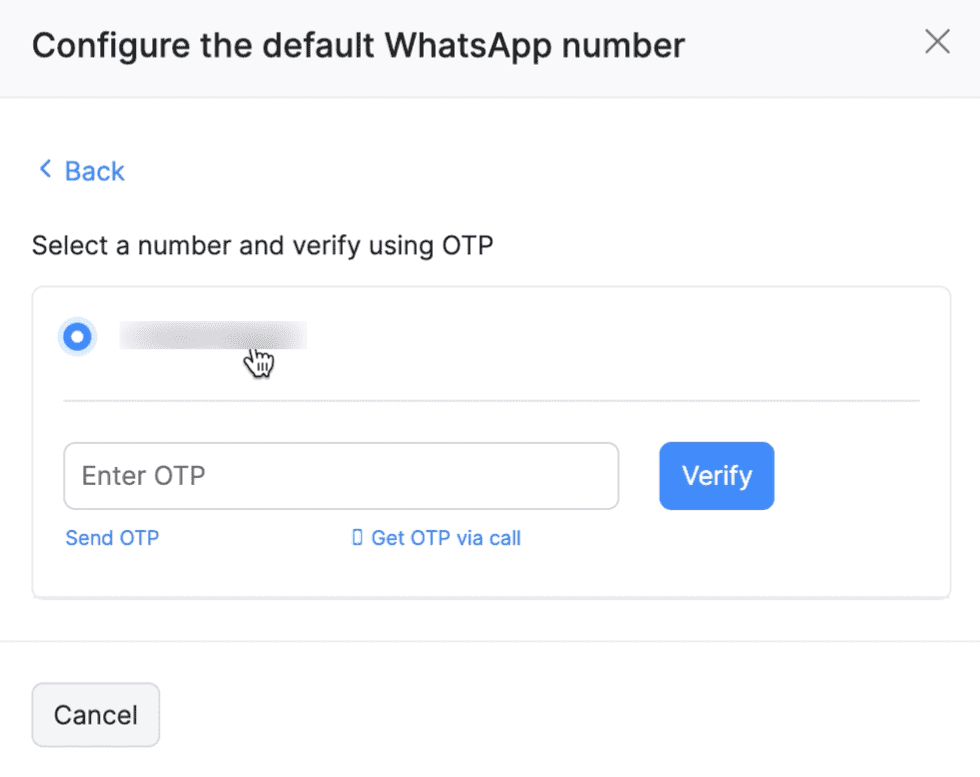
Enter the OTP and click Verify.
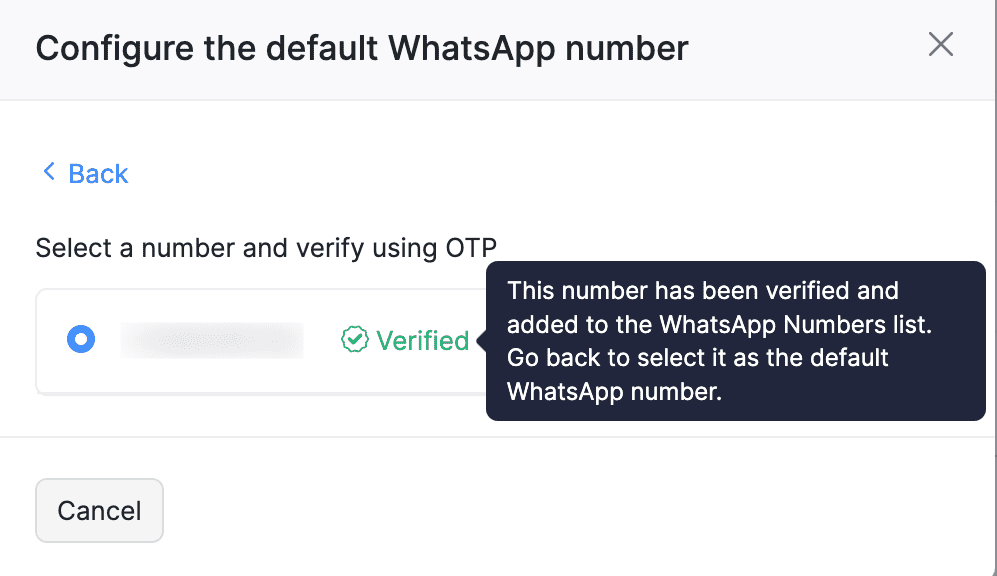
Once verified, click Back and select the number from the Default WhatsApp Number dropdown.
Your default WhatsApp number will be updated.
Change WhatsApp Business Account
You can also change the WhatsApp Business account if you already have an existing account. Here’s how:
Go to Settings, navigate to Integrations & Marketplace and click WhatsApp.
Click Configure and select Change Account from the dropdown.
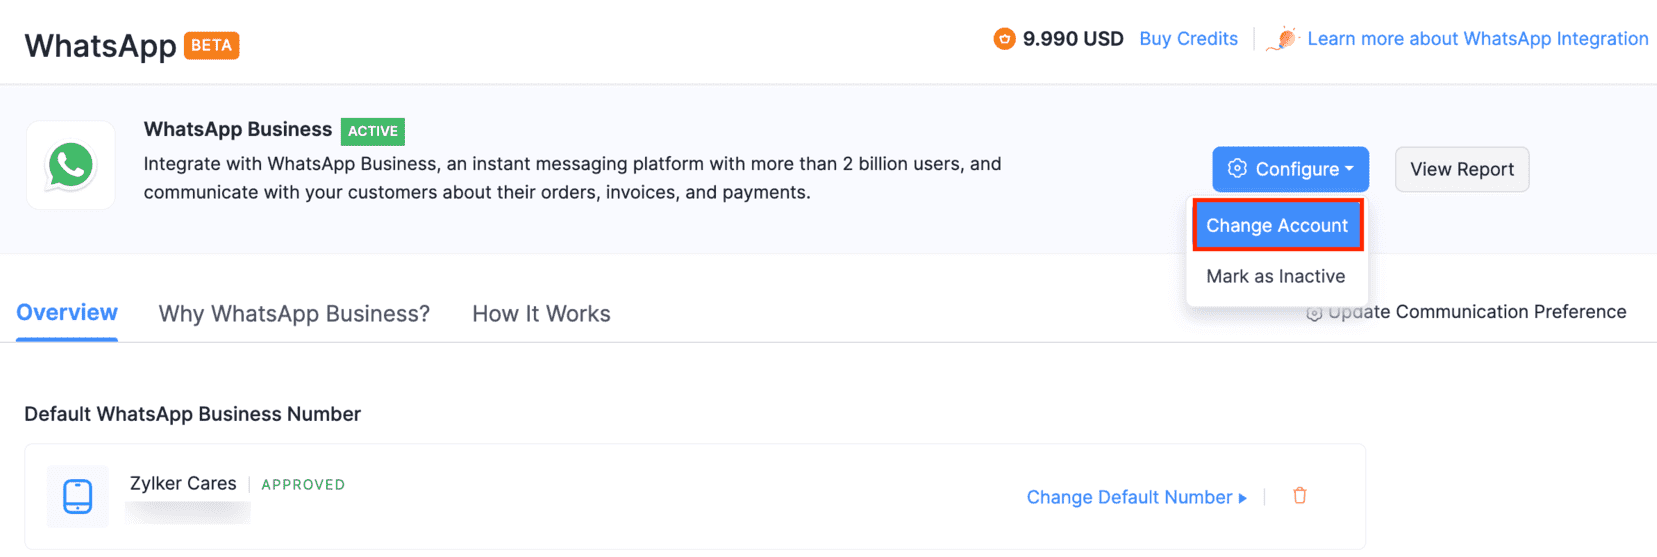
Note: Once you change your WhatsApp Business account, you will not be able to use your existing WhatsApp channel and templates. Therefore, you will be required to delete the templates before proceeding.
Warning: Ensure that you delete the templates from Zoho Books and not from Meta to avoid syncing issues.
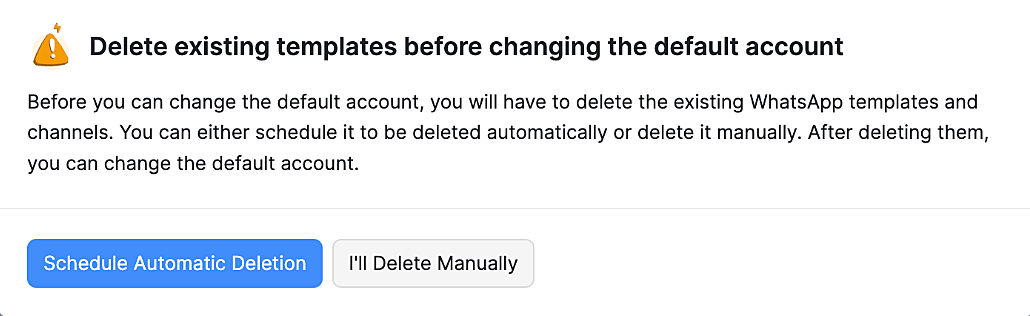
- In the following pop-up, you should delete the existing templates before changing the default account. You can click:
Schedule Automatic Deletion to initiate the automatic deletion process. The time duration for deletion depends on the process at Meta’s end.
I’ll Delete Manually to remove certain templates. Go to each template, click the More icon next to it and select Delete.
Once the deletion process is completed, the status of your WhatsApp Business account will be changed to SETUP PENDING. You can also check whether the number of templates for each module has been changed to 0 to confirm that the deletion process has been completed.
Click Configure, and select Change Account from the dropdown. The Change WhatsApp Business Account pop-up will appear.
- Click Use the existing WhatsApp Business account registered with Zoho and select the account from the dropdown to continue using the existing account. (or)
- Click Create a new WhatsApp Business account with Zoho to create a new WhatsApp Business account.
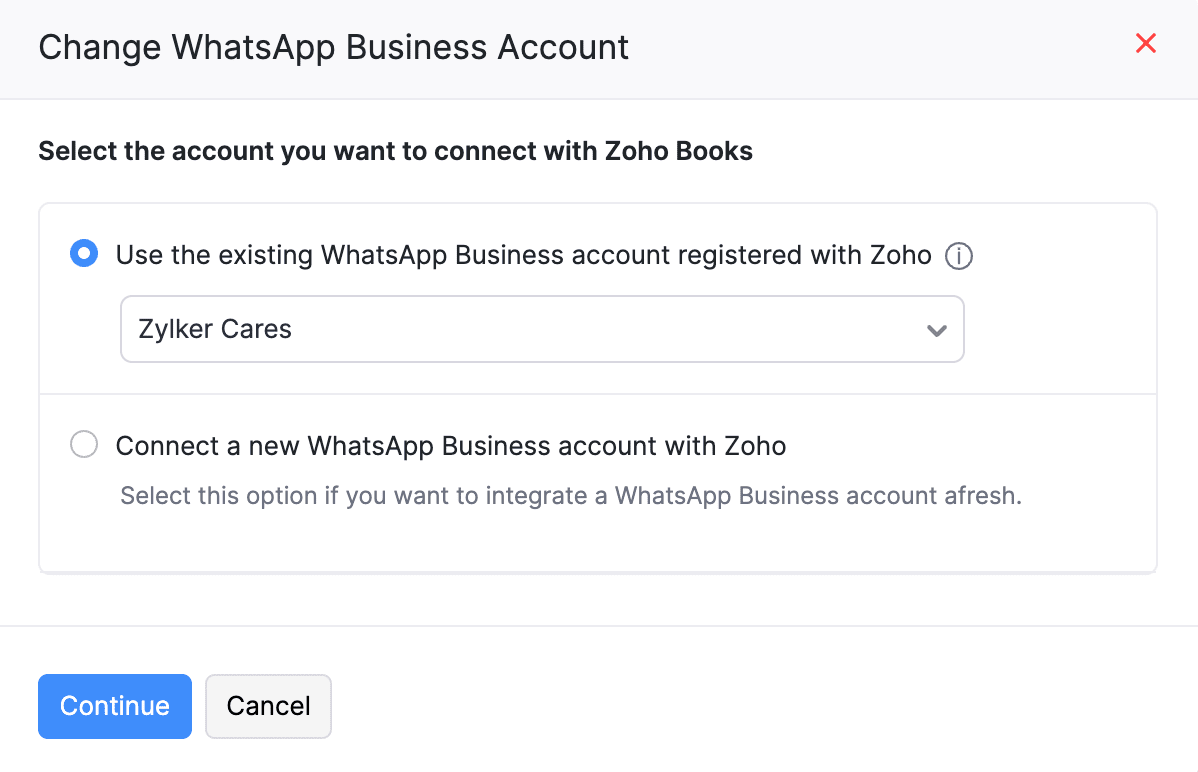
Click Continue.
The WhatsApp Business Account will be changed.
 Yes
No
Yes
No
Thank you for your feedback!