Free/ busy sharing
The Free/Busy sharing feature in Zoho Calendar, helps you figure out the best schedule to host an event. You can enable Free/Busy sharing for every calendar separately. If you have enabled Free/Busy sharing for a specific calendar, only the events from that particular calendar will be considered for Free/Busy status. You can also check for the Free/Busy status of the attendees while hosting an event.
In the Create Event, Duplicate Event and Edit Event tabs, there is an option to check the free/busy status of all the attendees of the event by just entering the email address of all the attendees. After checking the free/busy status, you can alter and fix the best time, add the attendees and create the event.
Note:
- Free/busy sharing and status are applicable only to attendees within your organization.
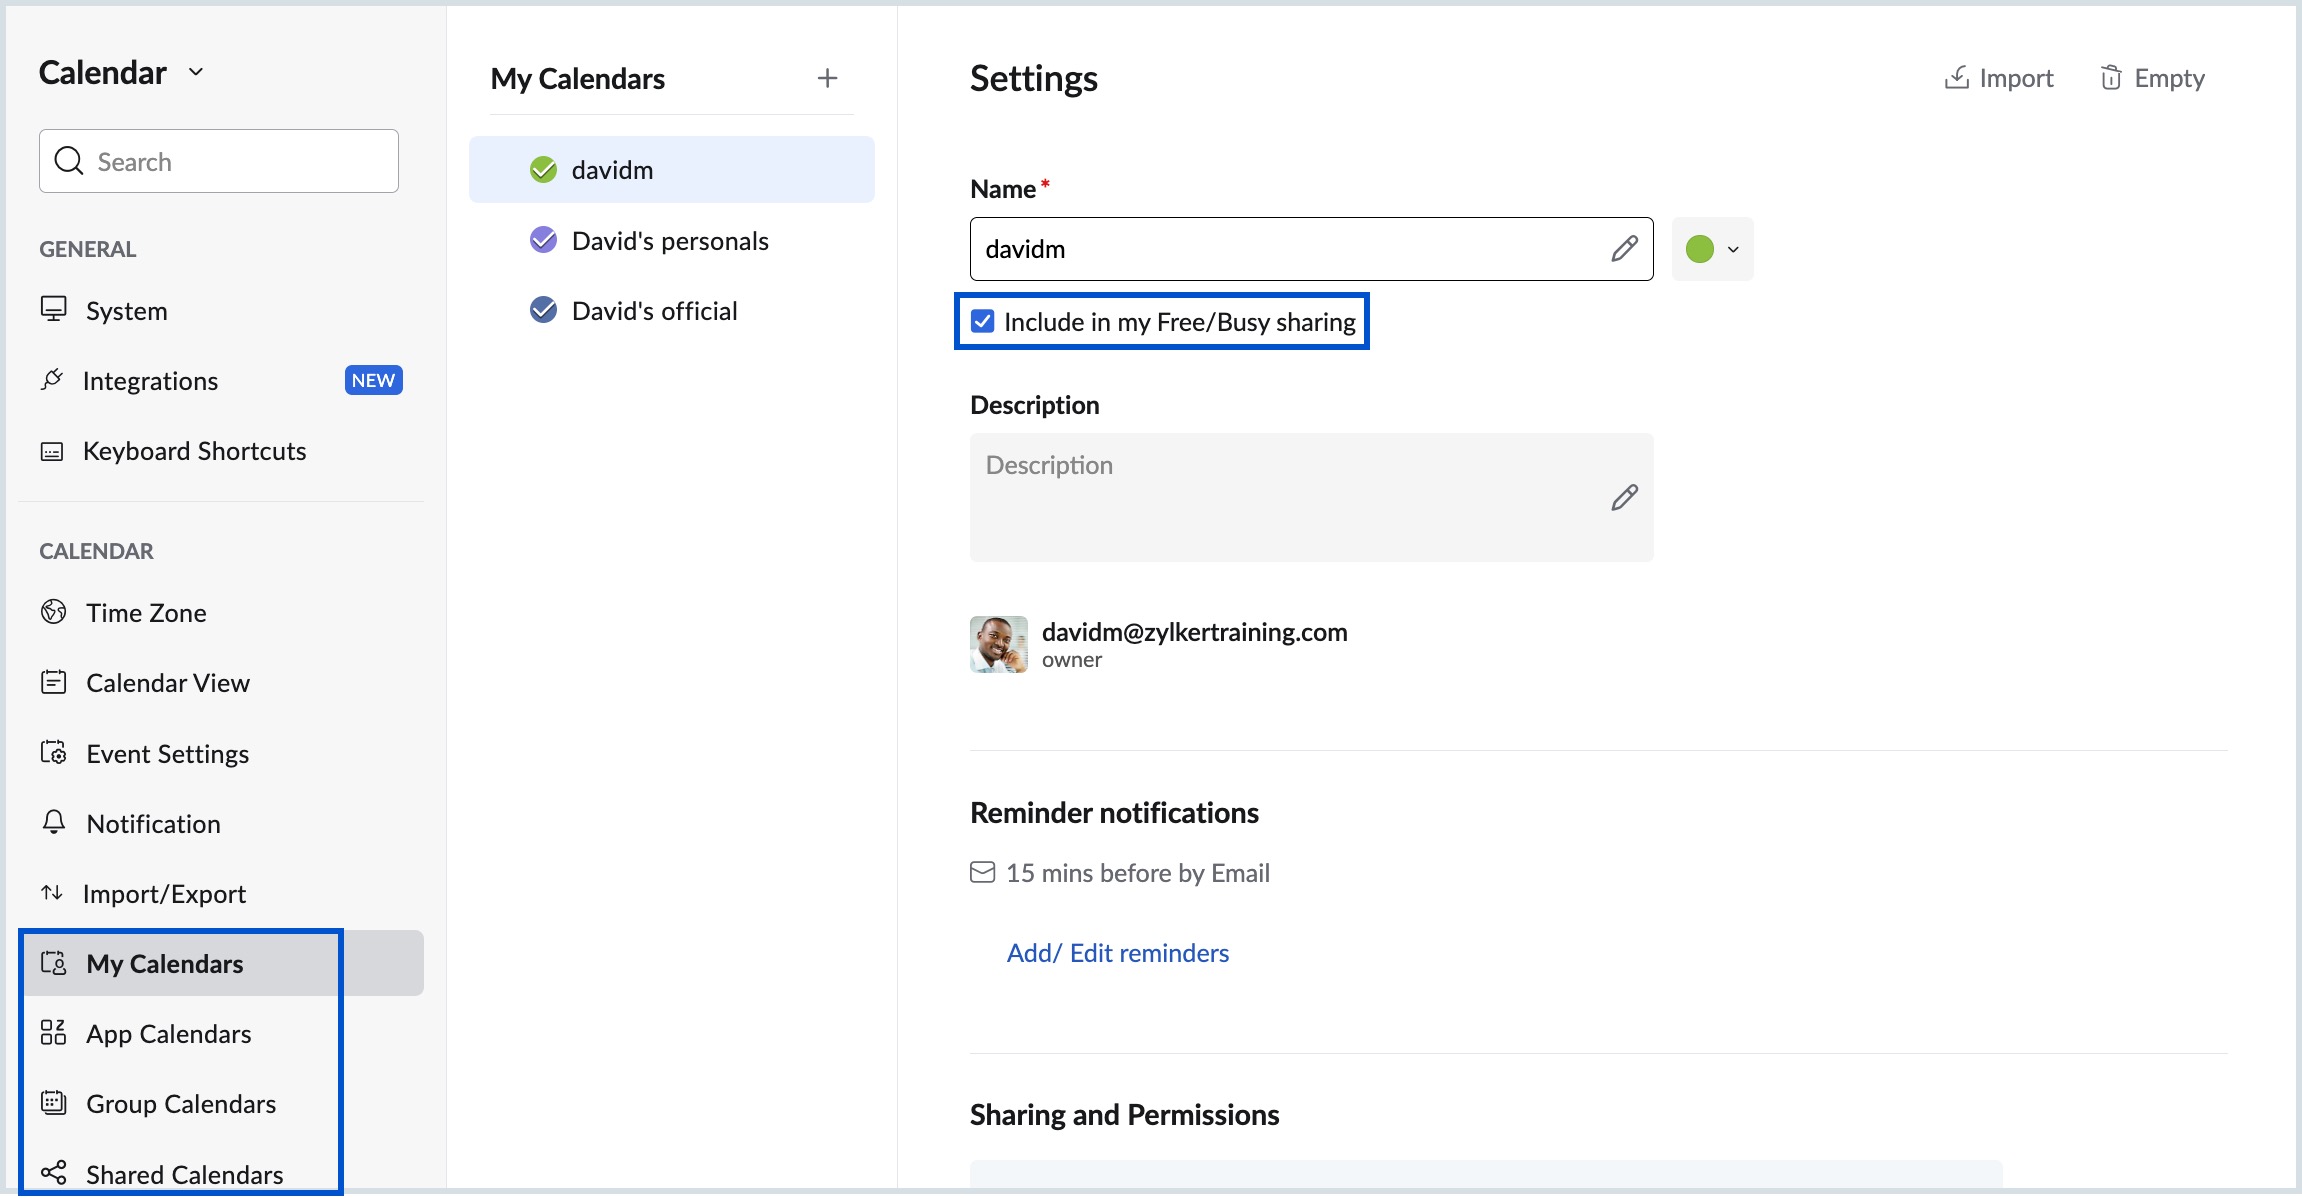
- The Include in my Free/Busy sharing option is available only for My Calendars, Group Calendars, Shared Calendars, and App Calendars (CRM and Recruit)
- If your administrator has set specific permissions for Free/busy sharing, your availability will be shared based on those permissions, and you will not be able to modify these settings in your calendar preferences.

- Free/ busy sharing will be disabled entirely if your administrator has disabled it for your organization.

For any changes to your Free/busy sharing permissions, please contact your administrator.
Free/ Busy Consideration
You can enable the Free/ Busy consideration in your calendar Event settings to show yourself busy during non-working hours. This will be reflected when a host checks your free/ busy status of you while adding you to an event.
Steps to enable or disable free/ busy consideration
- Log in to Zoho Calendar.
- Go to Settings > Calendar > Event Settings > Free/ Busy consideration.
- Click on the check box - Show me as busy during non-working hours to show yourself busy during non-working hours.

- You will be shown busy during non-working hours while a host checks your availability for an event.
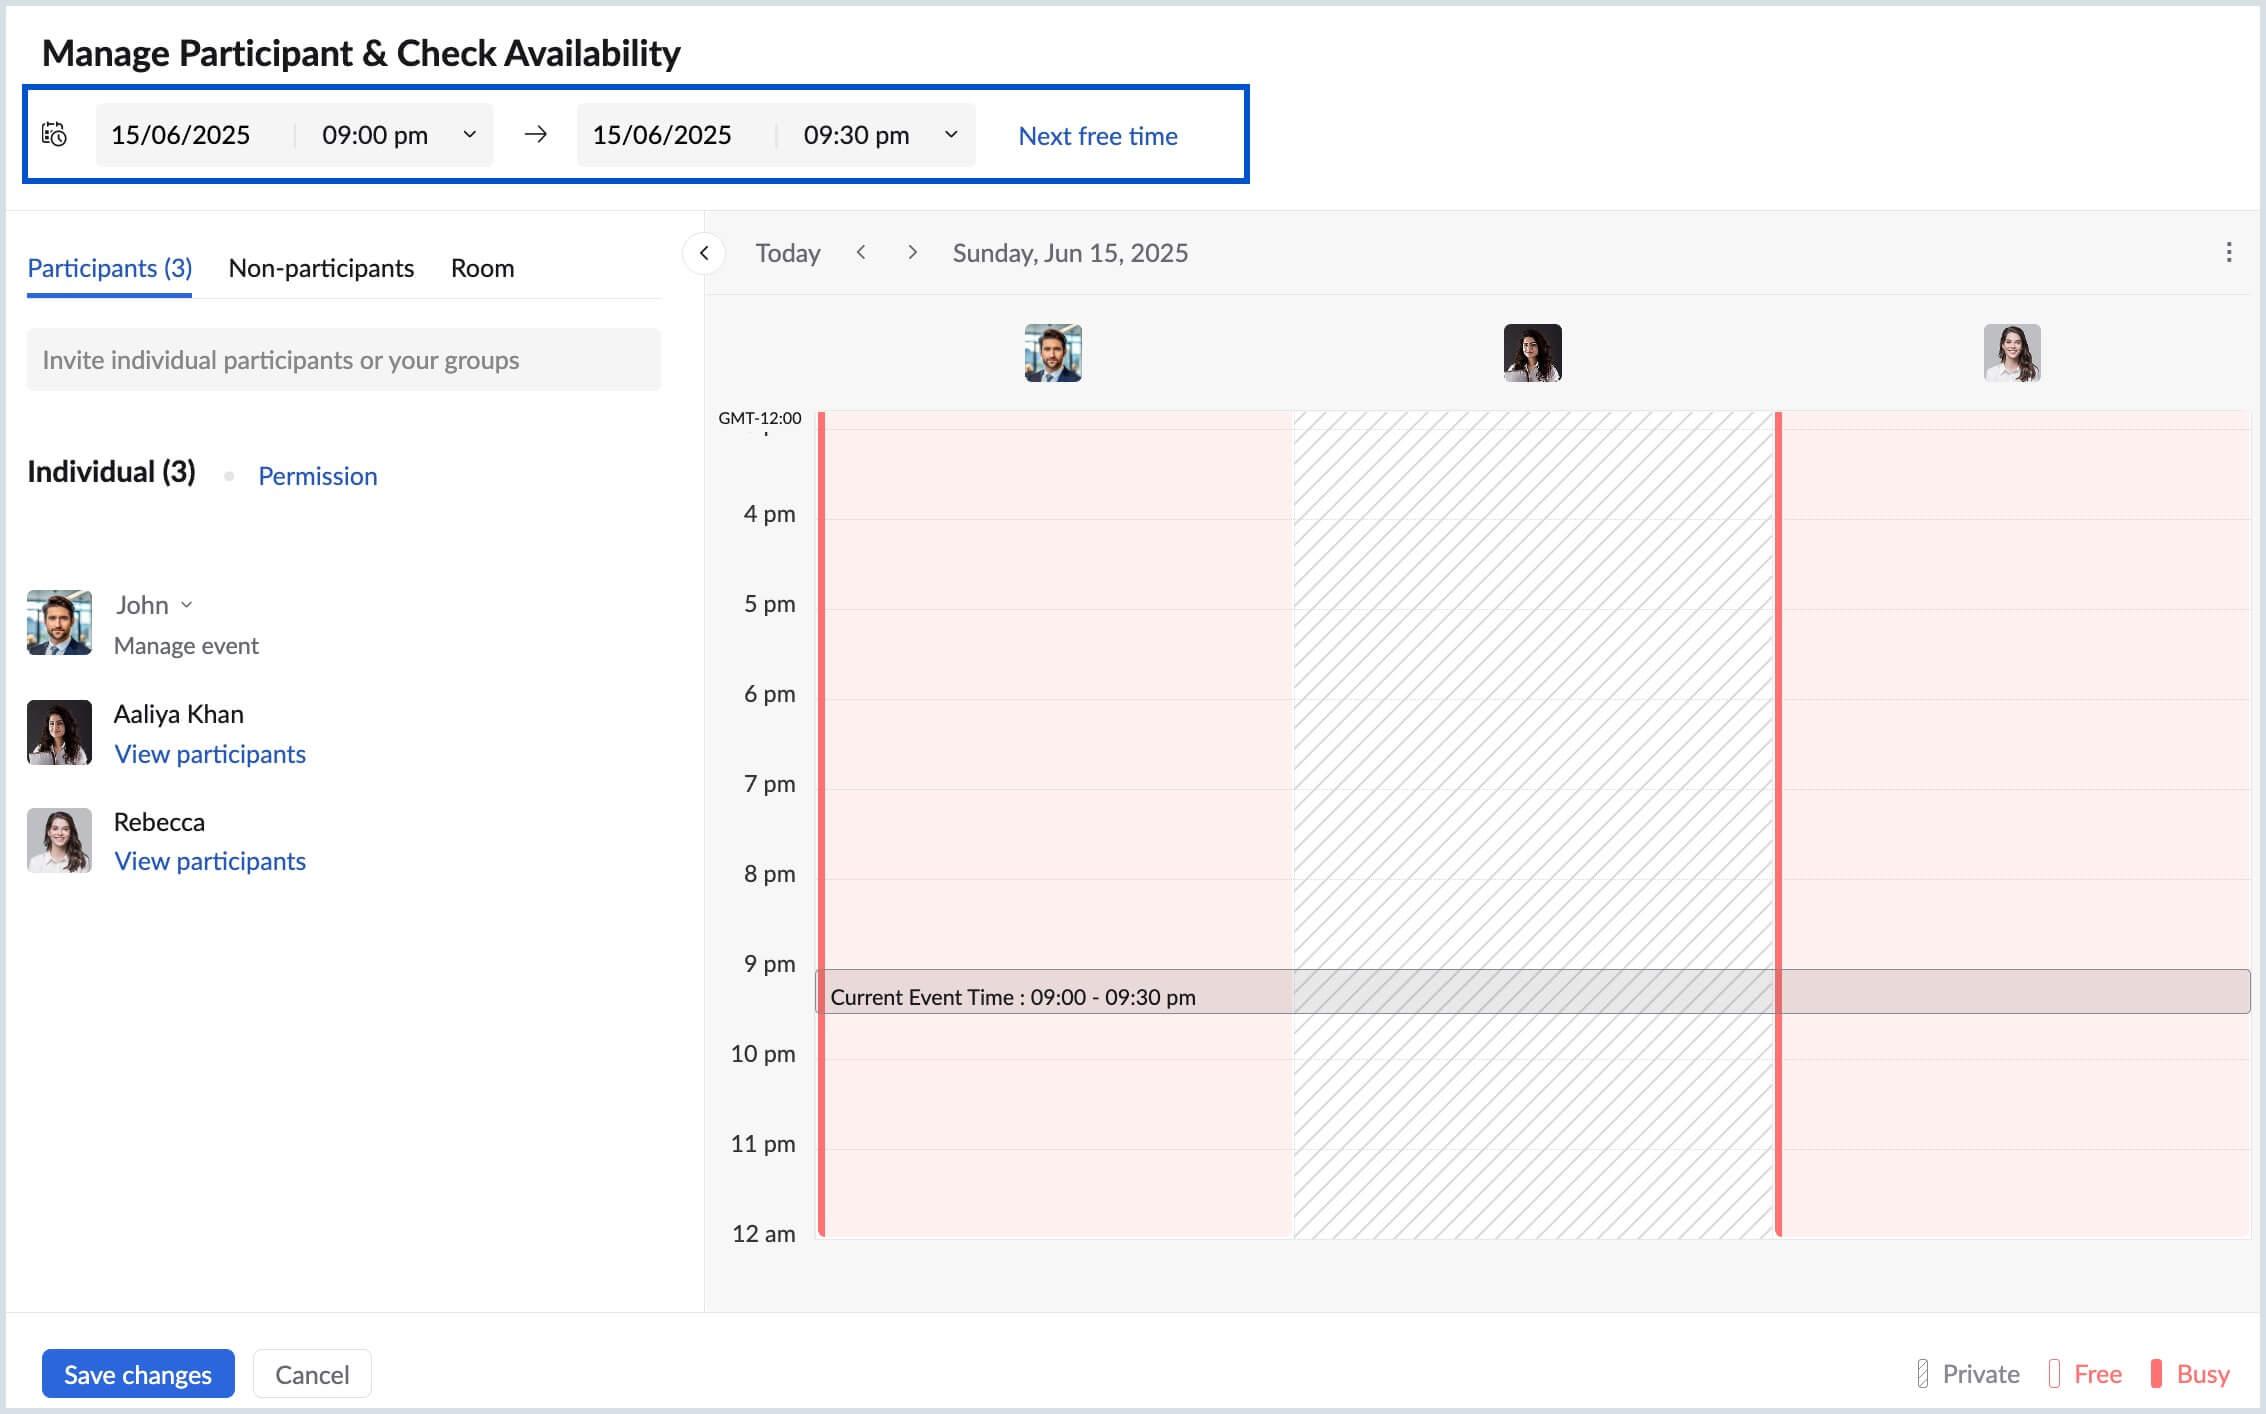
The busy time will be denoted by a red band and the free time will be blank.
Calendar-specific free/ busy sharing
In Zoho Calendar, you can add the calendars in the My Calendars section to your free/ busy schedule. This will show you busy during the times when an event is created to a particular calendar.
You can add the calendar to your free/ busy schedule while creating the calendar or editing the calendar.
Steps to include a calendar to your free/ busy schedule
- Log in to Zoho Calendar.
- Select the Add calendar icon from the drop-down found next to My calendars in the left pane.
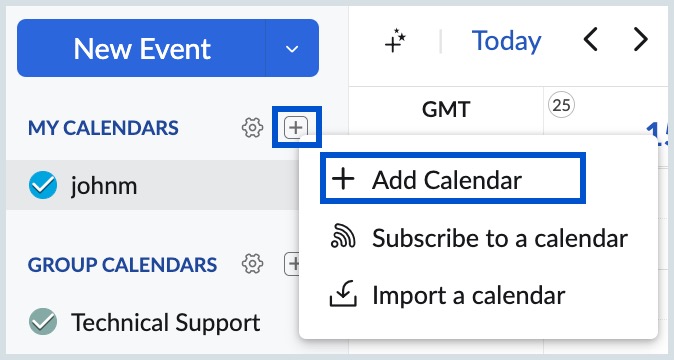
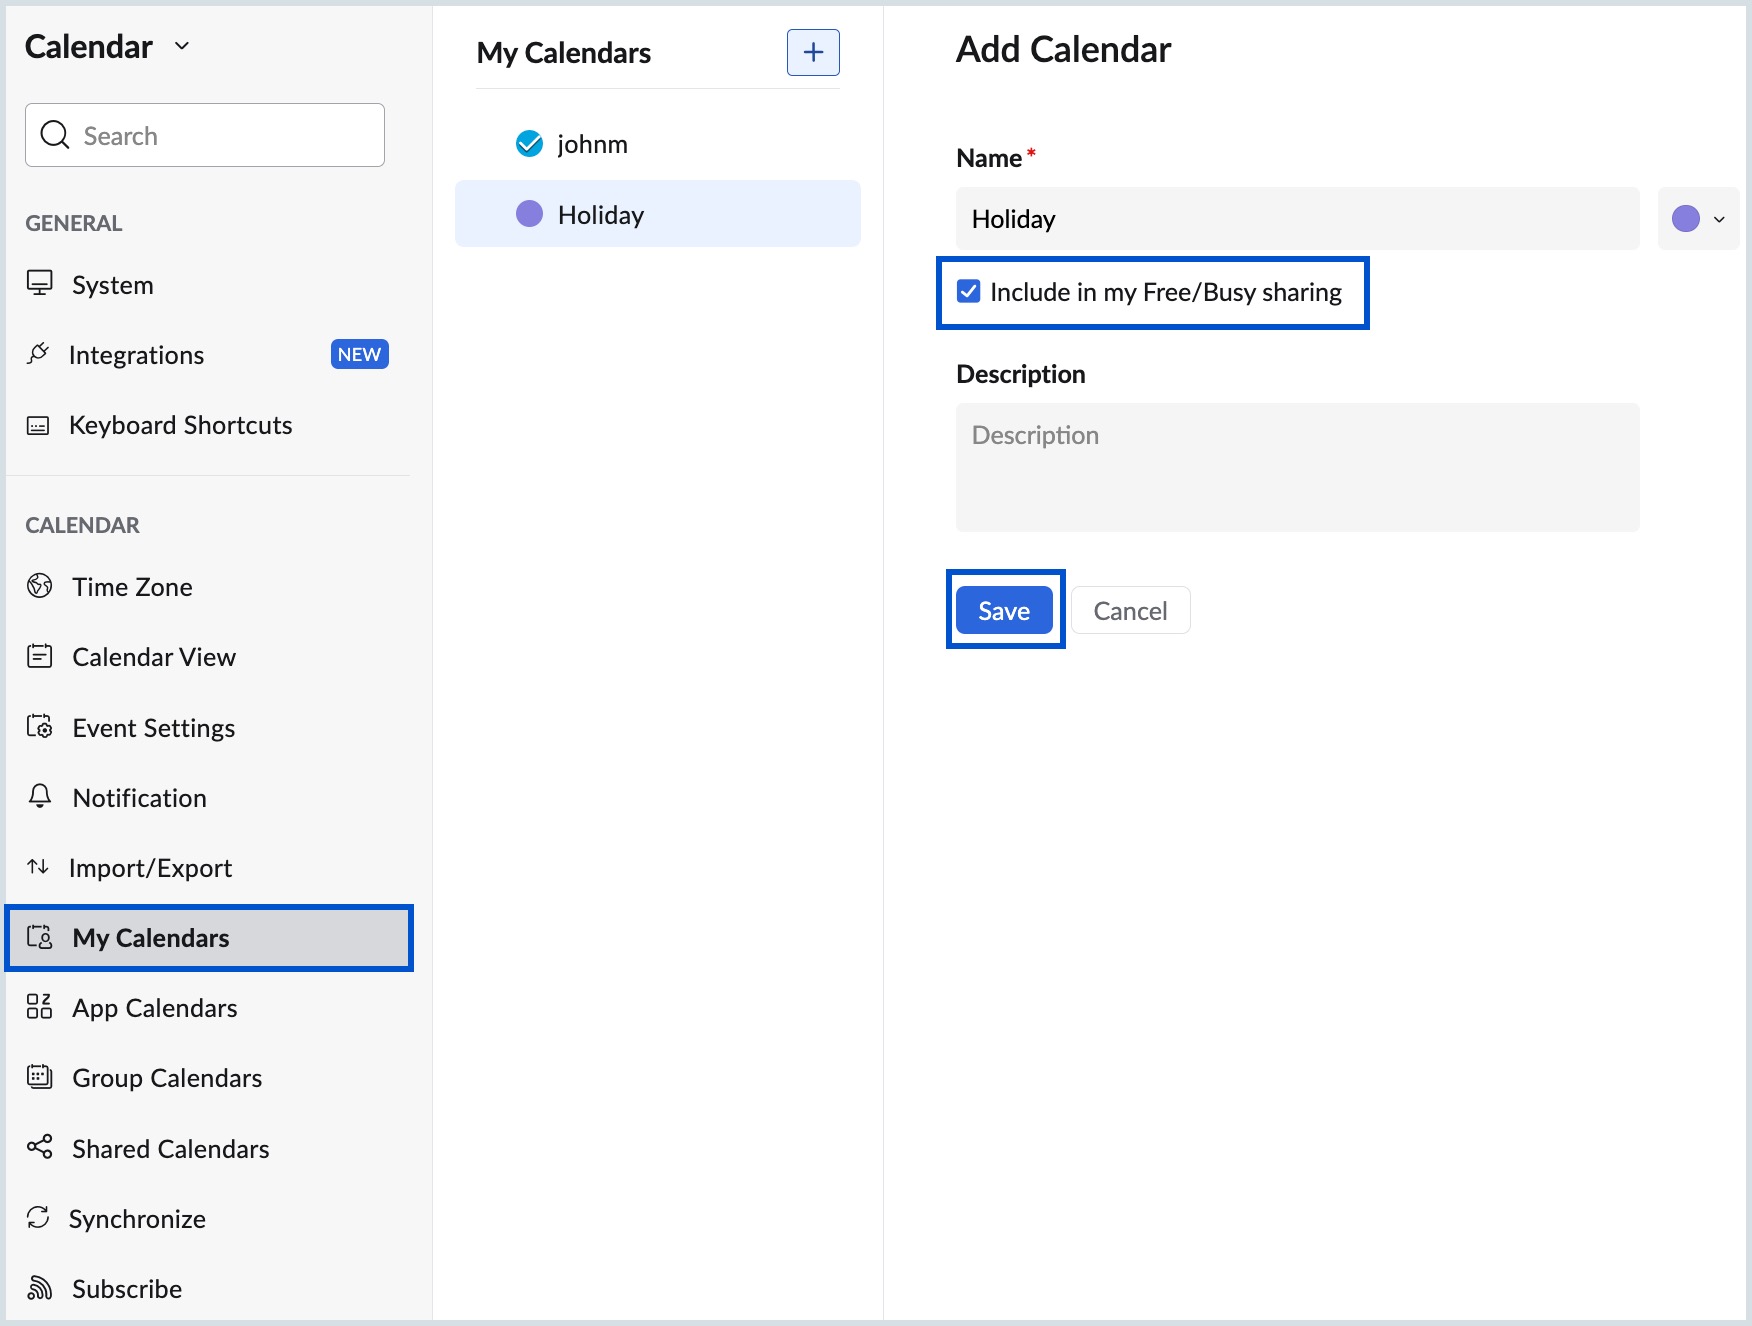
- Provide the Calendar Name, Description and Calendar color.
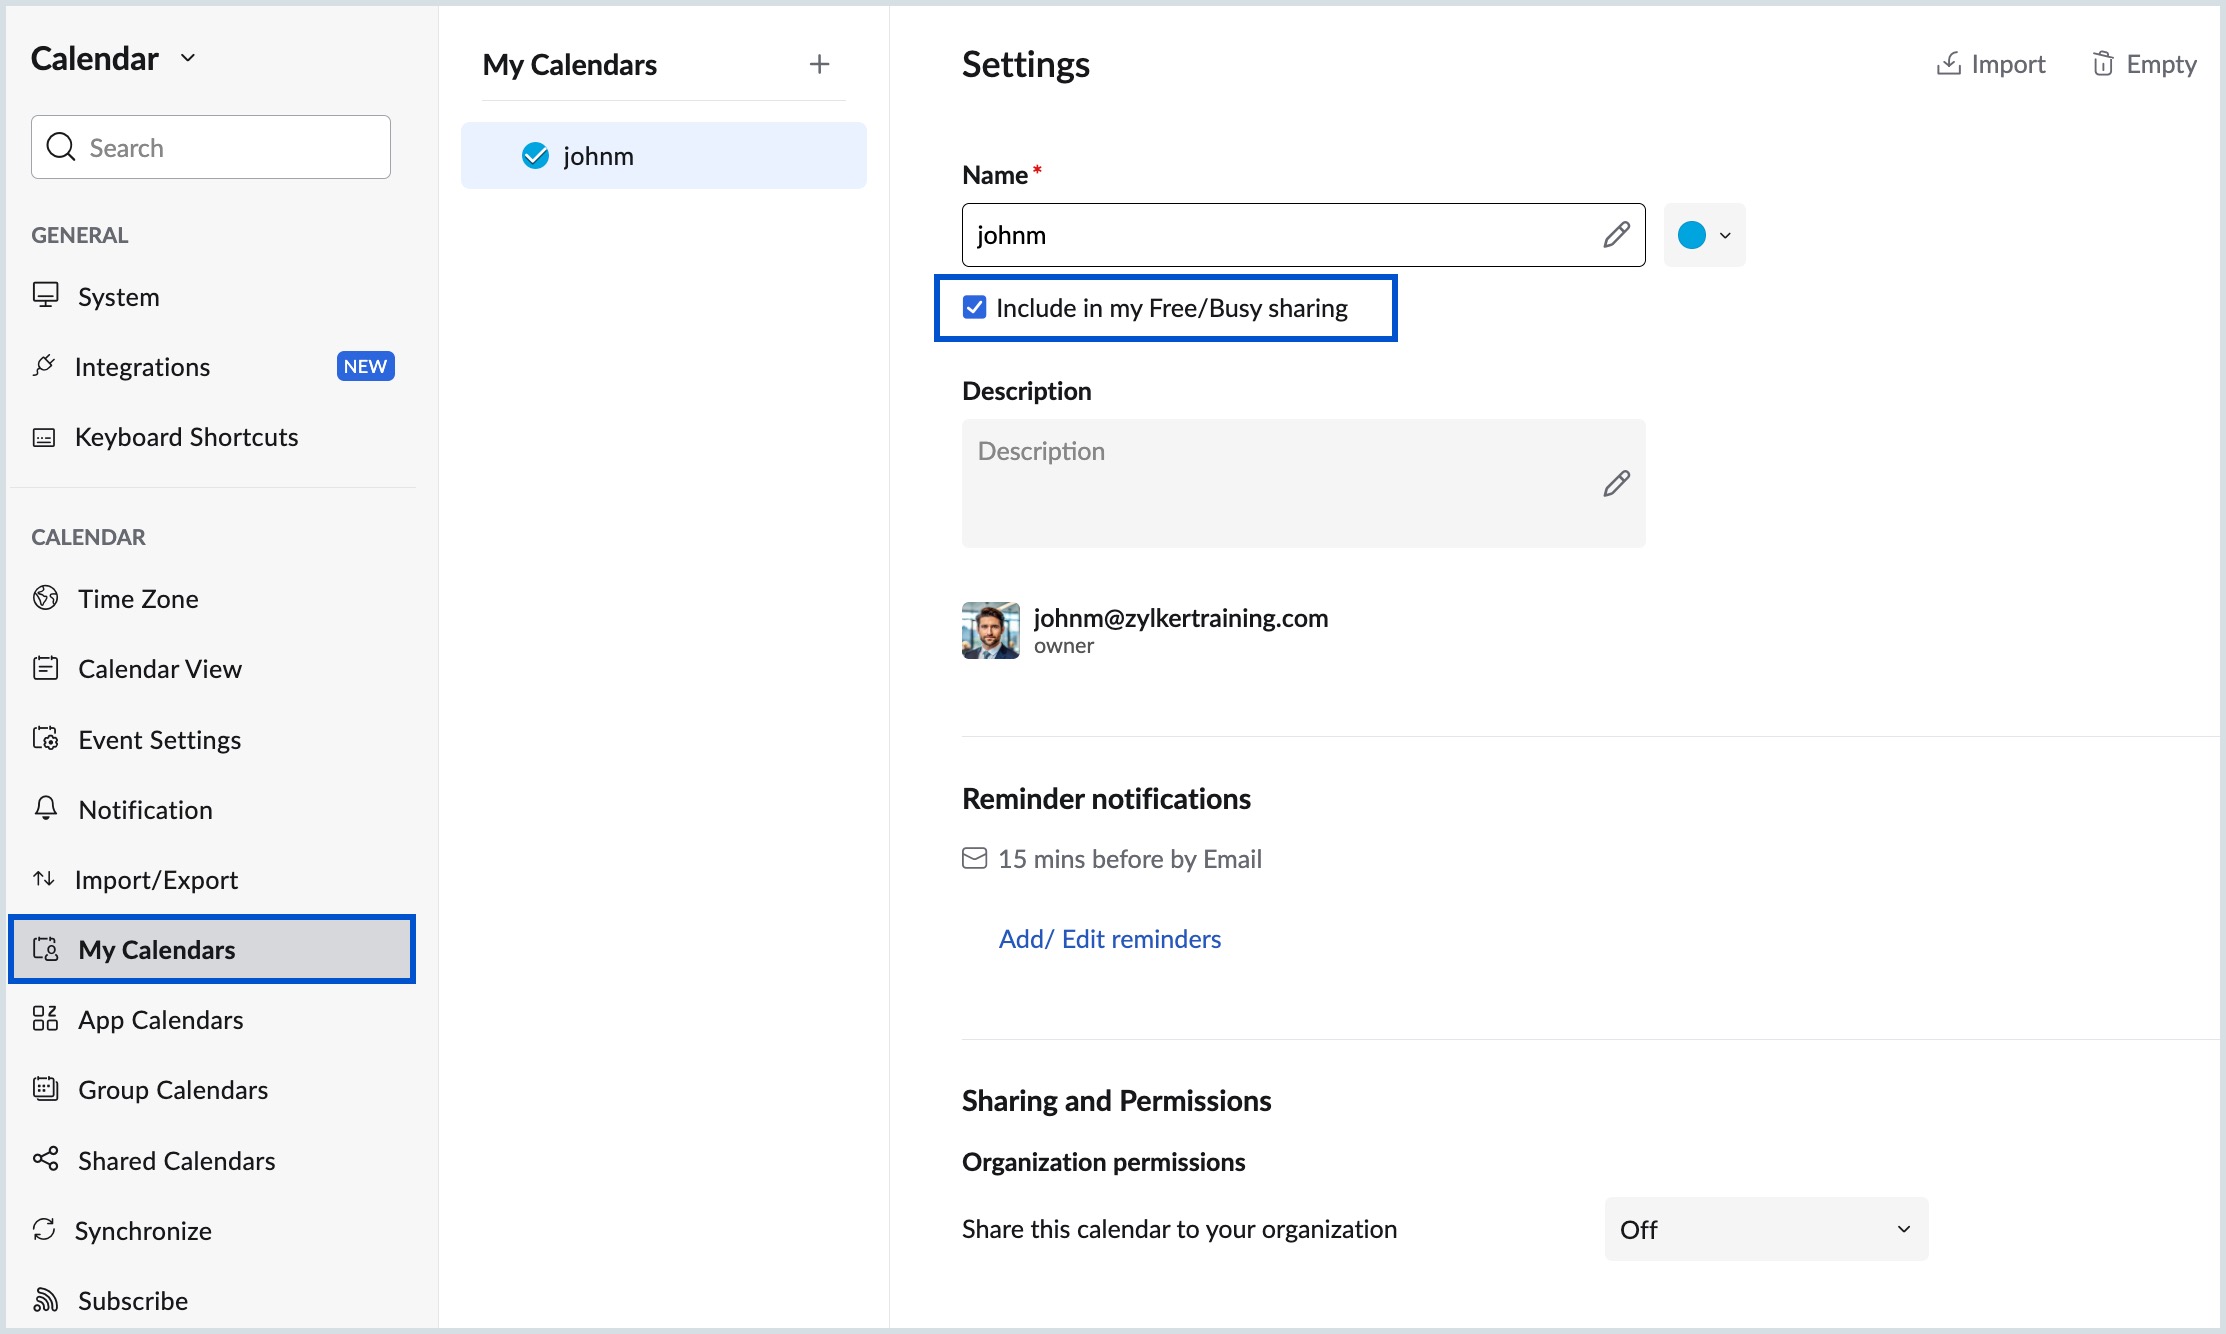
- Check the Include in my Free/ Busy sharing check-box.
- Click Save.
You can also edit a calendar under the My Calendar section to include it in your free/ busy sharing.
Steps to edit a calendar to include in free/ busy sharing
- Hover over the calendars in the My calendars section and click on the More options icon in the calendar you want to include in your free/ busy schedule.

- Click Edit
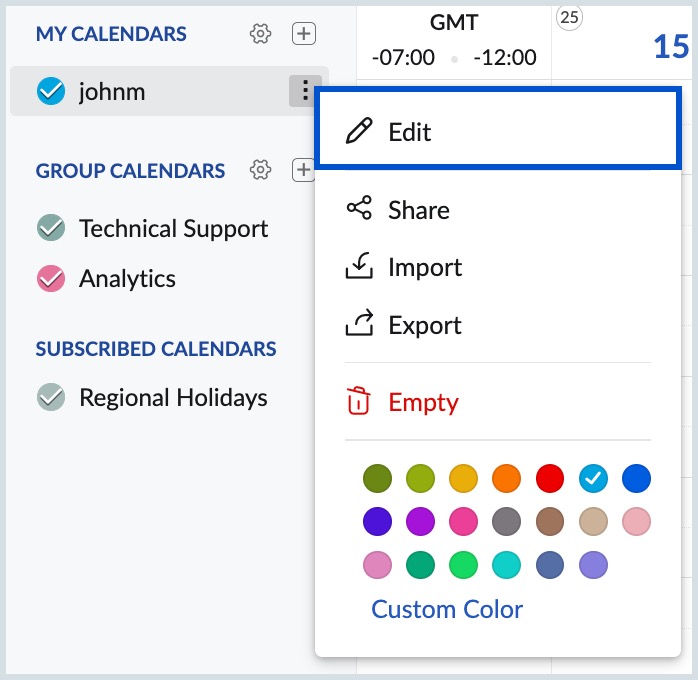
- Check the Include in my free/ busy sharing checkbox.
Event-specific free/ busy sharing
In Zoho Calendar, you can choose to add/ remove a specific event in your free/ busy schedule.
Steps to enable or disable free/ busy sharing for an event
- Log in to Zoho Calendar.
- Create a new event, edit an event or duplicate an event.
- Provide/ Edit the details of the event.
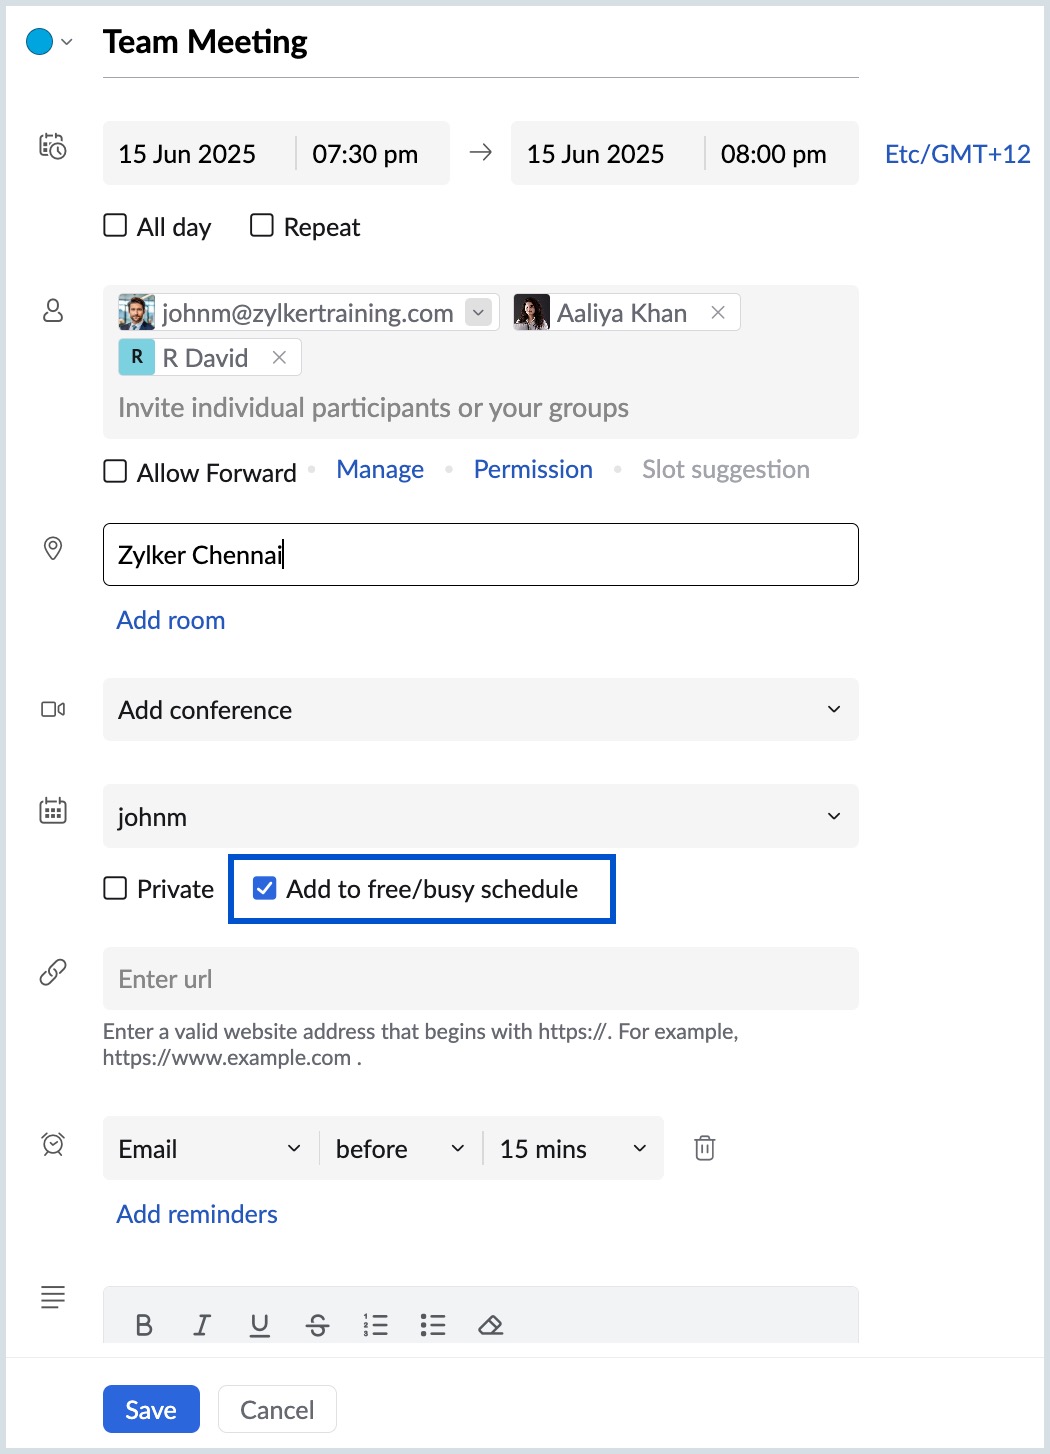
- Check or uncheck the Add to free/ busy schedule check box under the Calendar field.
- Click Save.
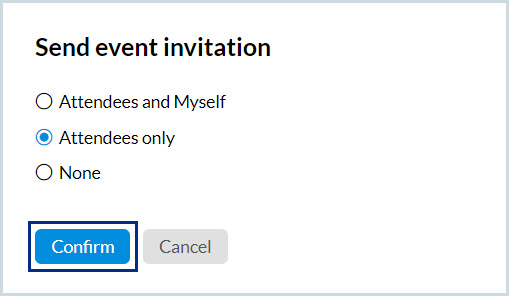
- Select an option from the Send event invitation pop-up and click Confirm
Note:
You cannot add an event to the free/ busy schedule if the calendar in which the event is being created is not included in the free/ busy sharing. You should enable the Include in my free/ busy sharing checkbox at the calendar level to add/ remove an event to/ from your free/ busy schedule.
Manage and View Free/ Busy
When you create an event using Zoho Calendar, you can view the free/ busy schedule of the attendees from within your organization. You can choose a time which will suit all the attendees and create an event accordingly.
Steps to Manage and View Free/ Busy schedule of attendees
- Log in to Zoho Calendar.
- Create a new event, edit an event or duplicate an event. Provide/ Edit the details of the event.
- Type the email addresses of the attendees in the Attendees field. Click Manage option below the Attendees field.
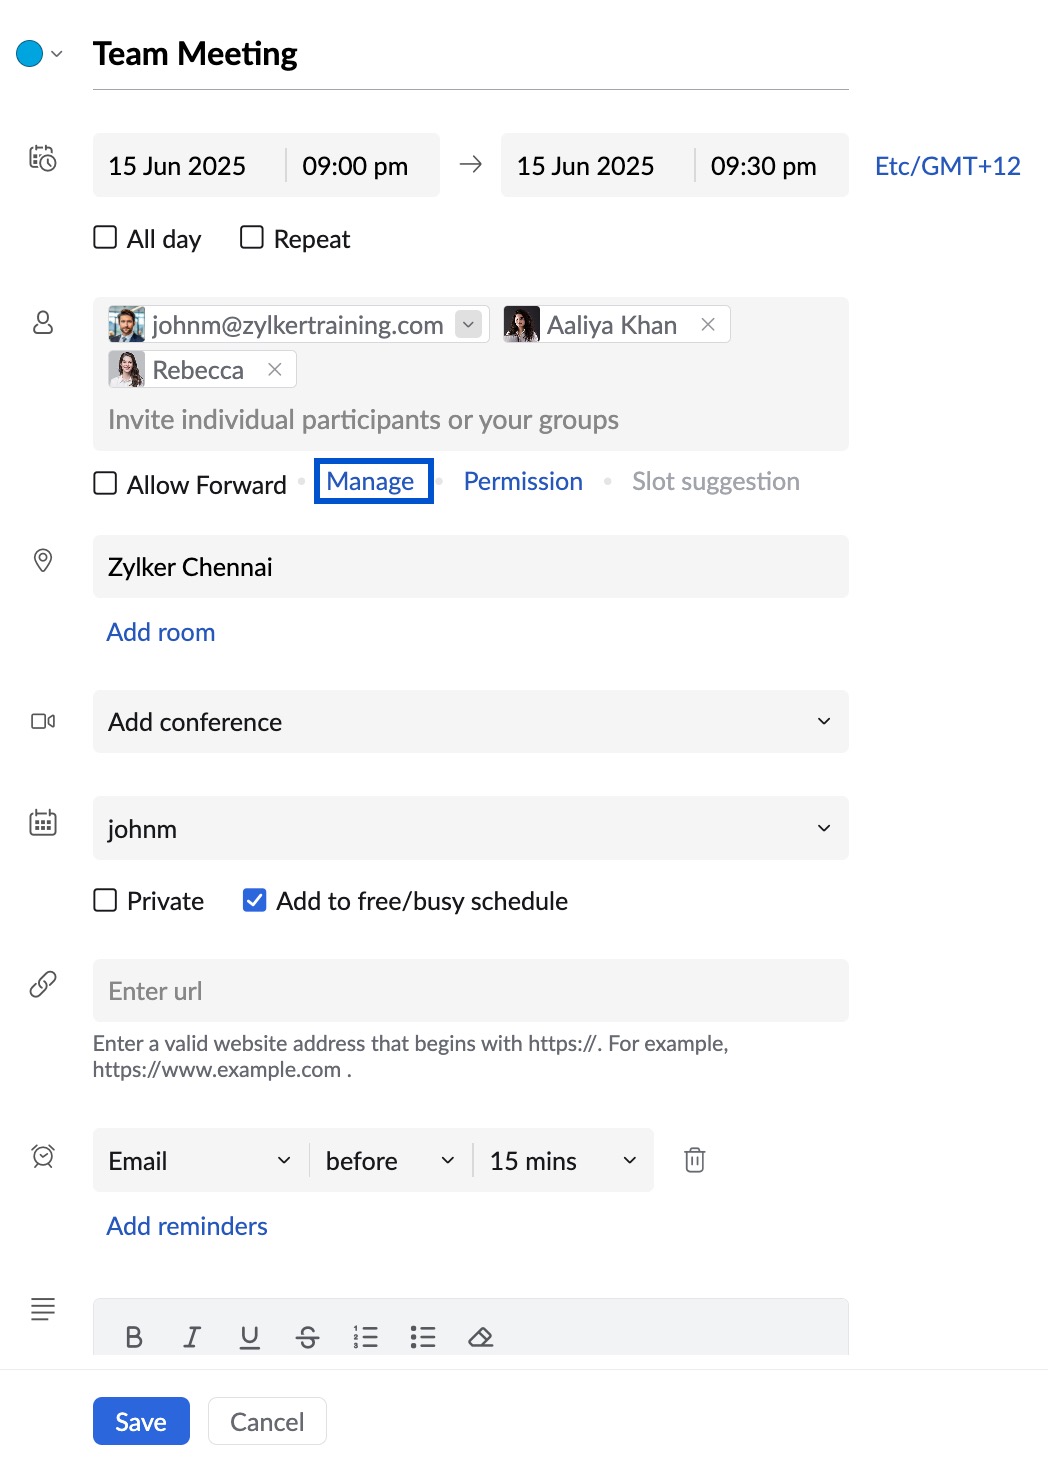
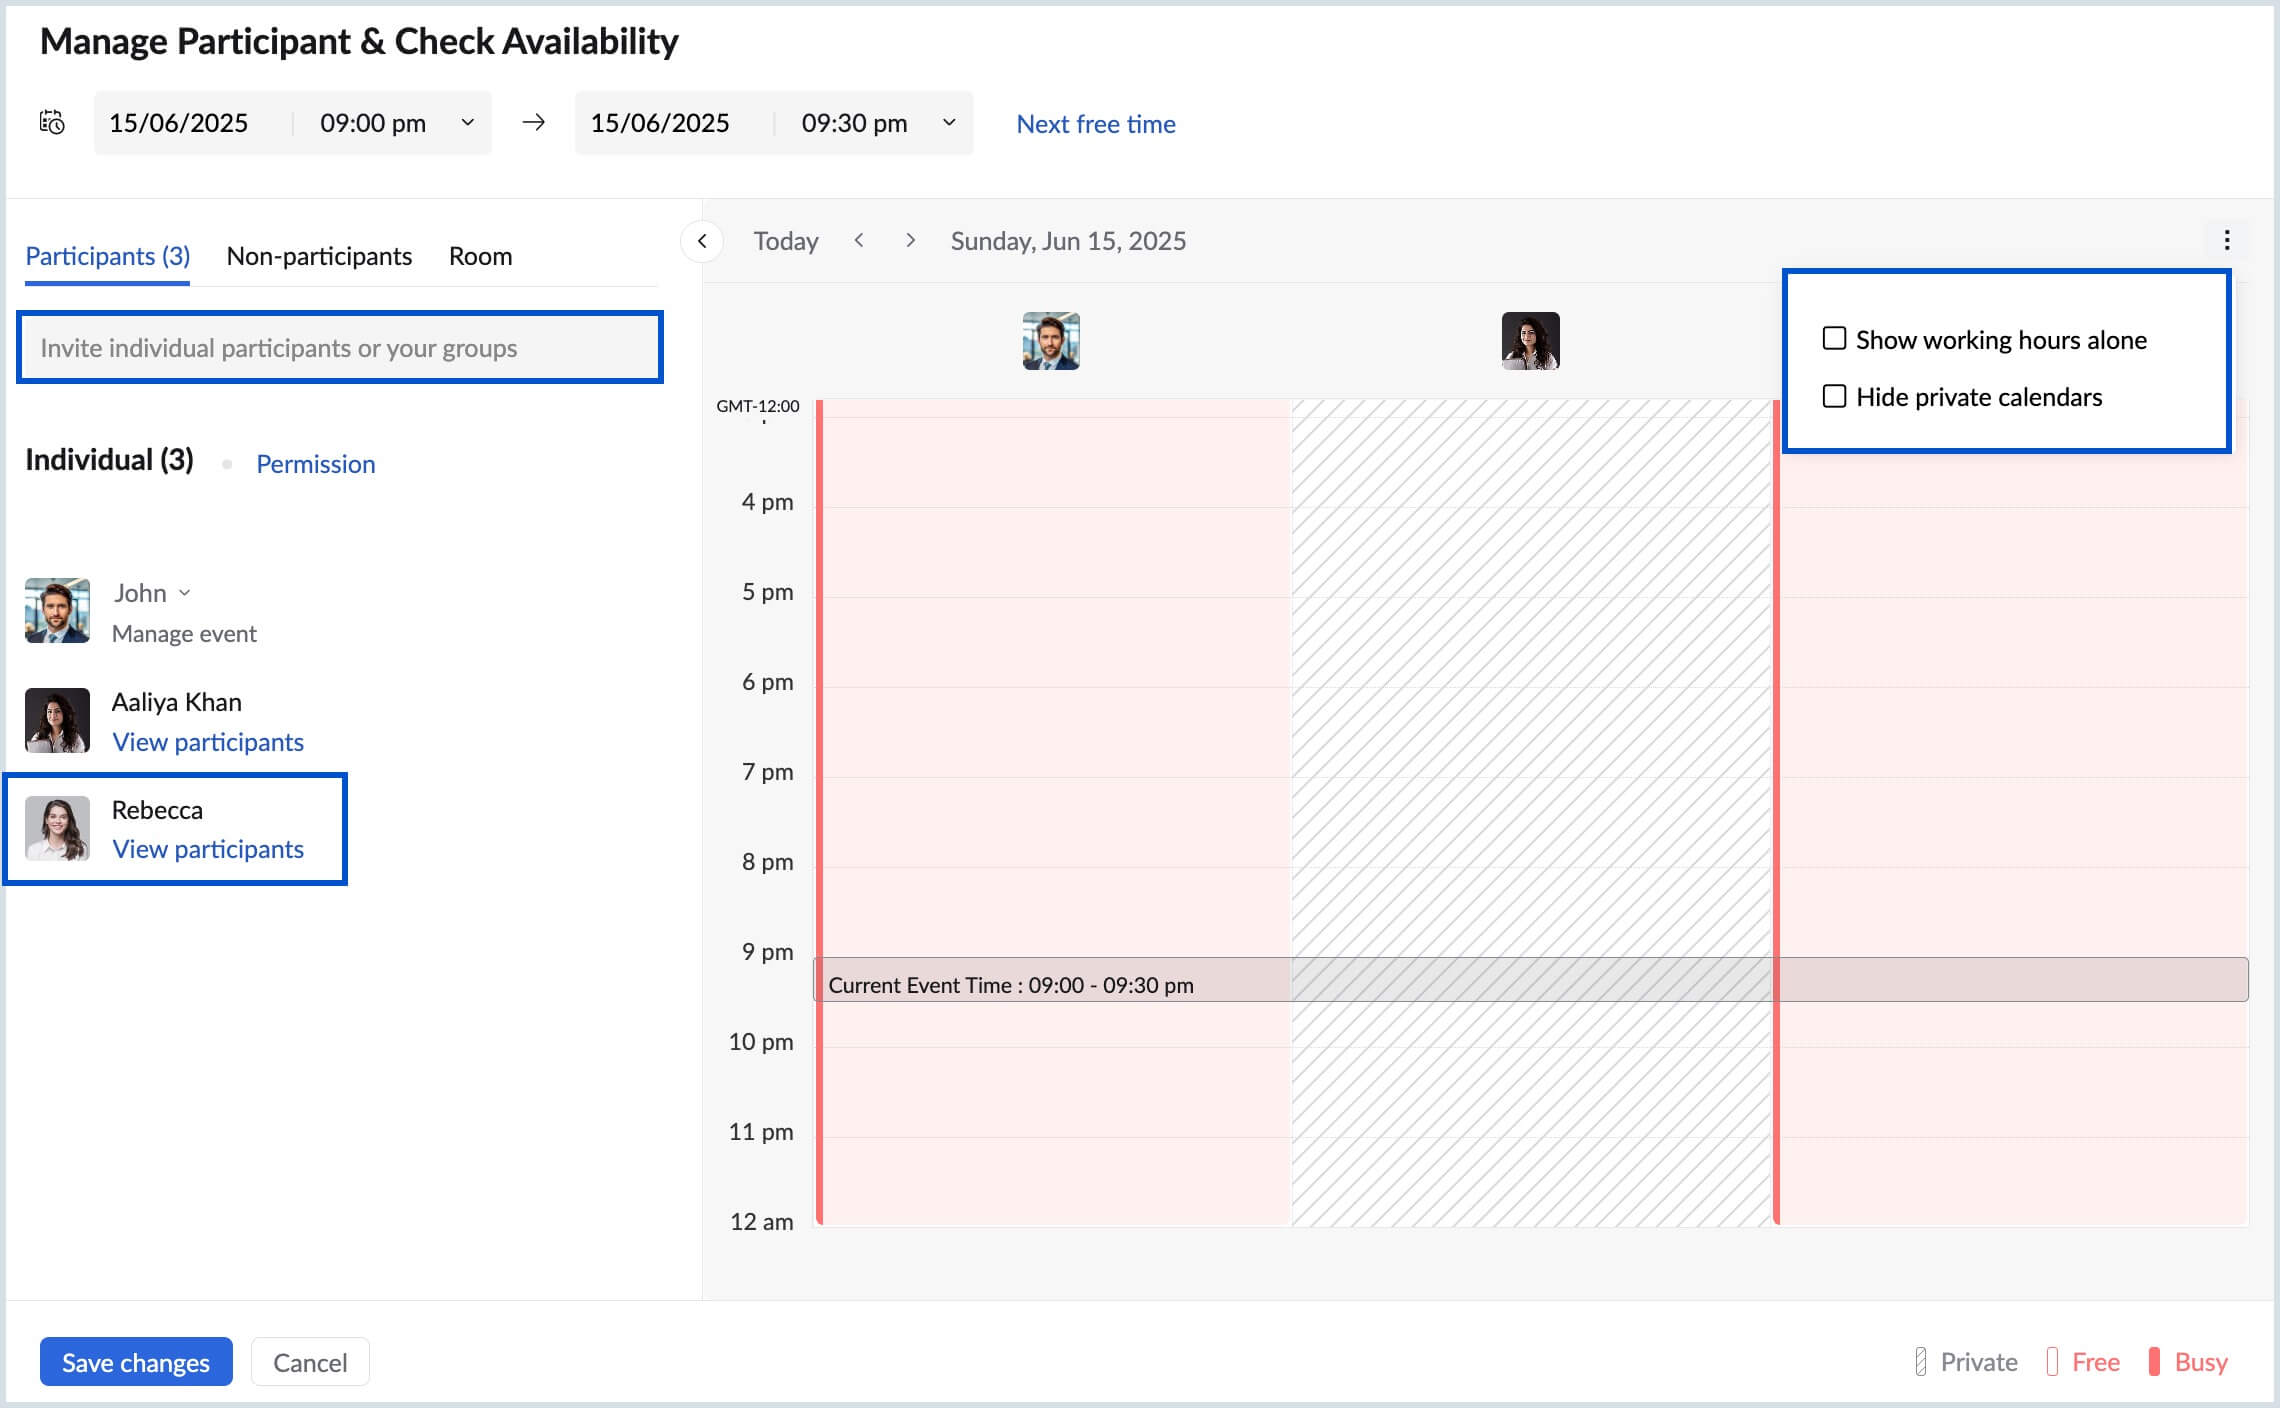
- A Manage Participants & Check Availability pop-up window appears, allowing you to view the free/busy schedules of attendees and group members within your organization.
- You can also add attendees by providing the attendees' email addresses/ group names in the Invite individual participants or your groups text box.
- Participants who are not part of your organization can be added but their free/ busy schedule will not be available.
- You can select the check boxes Show working hours alone (to display only your working hours) and Hide private calendars (to mask the visibility of your private calendars) from the more options icon on the top-right pane.
- Select the date and time for the event to check the free/ busy status of the attendees. Click the Next free time button on top of the pop-up window to see the available free time for all the attendees from within your organization.
- Click Done.
- Provide other details of the event and click Save Changes.
- Select an option in the Send event invitation pop-up and click Confirm.
- You can also find the next best possible time slot where majority of the particpants are available using the participants' availabilty option.