
Preferences
In Zoho Commerce, you can configure preferences for Items and Orders modules by customizing fields, adding layouts, and specifications.
Field Customization
Note: This feature is available only for certain plans of Zoho Commerce. Visit the pricing page to check if it’s available in your current plan.
In addition to the default fields available, you can create additional fields, known as custom fields, and customize them to fit your unique business needs. Here’s how:
Scenario: Suppose your business serves customers from multiple industries. To keep track of the industry each customer is associated with, you can create a custom field named “Industry” in the preferences.
- Create a New Custom Field
- Custom Fields Usage
- Edit a Custom Field
- Mark a Field as Inactive or Active
- Delete a Custom Field
- Configure Access
Create a New Custom Field
To create a new custom field:
- Log in to your Zoho Commerce organization.
- Click Settings in the top right corner.
- Navigate to the module for which you want to add the custom field.
- Go to the Field Customization tab.
- Click + New Custom Field in the top right corner.

-
Fill in the following details:
- Label Name: Select an appropriate name for your custom field.
Field Description Example Text Box (Single Line) Enter short text, numbers, or both (up to 255 characters). Order No: 12345AB Email Store additional email addresses. brandon.taylor@zylker.com URL Save website URLs. https://www.zoho.com/commerce Phone Store phone numbers. (123)-456-7890 Number Record whole or negative numbers. 7, -7 Decimal Store positive or negative decimal values. 12.90, -94.53 Amount Record amounts with currency codes. USD50, INR100 Percent Store percentage values. 25% Date Enter custom or relative date values. 19 Jun 2019, Today, Start of Month Date and Time Store both date and time values in YYYY-MM-DD HH:MM format. 2025-06-19 14:30 Check Box Add a checkbox to confirm actions or options. You can also choose to have the check box ticked by default. Confirmed Auto-generate Number Automatically generate values with custom prefixes or suffixes. INV-001, REF-2025-01 Dropdown Choose one option from a list. Customer Type: Retail / Wholesale Multi-select Select up to 30 options from a list. Preferred Channels: Email, SMS, Call Lookup Pull data from another module into the current module. Pull Customer Name from the Contacts module Text Box (Multi-line) Enter large blocks of text, up to 36,000 characters. Additional Notes or Descriptions Attachment Upload files like documents, PDFs, or images.
Max file size: 7 MB.
Supported types: Images – GIF, PNG, JPG, JPEG, BMP, TIF, and TIFF
Documents – XXLS, XLSX, DOC, DOCX, XML, CSV, PDF and TXT.Invoice.pdf, product.jpg Formula Create calculated fields using formulas, operators, and other fields. Total = Quantity * Unit Price External Lookup Fetch and display data from another Zoho app’s field. Fetch user role from Zoho CRM
- Label Name: Select an appropriate name for your custom field.
-
Select the appropriate Data Privacy option:
- Personally Identifiable Information: PII refers to information that can be used to identify a specific individual. Select this option if the data you’re entering is confidential and considered personally identifiable. You can mark fields such as Text, Email, URL, Phone, Number, and Date as PII. Choose if the information you enter will be sensitive.
- Sensitive data: Encrypt and store it. The custom field can be viewed only by users with permission to access PII.
- Not sensitive data: Store it without encryption. Only users with access to protected data can view the custom fields. However, users can use this field to perform advanced searches.
- ePHI: Select this option if the information that you enter can be used to identify a patient. Only users with access to protected data can access the fields. Users cannot use this field to perform advanced searches.
Scenario: An electronic copy of a medical report will be ePHI. You can mark only fields such as Text, Email, URL, Phone, and Date as ePHI. The data will be treated as sensitive; therefore, it will undergo encryption before being securely stored.
- Choose if the values entered in the custom field has to be unique in Prevent Duplicate Values .
- Select Yes if the value entered should be unique.
- Select No if the value entered does not have to be unique.
- You can add data to a custom field and validate them using the Input Format option. You can specify the type of characters and length that can be entered in the custom field.
Scenario: In India, the Permanent Account Number (PAN) is a 10-character alphanumeric code used to identify taxpayers. The PAN consist of five uppercase letters, followed by four digits, and ending with one uppercase letter (e.g., ABCDE1234F). If you want to store PAN details for users in your organization, you can create a custom field and use an Input Format to ensure accuracy. To match the correct PAN structure, enter the following value as the input format: ^[A-Z]{5}[0-9]{4}[A-Z]{1}$. This ensures that only valid PAN entries are accepted.
- If you choose the Text Box (Single Line) or Text Box (Multi-line) data type, you can either enter the input format directly by clicking Configure Custom Format or choose from the available input formats by clicking Use Standard Formats.
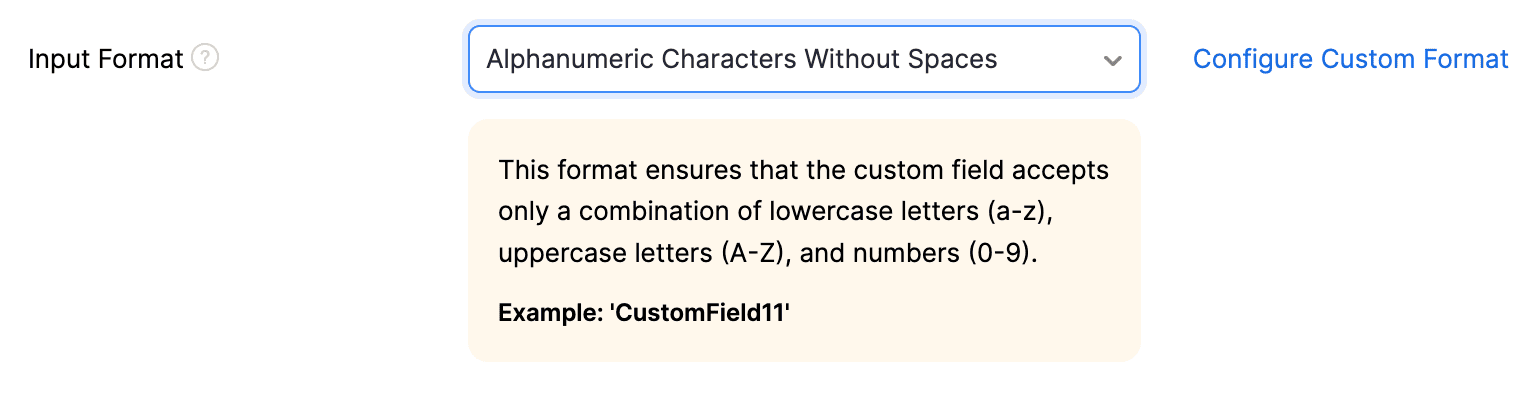
- If you select Use Standard Formats, you can choose from the following options:
| Format | Description |
| Numbers | The custom field accepts only a combination of the numbers 0-9. For example, 123. |
| Alphanumeric Characters Without Spaces | The custom field accepts only a combination of lowercase letters (a-z), uppercase letters (A-Z), and numbers (0-9), without any spaces. For example, customField123. |
| Alphanumeric Characters With Spaces | The custom field accepts only a combination of lowercase letters (a-z), uppercase letters (A-Z), numbers (0-9), and spaces. For example, custom Field 123. |
| Alphanumeric Characters With Hyphens and Underscores | The custom field accepts only a combination of lowercase letters (a-z), uppercase letters (A-Z), numbers (0-9), hyphens (-), and underscores (_). For example, custom-Field_123. |
| Alphabets Without Spaces | The custom field accepts only a combination of lowercase (a-z) and uppercase (A-Z) letters, without any spaces. For example, customField. |
|
- If you select Configure Custom Format, you can directly enter the input format in the custom field. For example, ^[A-Z]{2}[0-9]{6}[A-Z]{1}$.

- Enter the Default Value to the displayed in the custom field.
Note: If you create a custom field for the Items module and set the Default Value as 1. It will automatically fill the custom field with 1 when you create an Item without providing any value for the custom field.
- Choose if this custom field should be a mandatory field in Is Mandatory. If you choose Yes, the user can only save the form in which this custom field was used after the when value in the custom field.
- Enable the Show in Store to display the custom field in your online store.
- Enable Show in PDF to display the custom field in PDFs.
- Click Save once all the required fields are filled to create a custom field.
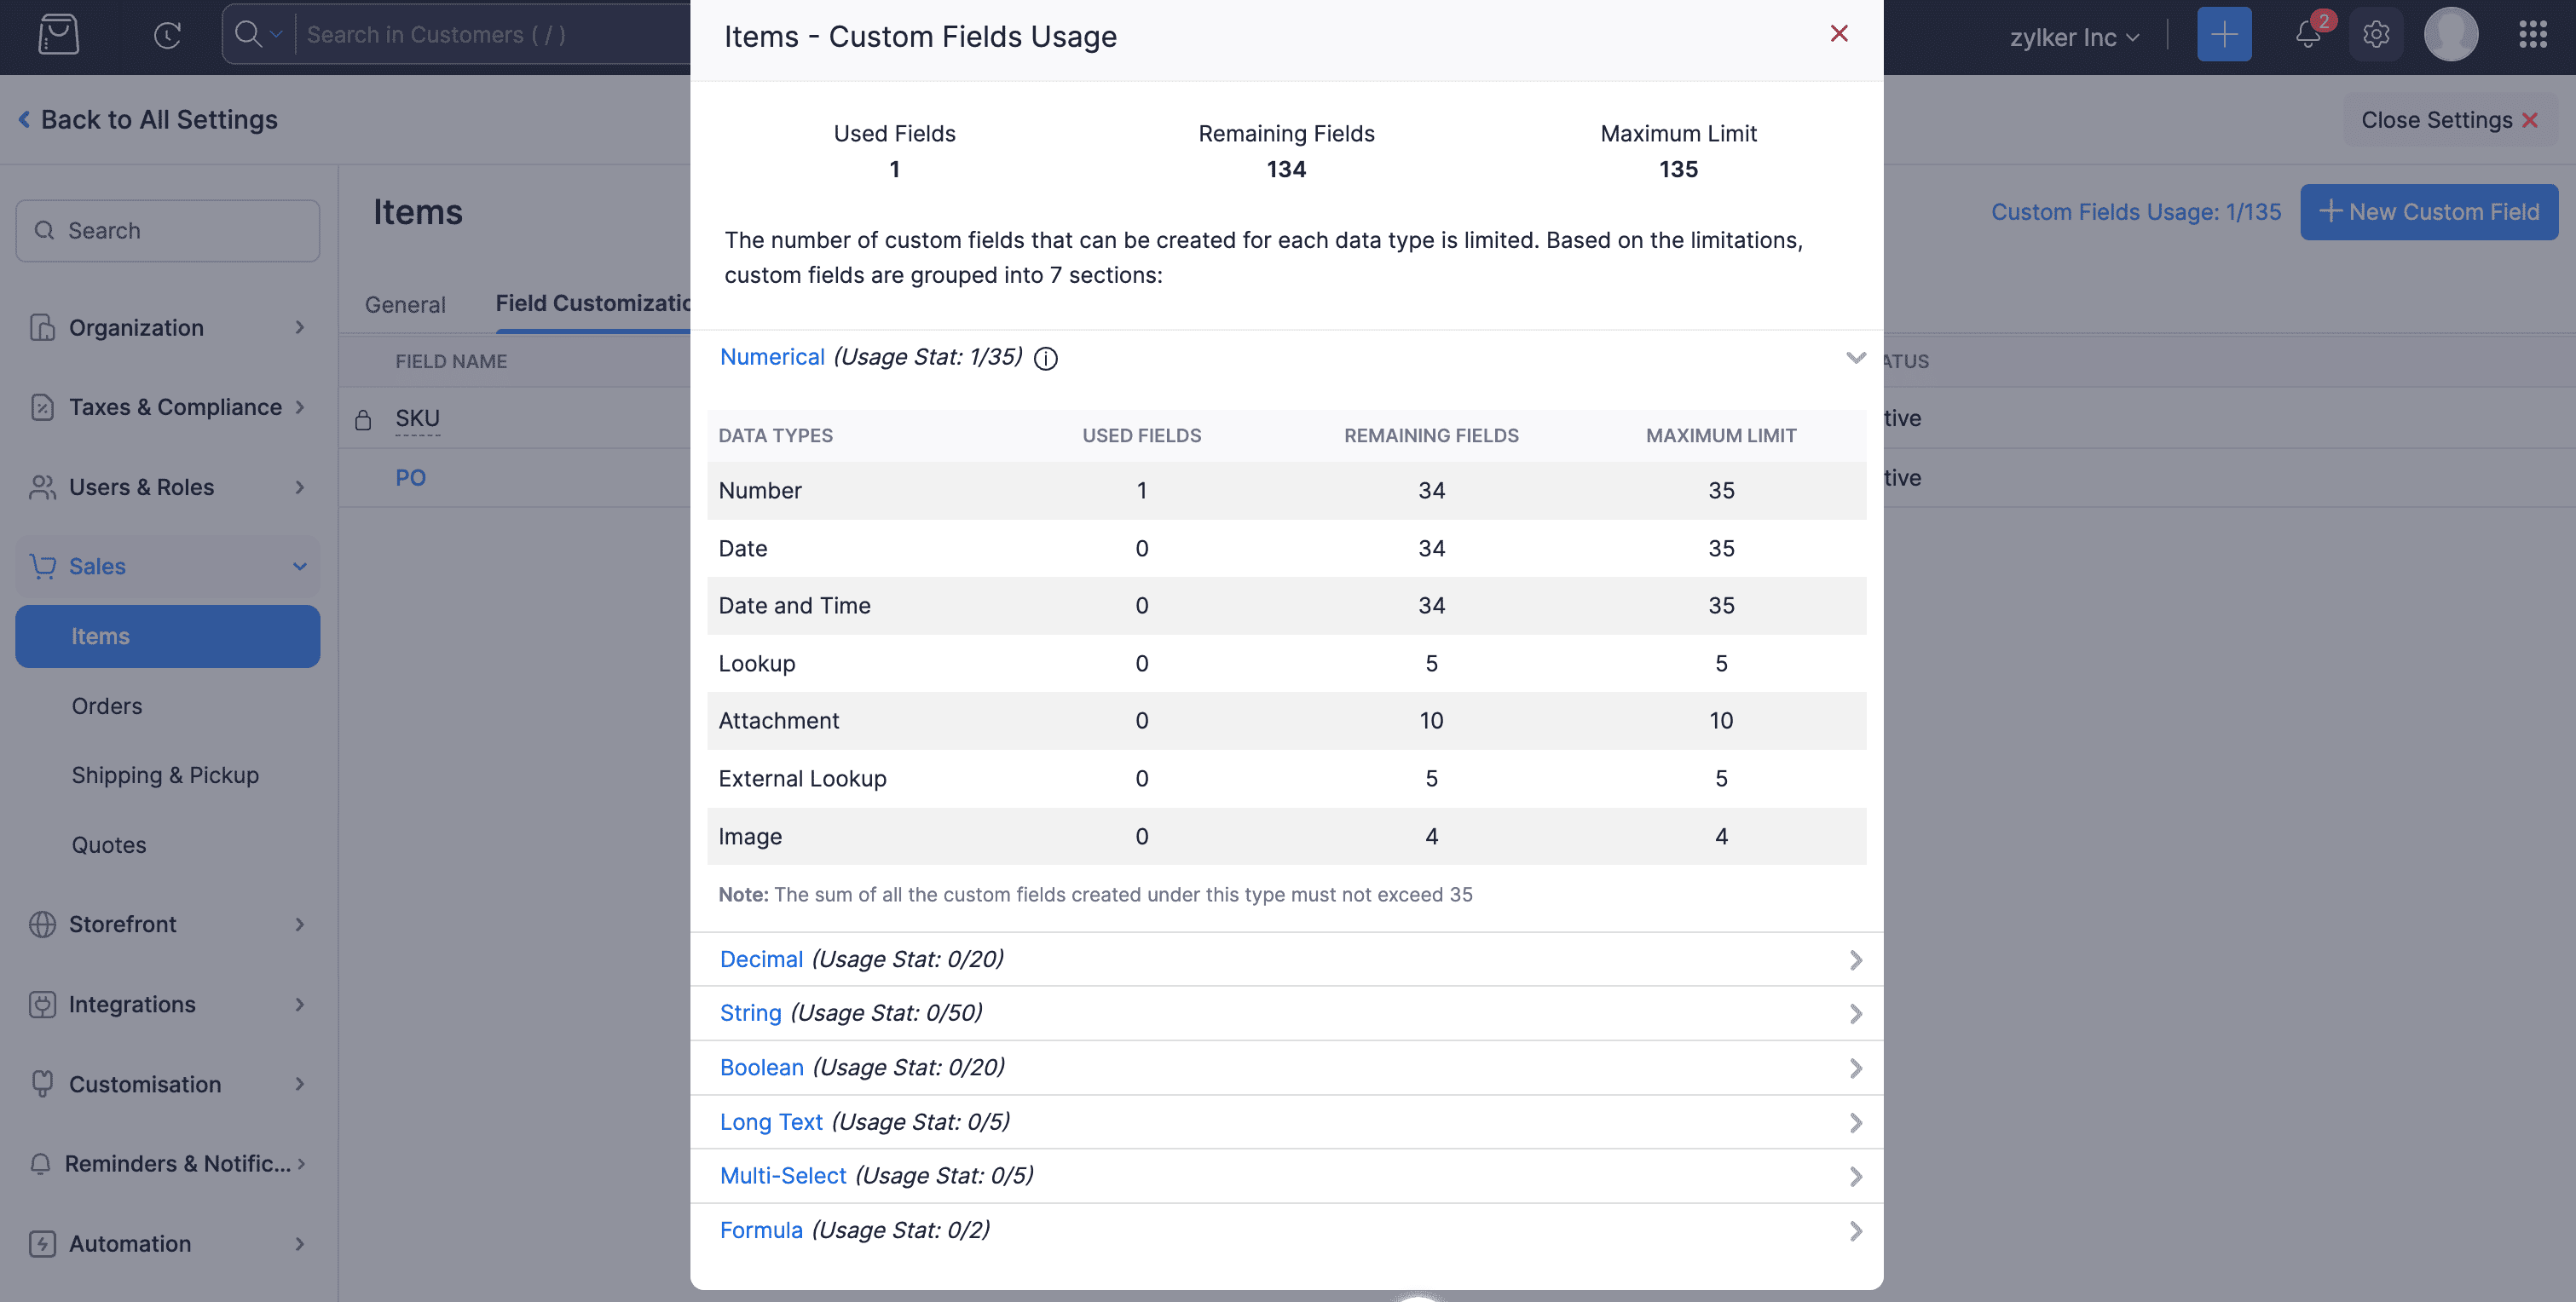
Custom Fields Usage
You can check the number of custom fields available in Custom Fields Usage. The number of custom fields you can use are split into seven sections: Numerical, Decimal, String, Boolean, Long Text, Multi-select, and Formula.
You can check the number of custom fields available for your use. Here’s how:
- Log in to your Zoho Commerce organization.
- Click Settings in the top right corner.
- Navigate to the module for which you want to check the custom field usage.
- Go to the Field Customization tab.
- Click Custom Fields Usage in the top right corner.

Now, you will be able to view the custom field usage for different modules.
Edit a Custom Field
To edit a custom field in Zoho Commerce:
- Log in to your Zoho Commerce organization.
- Click Settings in the top right corner.
- Navigate to the module containing the custom field you want to edit.
- Go to the Field Customization tab.
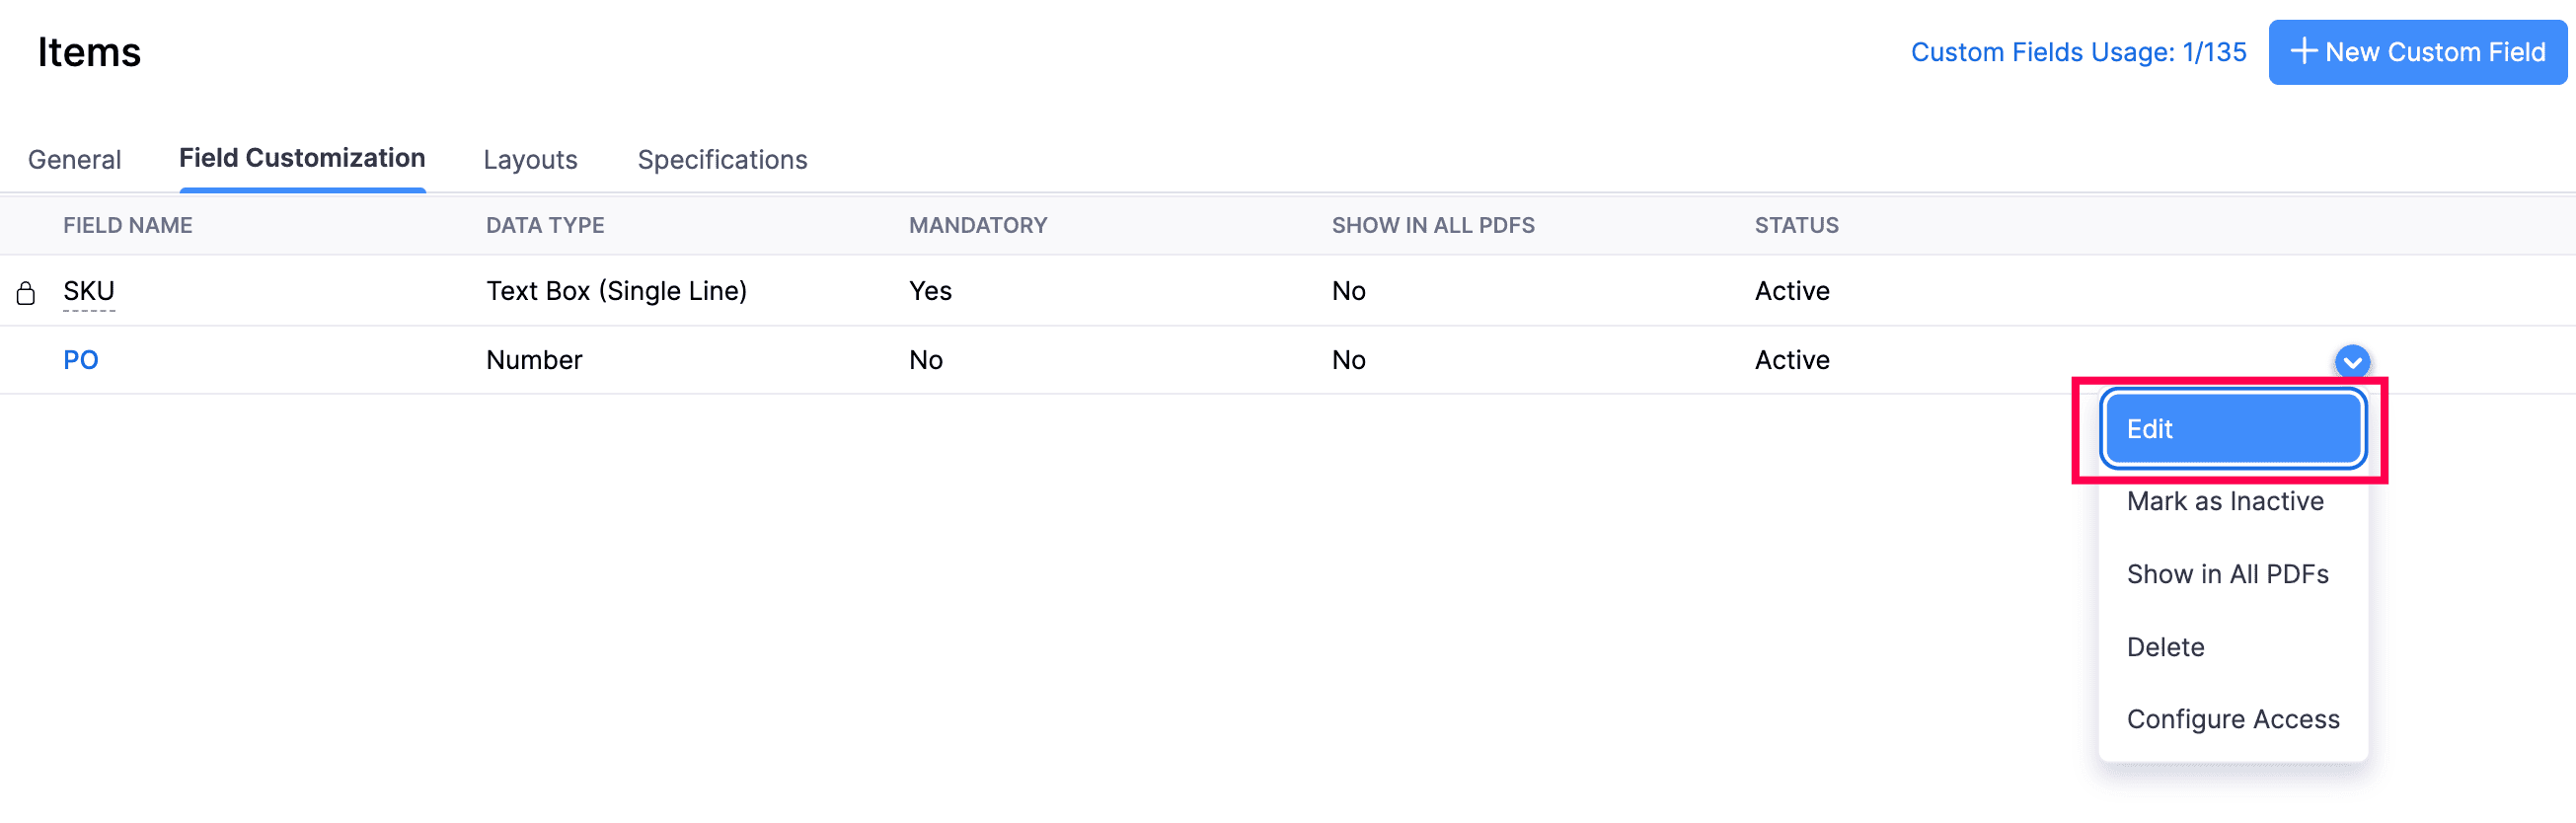
- Hover over the custom field that you want to edit and click the dropdown towards the right.
- Click Edit.
- Click Save to update the required changes.
Note: If you enable Prevent Duplicate Values for an existing custom field with over 10,000 records, updating all records may take some time. You’ll get an in-app notification once it’s done.
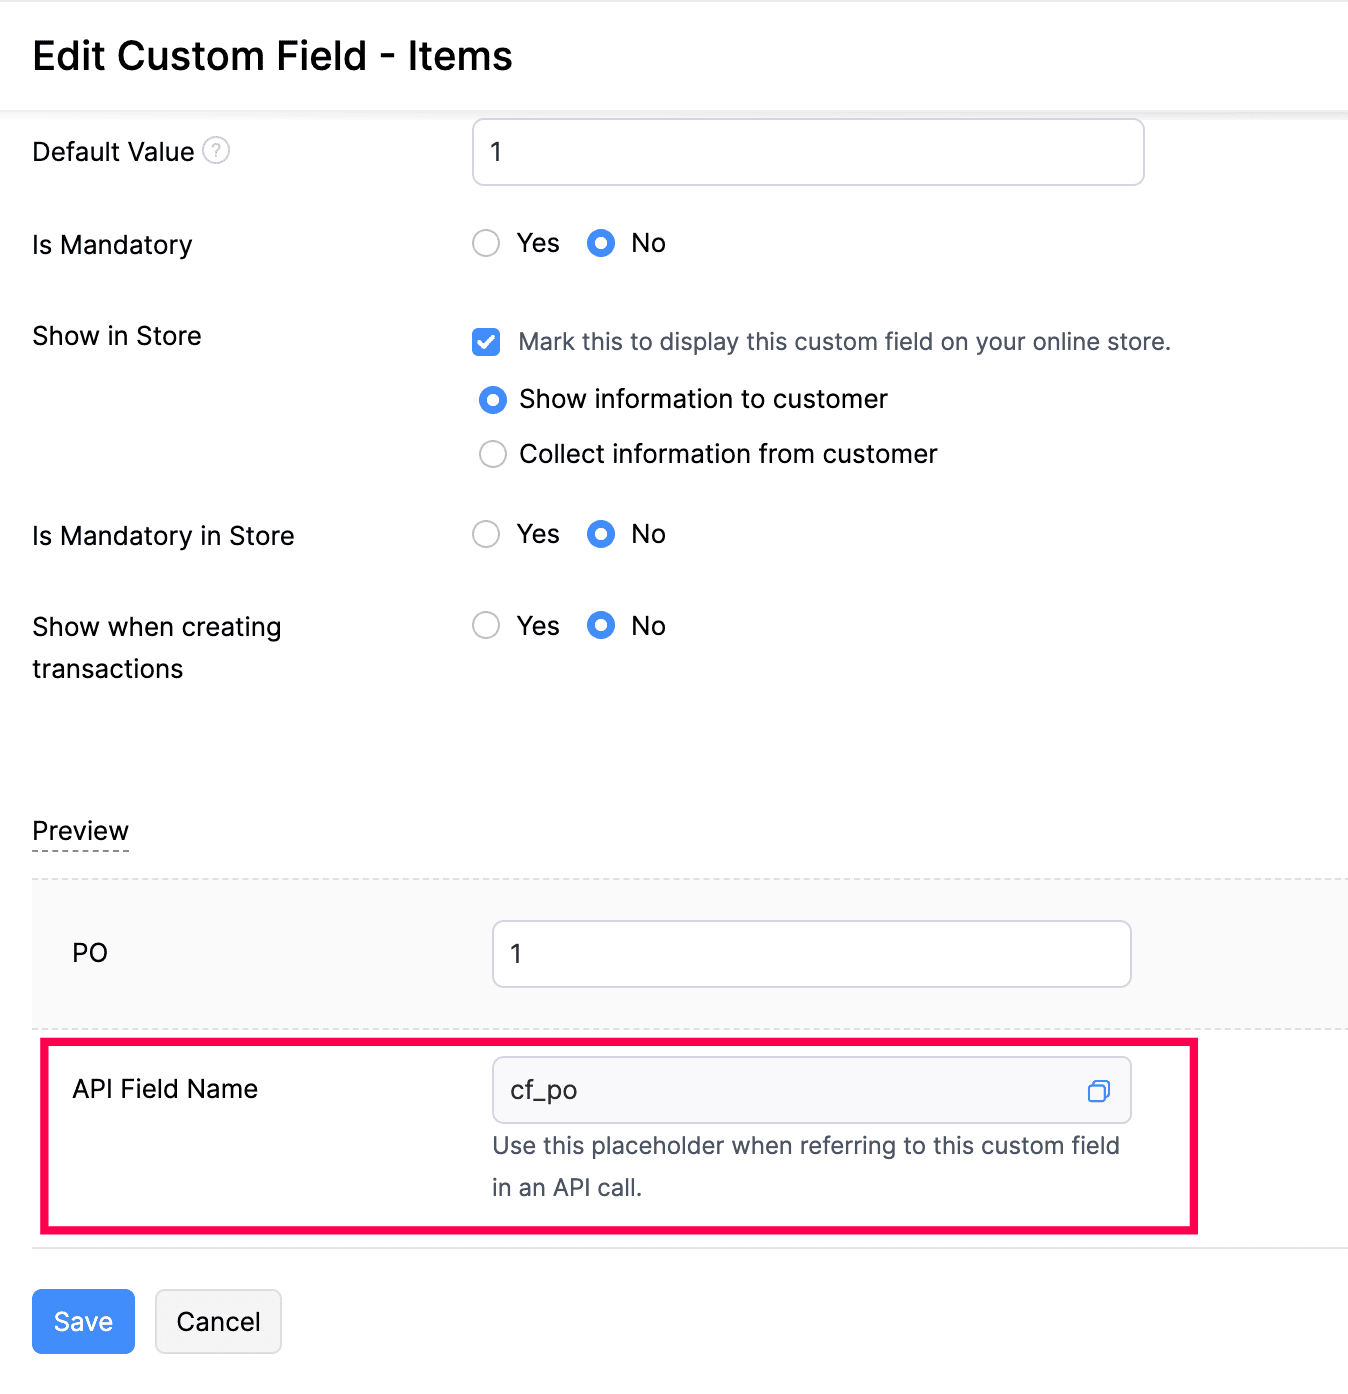
API Field Name
Once you create a custom field, you can edit it to find the API Field Name. This name will be used when referring to this custom field in API calls.
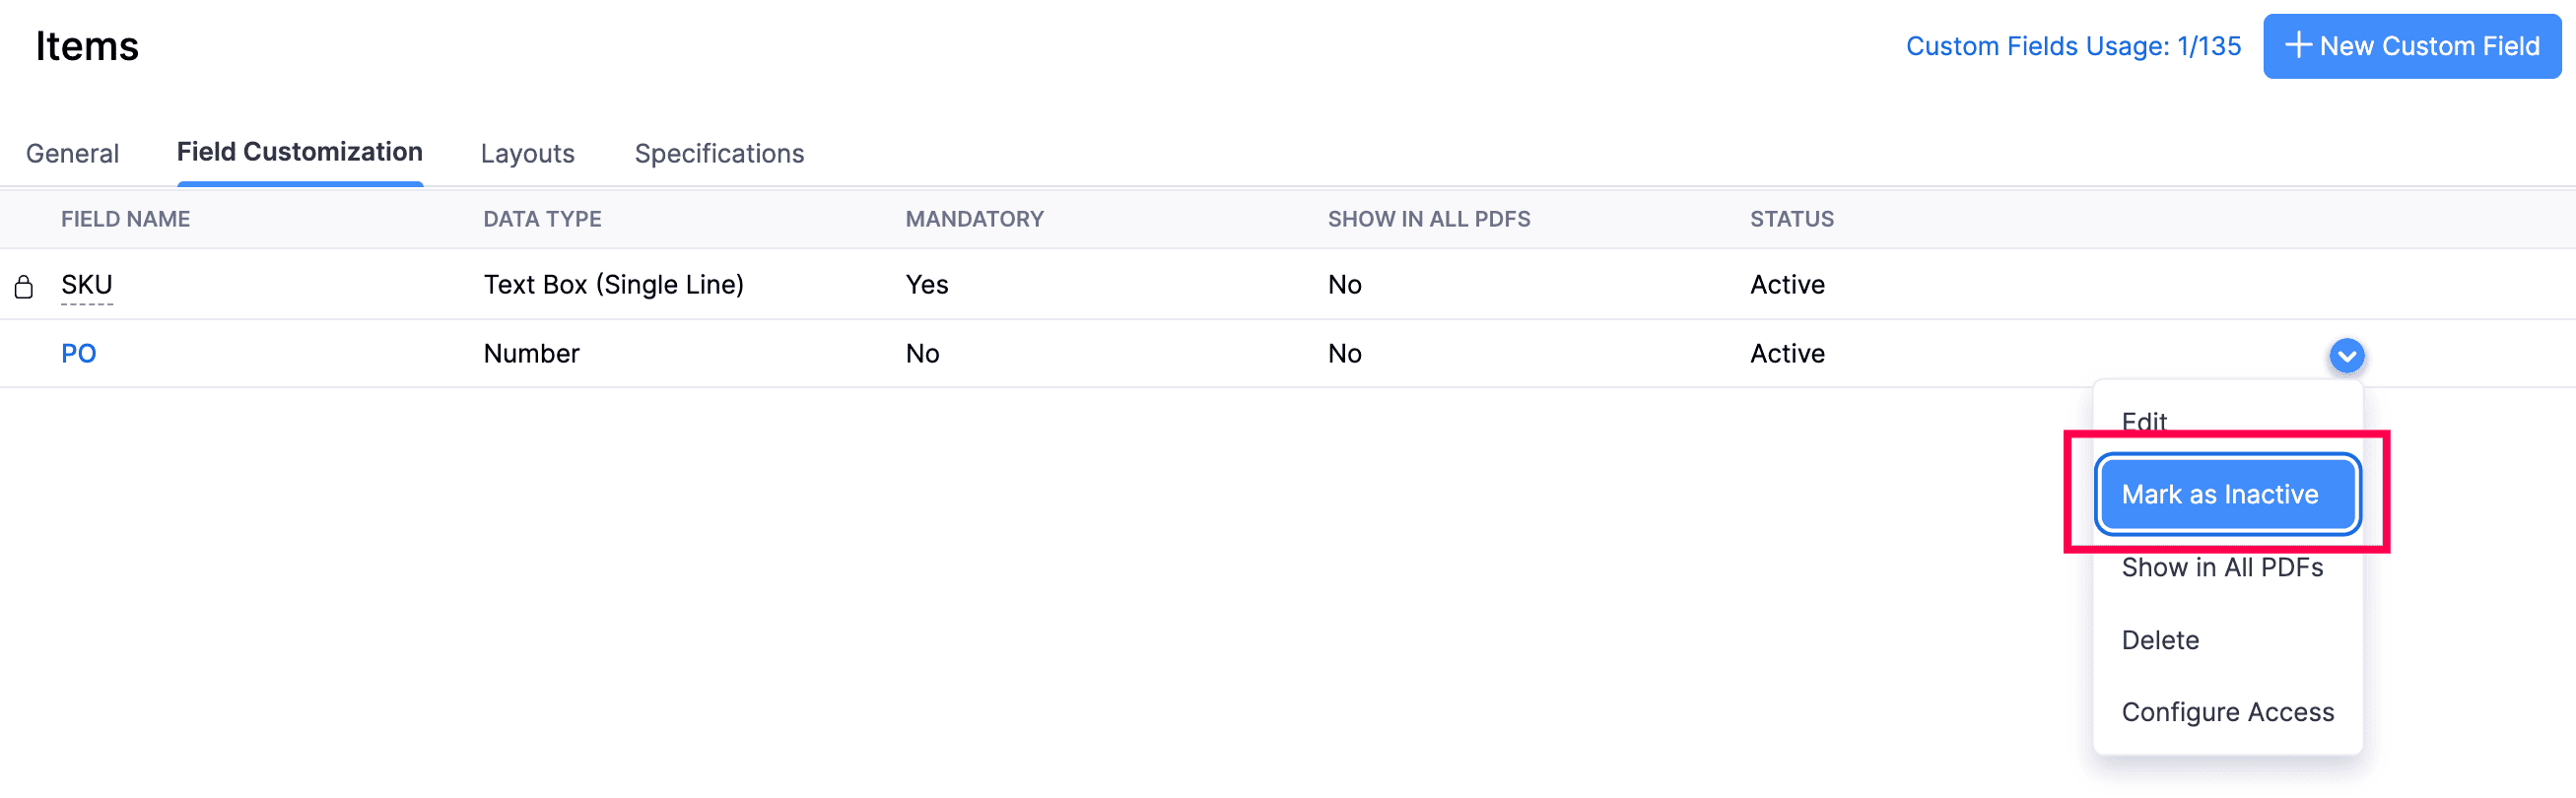
Mark a Field as Inactive or Active
You can manage the visibility of the custom fields by marking them as Active or Inactive. Here’s how:
- Log in to your Zoho Commerce organization.
- Click Settings in the top right corner.
- Navigate to the module containing the custom field you want to mark as inactive.
- Go to the Field Customization tab.
- Hover over the custom field that you want to mark as inactive and click the dropdown towards the right.
- Click Mark as Inactive.
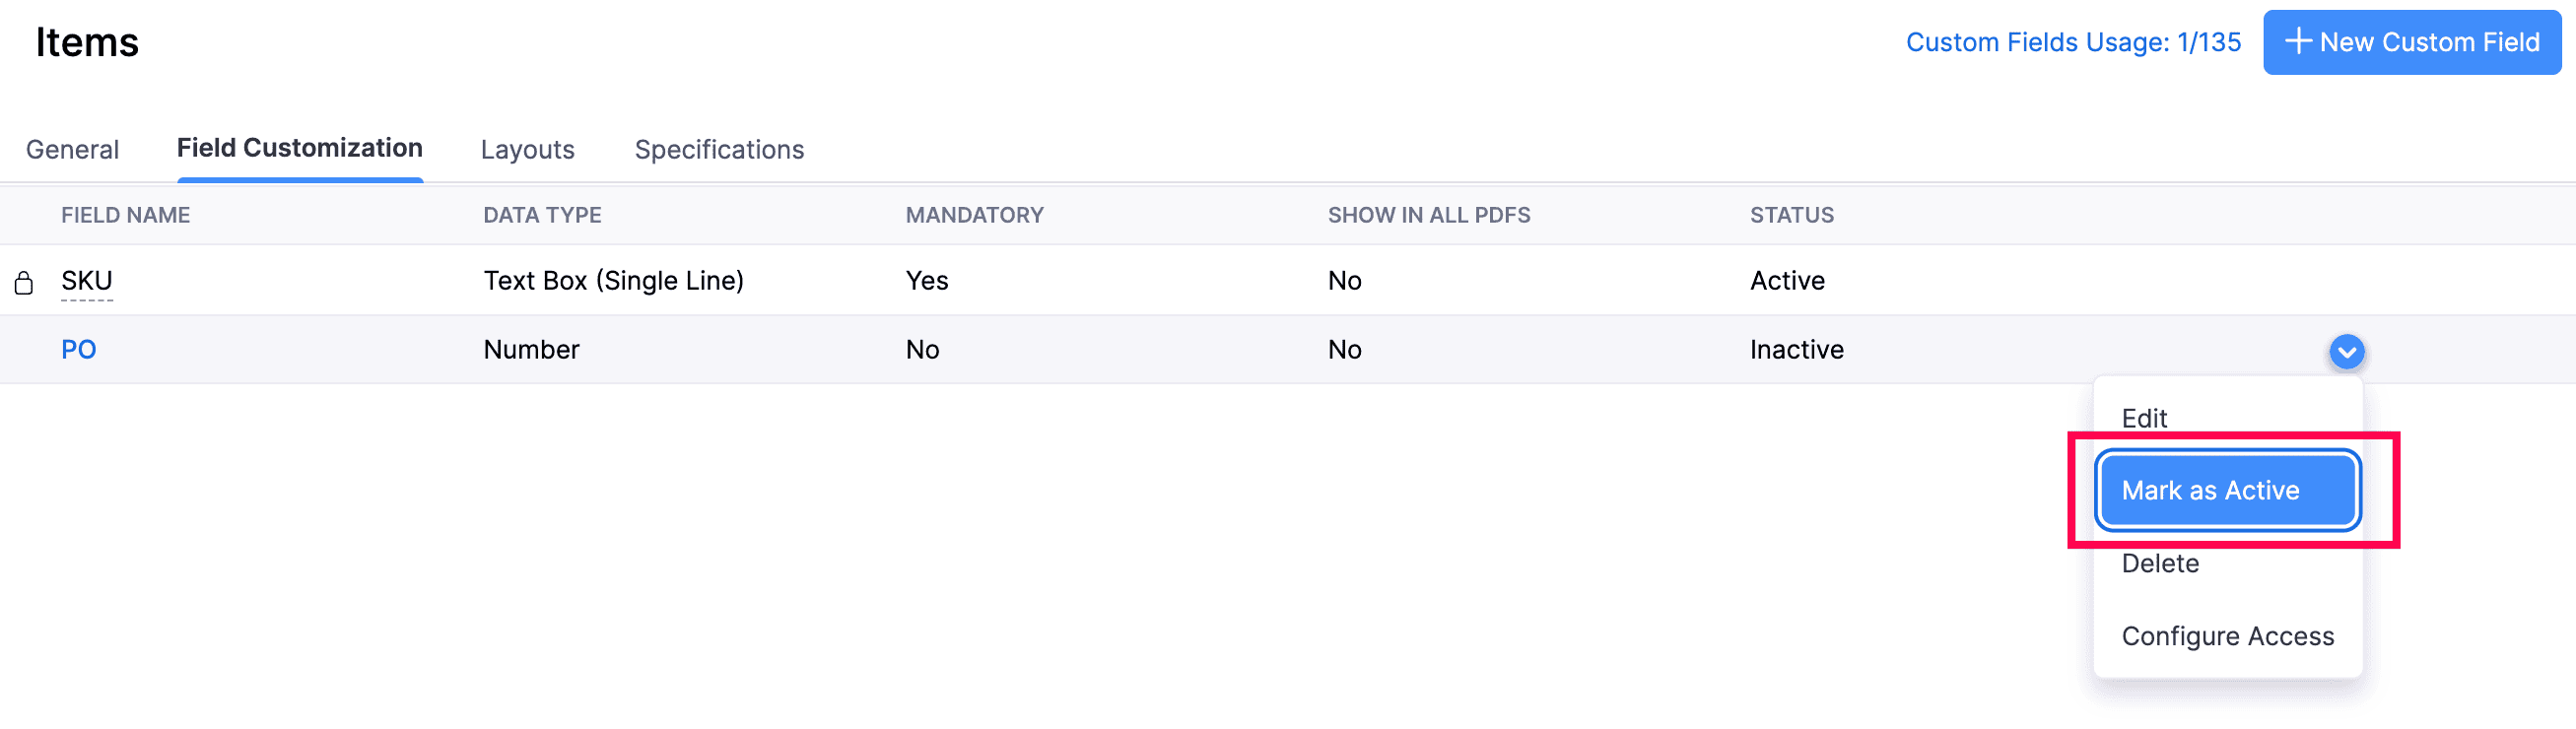
If you have marked a custom field as inactive, you can make it as active again. Here’s how:
- Hover over the custom field you want to mark active and click the dropdown towards the right.
- Click Mark as Active.
Delete a Custom Field
You can delete a custom field if you no longer want to use it. Here’s how:
- Log in to your Zoho Commerce organization.
- Click Settings in the top right corner.
- Navigate to the module containing the field you want to delete*.*
- Go to the Field Customization tab.
- Hover over the custom field that you want to delete and click the dropdown towards the right.
- Click Delete.

- Click Yes to confirm your action.
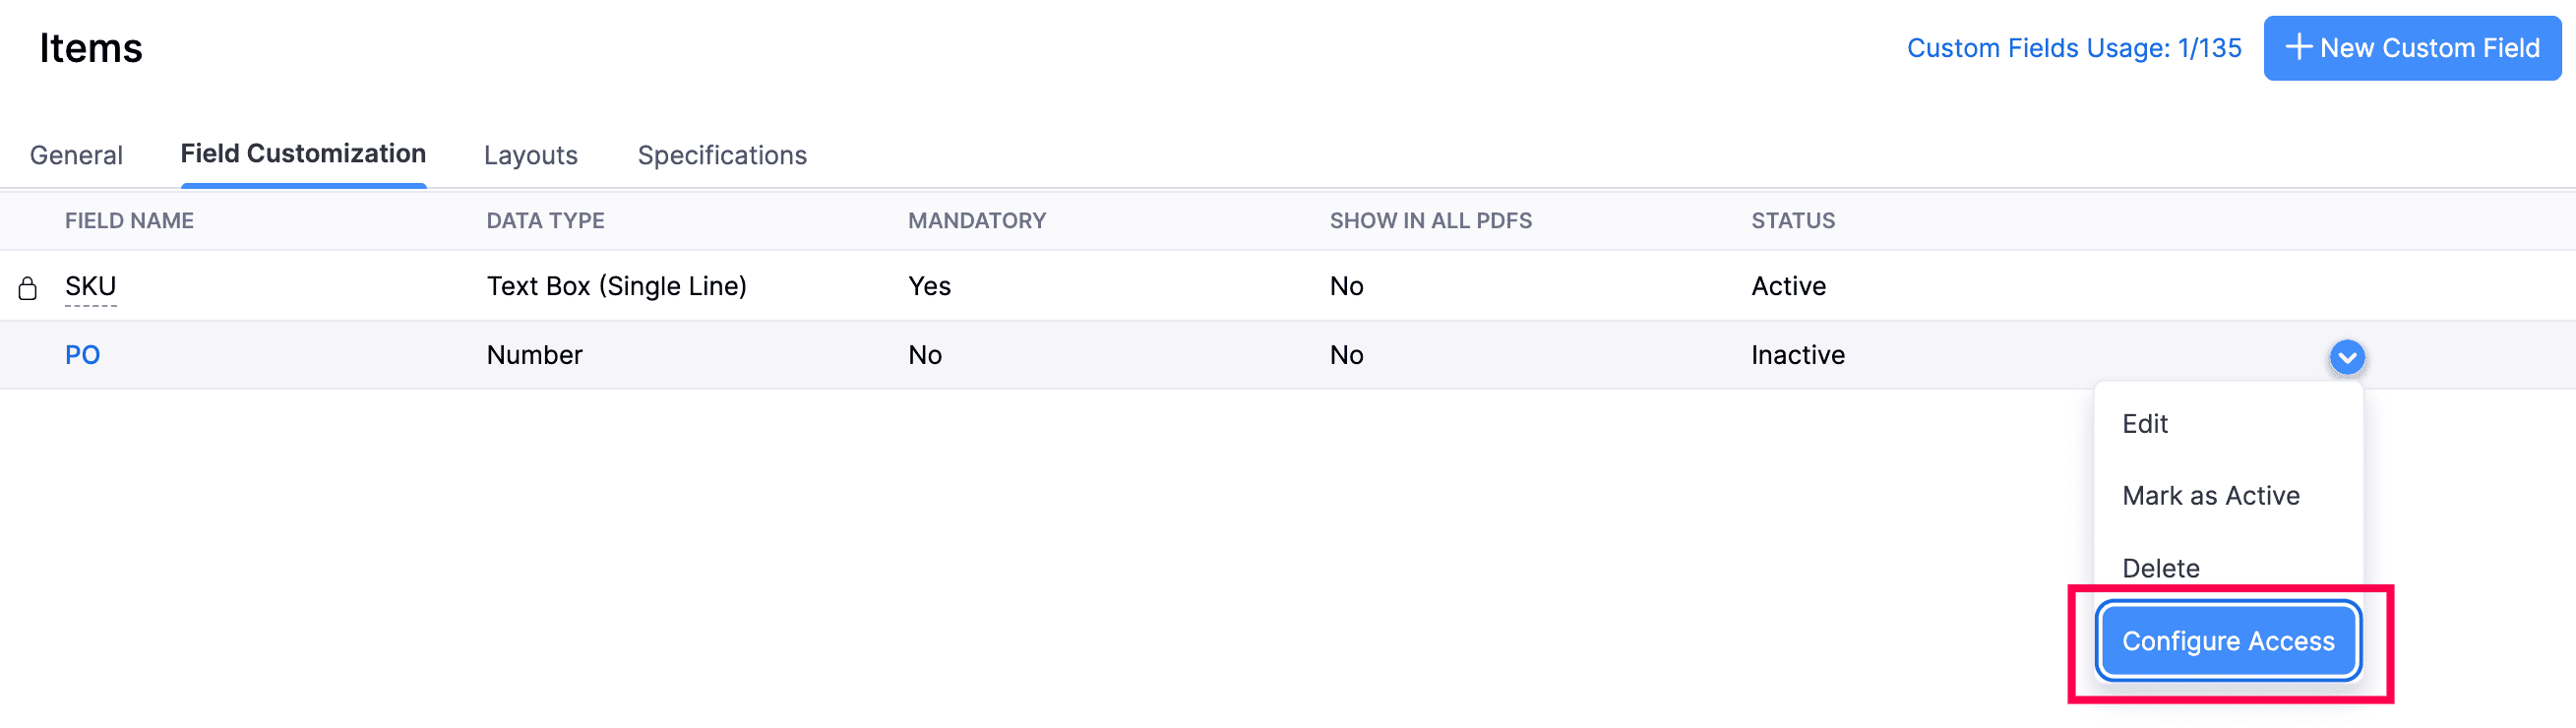
Configure Access
You can configure access for a custom field to control who can view or edit it. Here’s how:
- Log in to your Zoho Commerce organization.
- Click Settings in the top right corner.
- Navigate to the module containing the custom field for which you want to configure access*.*
- Go to the Field Customization tab.
- Hover over the custom field that you want to configure access to and click the dropdown towards the right.
- Click Configure Access.
- Choose the appropriate access level for the required roles.
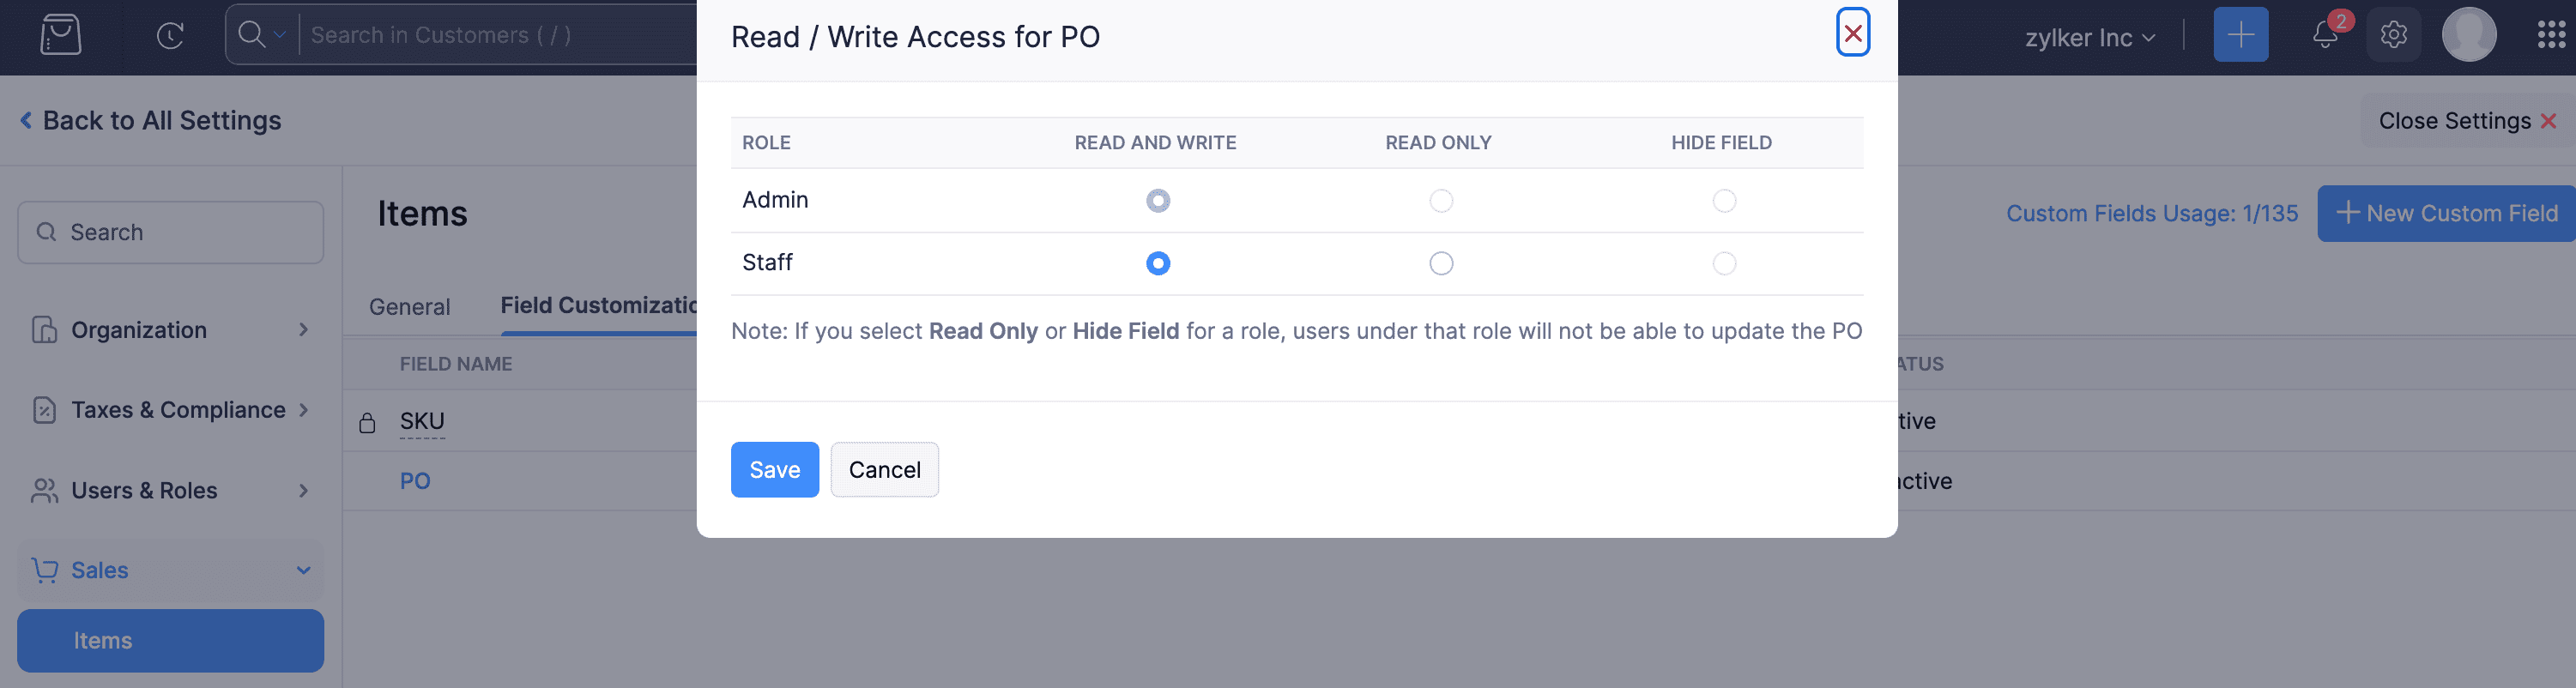
- Click Save.
Layouts
You can create layouts in the Items module to group specific custom fields, making it easier to add them to your product pages in Zoho Commerce.
To add a layout:
- Log in to your Zoho Commerce organization.
- Click Settings in the top right corner.
- Navigate to the Items under Sales.
- Go to the Layouts tab.
- Click + Add Layout in the top right corner.

- Enter the Layout Name, add a Description, and select the custom fields that should be displayed in this layout. {< resize-image “Save Layout” “/commerce/help/items-preferences/save-layout.png” “900” >}}
- Click Save.
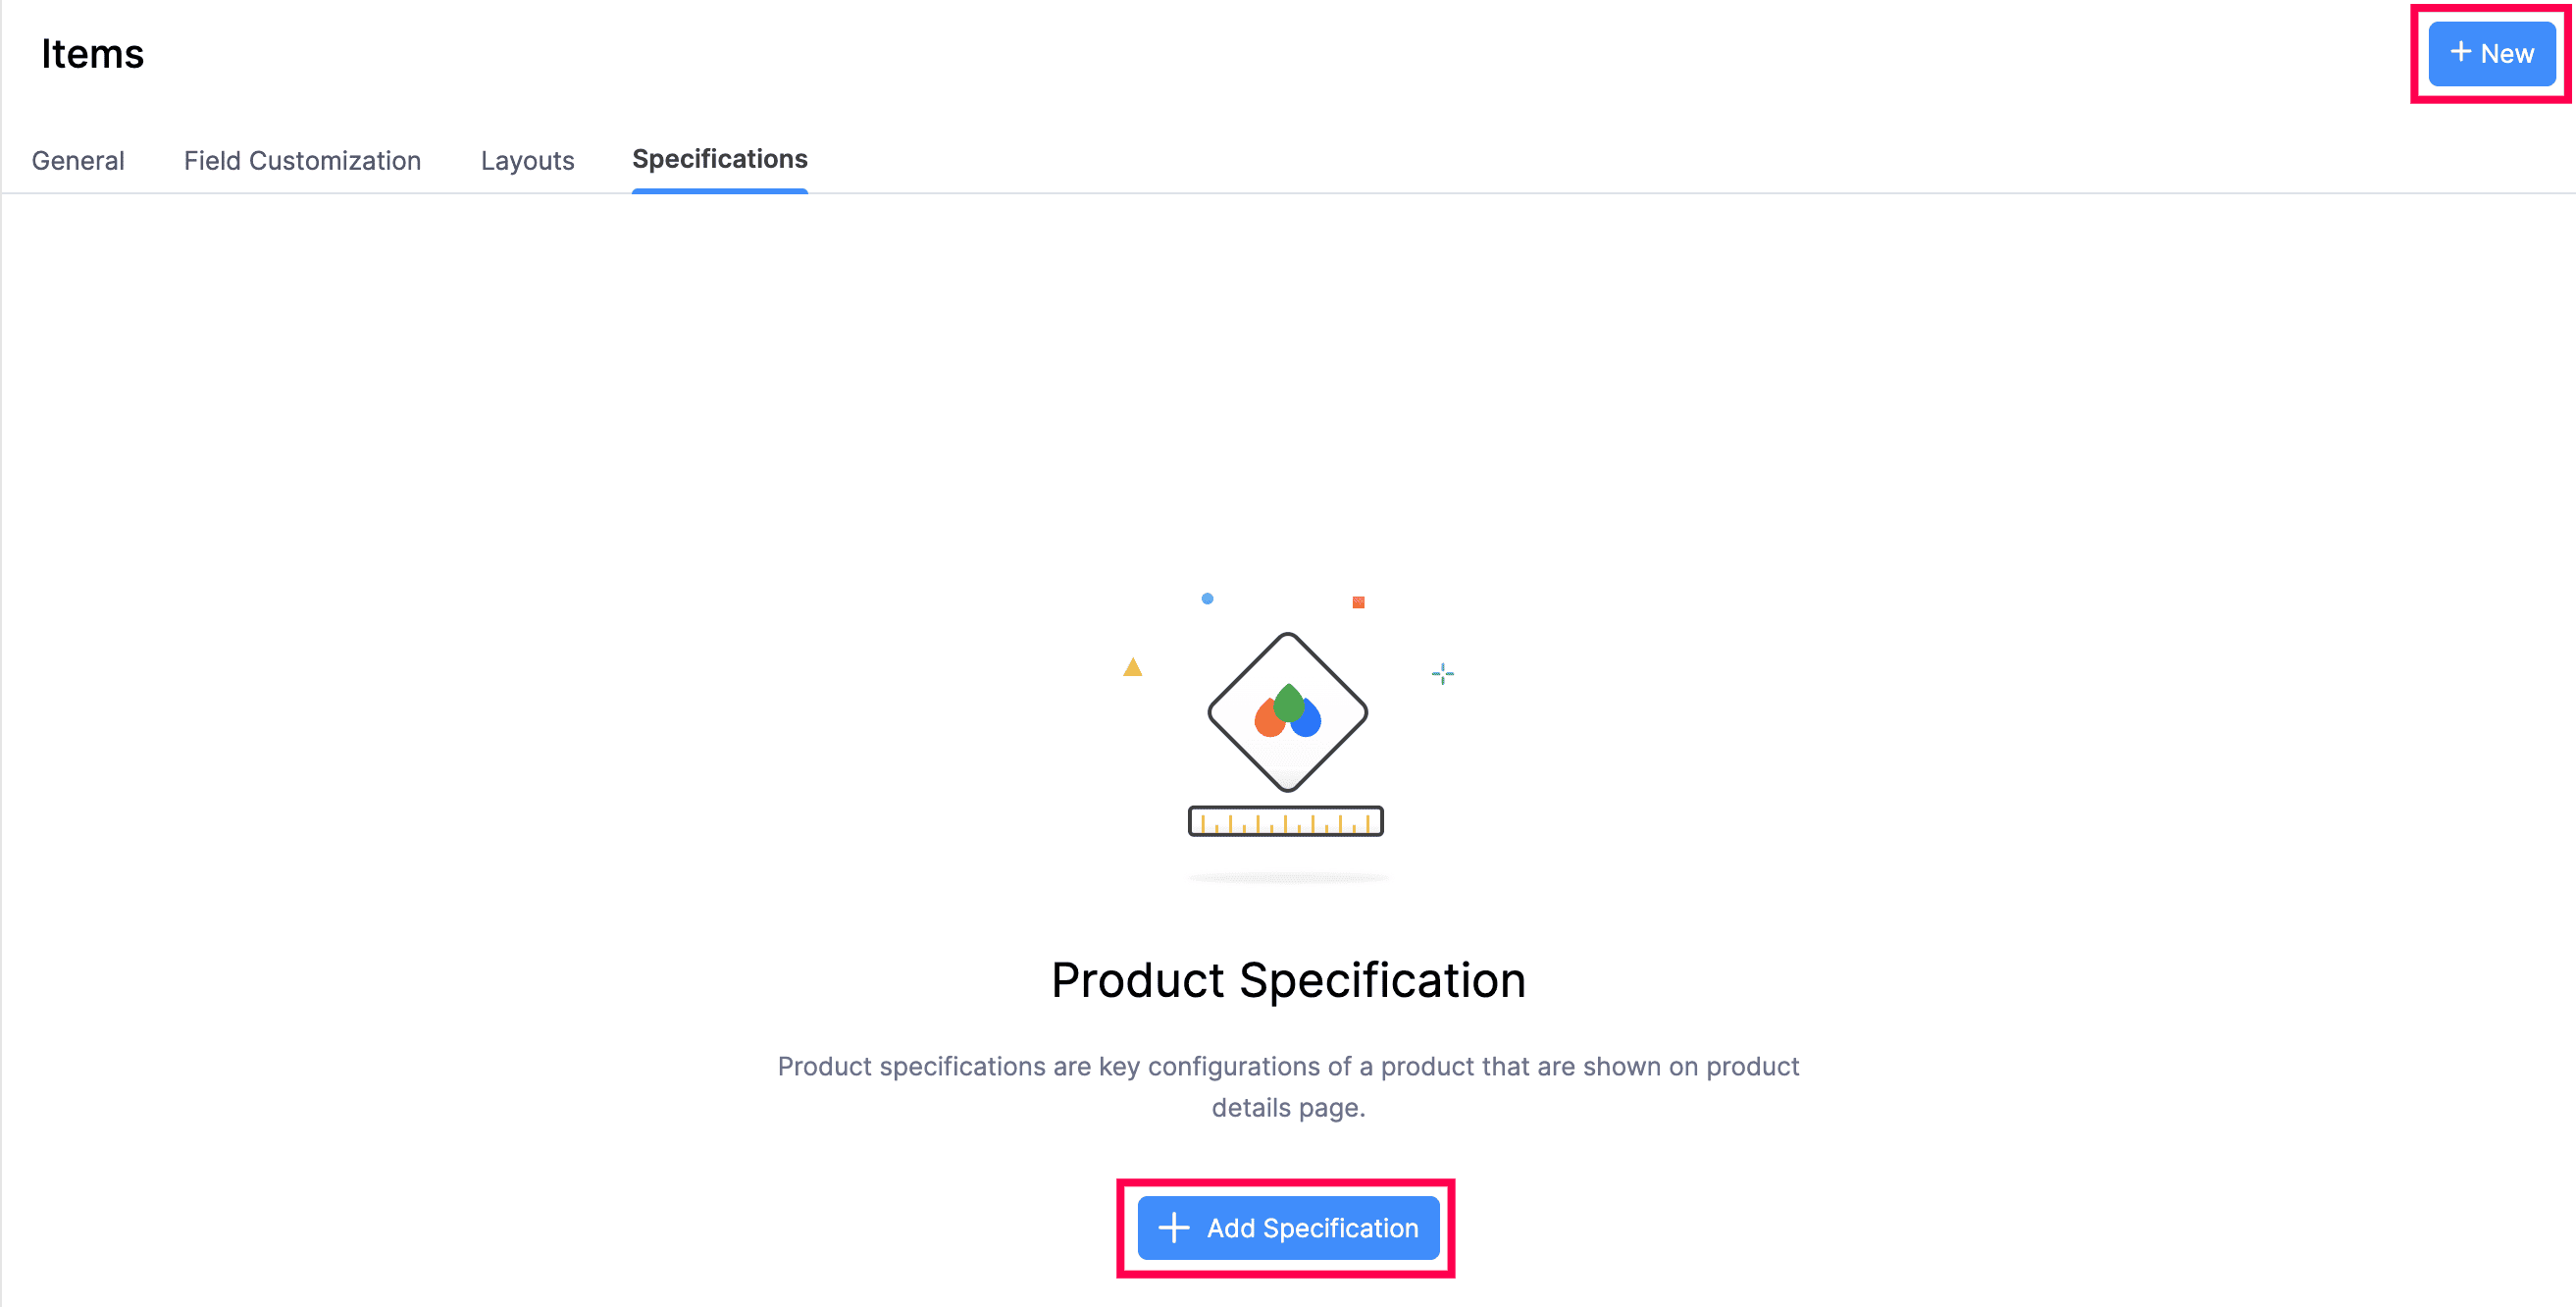
Specifications
You can add specifications in the Items module by configuring key details of a product that are shown on the product details page in Zoho Commerce.
To add specifications:
- Log in to your Zoho Commerce organization.
- Click Settings in the top right corner.
- Navigate to the Items under Sales.
- Go to the Specifications tab.
- Click + Add in the top right corner.
- Under Item Specification, enter the Group Name, Field Name, and Values.
- Click Add Group and repeat the steps to add more specifications as needed.
- Click Save to apply the specifications to the product page.