Billing Settings in the Catalyst Console
As mentioned earlier, the Catalyst console enables you to keep track of your Catalyst usage, provides billing information, and helps you manage your budgets. These features are available in different sections under Billing in the settings. Let’s look at them one by one.
Overview
The Overview section provides a brief summary of your Catalyst usage and your payment history.
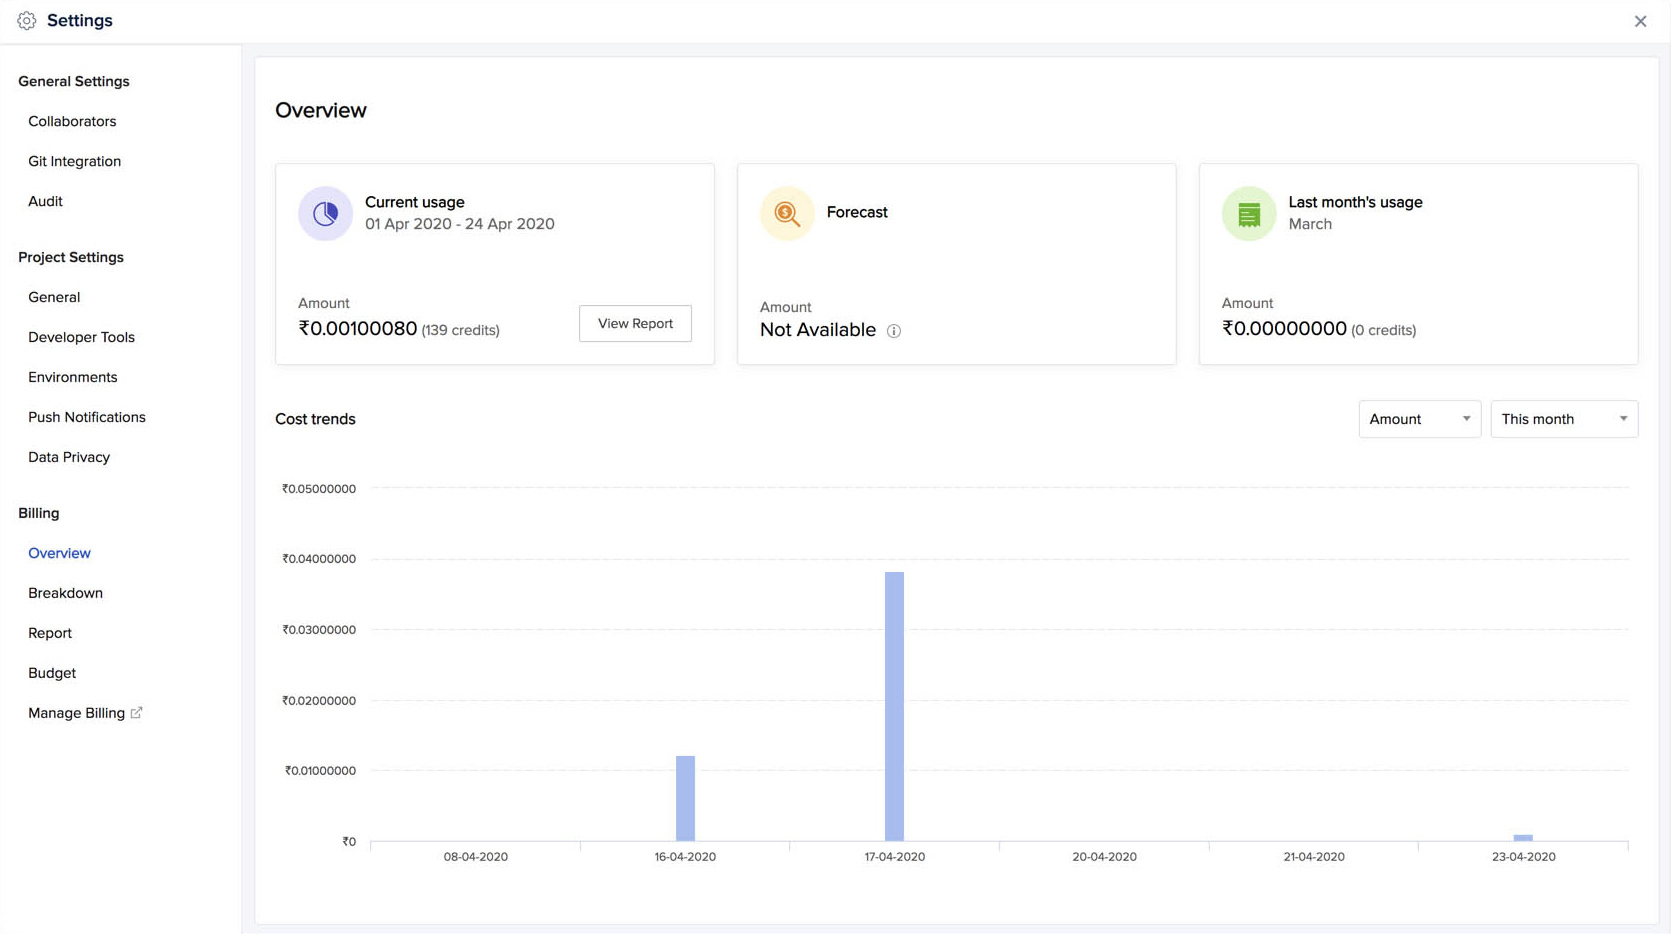
You can check your ongoing bill amount for the current month under the Current Usage tile, both as amount and its equivalence in credits. This value is automatically updated once every 30 minutes, and the latest value based on your usage is displayed.
You can view a detailed report of your usage by clicking View Report. This will open the Report section of Billing.
Forecast analyzes the cost that could be incurred for the current month based on your usage information of the previous month. This usage prediction enables you to get an estimation of your expenditure in Catalyst, and allows you to plan your activities. If the data of the previous month is not available in Catalyst, Forecast will not be able to predict the current month’s usage.
Last Month’s Usage displays the usage information of the previous month in amount and credits.
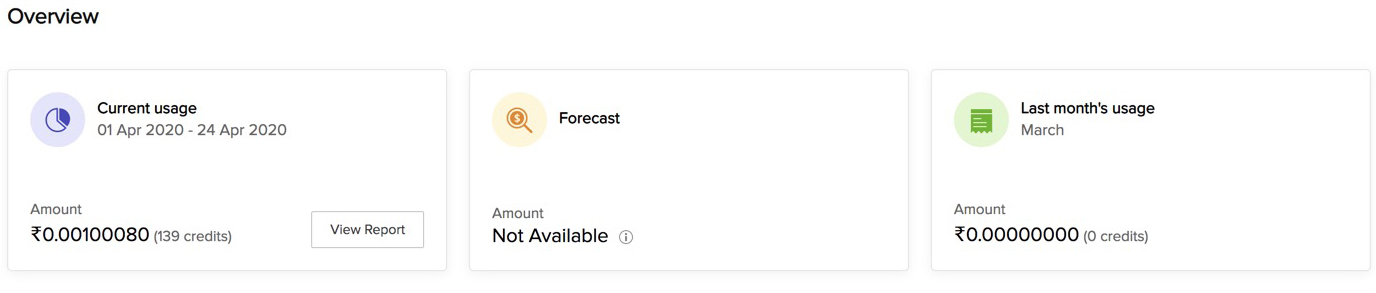
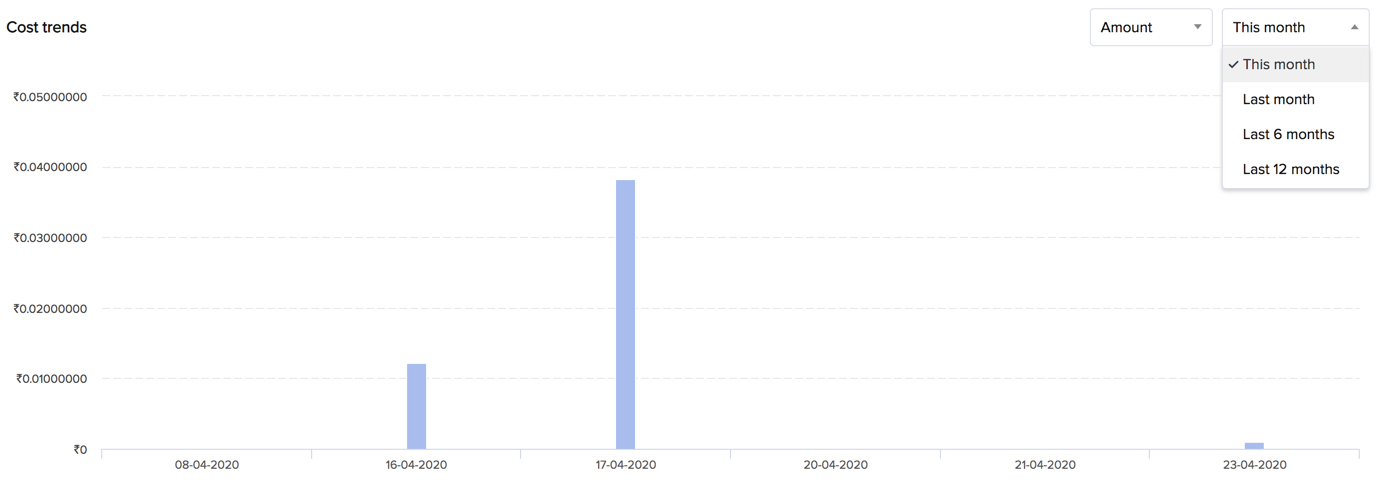
The Cost Trends graph displays the cost information incurred during various time periods in the form of a bar graph. The graph shows the usage in terms of amount or credits for every day of the selected time period.
You can change the unit by selecting Amount or Credit from the first dropdown list.
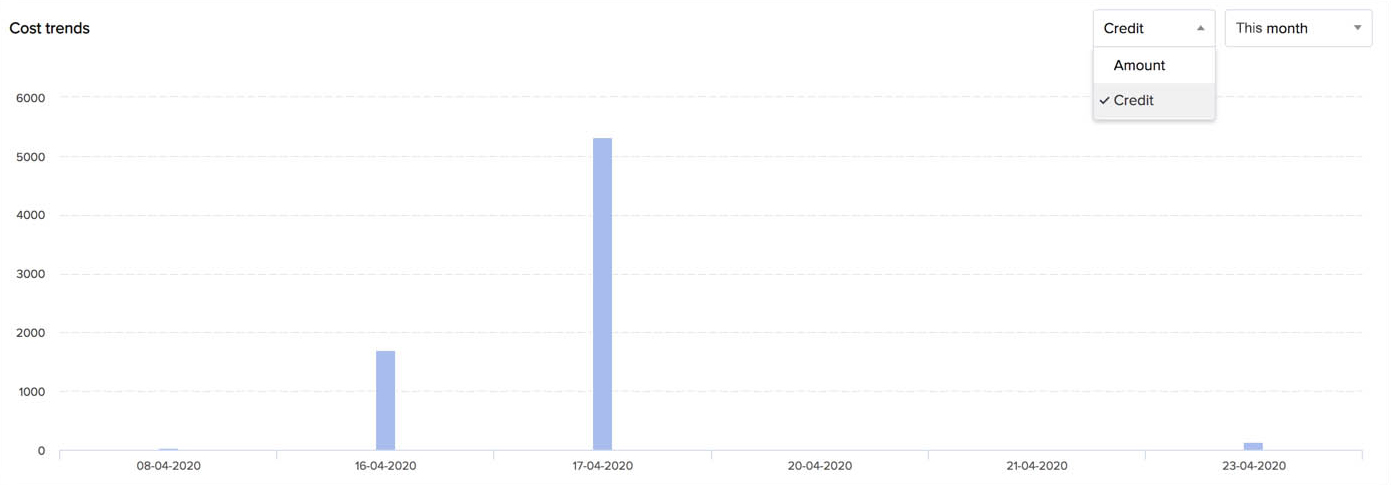
You can also use the second dropdown list to select the time period for which you want the graph to display cost information.
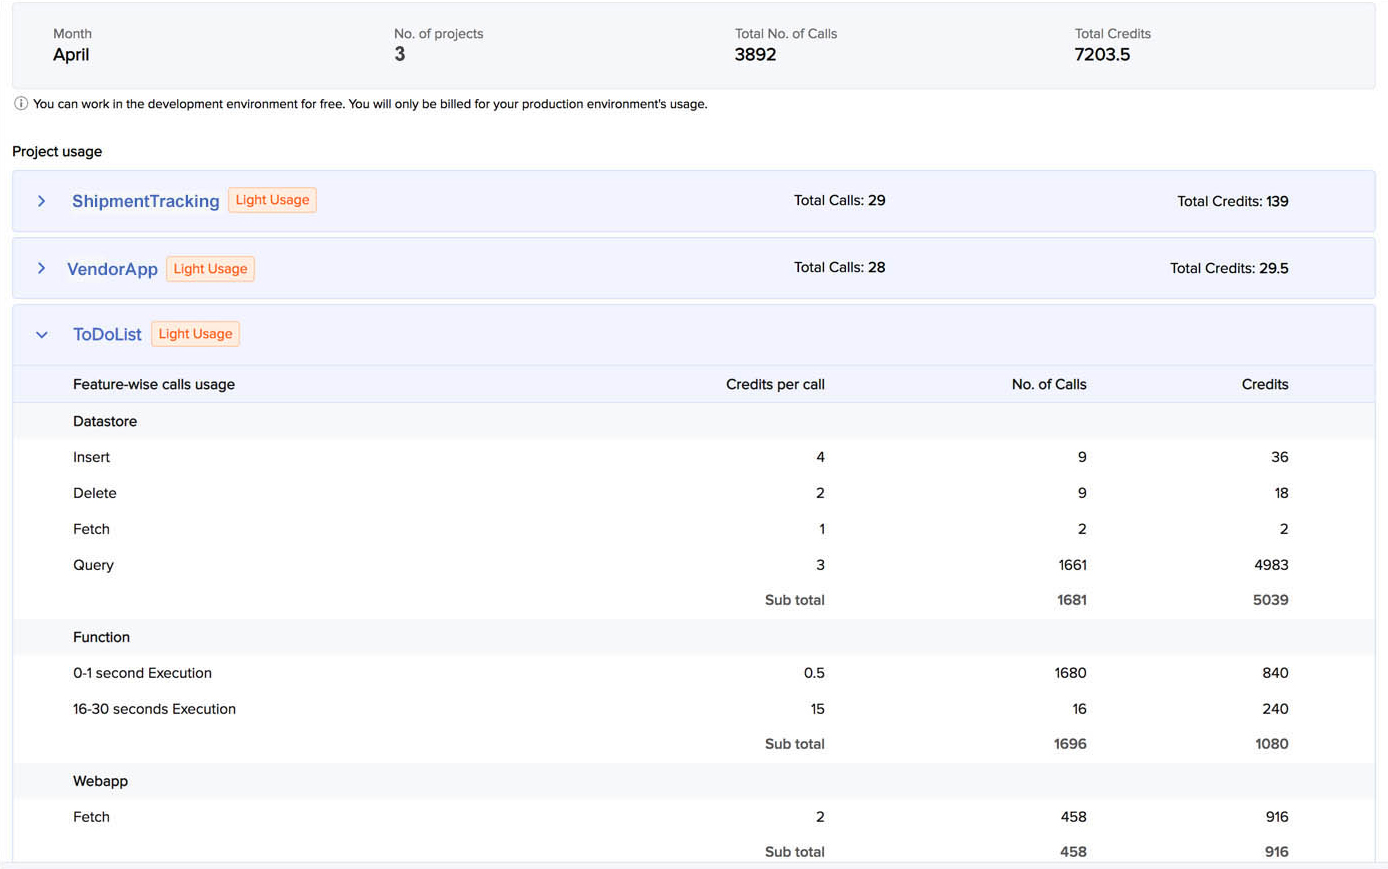
Breakdown
The Breakdown section displays the usage and cost breakdown for each of your Catalyst projects individually.
It provides detailed information on the component calls made in every feature, the price per call, the total number of calls made, and the amount charged for each project. The pricing plan of each project is also displayed.
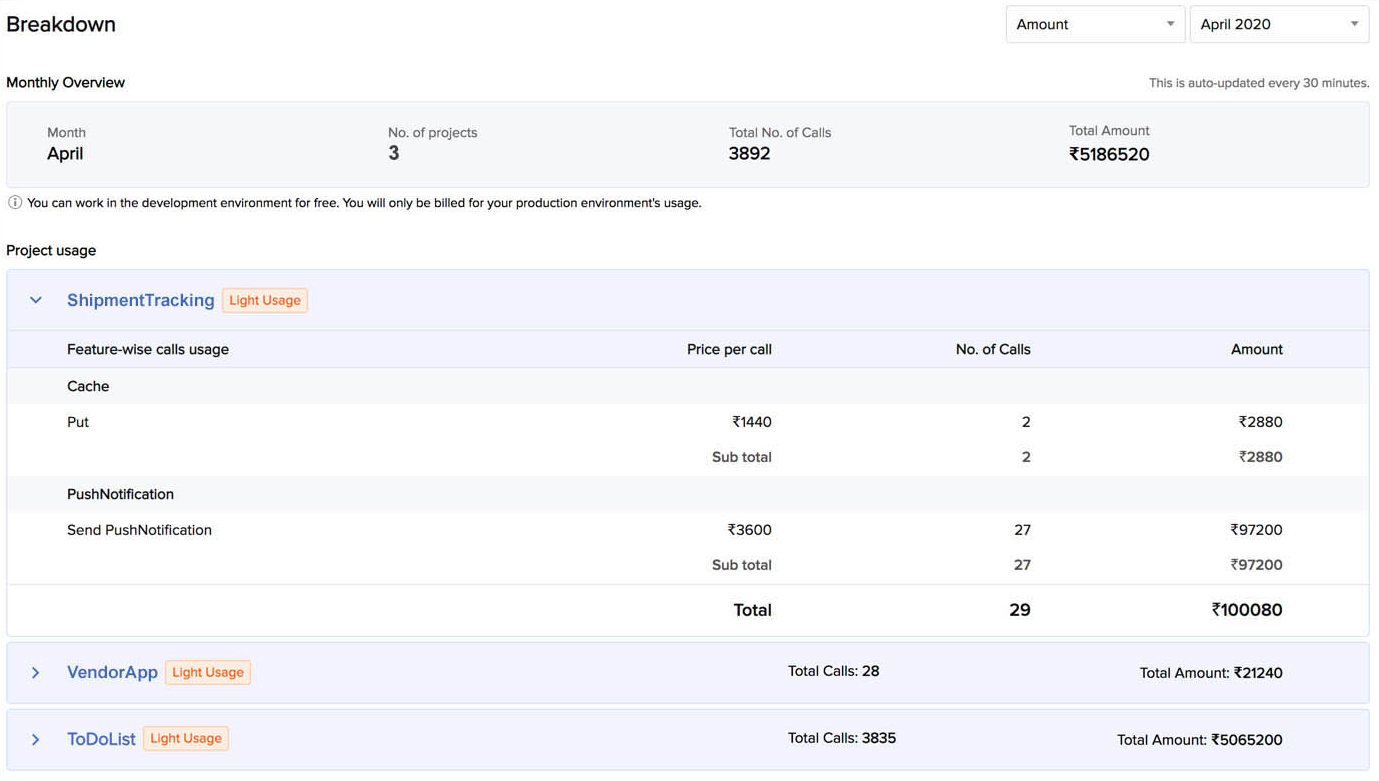
You can choose to view the cost breakdown in terms of amount or credits by selecting the unit from the first dropdown list.

You can also select the month for which you need to access the information from the second dropdown list.

The Monthly Overview section displays the overview for the month and in the unit that you select. The Project Usage section also displays the cost breakdown for the month and in the unit that you select.
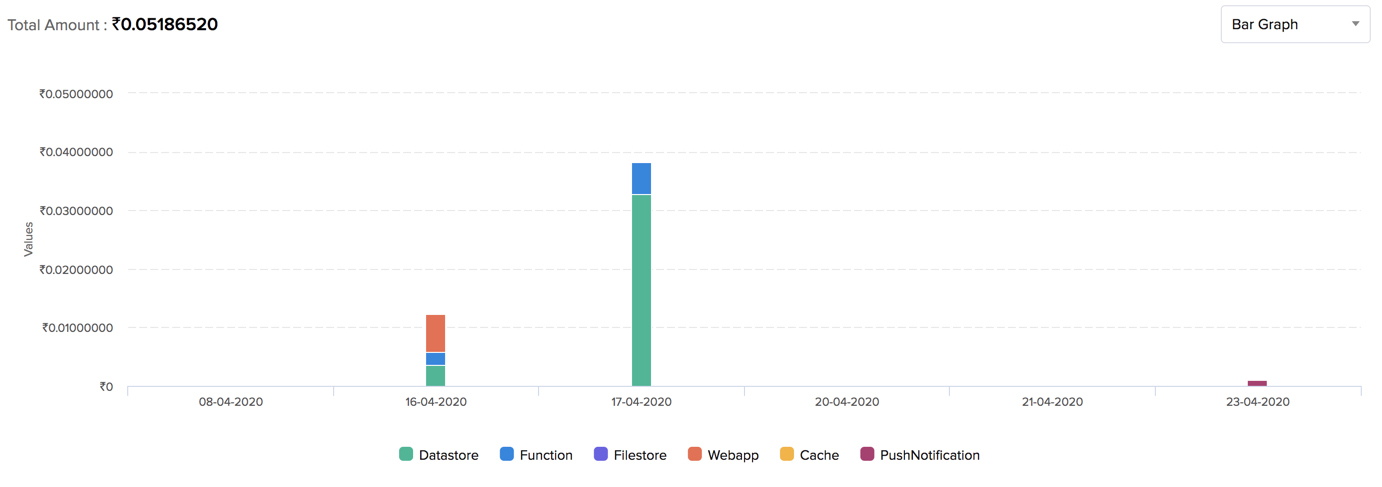
Report
The Report section provides detailed insight into your Catalyst usage based on various criteria that you select. You can access information about your usage and expenditure based on the components, individual projects, and time periods that you select.
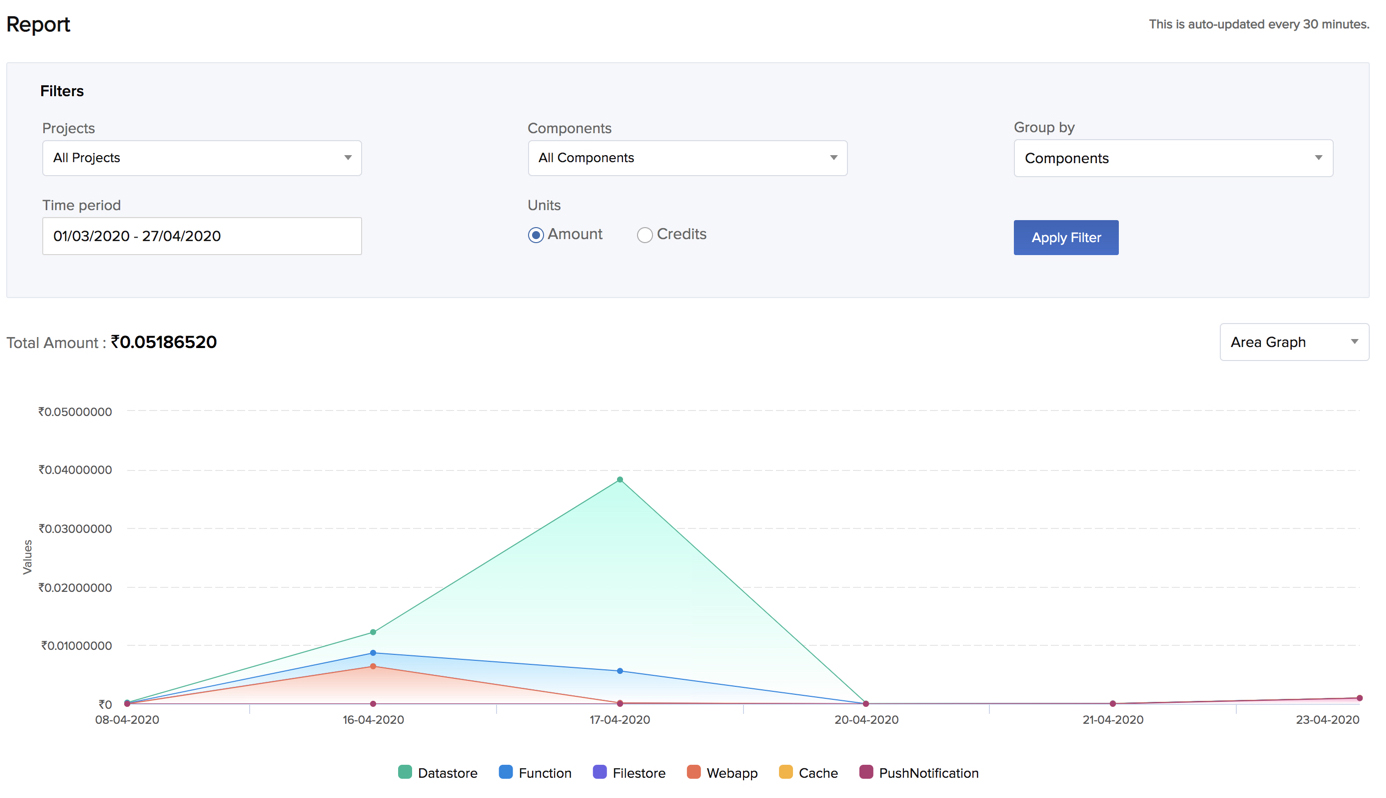
You can select the individual projects for which you need to access information from the Projects dropdown list in the Filters section.

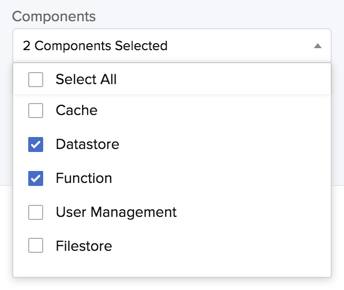
You can view the usage of particular components alone by selecting them from the Components dropdown list.
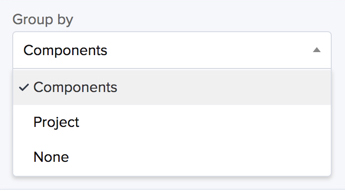
You can view the graph by the projects or by the components.
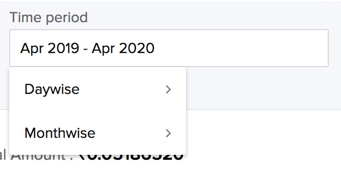
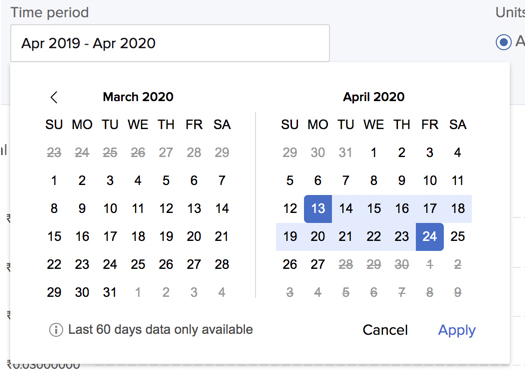
To view the graph for a time period between specific dates, select Daywise from the Time Period dropdown list.
Now, select the dates for which you need to access information from the calender and click Apply.
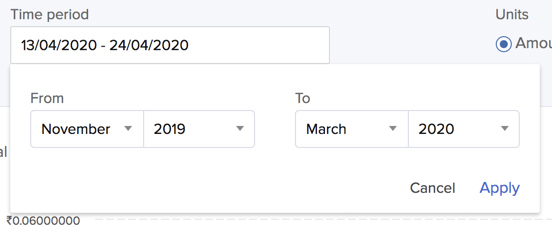
To view the graph for a time period between specific months, select Monthwise from the dropdown list and select the months. Click Apply.
You can also select Amount or Credits to view the graph in. After you apply all the filters, click Apply Filter. The graph displays the report based on these filters.
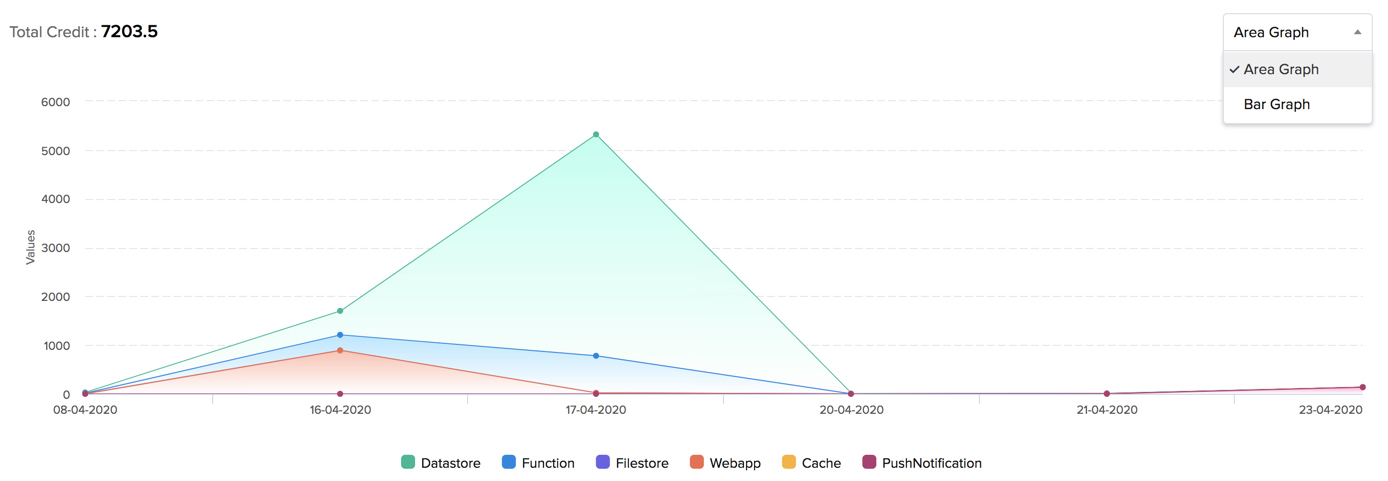
You can view the report in the form of an area graph or a bar graph.
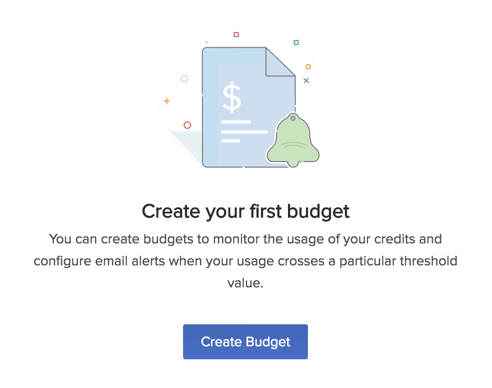
Budgets
You can create budgets in Catalyst to set usage limits of amount or Catalyst credits, and configure email alerts when your usage crosses a particular threshold value. Budgets help you monitor your activities in Catalyst and allow you to plan your expenses.
Catalyst also enables you to automate the disabling of the production environment of an application when its usage hits a particular threshold value.
Points to remember:
-
When you enable the Disable Production option while setting a threshold value for a budget, Catalyst will automatically disable the production environment of the selected project when the threshold is reached, and will alert you of it through an email.
-
You can re-enable the production environment of a project that was disabled upon reaching a specified threshold. It will not get re-enabled automatically.
-
Catalyst runs a scheduler once every 30 minutes to obtain the current credit consumption or charges of a project. Therefore, the checks for crossing a specified threshold are made only once every 30 minutes. If your project reaches a configured threshold in between these checks, Catalyst will not detect it until the scheduler’s next run.
-
If you re-enable the production environment after it has automatically been disabled because of threshold limits, it will not get disabled again in the next 30 minutes during the next scheduler check. It will only get disabled again after the end of the current month, provided you have not modified the threshold limits.
-
In case you modify the threshold value after the production gets disabled, the next scheduler check will check for threshold limits and will disable the production again in case it is reached.
-
If you have multiple budgets configured for a single project, Catalyst will disable the production environment for all the budgets the Disable Production has been enabled for, after reaching each specified threshold limit.
Create a Budget
To create a budget:
-
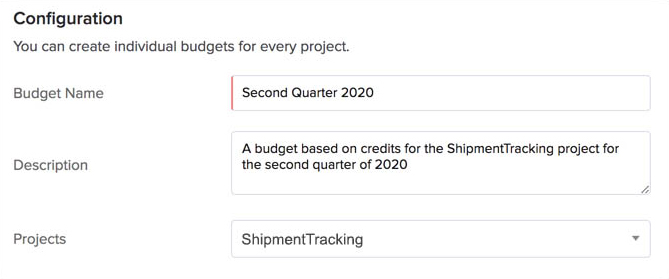
Click Create Budget from the Budget section under Billing in settings.
This will open the budget creation page. -
Enter a name and a description for the budget. Select a project that the budget should apply to. You can apply this budget for all projects as well.
-
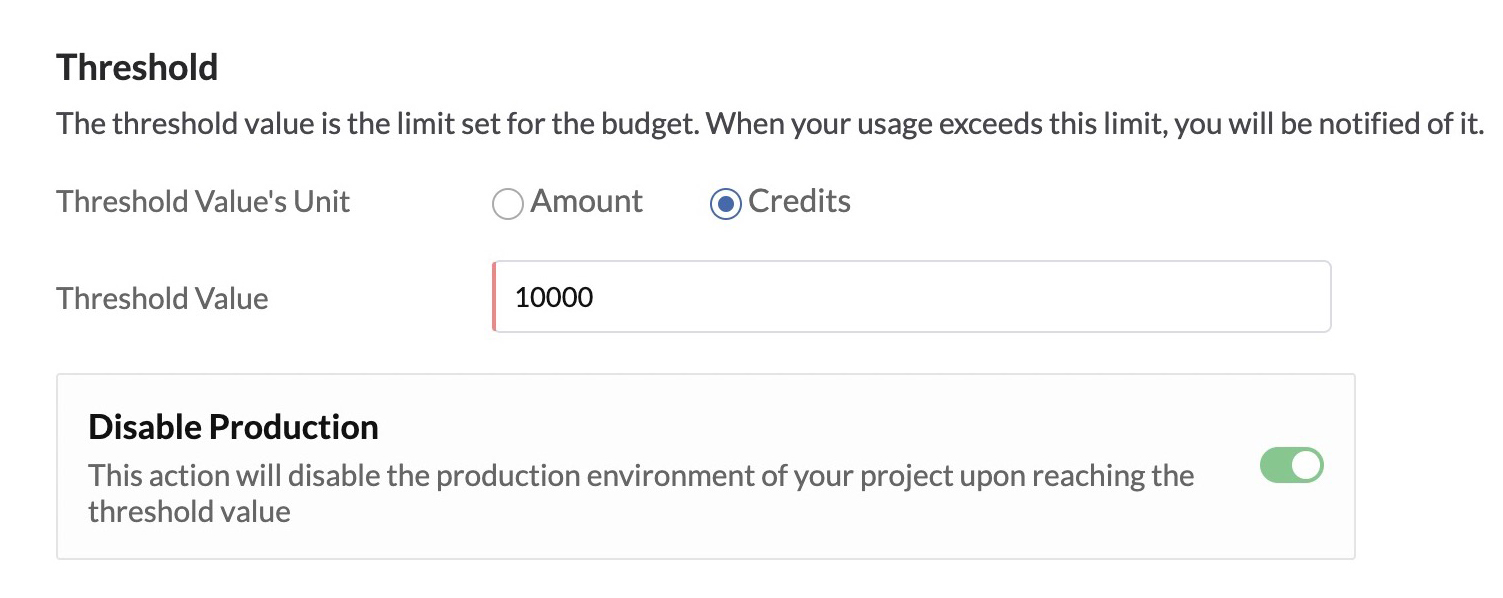
Select Amount or Credits and enter the threshold value for it. This is the maximum value set for your budget.
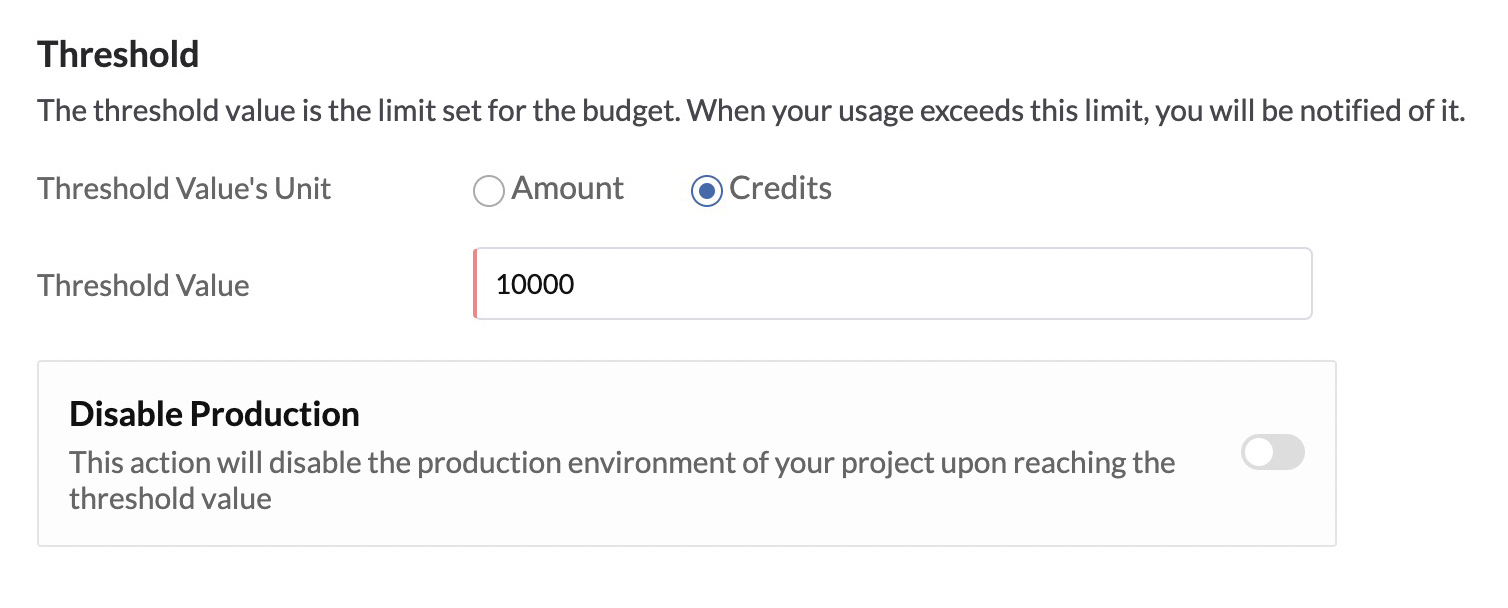
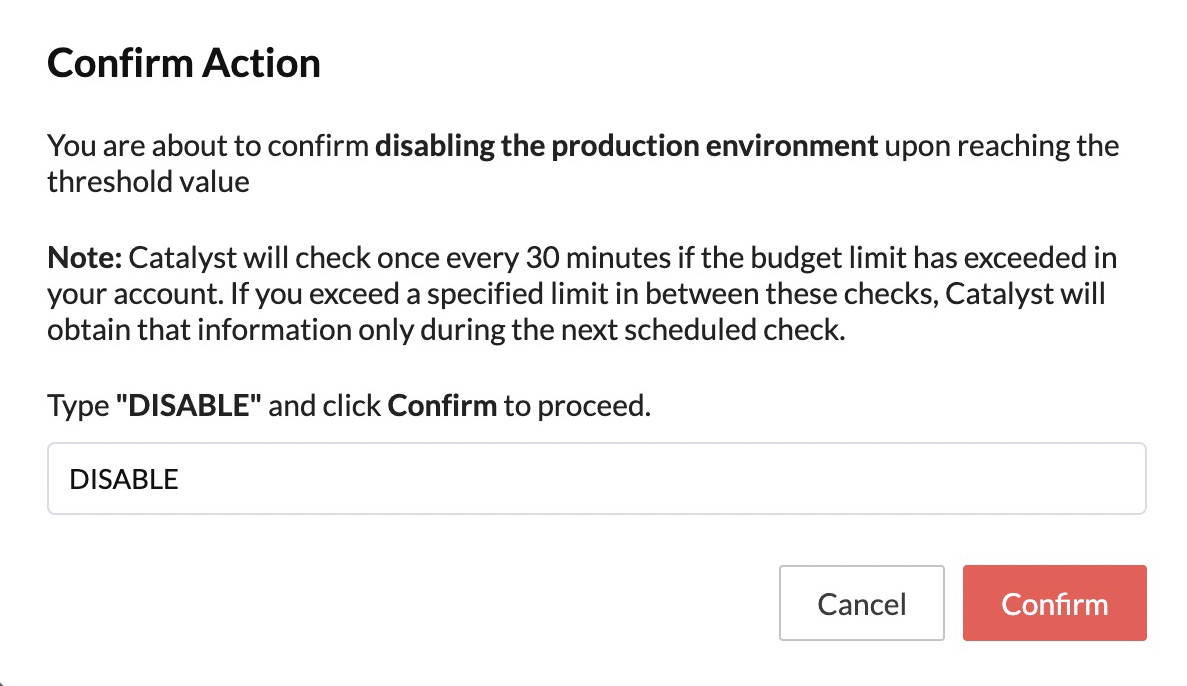
You can enable the Disable Production option to have the production environment automatically disabled upon reaching this threshold. This will open a pop-up. Enter “DISABLE” and click Confirm to confirm the action.
-
You can now create rules that enable you to configure email alerts to be sent when your usage reaches a certain percentage of the threshold value. You can also configure this based on the amount or number of credits, depending on if you defined the threshold based on the amount or credits consumed.
Enter a percentage or an amount/credit value in the text box. The amount/credit value is calculated automatically in the first case, or the percentage is calculated automatically in the second case, and is displayed.
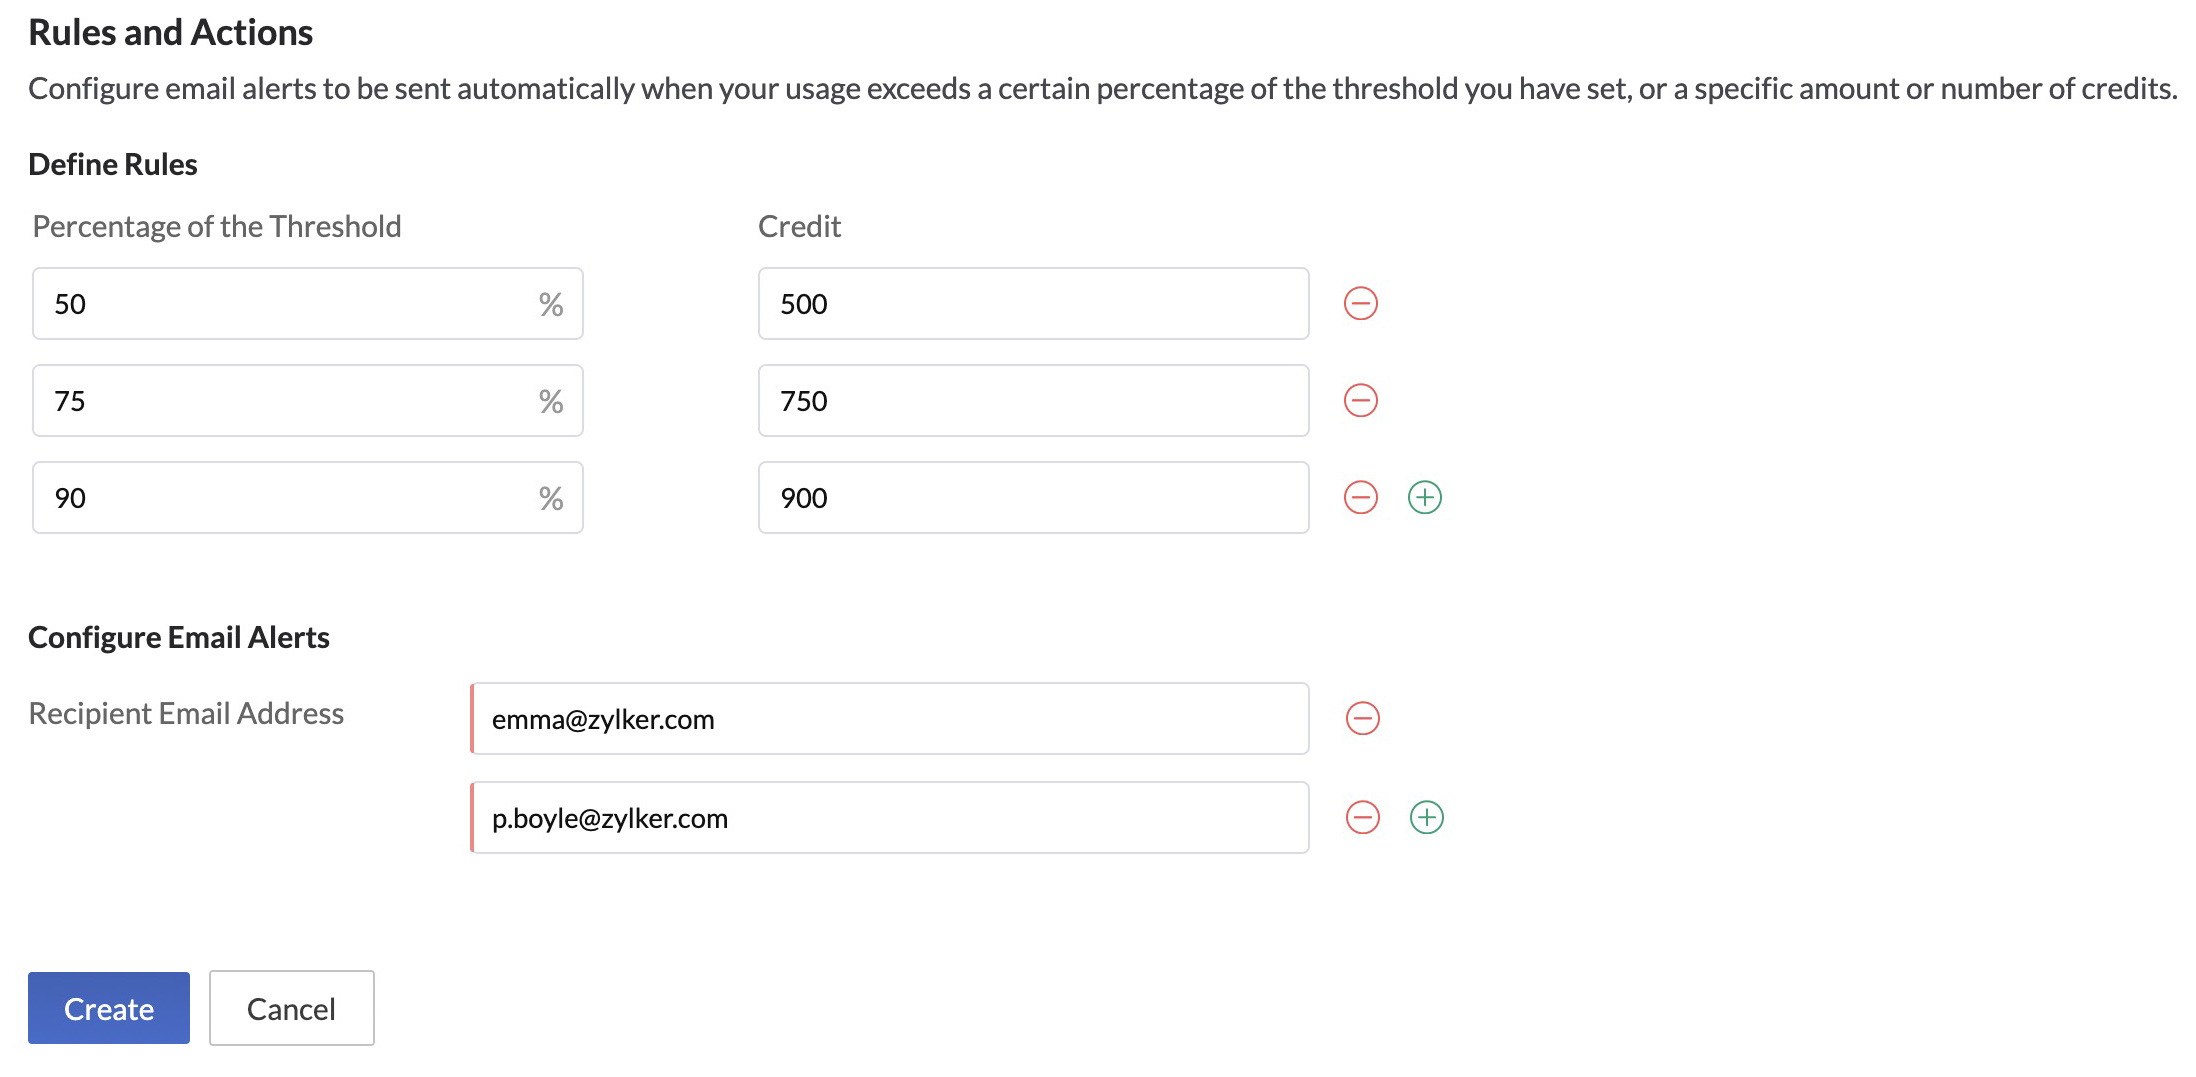
For example, if you require an email alert to be sent when your usage reaches 50% of the threshold limit value of 1000 credits, enter “50” under percentage. You will then receive an email alert when you use up 500 credits. Similarly, if you require an email alert to be sent when your amount consumption is 100$ of the a 500$ threshold, enter “100” under Amount.
For example, if you require an email alert to be sent when your usage reaches 50% of the threshold limit value of 1000 credits, enter “50” under percentage. You will then receive an email alert when you use up 500 credits. Similarly, if you require an email alert to be sent when your amount consumption is 100$ of the a 500$ threshold, enter “100” under Amount.You can create a maximum of five rules. To create another rule, click the (+) icon. To delete a rule, click the (-) icon.
Now, enter the recipient email address that the email alerts should be sent to. You can configure a maximum of three recipients.
-
Click Create.
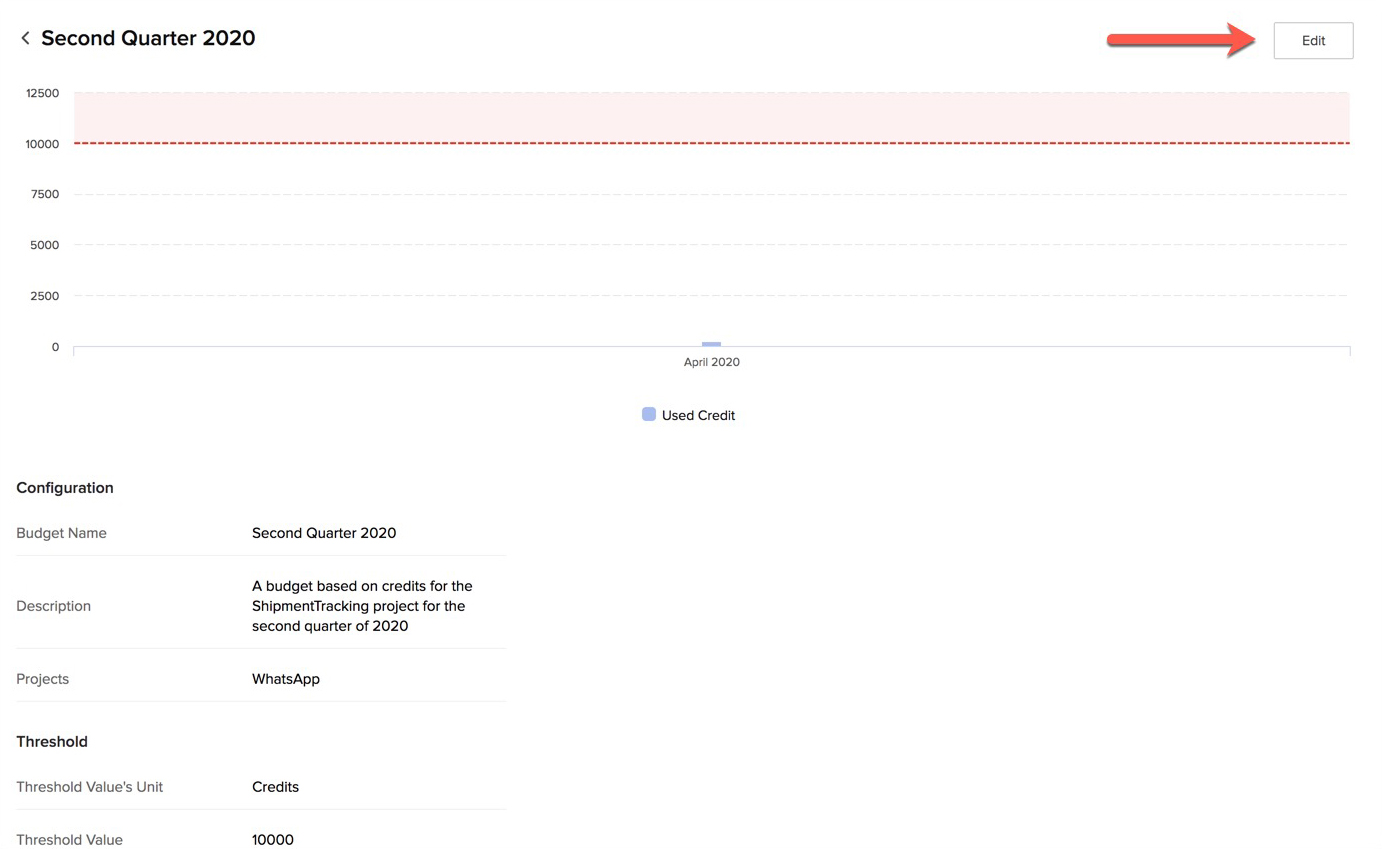
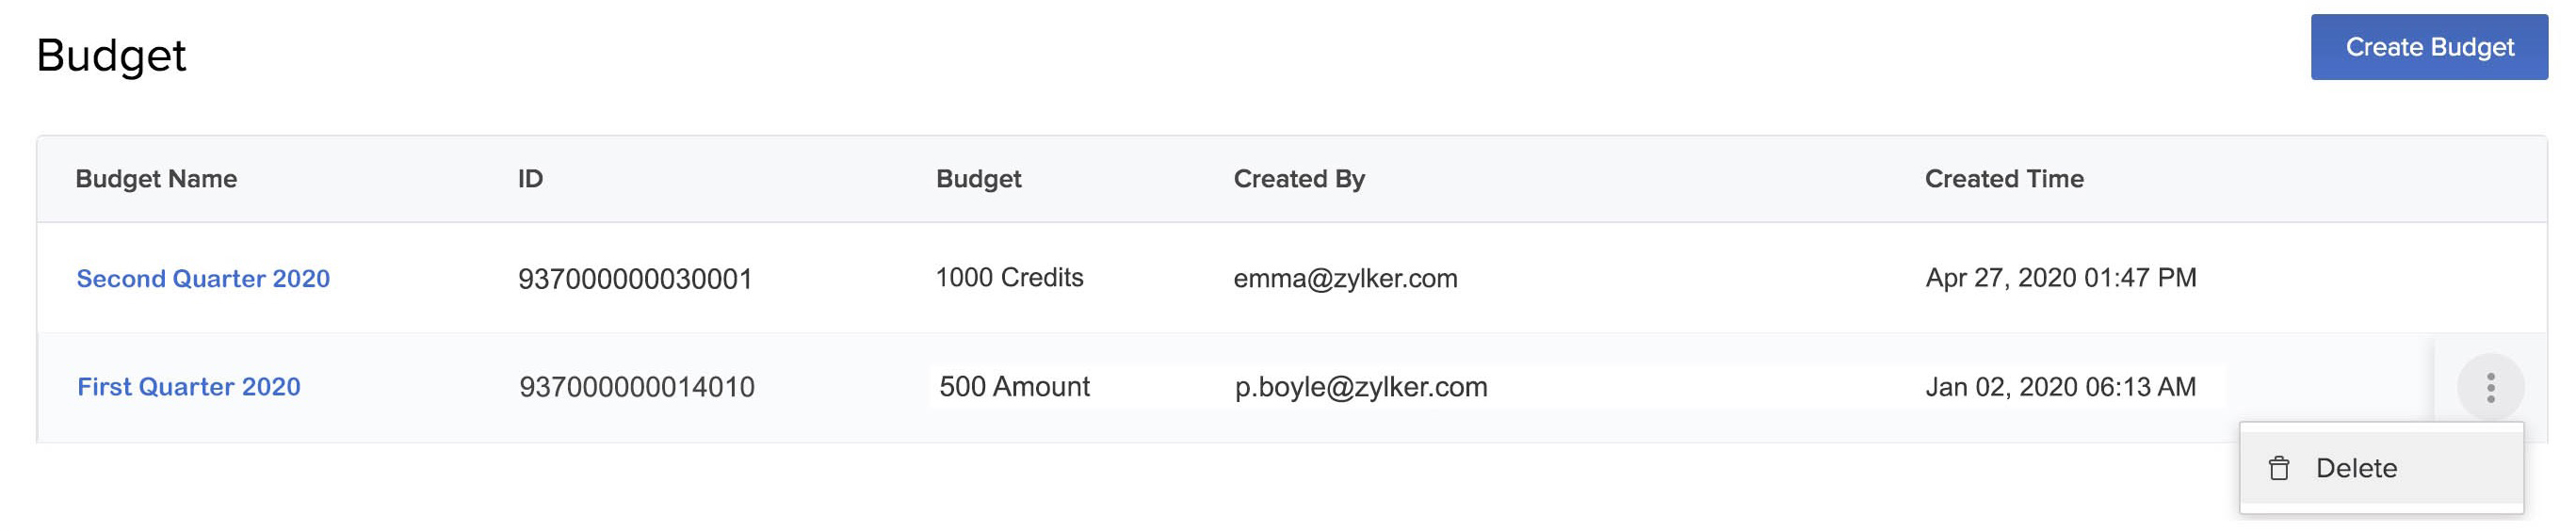
The budget will be created and listed in the Budgets page along with its details. A unique ID is also created for the budget.

You will now receive email alerts based on the rules that you set in the budget.
You can view a budget’s configuration by clicking the budget’s name. To edit the budget, click Edit from the budget view’s page. Modify the details and save the changes.
Delete a Budget
- You can delete a budget by clicking the ellipsis icon and clicking Delete from the Budget page.
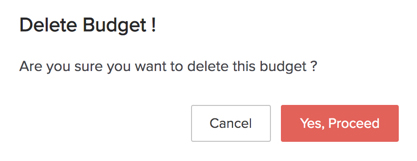
- Click Yes, Proceed in the confirmation window.
Yes
No
Send your feedback to us