
Managing Expenses
Edit Expenses
If you want to make changes to an expense, you can edit it.
Prerequisites:
- You can edit only Unreported and Unsubmitted expenses.
- You cannot edit Expired expenses.
To edit an expense:
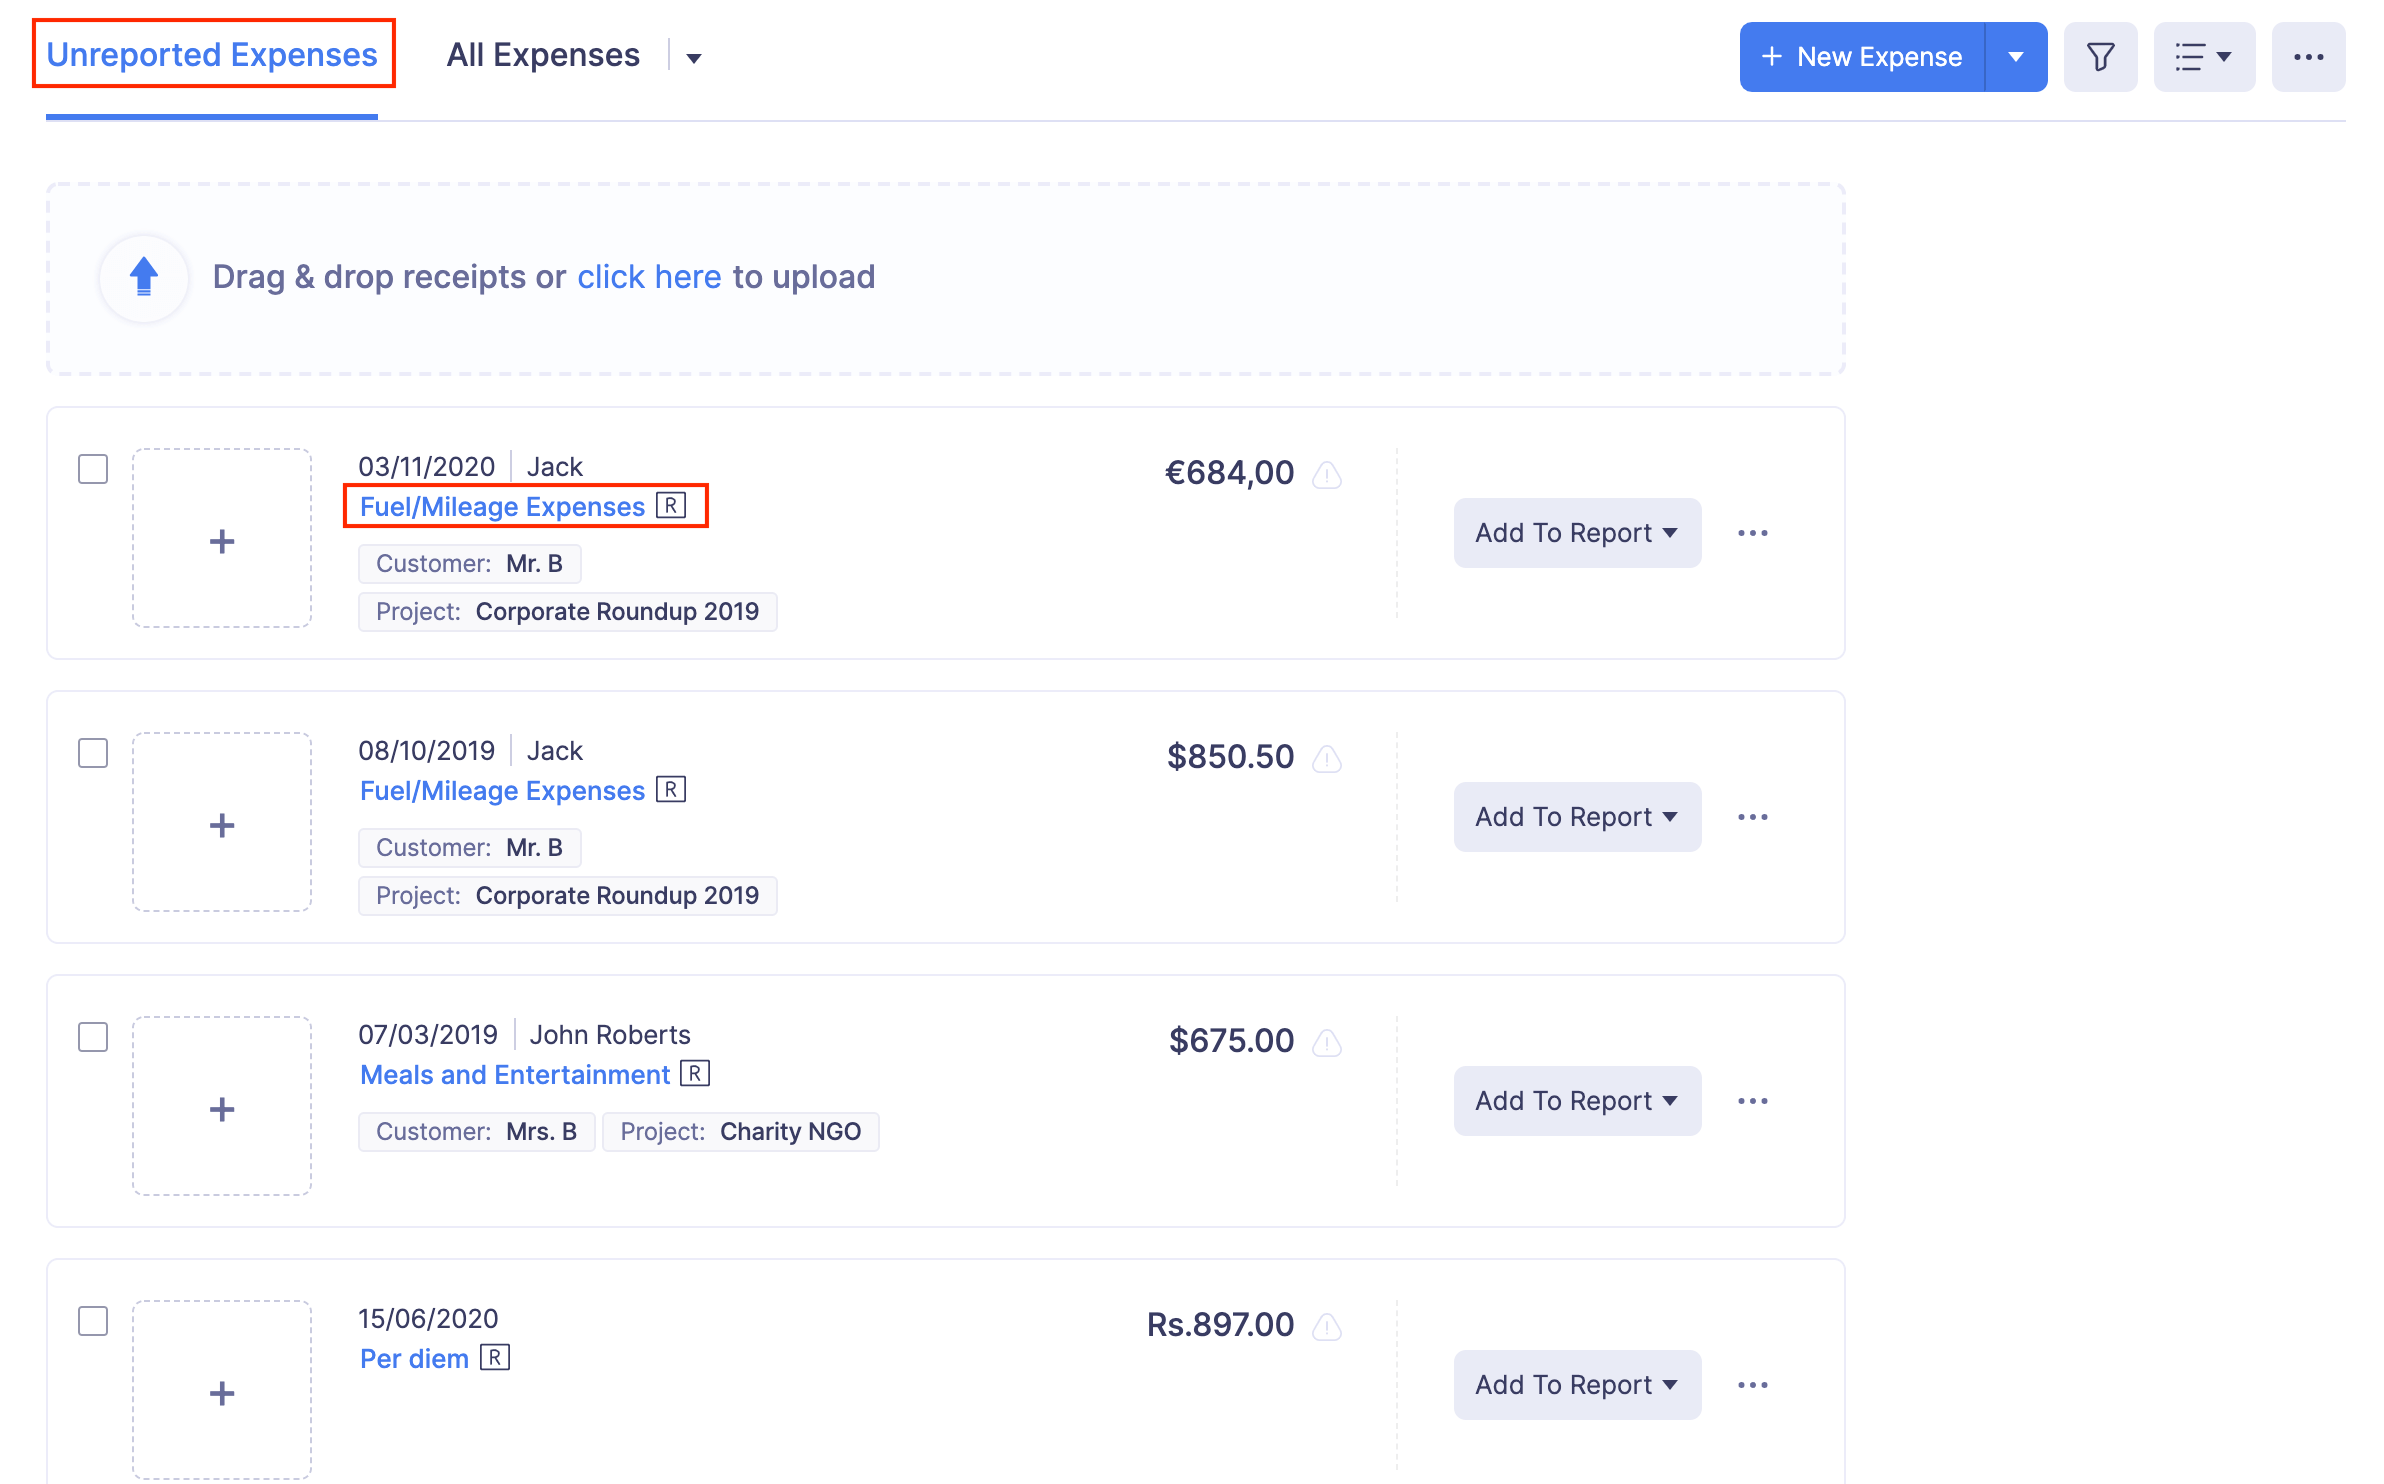
- Navigate to Expenses.
- If you’re in the Unreported Expenses tab, click the expense you want to edit and the Edit Expense page will open.
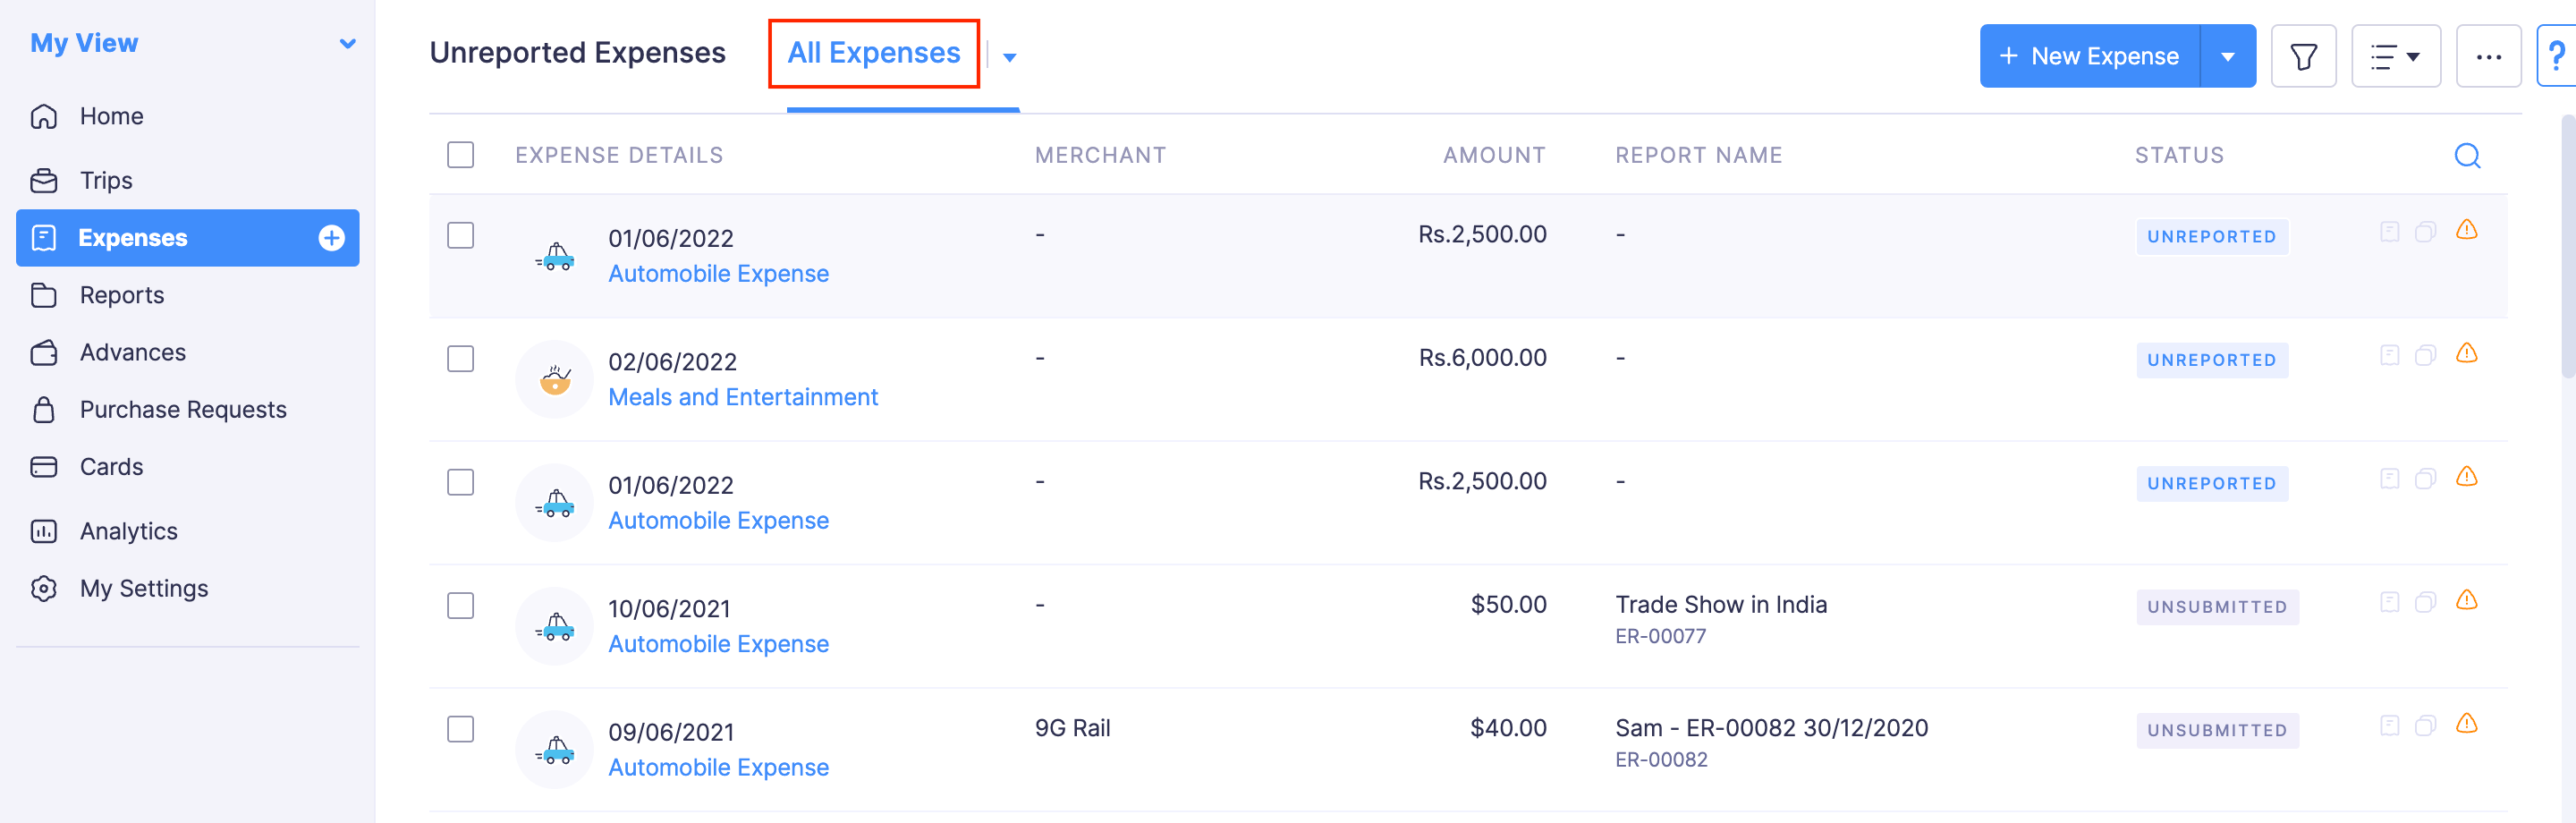
- If you’re in the All Expenses tab, click the expense you want to edit and click the edit icon at the top right corner of the page.
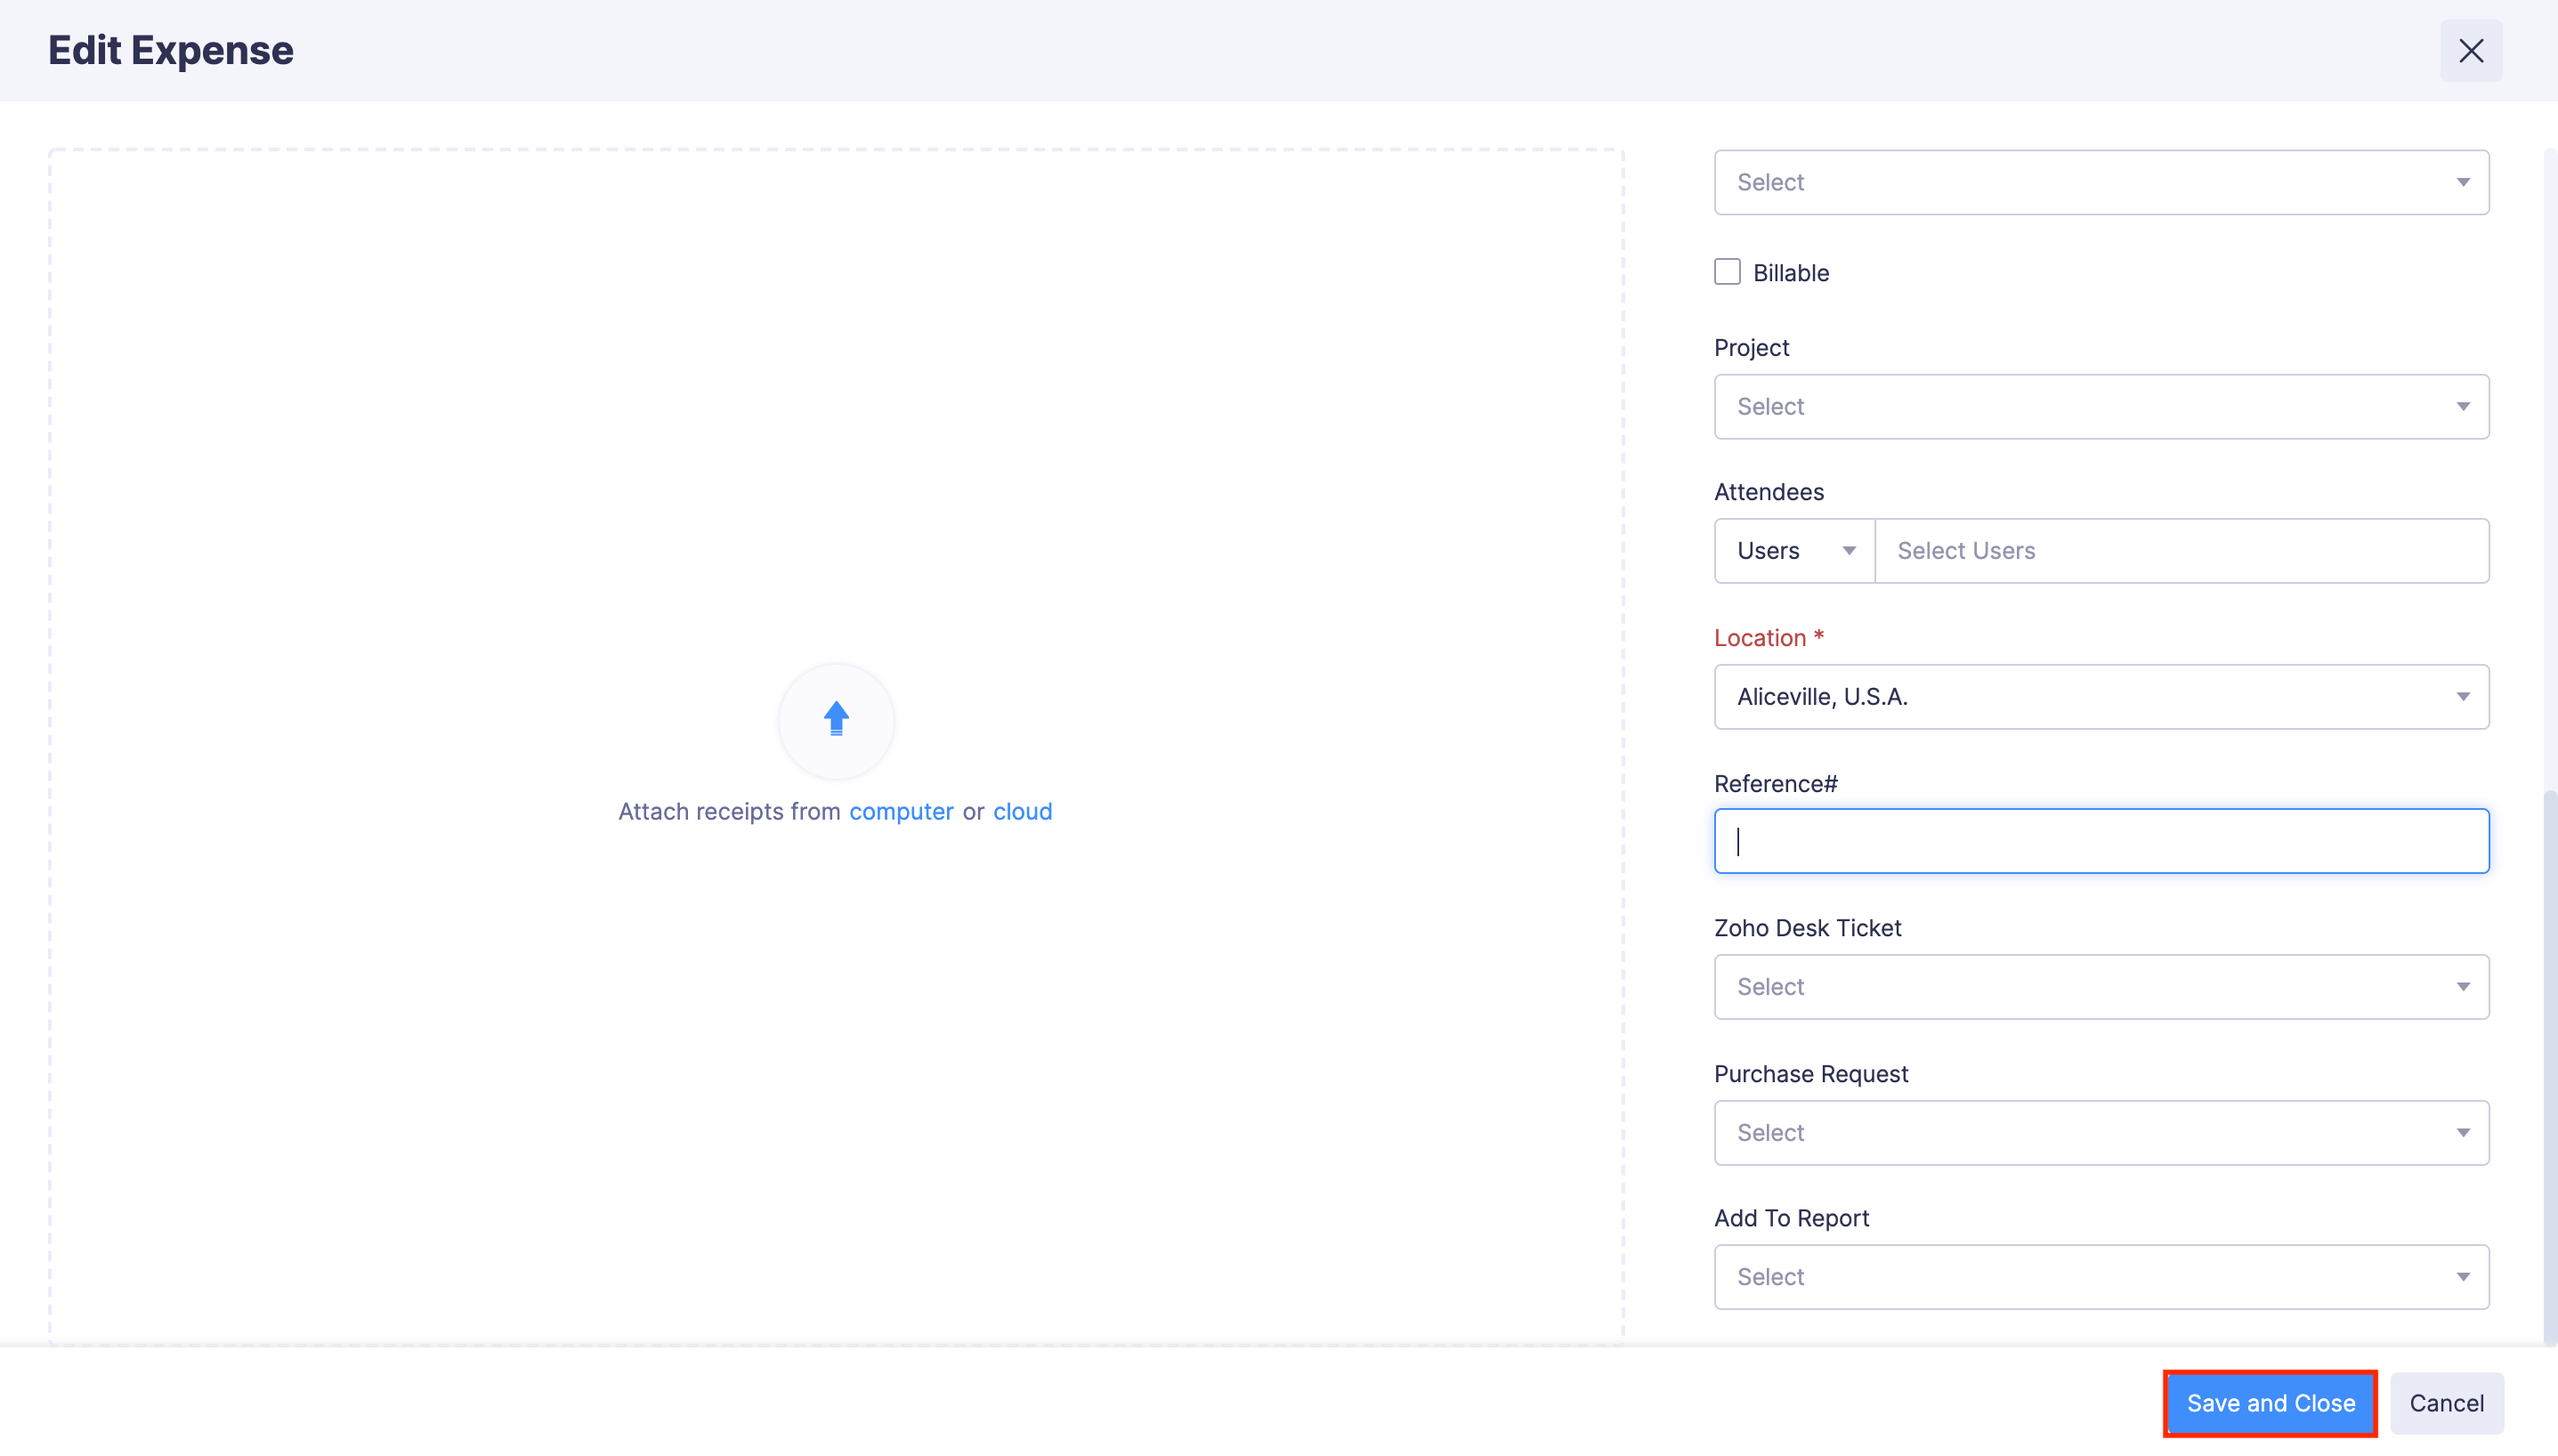
- Make the necessary changes in the Edit Expense page.
- Click Save and Close.
Inline Editing
You can now update the expenses you’ve recorded directly from the expense detail page, without going to the edit expense page.
Here’s the list of fields you can edit from the expense detail page :
| Expenses | Editable Fields |
|---|---|
| Expense Records / Expenses in Reports | Expense category, date, amount, merchant name, currency, and description |
| Mileage Expense | Description only |
| Itemized Expenses | Expense date and merchant name |
| Per Diem Expense | Description only |
| Manually Created Card Expenses | Expense date, category, and merchant name |
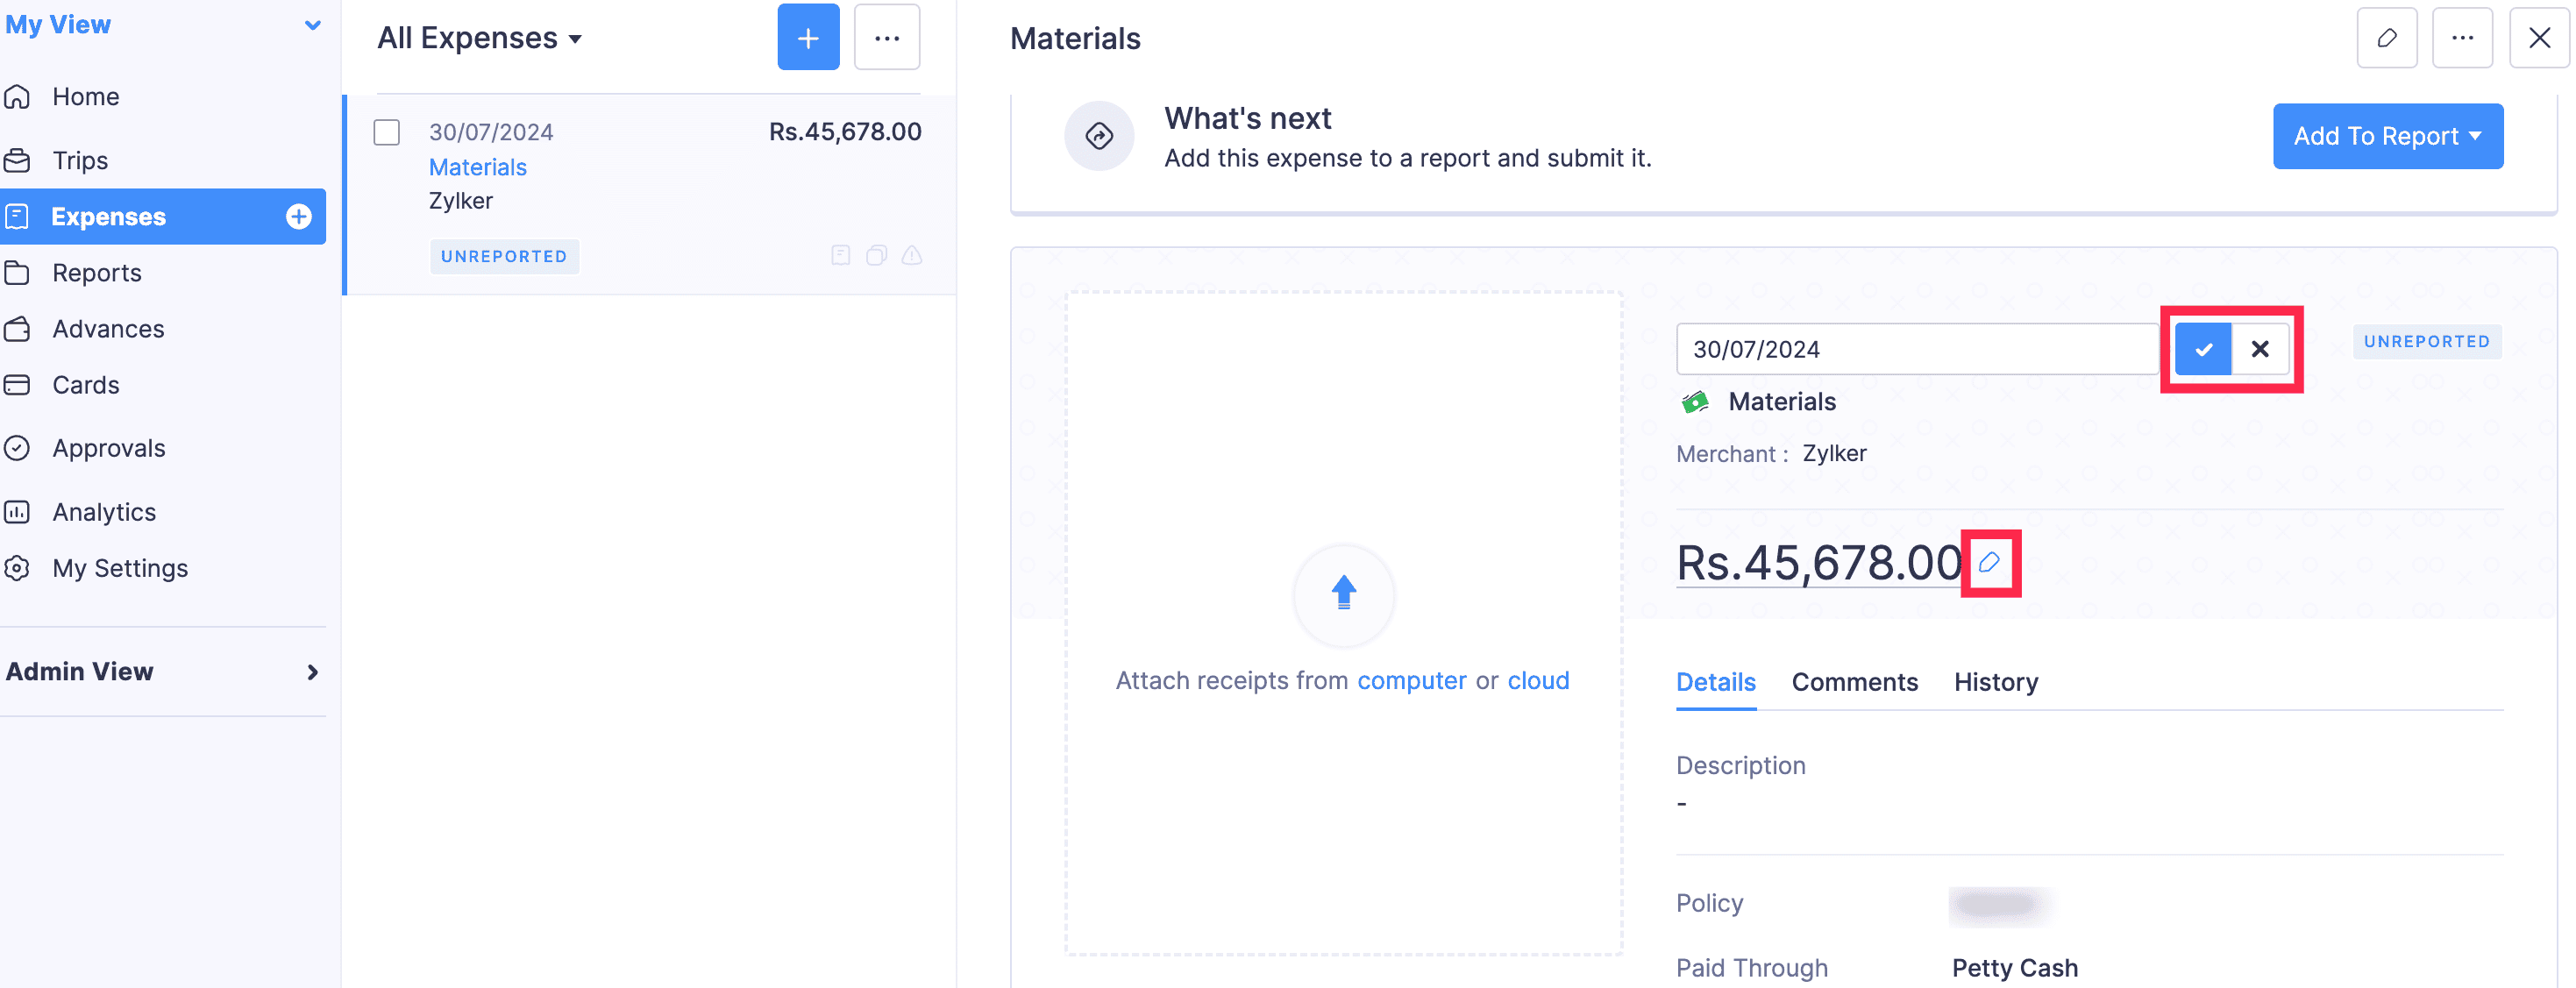
To update an expense record using inline editing:
Note: You can edit only one field at a time.
- Navigate to Expenses.
- In the All Expenses tab, click the expense you want to edit.
- Hover over the field you want to edit and click the Edit icon that appears next to it.
- After making the necessary changes, click the tick icon next to the date field to save your updates.
You can follow the same steps to edit your other expenses, including mileage, per diem, and itemized expenses, by navigating to the expense details page of the respective expense.
Clone Expenses
Clone an expense to duplicate all the essential details of an expense. Here’s how:
- Go to Expenses on the left sidebar.
- Navigate to the All Expenses tab.
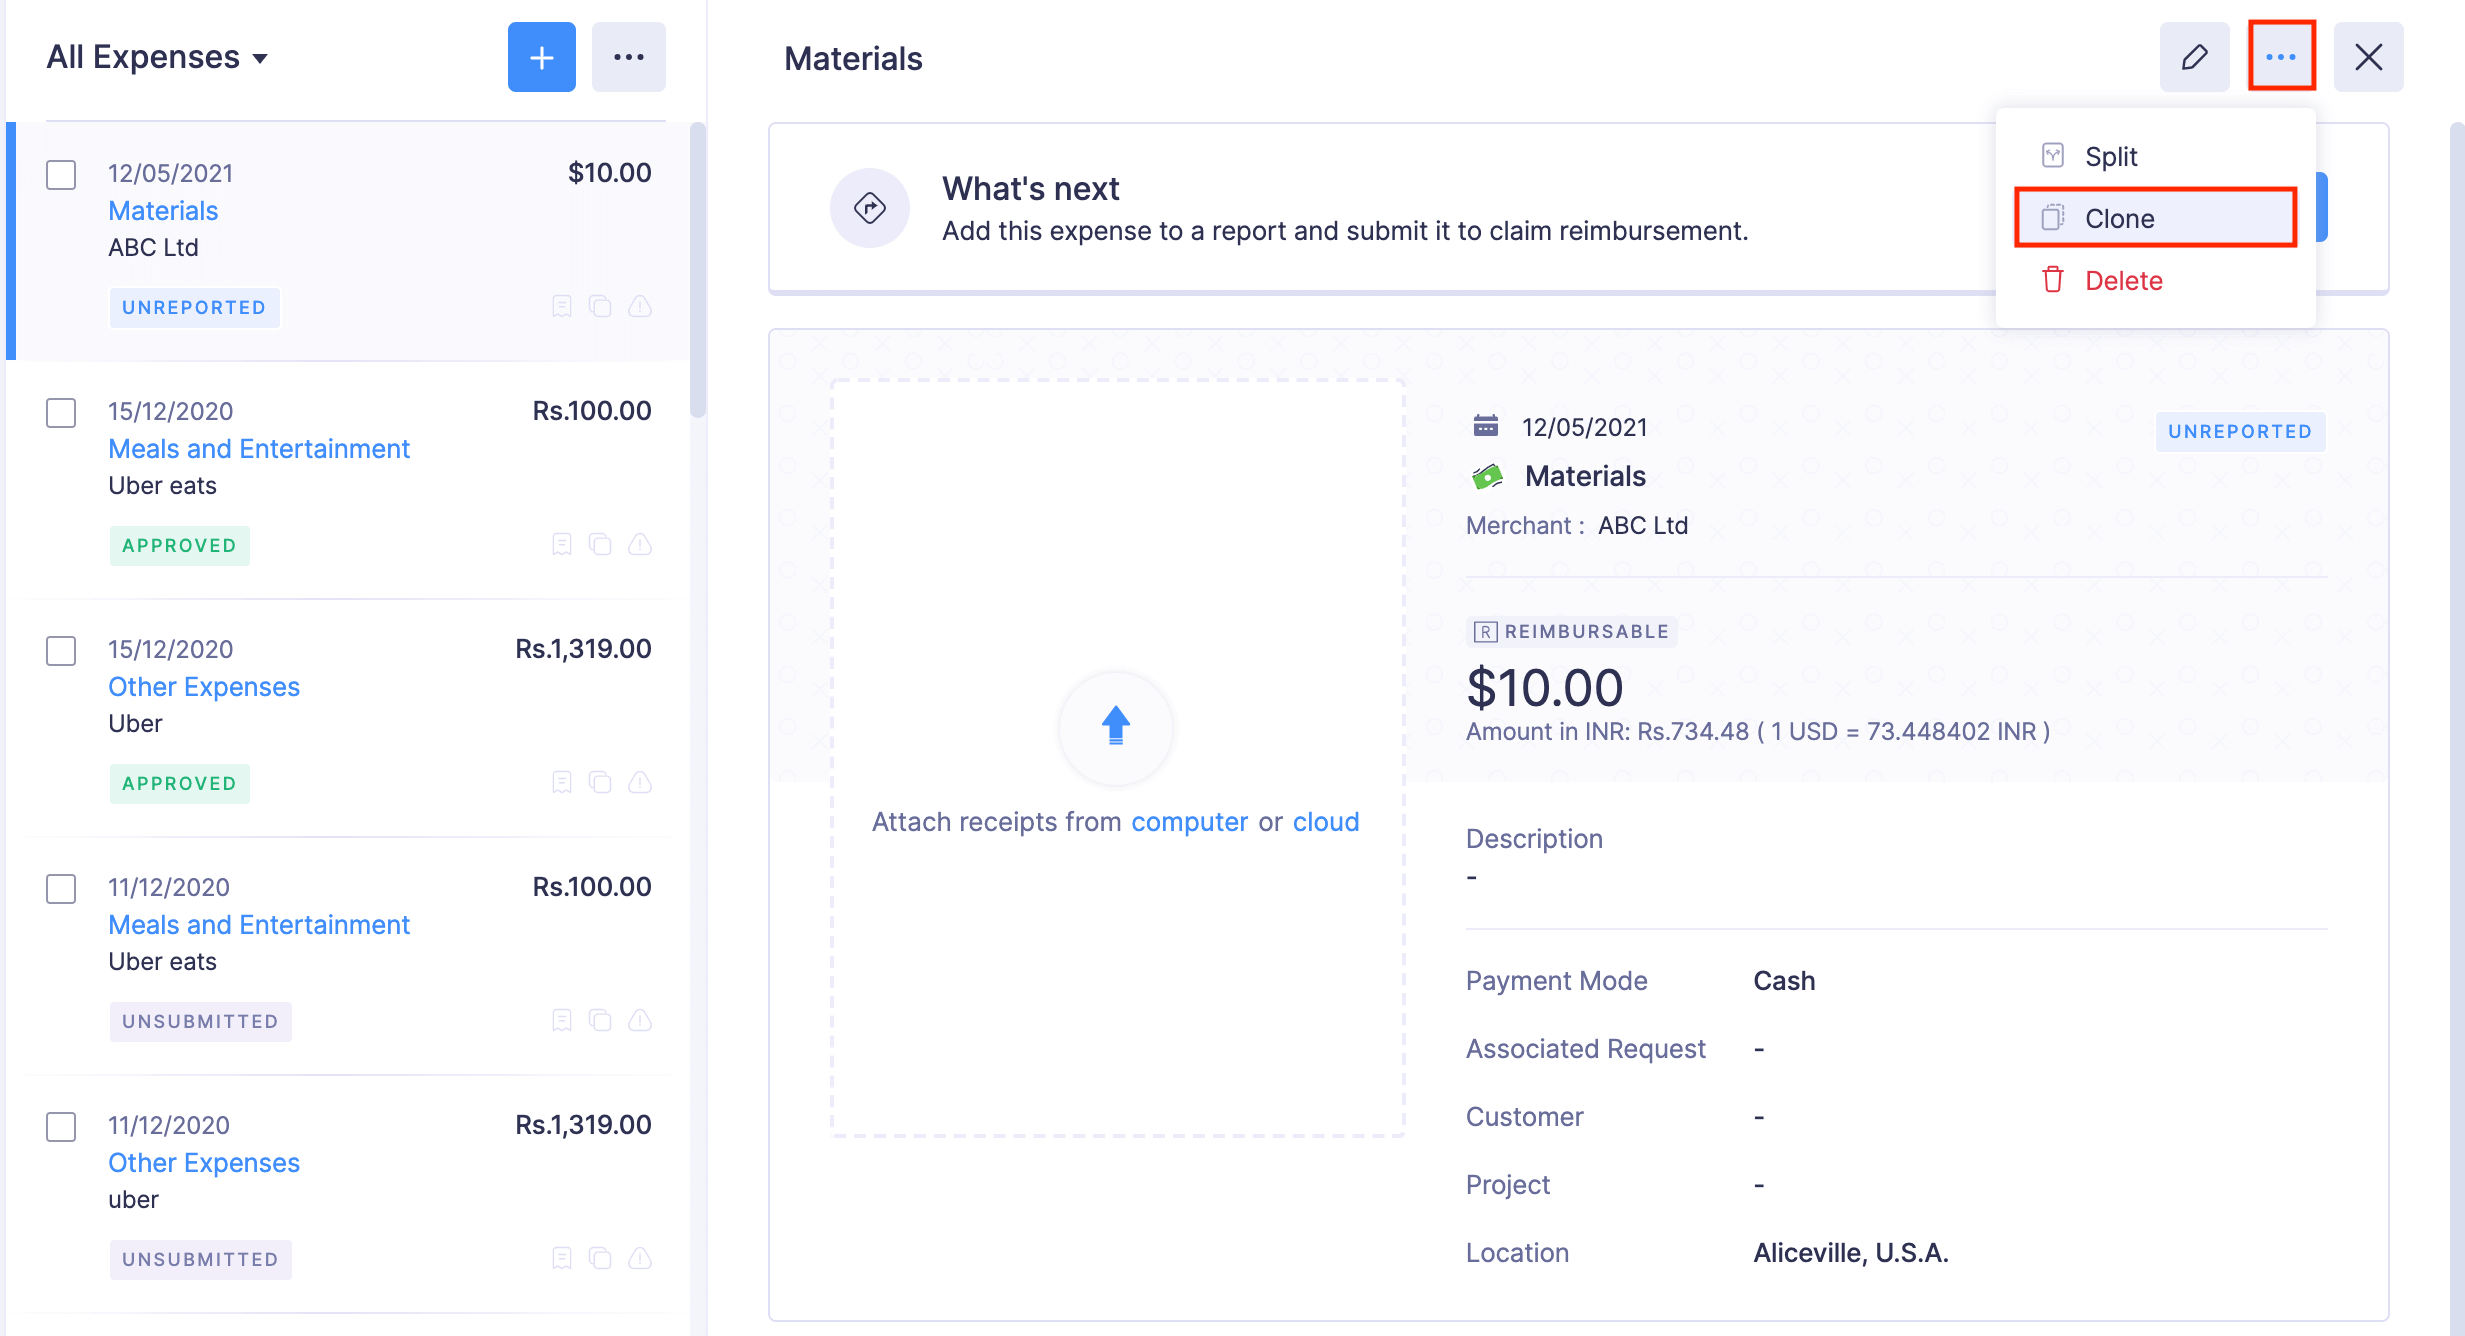
- Click the expense you want to clone.
- Click the More icon at the top right corner and select Clone. (In case of approved and reimbursed reports, click the Clone button at the top right corner of the page.)
- Make changes if necessary.
- Click Save and Close to create a new expense.
Delete Expenses
Note: You cannot delete expenses in the Submitted, Approved, and Reimbursed statuses.
Warning: Once an expense is deleted, it cannot be retrieved.
To delete an expense:
- Go to the Expenses module.
- If you’re in the Unreported Expenses tab, click the More icon at the right corner of the expense you want to delete and click Delete.

- If you’re in the All Expenses tab, click the expense you want to delete. Click the More icon at the top right corner of the expense and click Delete.
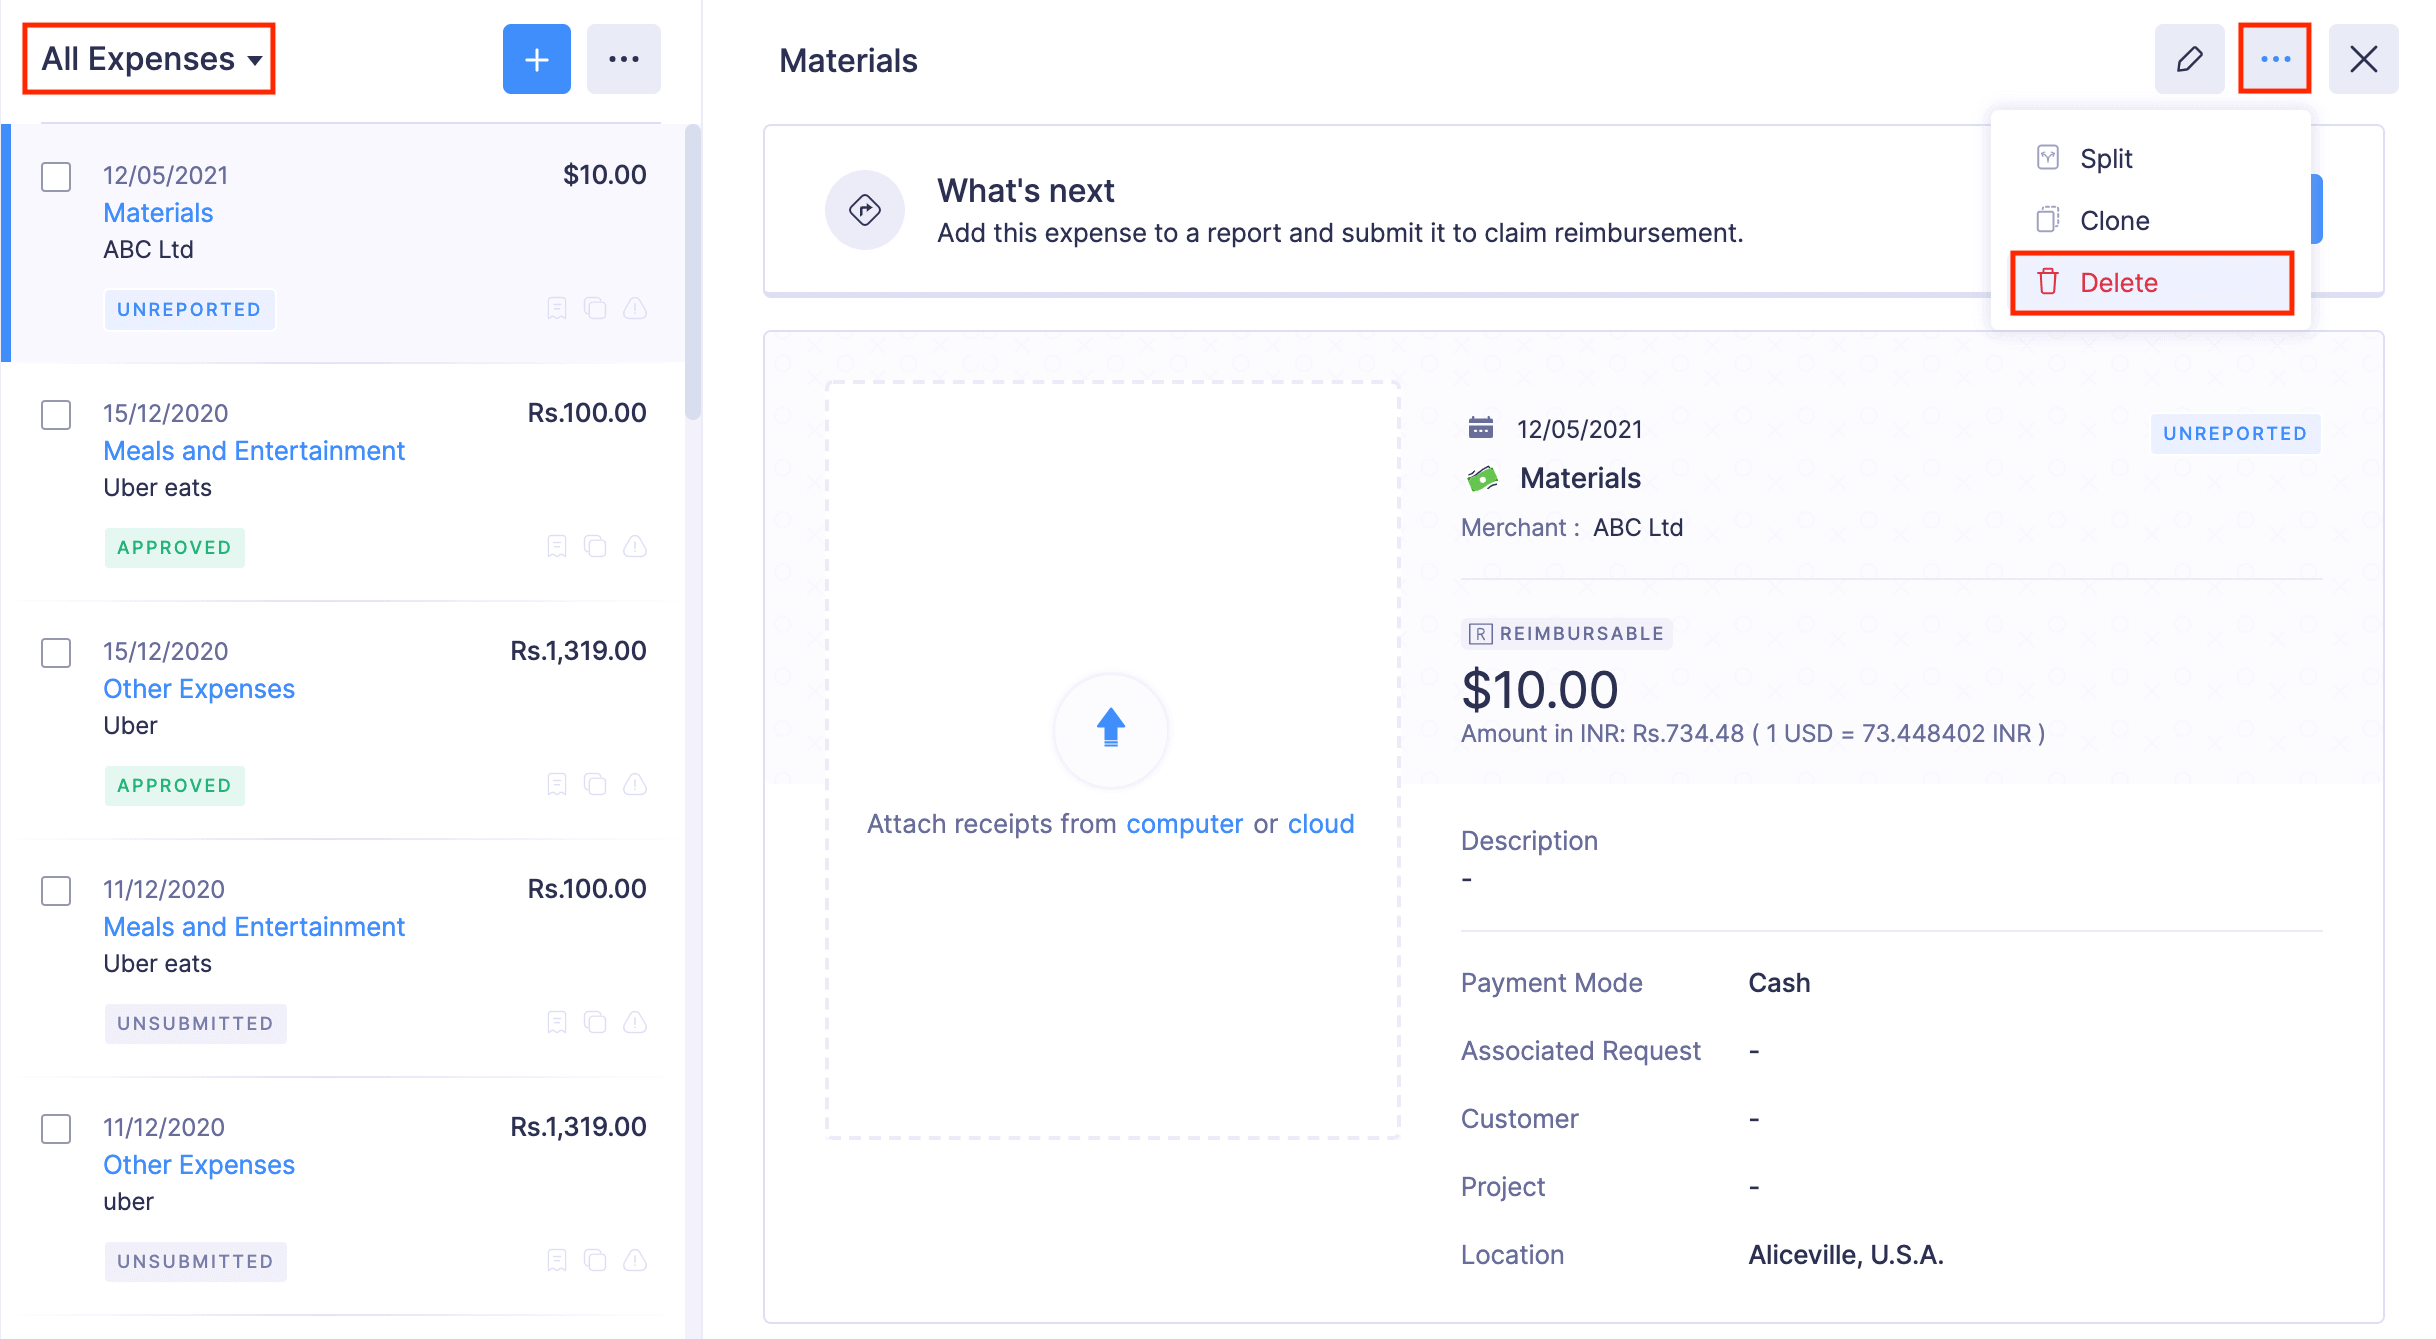
- In the pop-up that follows, select Delete to delete the expense.
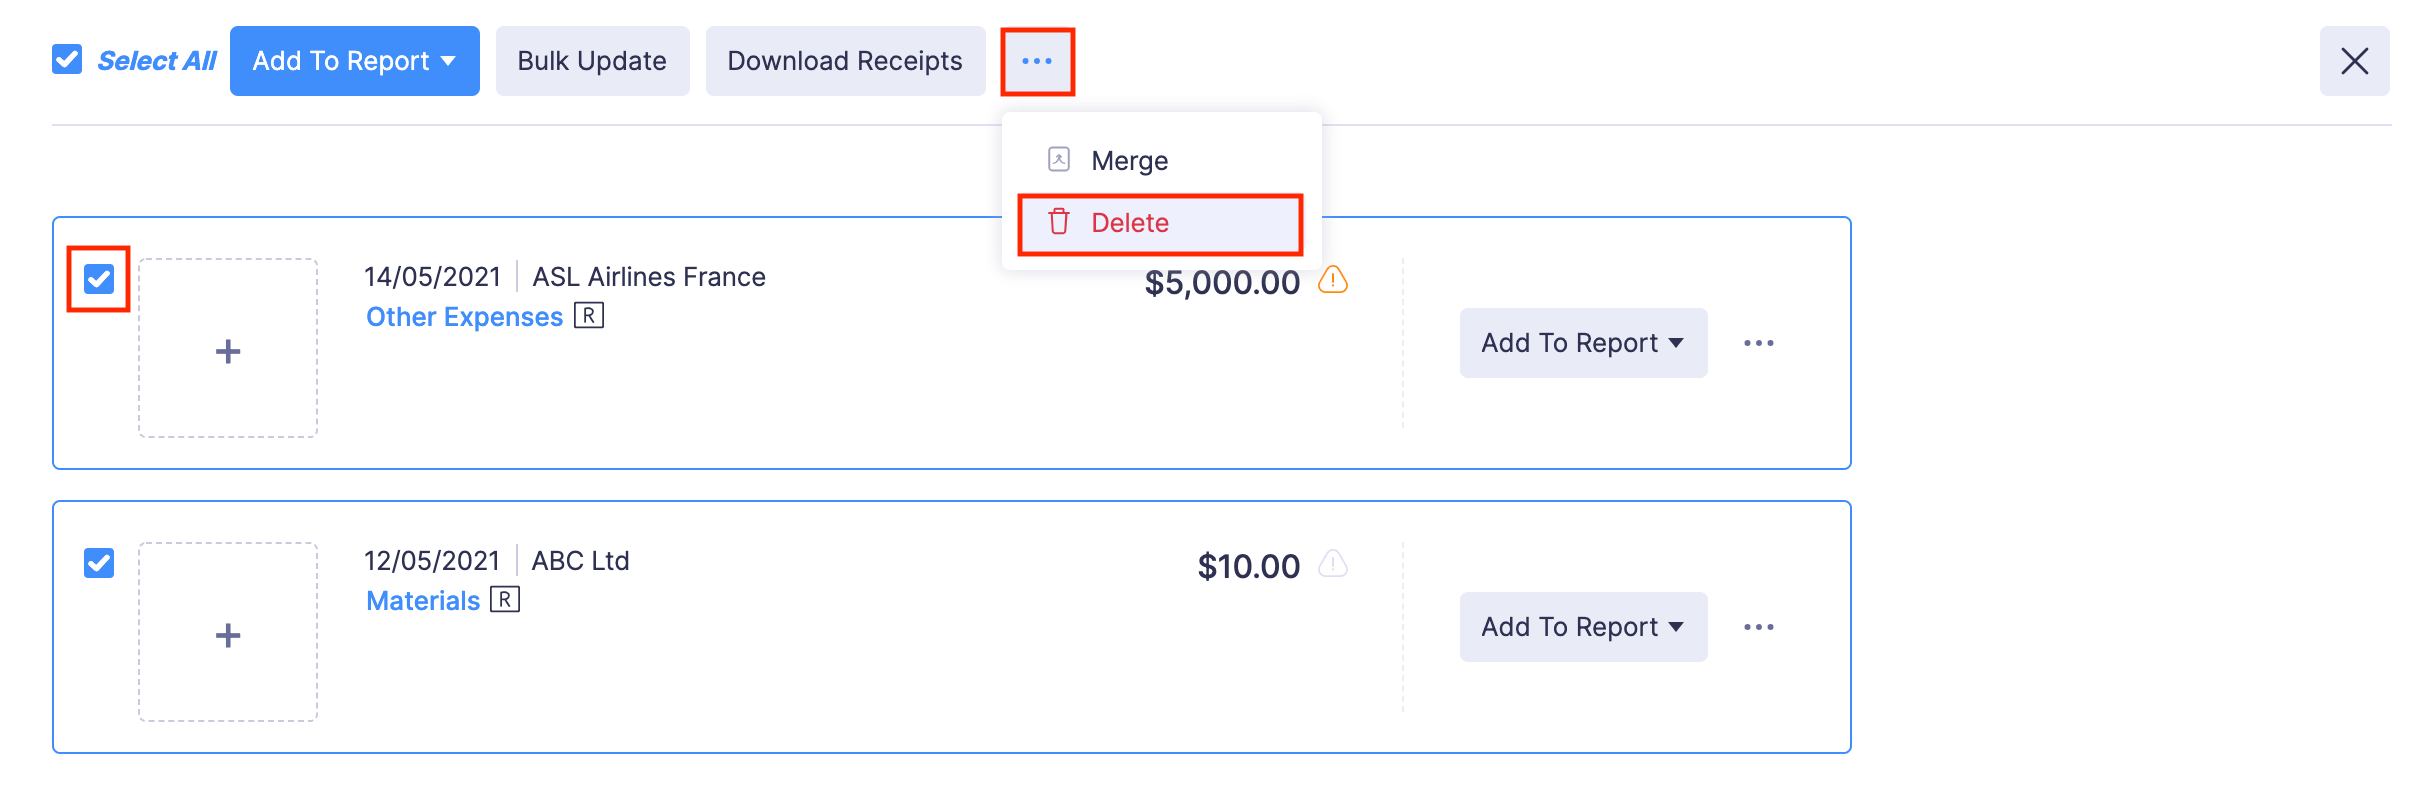
- If you want to delete the expenses in bulk, then select the expenses and click the More icon at the top of the page.
- Select Delete. All the selected expenses will be deleted.
Search Expenses
If you want to locate a particular expense from a group of expenses, you can search for the expense. Here’s how:
- Go to My View on the left sidebar.
- Click Expenses on the left sidebar.
- Click the Search icon in the right corner.
- You can enter any field value of the particular expense that you want to view.
- Click Search.

Export Expenses
Expenses can be exported in two formats:
| CSV - Comma Separated Values | XLS (XLSX) - Microsoft Excel |
To export expenses:
- Navigate to Expenses.
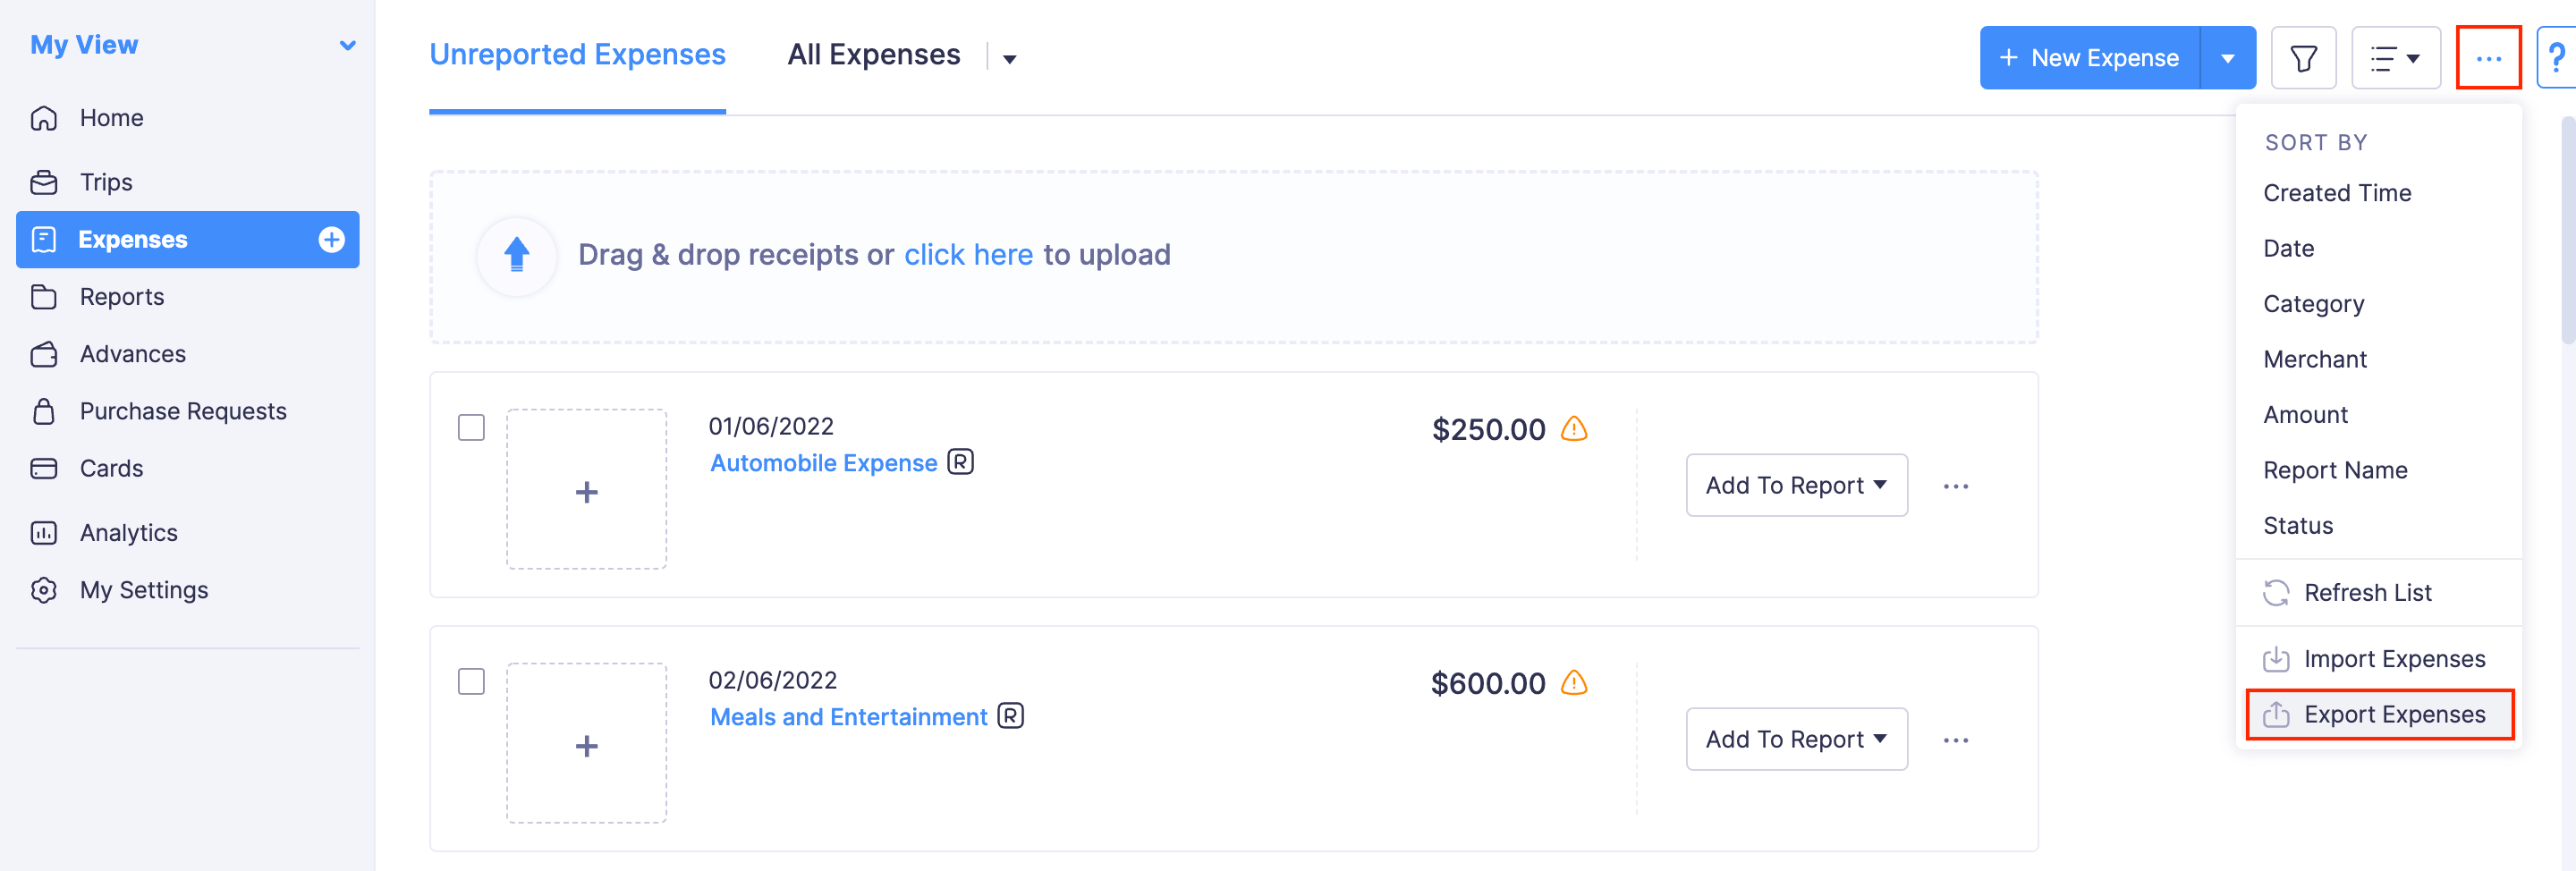
- Click the More icon on the top right corner of the page.
- Select Export Expenses.
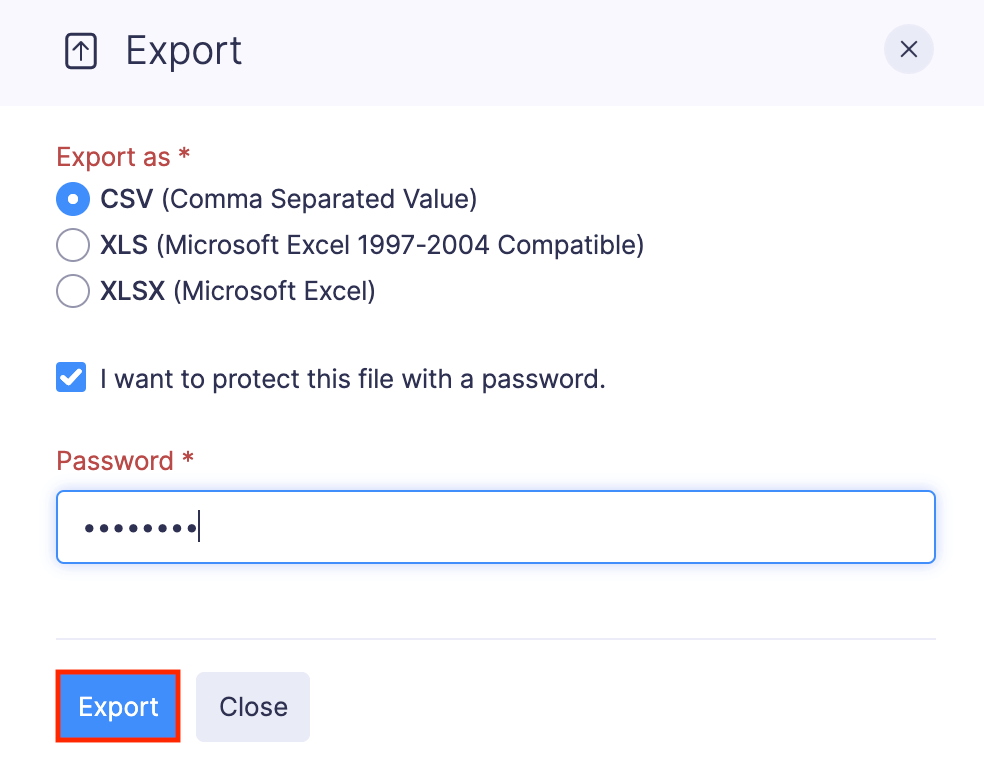
- Select the format (CSV, XLS or XLSX) in which you would like to export your expense data.
- Mark Include Sensitive Personally Identifiable Information (PII) while exporting to export expenses with PII such as name of the user, email address, etc.
- You can also protect the export file with a password. Mark I want to protect this file with a password and provide a password in the Password field.
- Click Export and your export file will be downloaded.
Bulk Actions
Bulk Actions allow you to perform a particular action on a group of expenses. You can update multiple expenses, add multiple expenses to a report, merge expenses, delete multiple expenses, and download expense receipts.
Bulk Update Expenses
Here’s how you can bulk update expenses:
- Go to Expenses on the left sidebar.
- Navigate to the All Expenses tab.
- Select all the expenses you want to update.
- Click Bulk Update in the top pane.
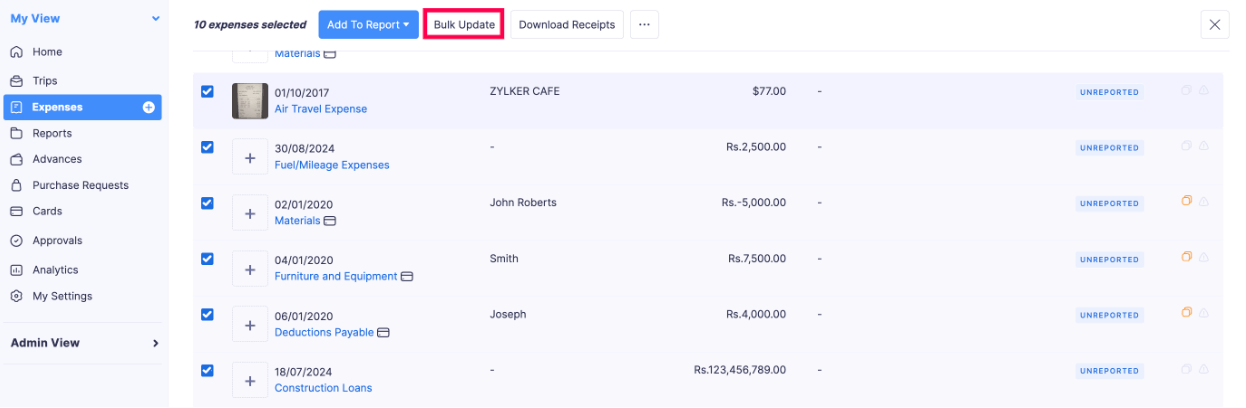
- You can update fields such as Date, Category, Reimbursement Claim, Description, Merchant, Project, Paid Through and Reference#. Click the More Fields dropdown if you want to update more fields.
- Click Save.
Bulk Add Expenses to Reports
Here’s how you can bulk add expenses to a report:
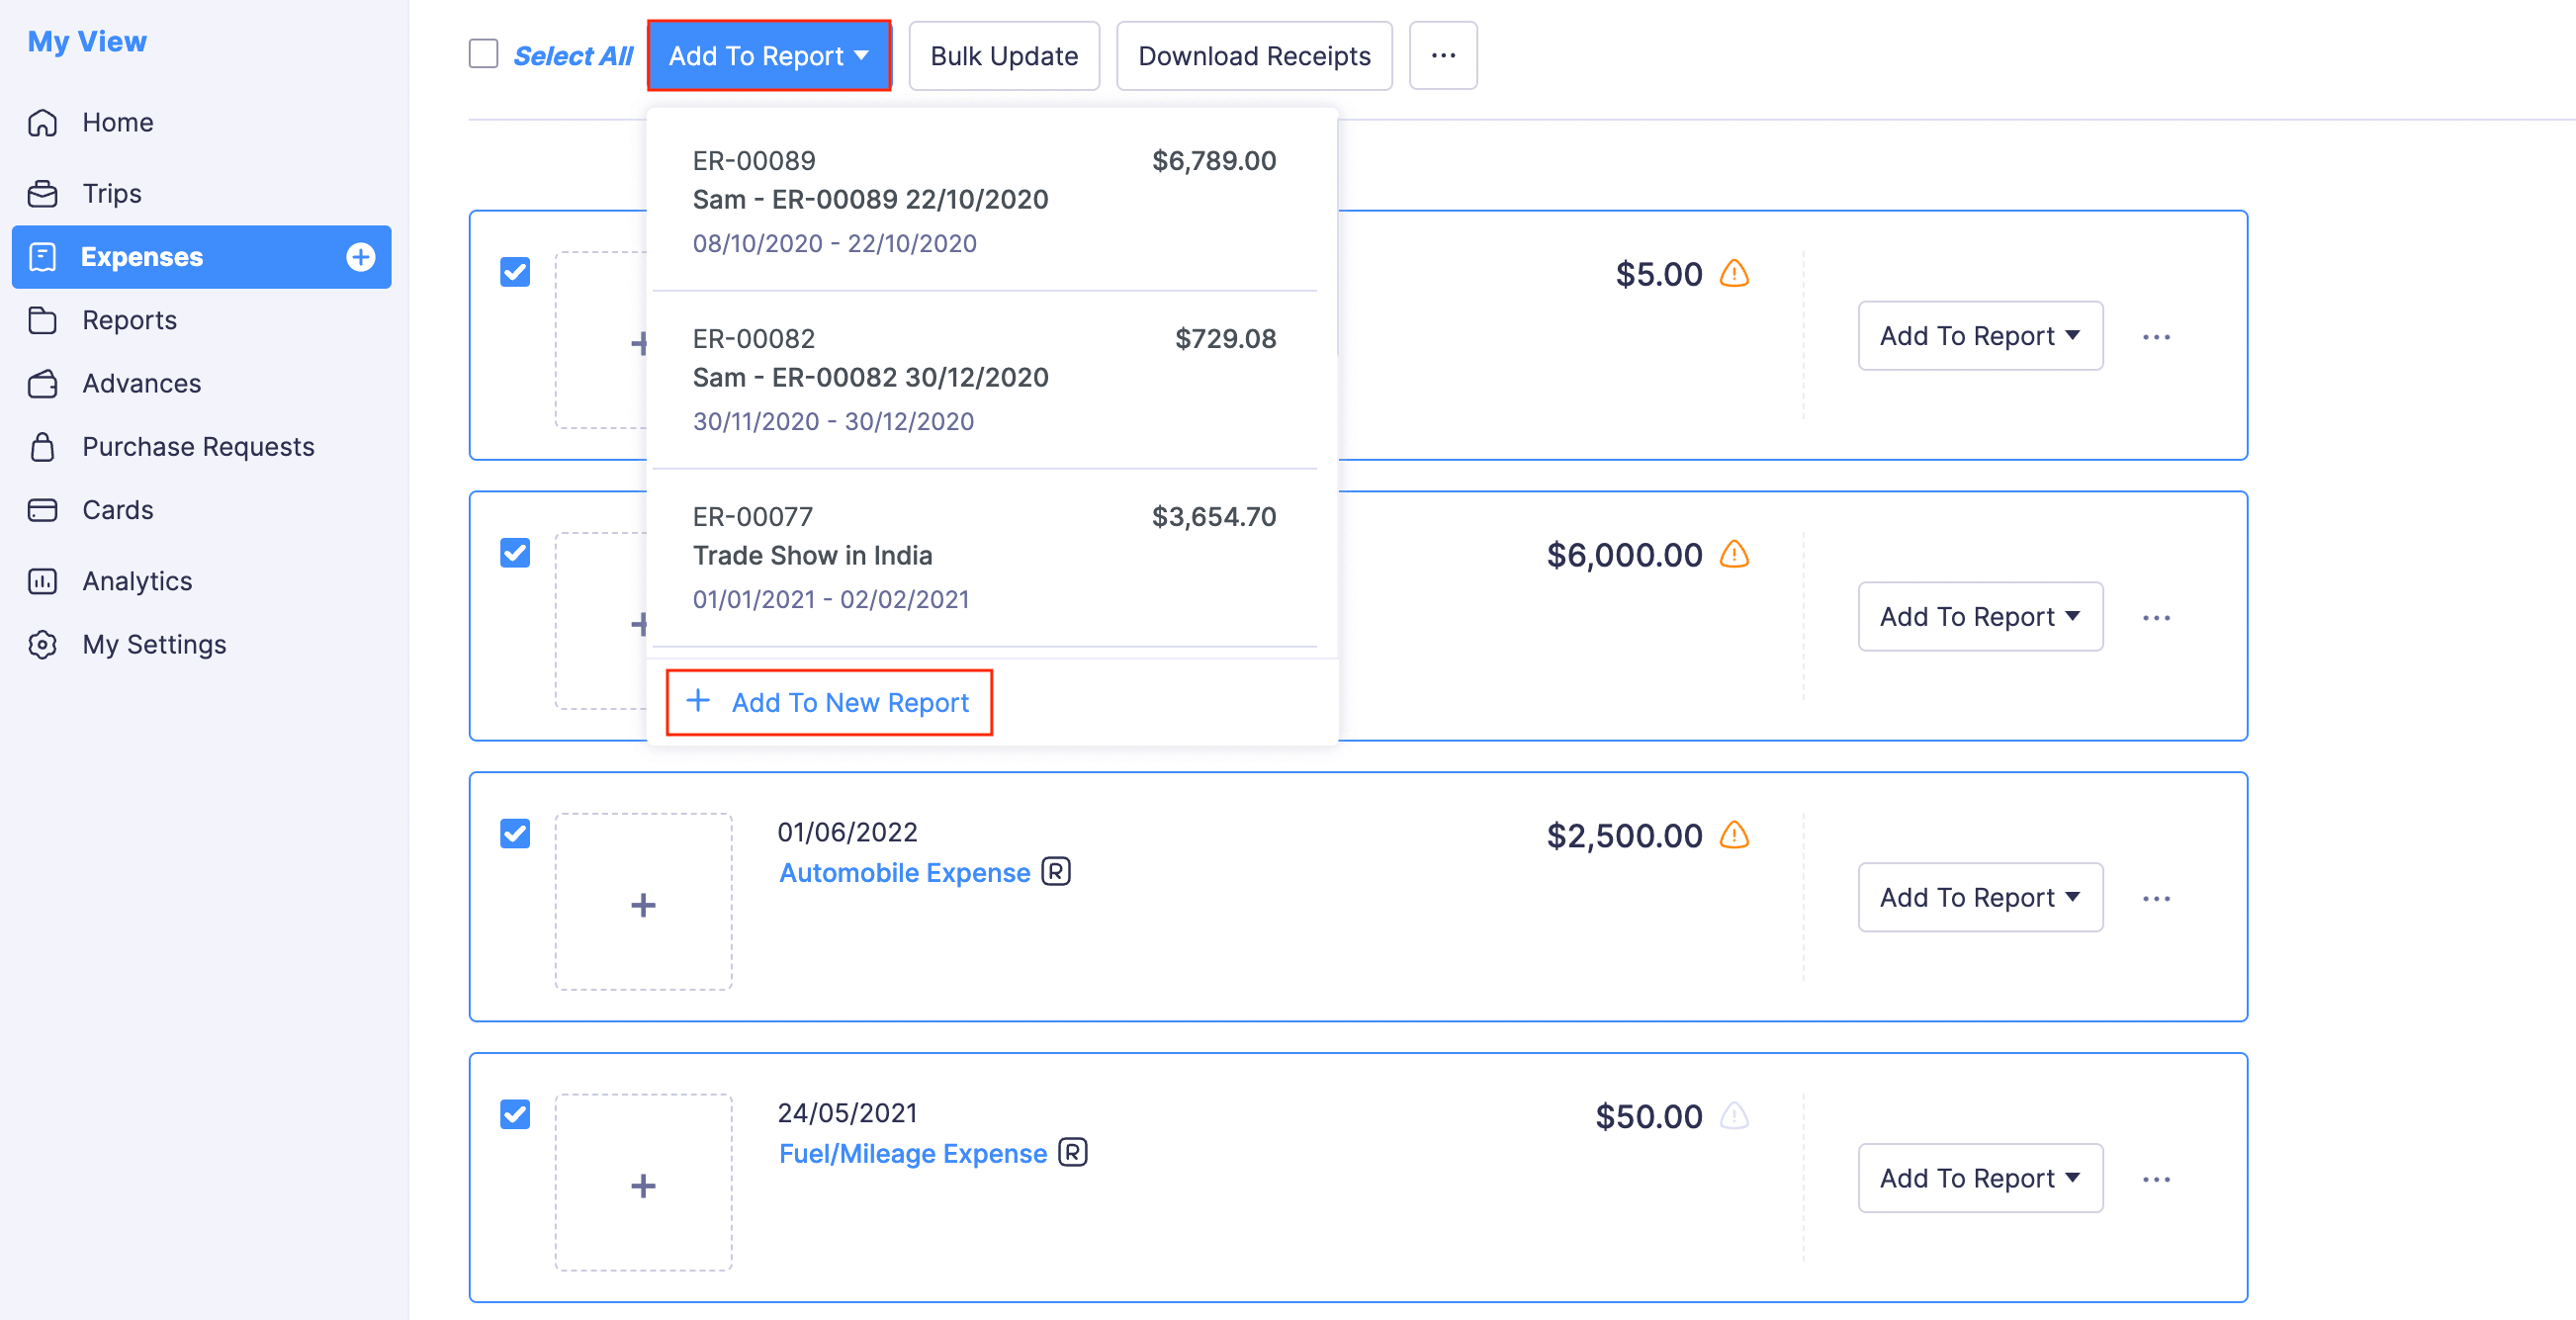
- Go to Expenses on the left sidebar.
- In the Unreported Expenses tab, select the unreported expenses you want to add to a report.
- Click the Add to Report dropdown in the top pane.
- Select a report from the dropdown. All the expenses you’ve selected will be added to that report.
- If you want to create a new report for the selected expenses, click + Add to New Report from the dropdown.
Merge Expenses
Here’s how you can merge two expenses:
Note: Upon merging two expenses, both the expenses will be automatically deleted and a new one will be created based on the selection. This merge cannot be undone.
- Go to Expenses on the left sidebar.
- Navigate to the All Expenses tab.
- Select the two expenses you want to merge.
- Click the More icon in the top pane.
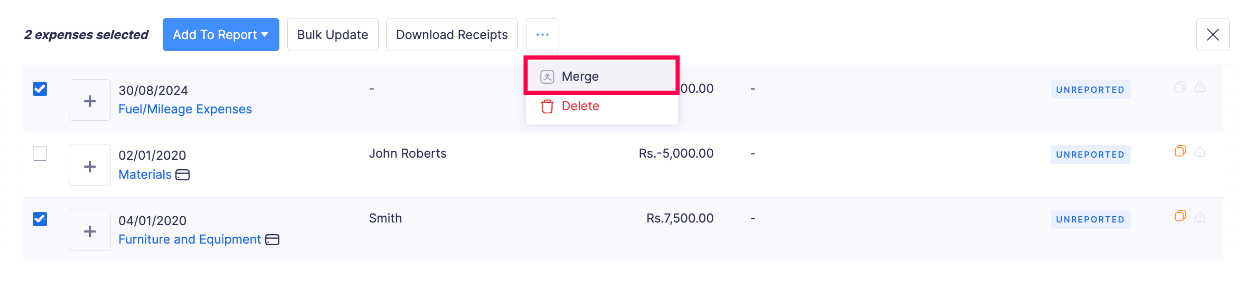
- Click Merge.
- Select the Master Expense from the two expenses you want to merge and click Continue.
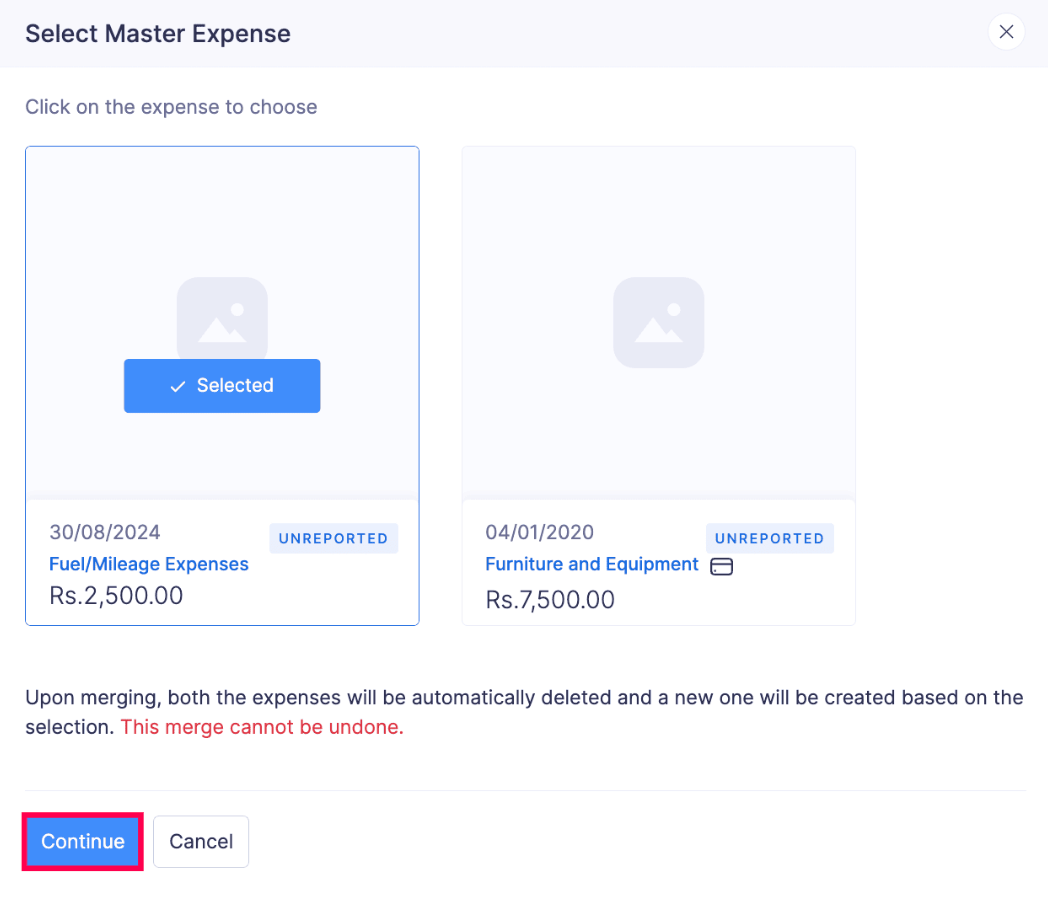
The selected expenses will be merged.
Download Expense Receipts
Here’s how you can download the expense receipts:
- Go to Expenses on the left sidebar.
- Navigate to the All Expenses tab.
- Select the expenses for which you want to download the receipts.
- Click Download Receipts in the top pane.

The expense receipt will be downloaded to your device.
 Yes
No
Yes
No
Thank you for your feedback!