If you’ve been curious about Zoho Sign but aren’t sure which plan fits your needs, you’re in the right place. Zoho Sign offers a free 14-day trial to help you explore its features—no credit card required. Whether you’re an individual or part of an organization, this trial gives you a hands-on experience with Zoho Sign so you can make an informed decision.
In this guide, we’ll walk you through everything you need to know about getting started with Zoho Sign, from signing up to making the most of your trial and exploring key features.
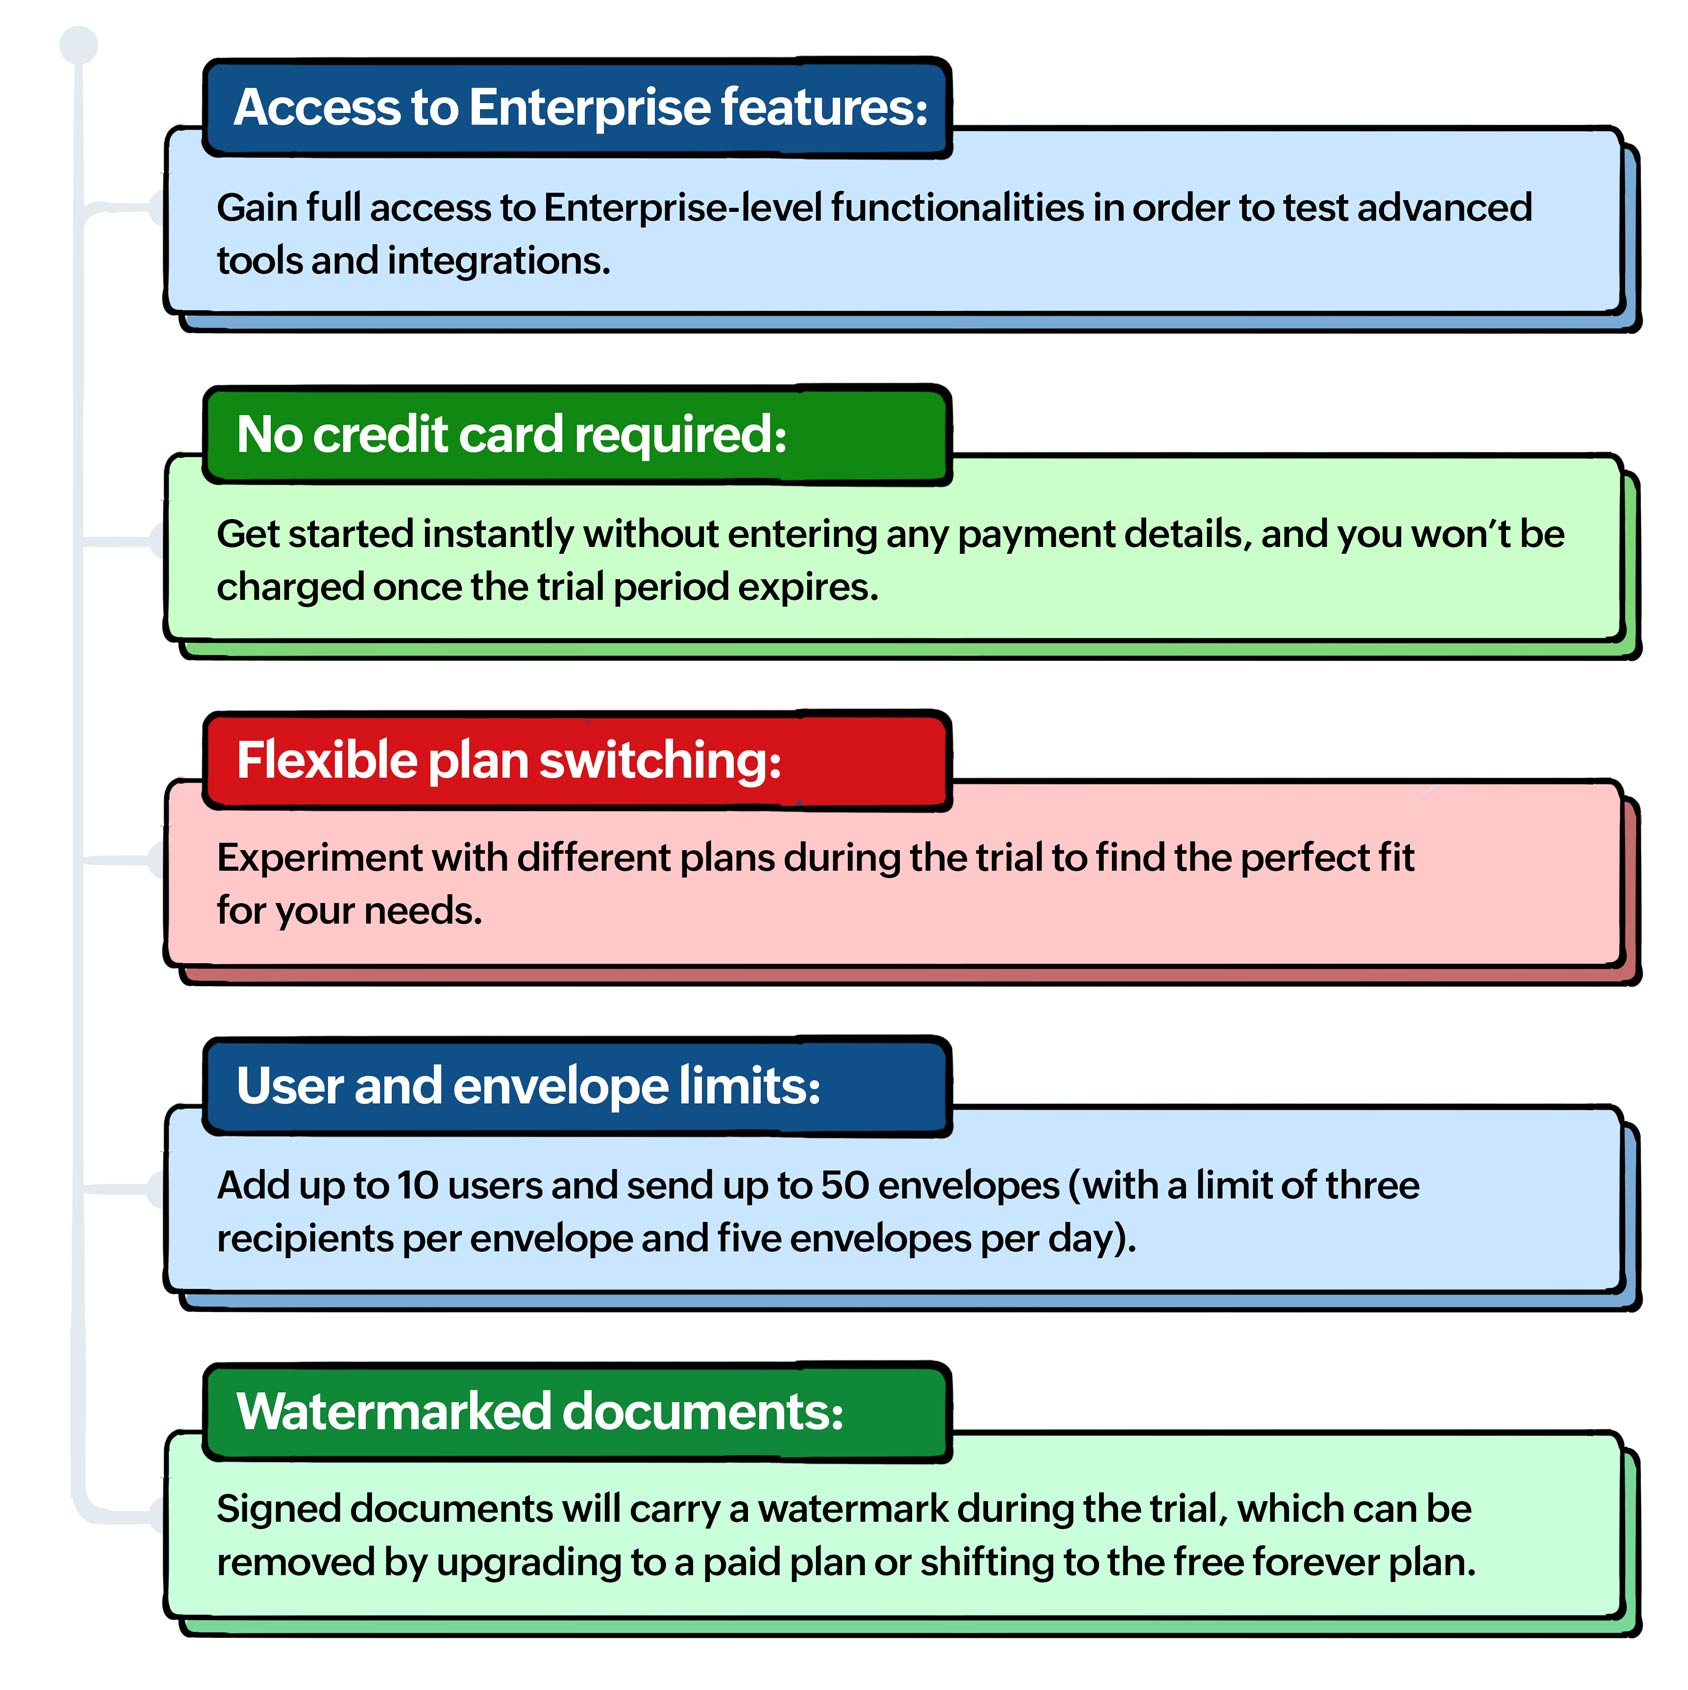
What you get with the 14-day free trial
Zoho Sign’s free trial lets you explore the platform completely risk-free, giving you full access to its features. Here’s everything included:
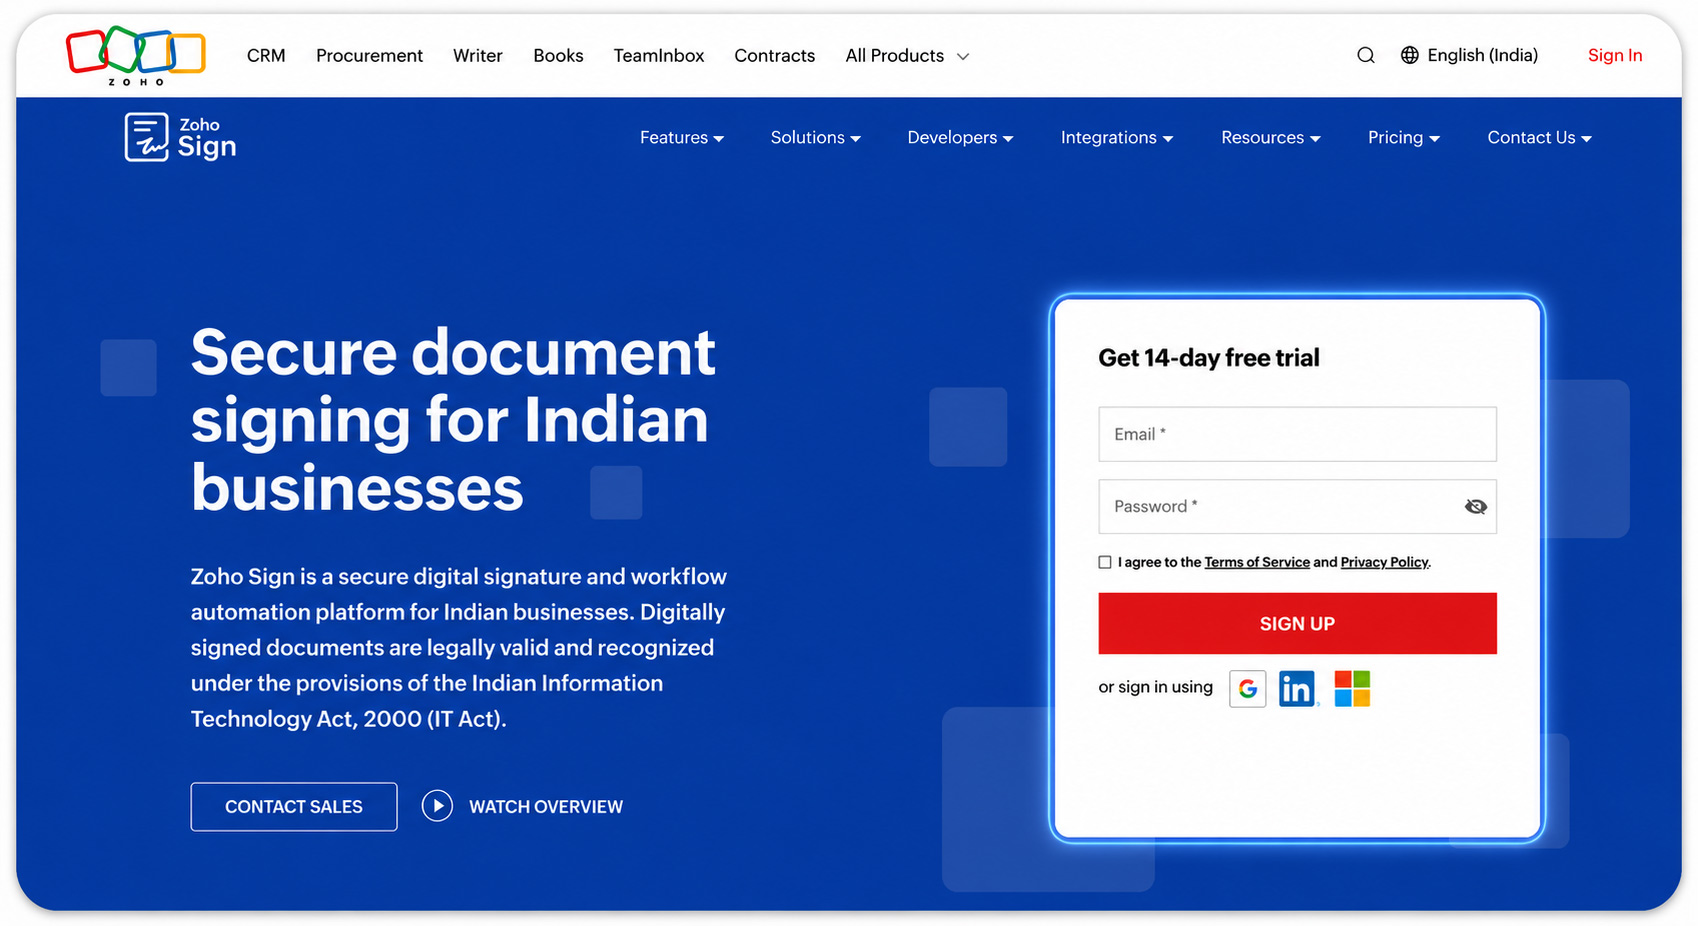
Signing up for the free trial
Signing up for the Zoho Sign free trial is quick and hassle-free. You can access Zoho Sign through its web app or via native apps on Android, iOS, iPadOS, macOS, and Windows. To get started, simply enter your email and phone number, and create a password. Alternatively, register instantly using your Google, LinkedIn, or Microsoft account. Once registered, you gain immediate access to the Enterprise plan for 14 days. During this period, you can explore all the features, switch between plans, and determine which option works best for you or your organization.
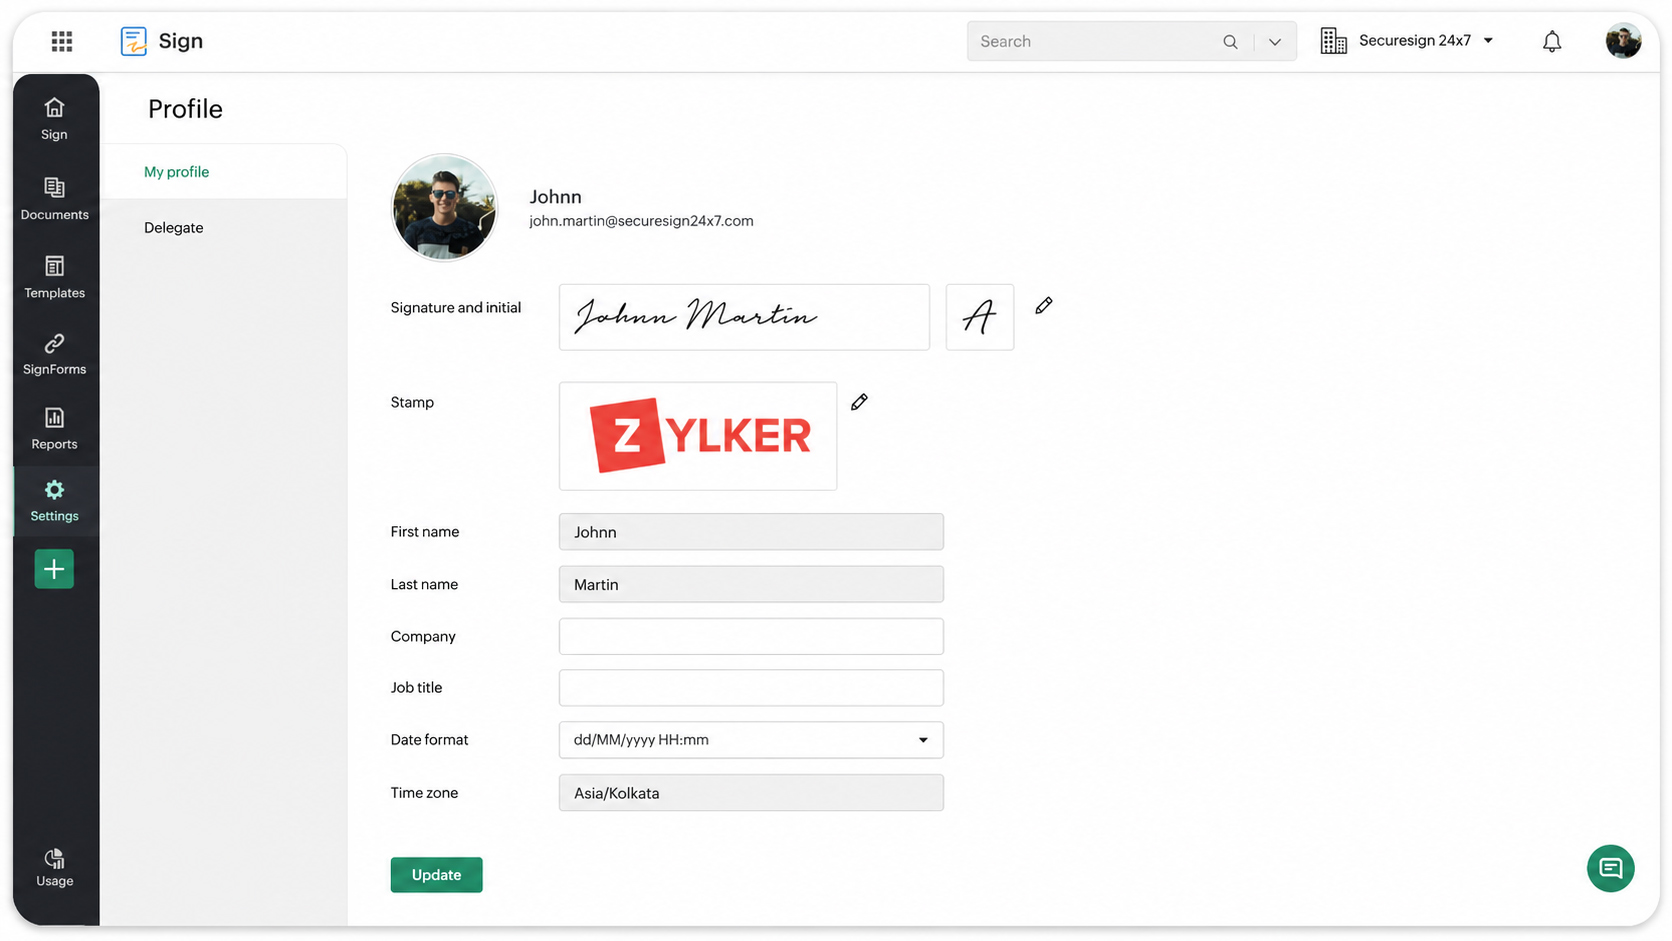
Setting up your Zoho Sign profile
After signing up, the first step is to set up your profile. This ensures your documents carry the correct details and your experience on the platform is personalized.
To set up your profile, go to "Settings" in the left navigation panel and click on "My profile" under the "General" section. Here, you can customize your profile by adding your signature, stamp, name, company name, job title, preferred date format, and time zone. Once you’ve made your changes, simply click Update to save them. With your profile complete, you’re ready to start sending and signing documents efficiently.
Features to explore during your trial
Now that your signature is ready to go, it’s time to start exploring what Zoho Sign can do. During your free trial, you can sign documents yourself, send documents out for signatures, manage and track them, and even try out advanced features like templates, SignForms, and more. In the following sections, we’ll walk you through each of these features step by step, so you can get a full sense of how Zoho Sign can simplify your document workflows.
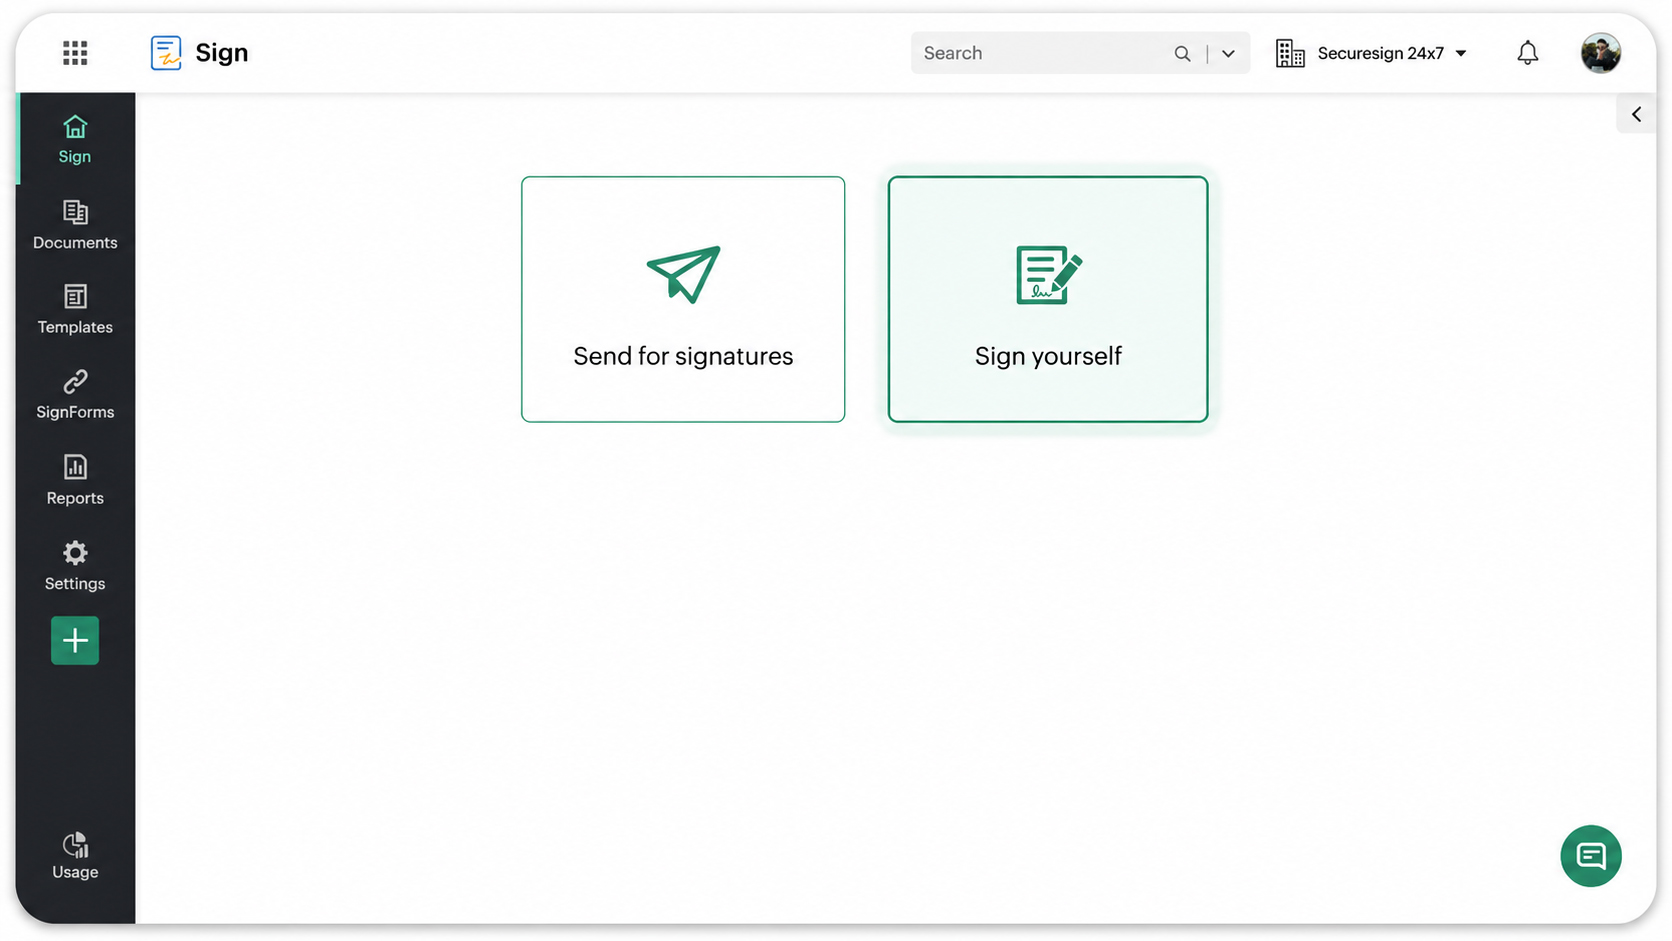
Signing documents yourself
Start by heading to your Zoho Sign dashboard and clicking the "Sign yourself" button. From there, you can upload your document, whether it’s saved on your device or stored in the cloud, or you can use the templates you have created in Zoho Sign.
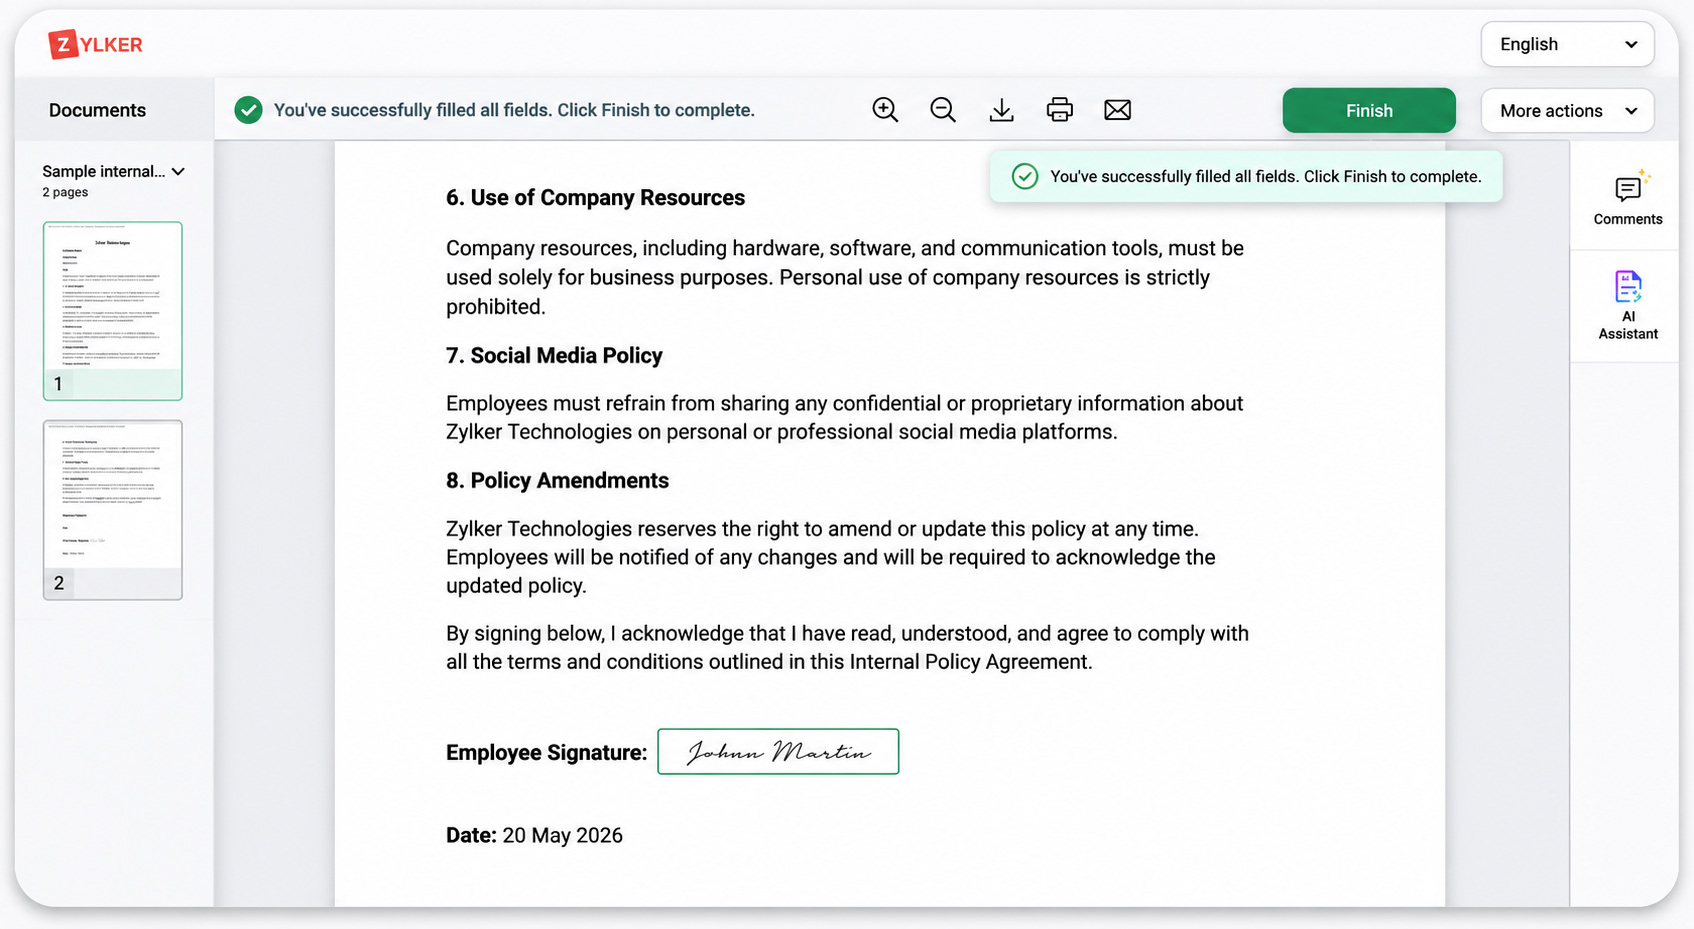
Once the document is uploaded, you’ll enter the document viewer, where you can add your signature by simply dragging and dropping it from the fields menu.
When everything is ready, select your preferred digital signature provider from the "Sign via" dropdown, and your signature will be applied. By default, the completed document lands in your registered email inbox, but if you need to share it with someone else, just enter their email and hit "Send."
Signing received documents
Zoho Sign makes it easy for anyone to sign documents, even if they don’t have a Zoho Sign account. When someone sends them a document, they’ll receive a request via email or SMS with a secure link. From there, they can access and sign the document instantly, no account setup required.
If you’re a Zoho Sign user, you can find your received documents in two places: the dashboard and the "Need your signature" page. To sign a document, simply select it, review the terms, click "Agree and Continue," fill in the required fields, add your signature, and you’re done!
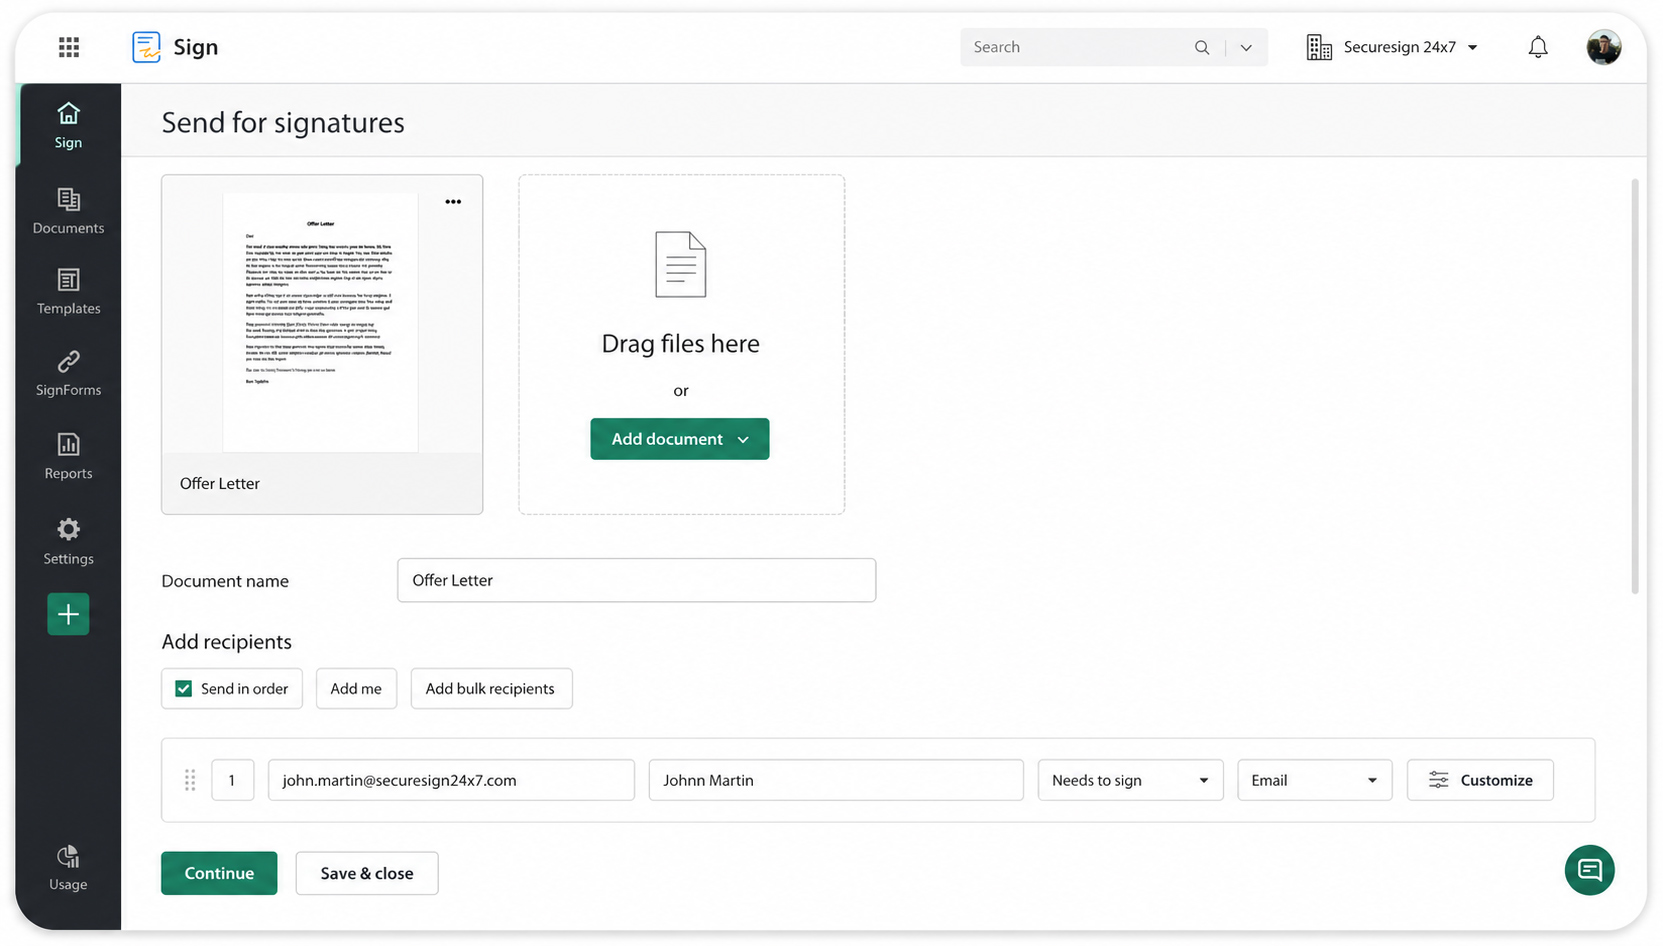
Sending documents for signature
From your dashboard, click "Send for signatures," upload your document, and give it a name. Then, add your recipients—enter their names and emails, set the signing order, define their actions, and choose how the document will be delivered. For large groups, the "Add bulk recipients" option lets you send to up to 1,000 people at once.
You can customize the experience for each recipient: add private notes, set authentication methods, choose languages, and even select which digital signature providers they can use. Under "More settings," you can add a description, categorize the document, set deadlines, enable reminders, and include a common note for all recipients.
Finally, place signer fields in the document viewer, click "Send," and confirm your details.
Managing and tracking documents
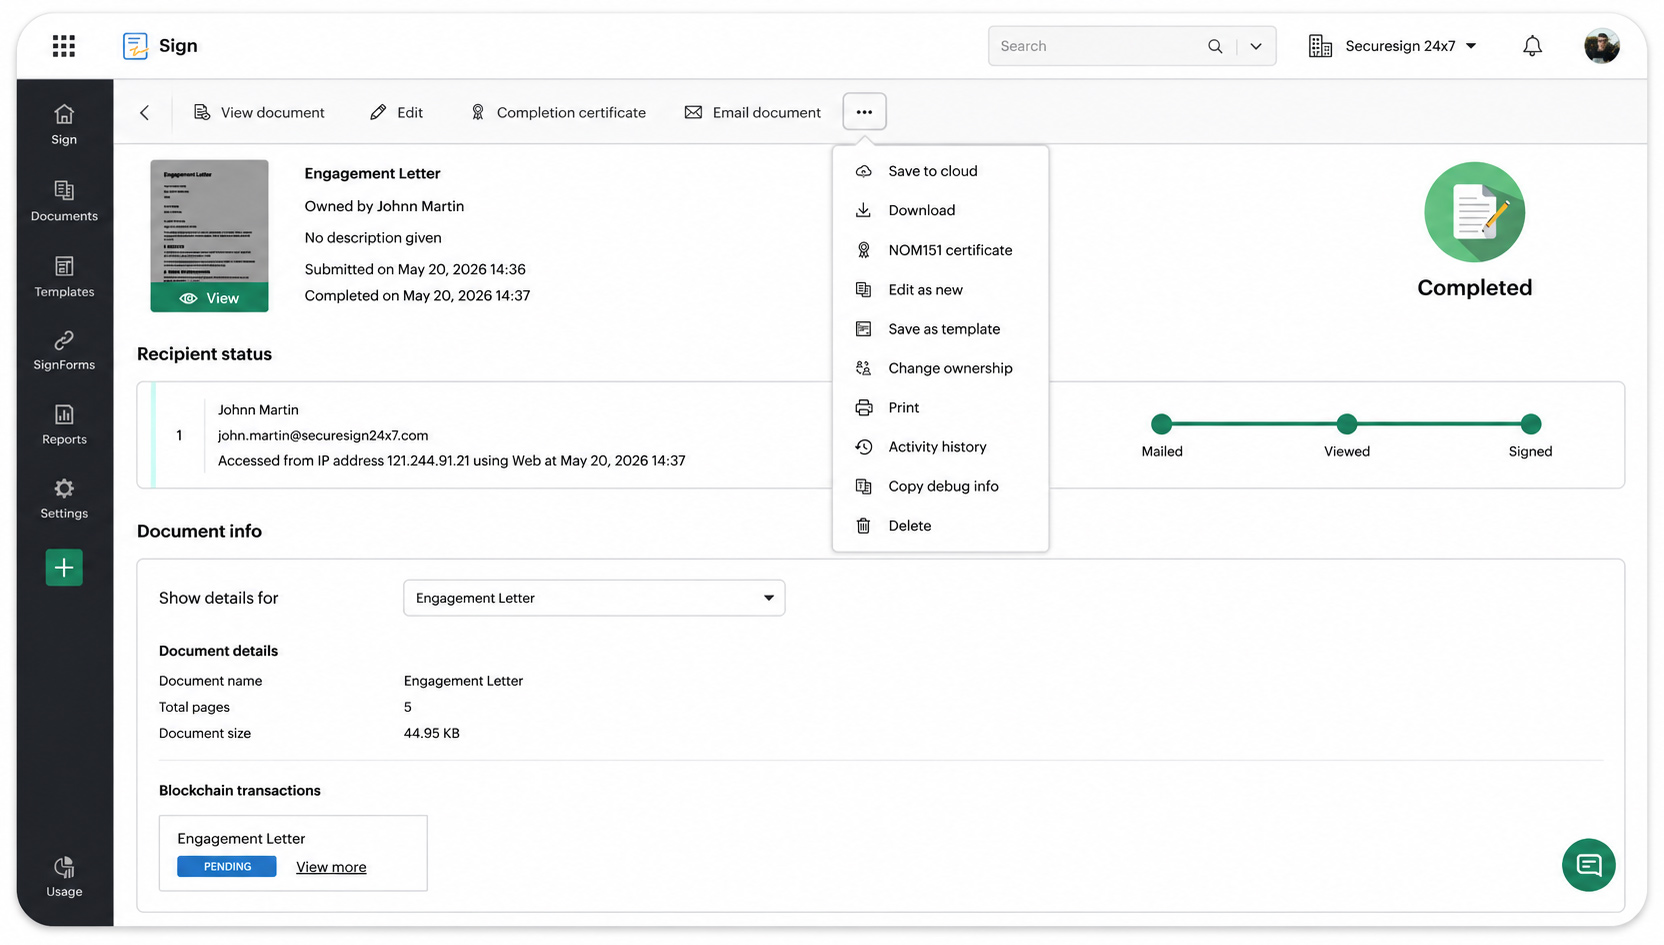
After you’ve sent a document for signature, Zoho Sign makes it easy to manage it and track its progress. Head over to the Zoho Sign dashboard and click "Documents" in the left navigation panel. From there, choose the category that matches the document you want to manage, or select "In progress" to monitor documents that are still awaiting action.
Once you open a document, the detailed view gives you access to key information such as the document owner, submission date, last updated date, and recipient status. Depending on the document’s status, you can send reminders, extend deadlines, recall documents, download copies, save documents to the cloud, email documents to others, print documents, or view the complete activity history and audit trail.
You can also make changes to documents that are still in progress. Use "Edit" to update document details and recipient settings, "Correct document" to modify the document or signing workflow, or "Edit as new" to quickly reuse the same document setup and fields.
To keep signing workflows moving smoothly, Zoho Sign also supports automatic email reminders and expiration date extensions. The activity history provides a secure, tamper-proof audit trail of every action performed on the document, helping maintain transparency and compliance throughout the signing process.
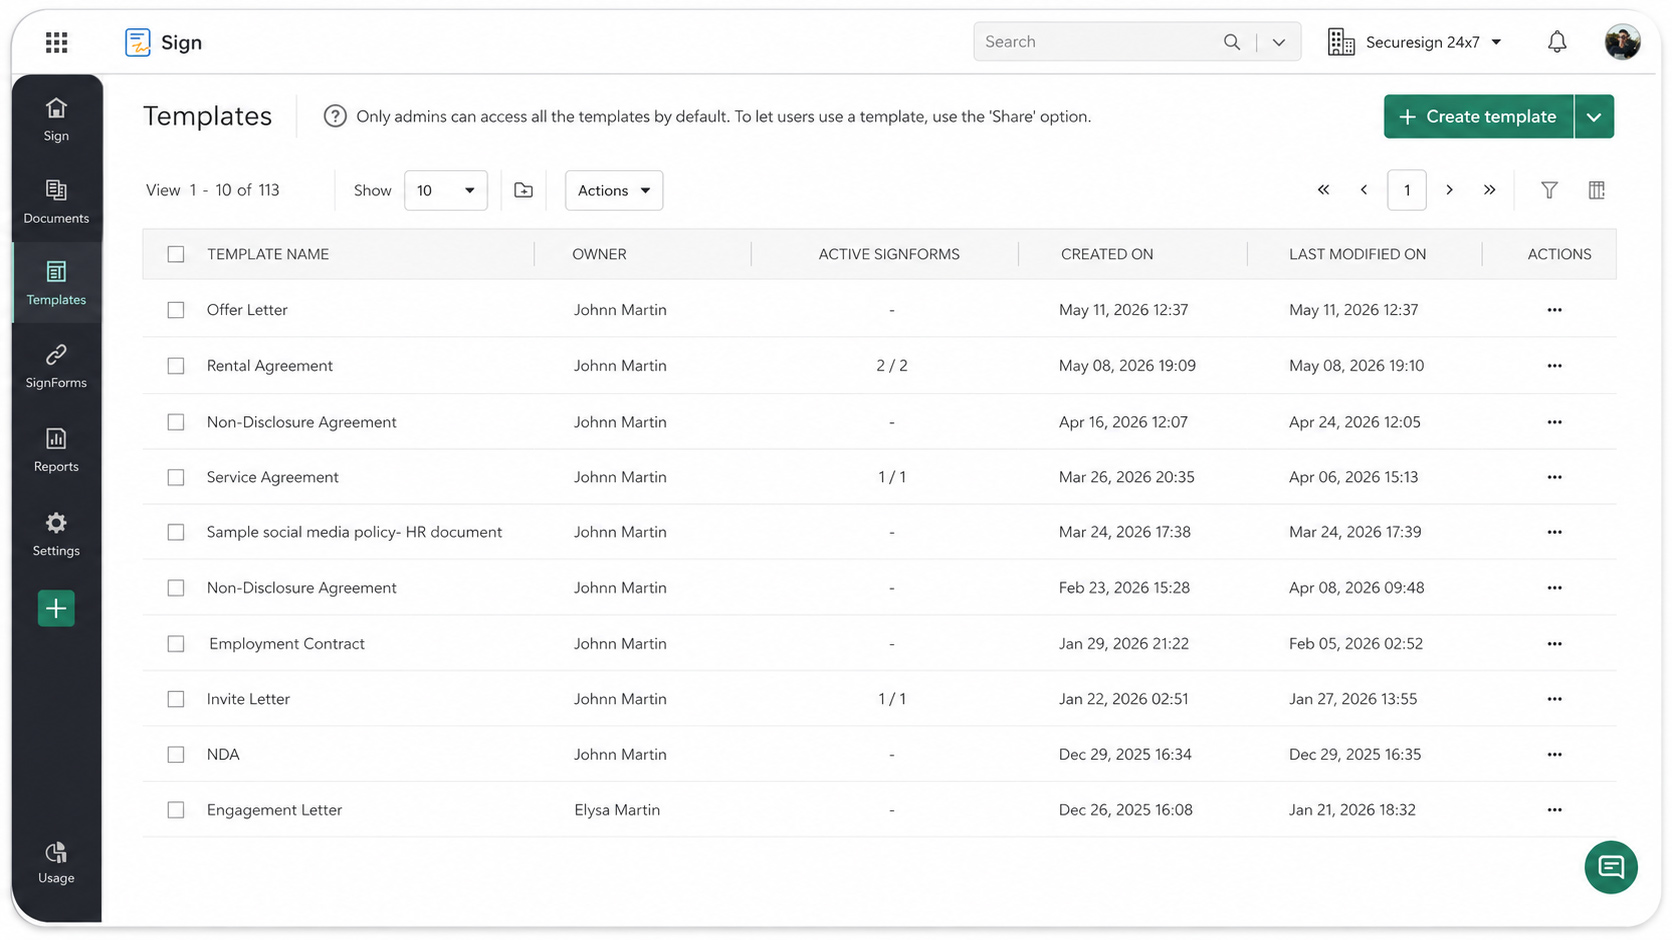
Creating templates
If you often send the same types of documents, Zoho Sign’s templates can save you a lot of time. Templates let you create reusable documents for contracts, agreements, or any frequently used forms, so you don’t have to start from scratch every time.
For instance, if you run a real estate business, use rental or lease agreement templates to quickly send out standardized documents without missing any key details.
To create a template, go to "Templates" in the left navigation panel and click "+ Create template." Creating a template is very similar to sending a document for signature, but instead of adding specific recipient details, you just define their roles.
Once your template is ready, using it is simple. When uploading a document to sign or send for signatures, just select Templates and pick the one you want.
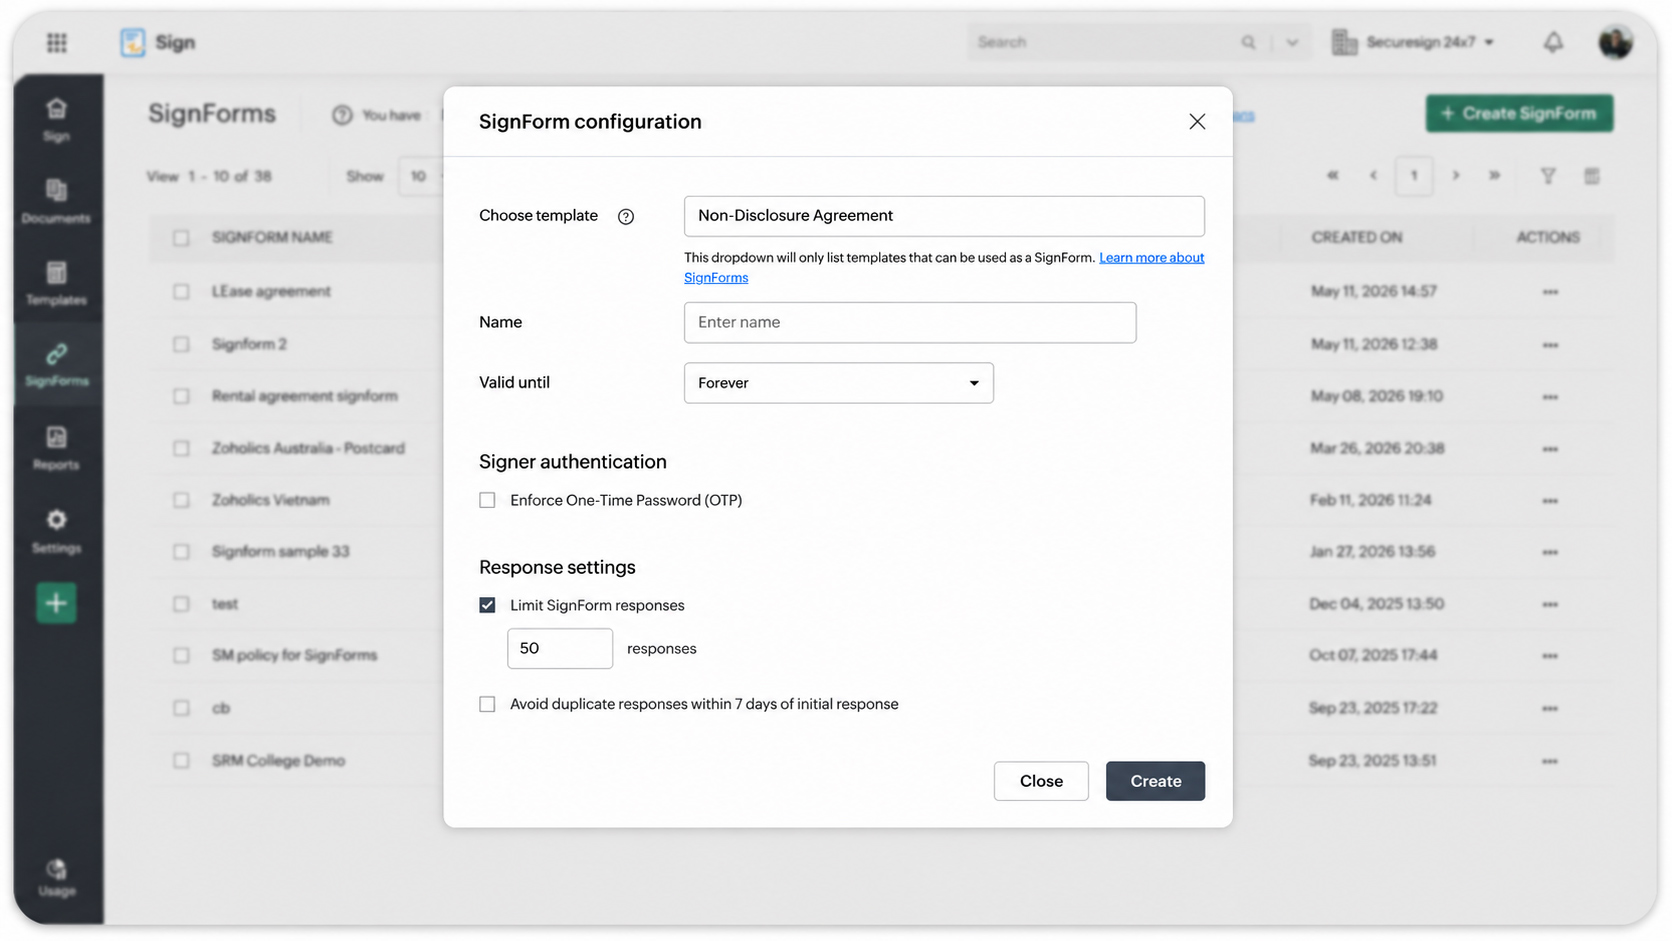
Creating SignForms
The SignForms feature makes collecting signatures effortless. Use it to create a self-service form or generate a secure public link that can be shared or embedded in websites and third-party applications.
For instance, if your business runs a membership program, you can create a membership enrollment SignForm and embed its URL on your website. New members can sign up and complete all necessary documents directly—no back-and-forth emails required.
SignForms are also perfect for workshops, surveys, or any scenario where you need multiple people to submit signed documents quickly. You can even create a template for a frequently used form, turn it into a SignForm, and share it as a public URL.
To create a SignForm, navigate to the "SignForms" tab and click "Create SignForm." Select the template you want to convert, give it a name, set its validity period, enable OTP verification if needed, configure response settings, and click "Create." That’s it—your SignForm is ready to use, making document collection fast, secure, and completely digital.
Besides templates and SignForms, Zoho Sign offers a host of other powerful features to simplify your workflows, including bulk signing and bulk sending, payment collection, advanced third-party integrations, in-person signing, signer groups, qualified electronic signatures (QES), custom SMTP, custom domain mapping, white labeling, and much more.
After your free trial
At the end of your 14-day free trial, if you haven’t upgraded, you’ll be automatically moved to the free plan, with all your data intact. You can subscribe to any of the paid plans or the API-only plan at any time.
So why wait? Sign up for your Zoho Sign free trial today at zoho.com/sign. You can also check out our help documentation on getting started with Zoho Sign or watch this video.
Please feel free to email us at support@zohosign.com to share your feedback or request a personalized demo.
Until next time, happy signing!
Comments