Connected Banking with ICICI Bank Payments
Zoho Books now partners with ICICI Bank - one of the largest banks in India to let you make payments directly from Zoho Books. Let’s take a scenario to explain this better:
Scenario: Peter runs a retail business. He makes and receives payments online for all his sales and purchases. Logging into his bank’s internet banking portal everytime to make a payment makes it inconvinient and time consuming. He immediately integrates his Zoho Books organization with his ICICI Bank Corporate account. He now settles bills and even makes advance payments–all without logging into the ICICI Bank CIB (Corporate Internet Banking) Portal.
Watch this video to learn how the integration works!
In this page:
- Benefits of the Integration
- Connecting to ICICI Bank
- Adding Vendor’s Bank Account Details
- Making Payments via Zoho Books
- Fetching Direct Feeds and Reconciling Bank Statements
- Disabling the Integration
Benefits of the Integration
- Make online payments to your vendors directly from Zoho Books without logging into ICICI Bank CIB (Corporate Internet Banking) Portal.
- Make advance payments and even bulk bill payments to your vendors.
- Make your GST payments directly from Zoho Books.
- Reconcile bank statements in a jiffy with direct feeds from the bank.
- Set up approval workflows and keep an eye on the all payments made.
Connecting to ICICI Bank
Connect your corportate bank account to Zoho Books by following these simple steps:
1. Setup
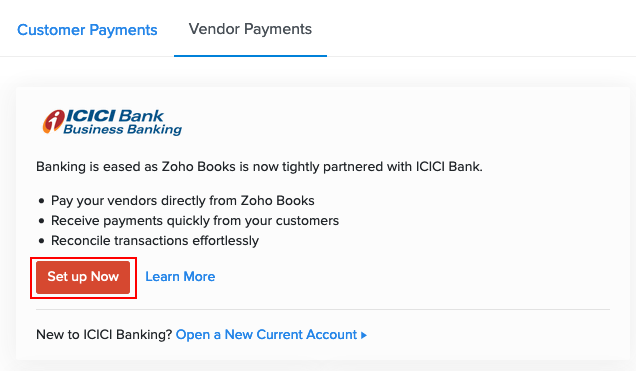
- Go to Zoho Books > Settings > Integrations.
- Select Vendor Payments and you will be able to find ICICI Bank listed under it.
- Click the Set up Now button to begin setup.
You will be prompted to fill in the necessary details to complete your setup.
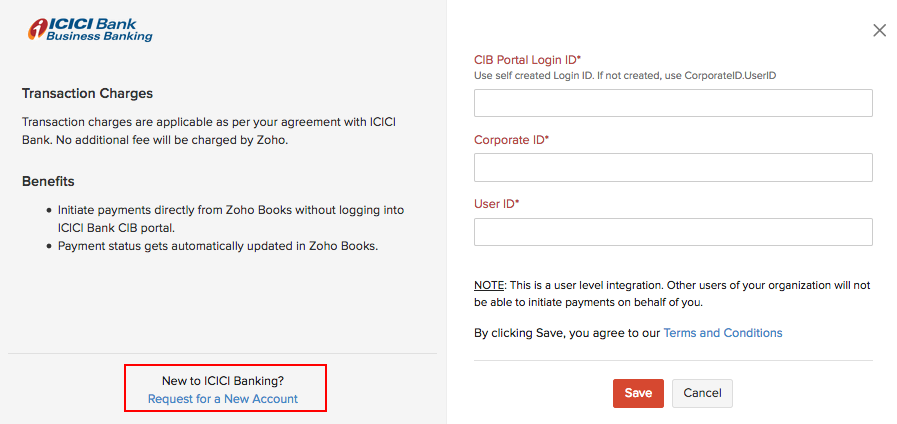
If you are a new user to ICICI Bank:
- Request for a new bank current account by clicking Request for a New Account (You can also request for a new account directly from the Vendor Payments page).
- Enter your Phone Number and Zip Code in the screen that follows.
- Click Submit.
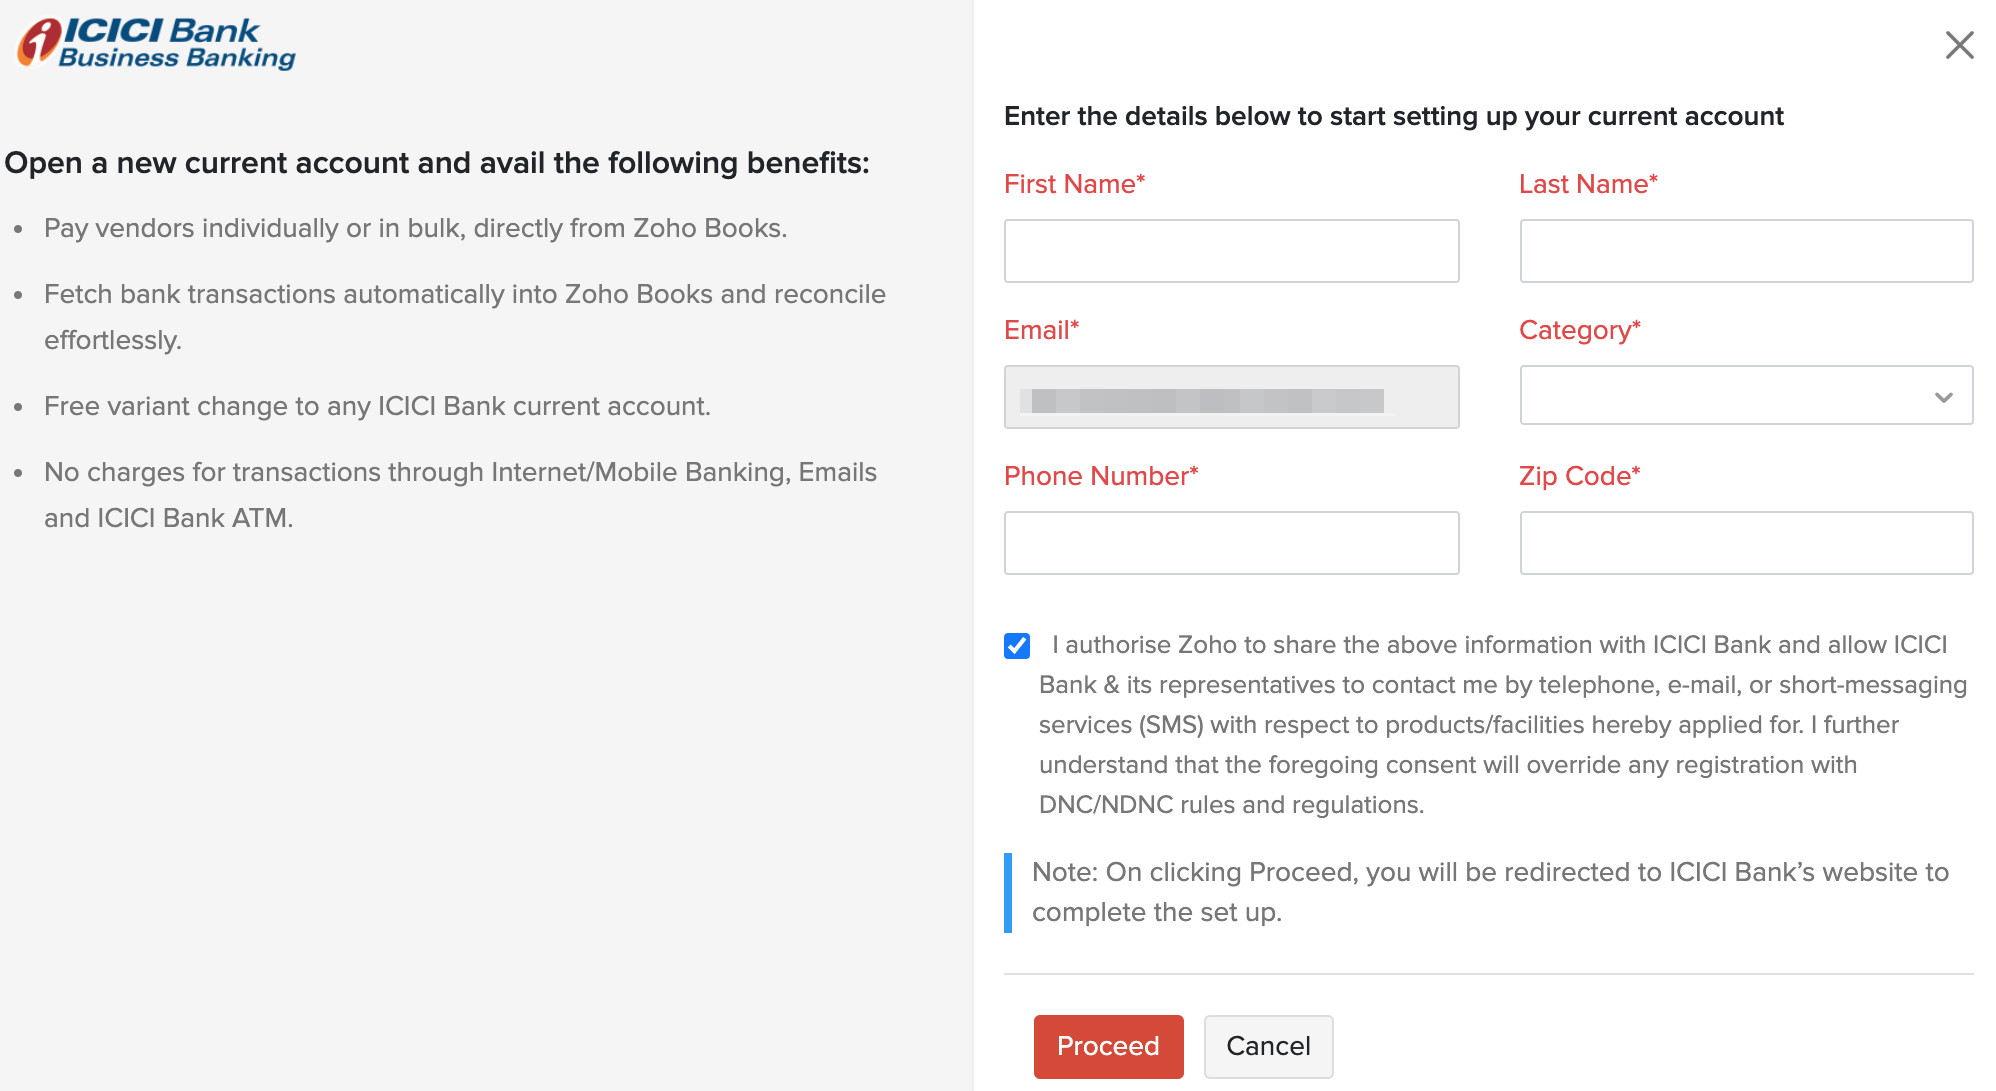
The bank executives will get in touch with you and help you open a new account. Once you have received your User ID and Corp ID, you will be able to integrate your ICICI Bank account with Zoho Books.
If you are an existing user of ICICI Bank:
- Click the Set up Now button and a pop-up appears.
- Enter your CIB Portal Login ID if you’ve created one in the portal. If you haven’t created one earlier, type your CorpID.UserID in the field.
- Enter your Corporate ID and User ID.
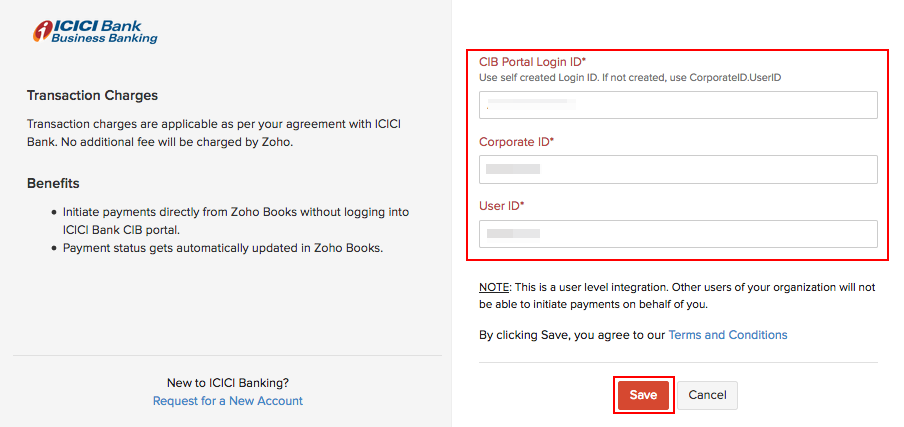
- Click Save and a pop-up appears.
- Read the instructions and click Proceed to approve the integration in your ICICI Bank CIB Portal.
Warning: Once you have set up the integration with these credentials, you will not be able to edit them in Zoho Books. You must disable the integration and set it up once again with the new credentials.
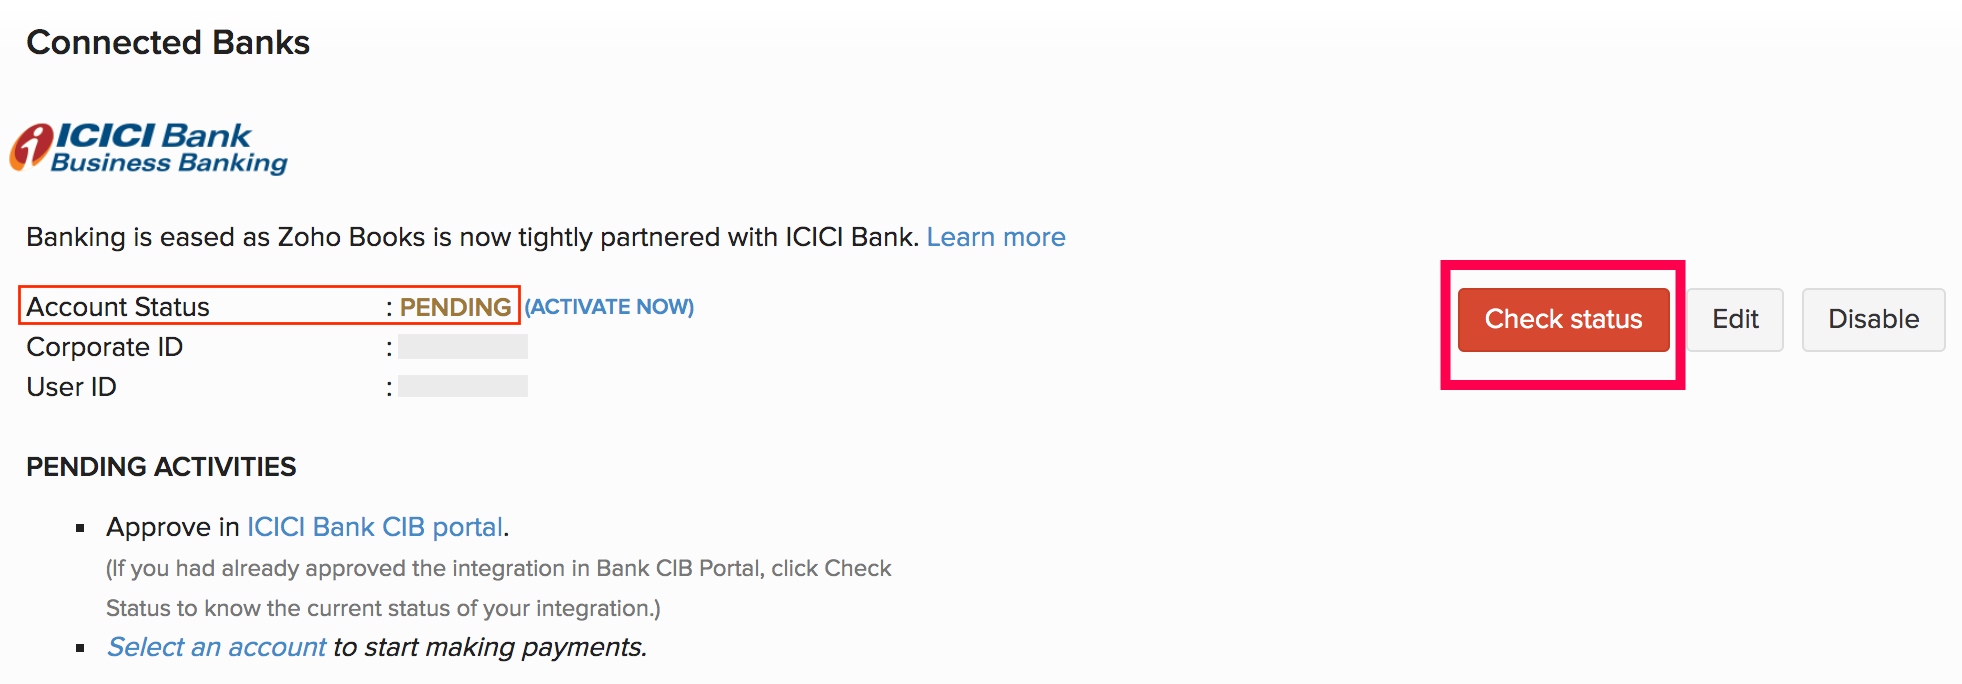
2. Approval
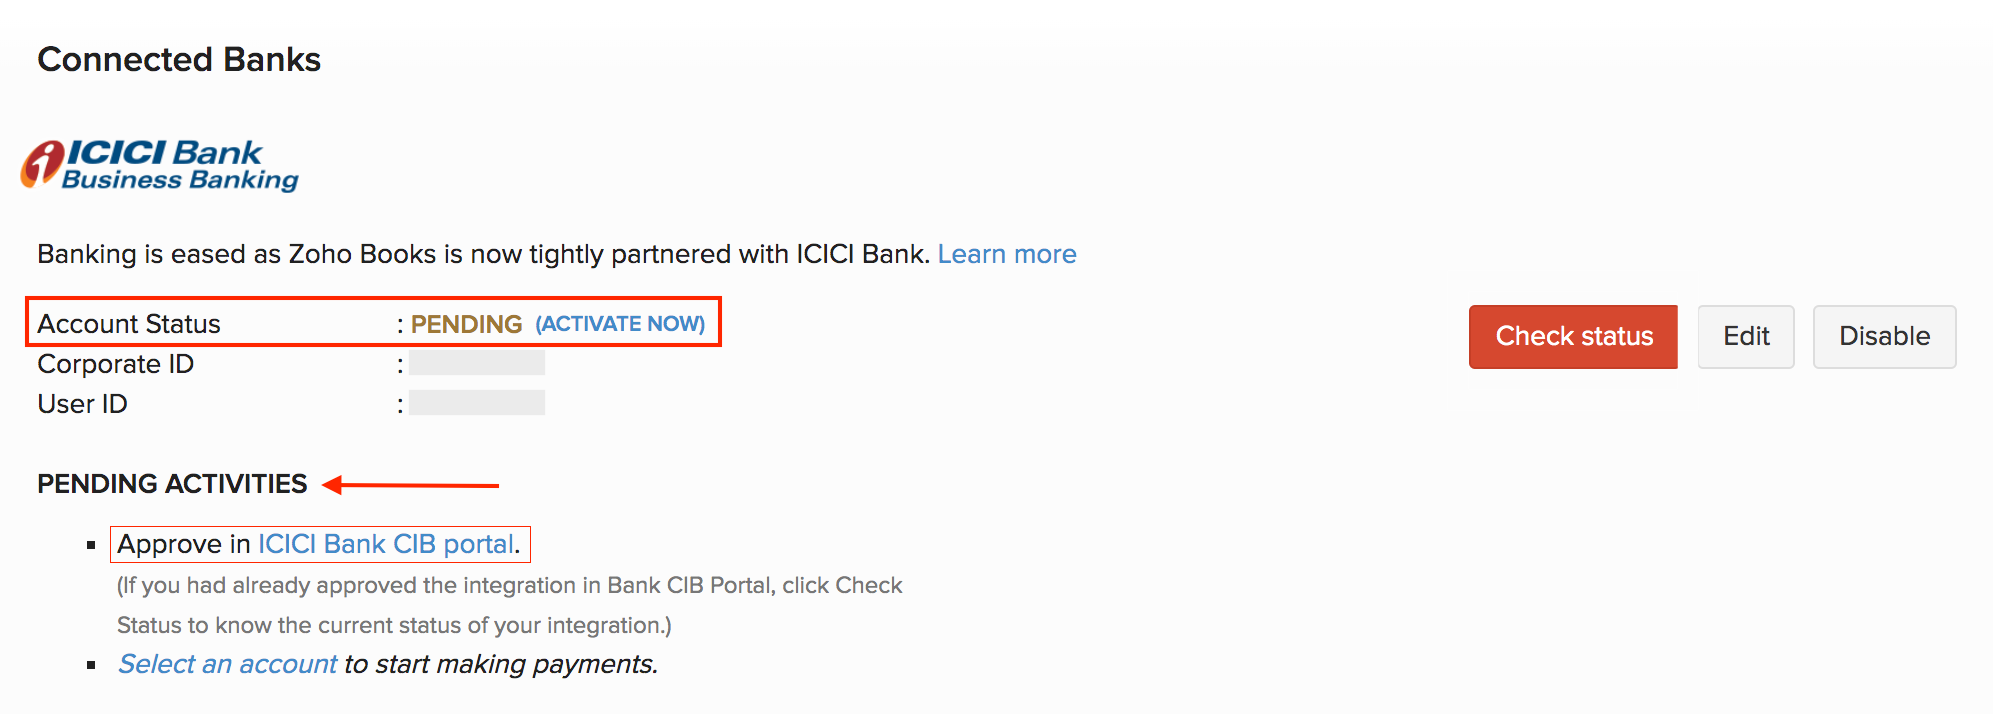
After initiating the integration, you need to approve it in the CIB Portal to complete the integration. Untill then, your Account Status will be Pending.
To approve the integration:
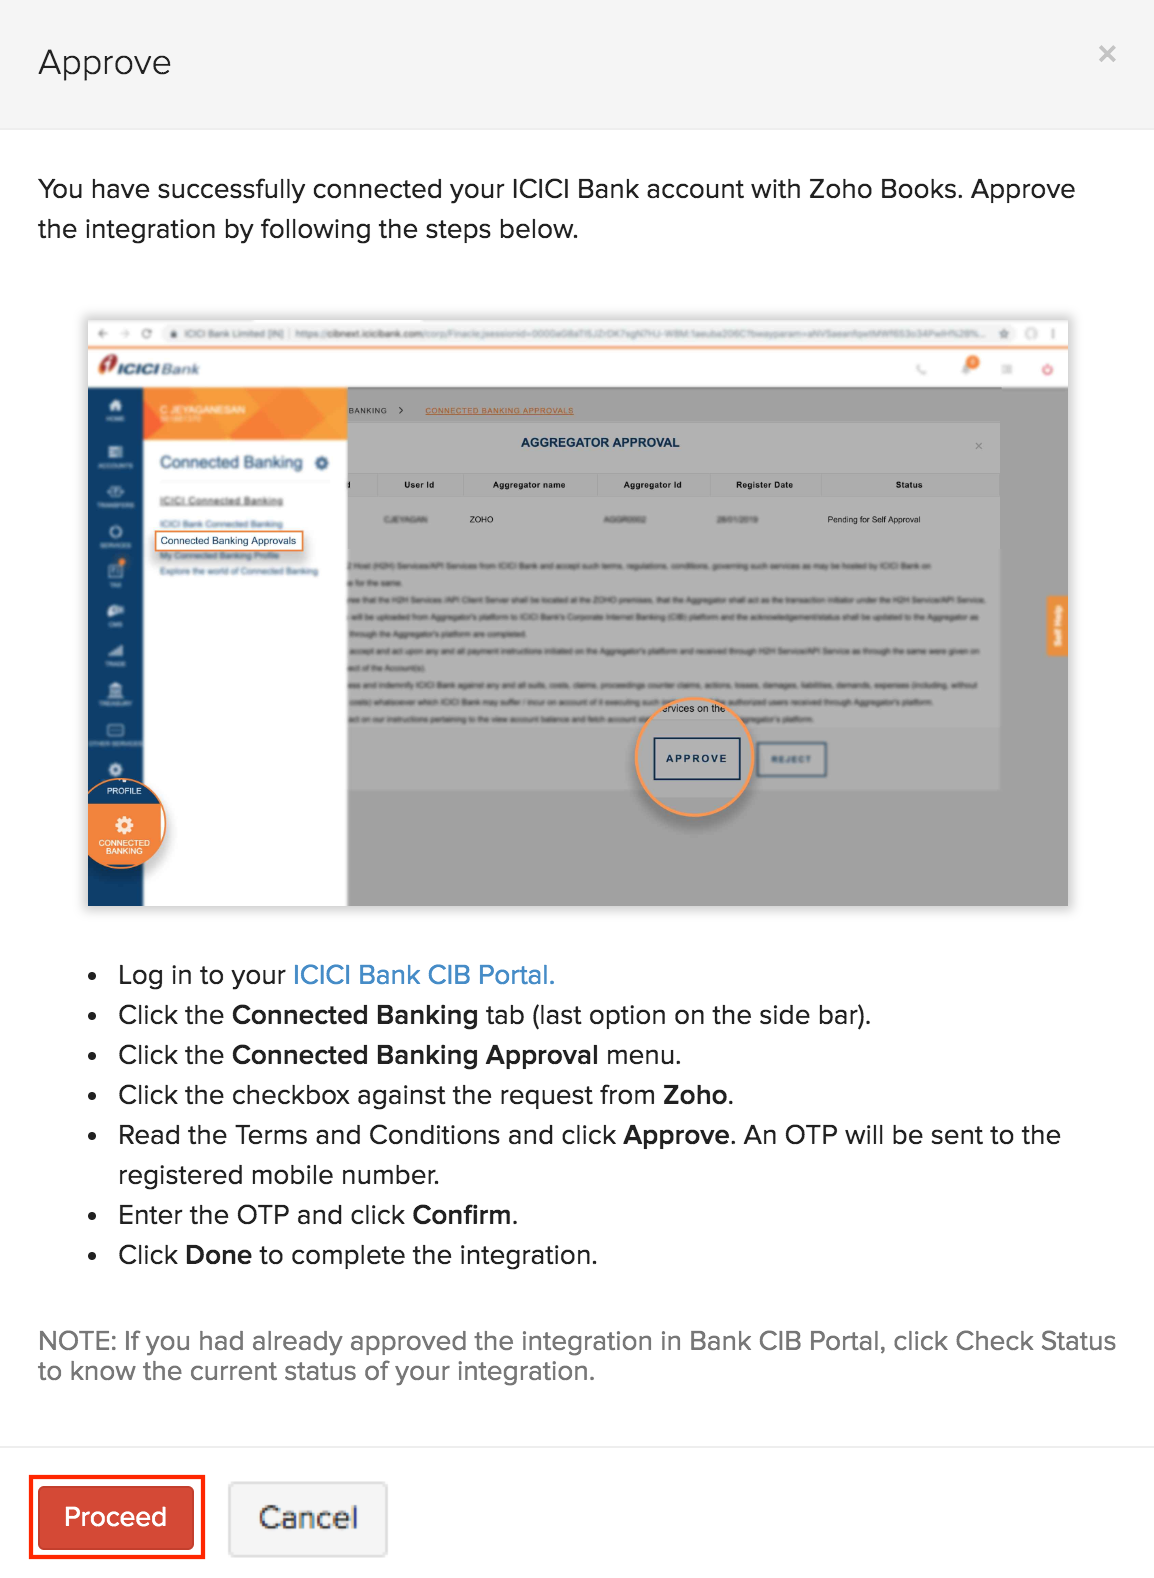
- Click Proceed in the pop-up that appears after the integration setup to approve the integration.
or
Click Cancel to approve the integration later. You will be able to find the option Approve in ICICI Bank CIB Portal under the Pending Activities section for the integration.
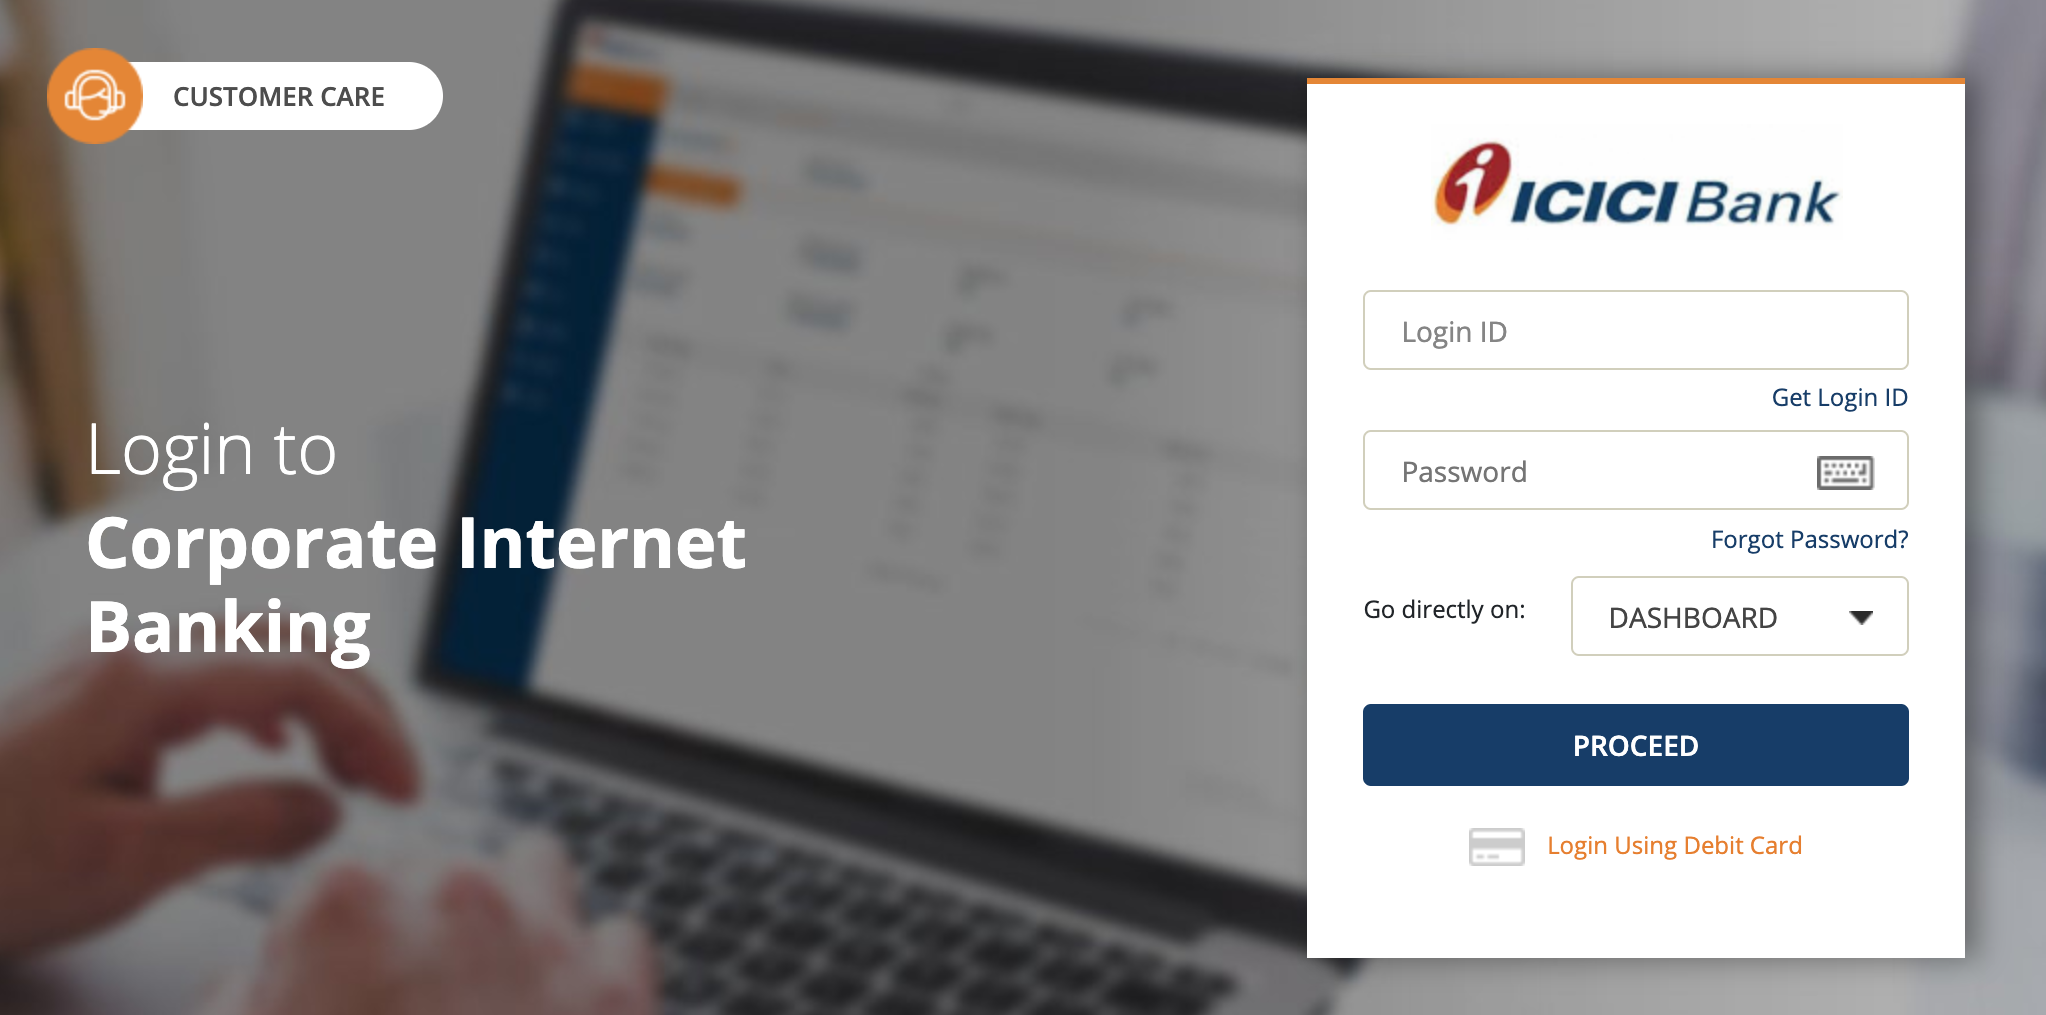
- Click Proceed or Approve in ICICI Bank CIB Portal and you’ll be redirected to the login page.
- Enter your ICICI Bank CIB Login ID and Password.
Insight: If you haven’t created a Login ID for your CIB Portal, enter your CorpID.UserID in the given field.
- Click Proceed to login.
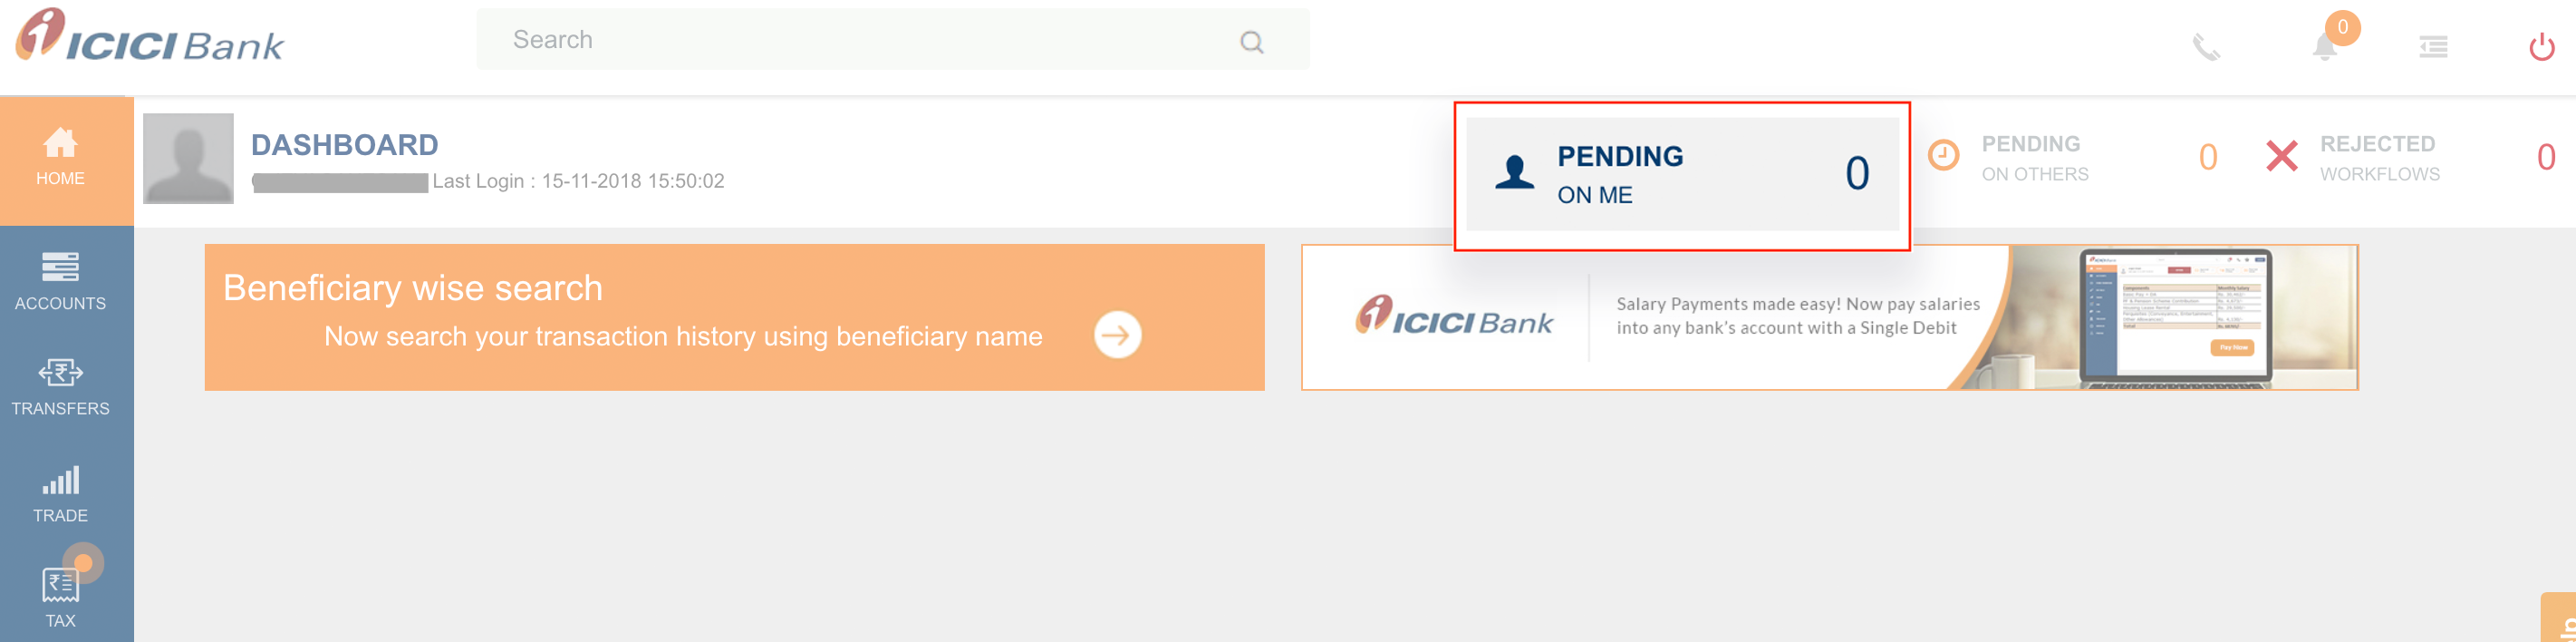
- Click Pending on Me from the top bar of the portal’s Dashboard.
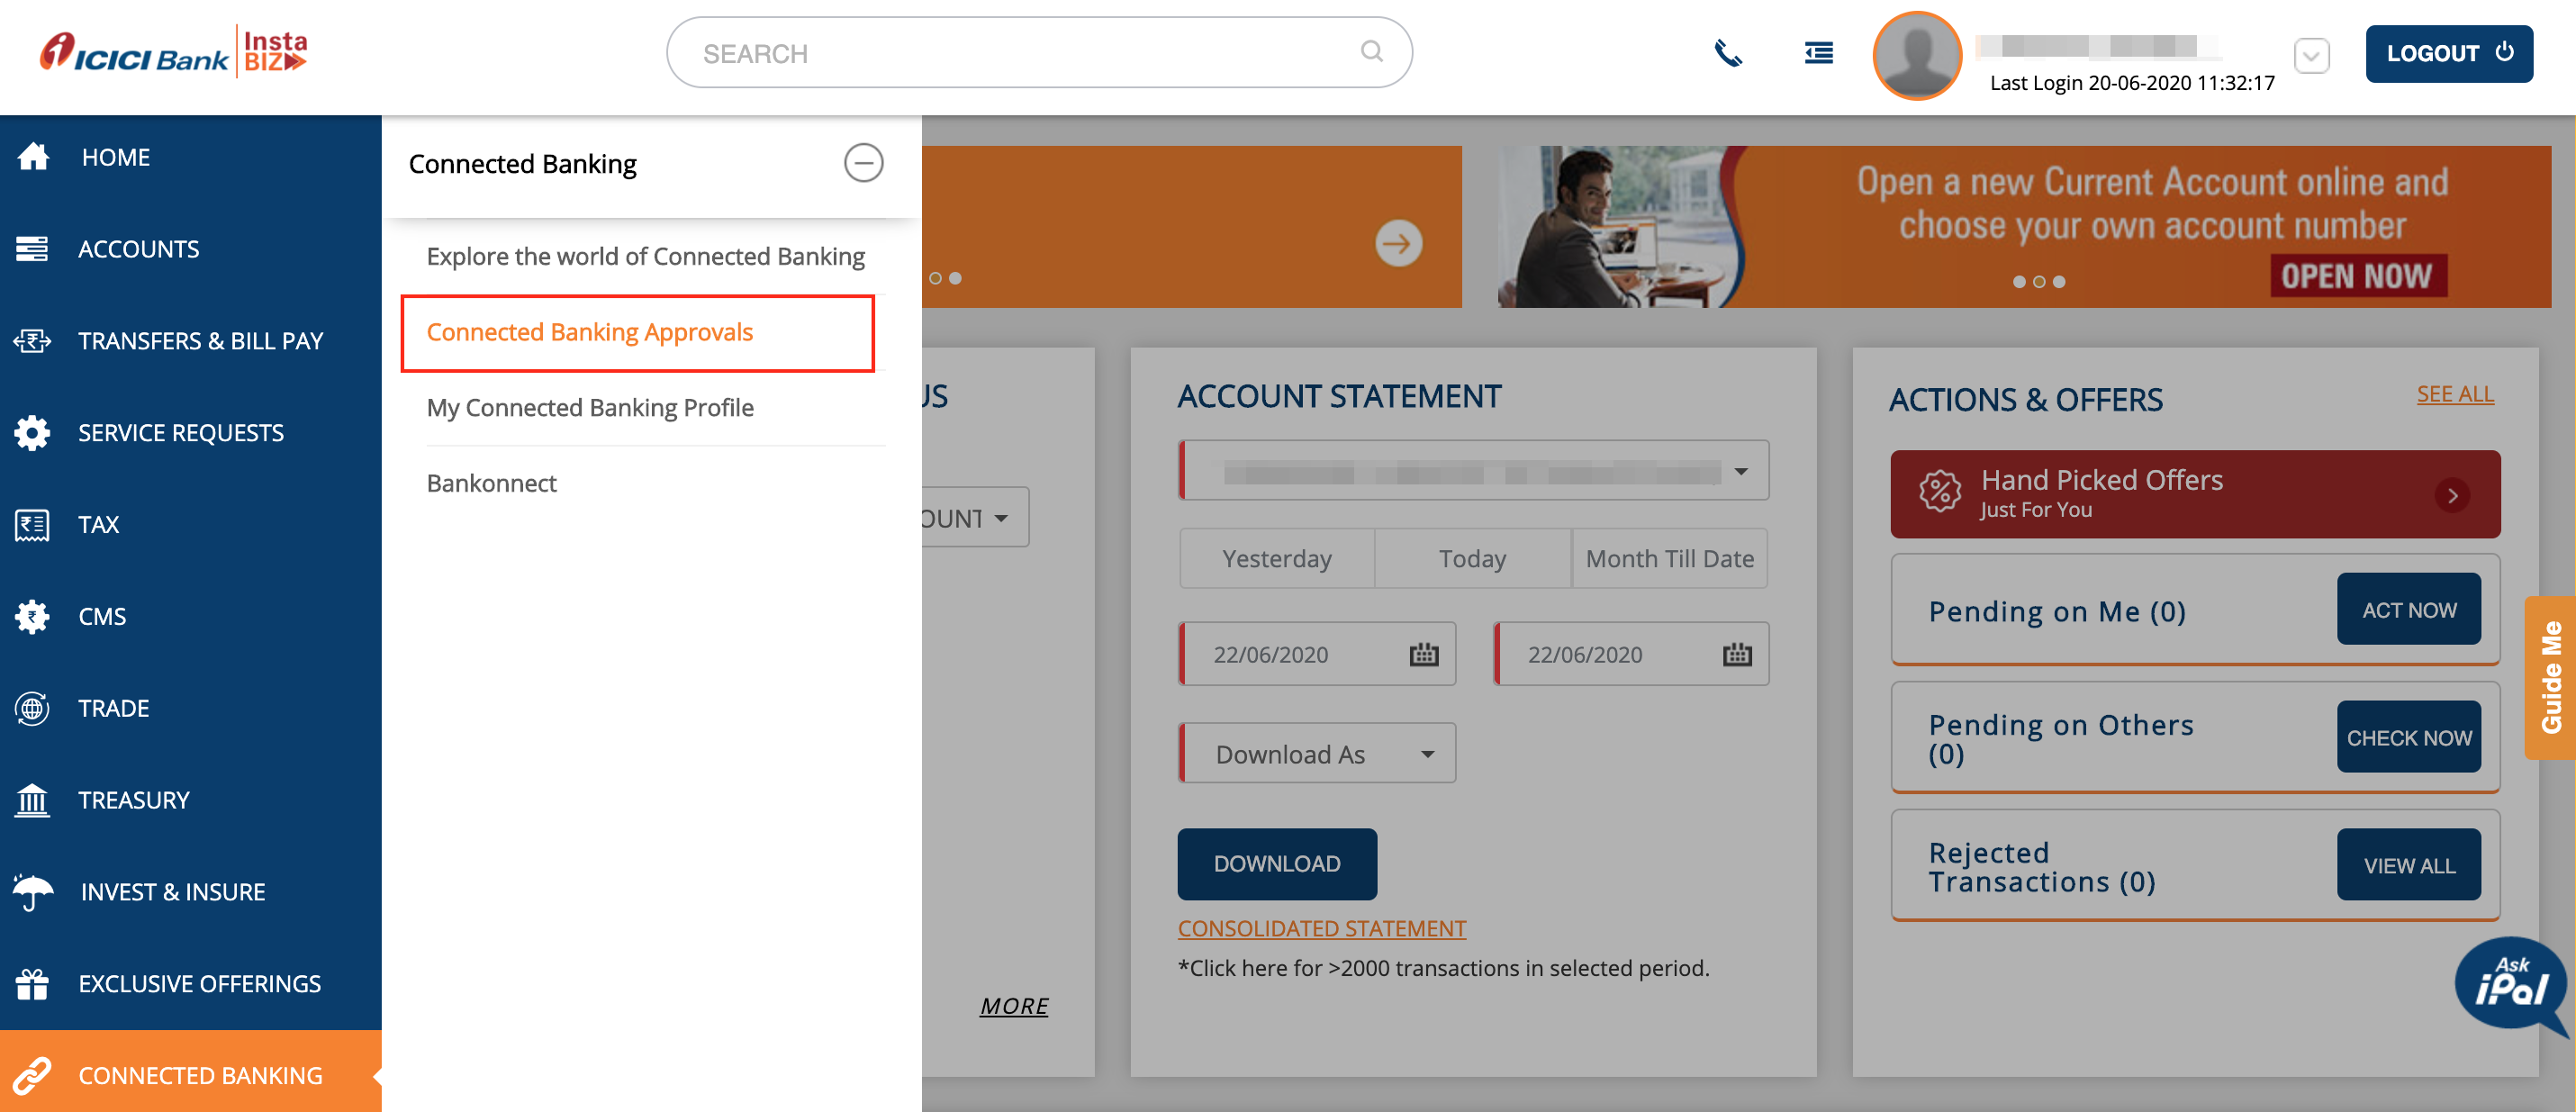
- Go to the Connected Banking Approvals tab.
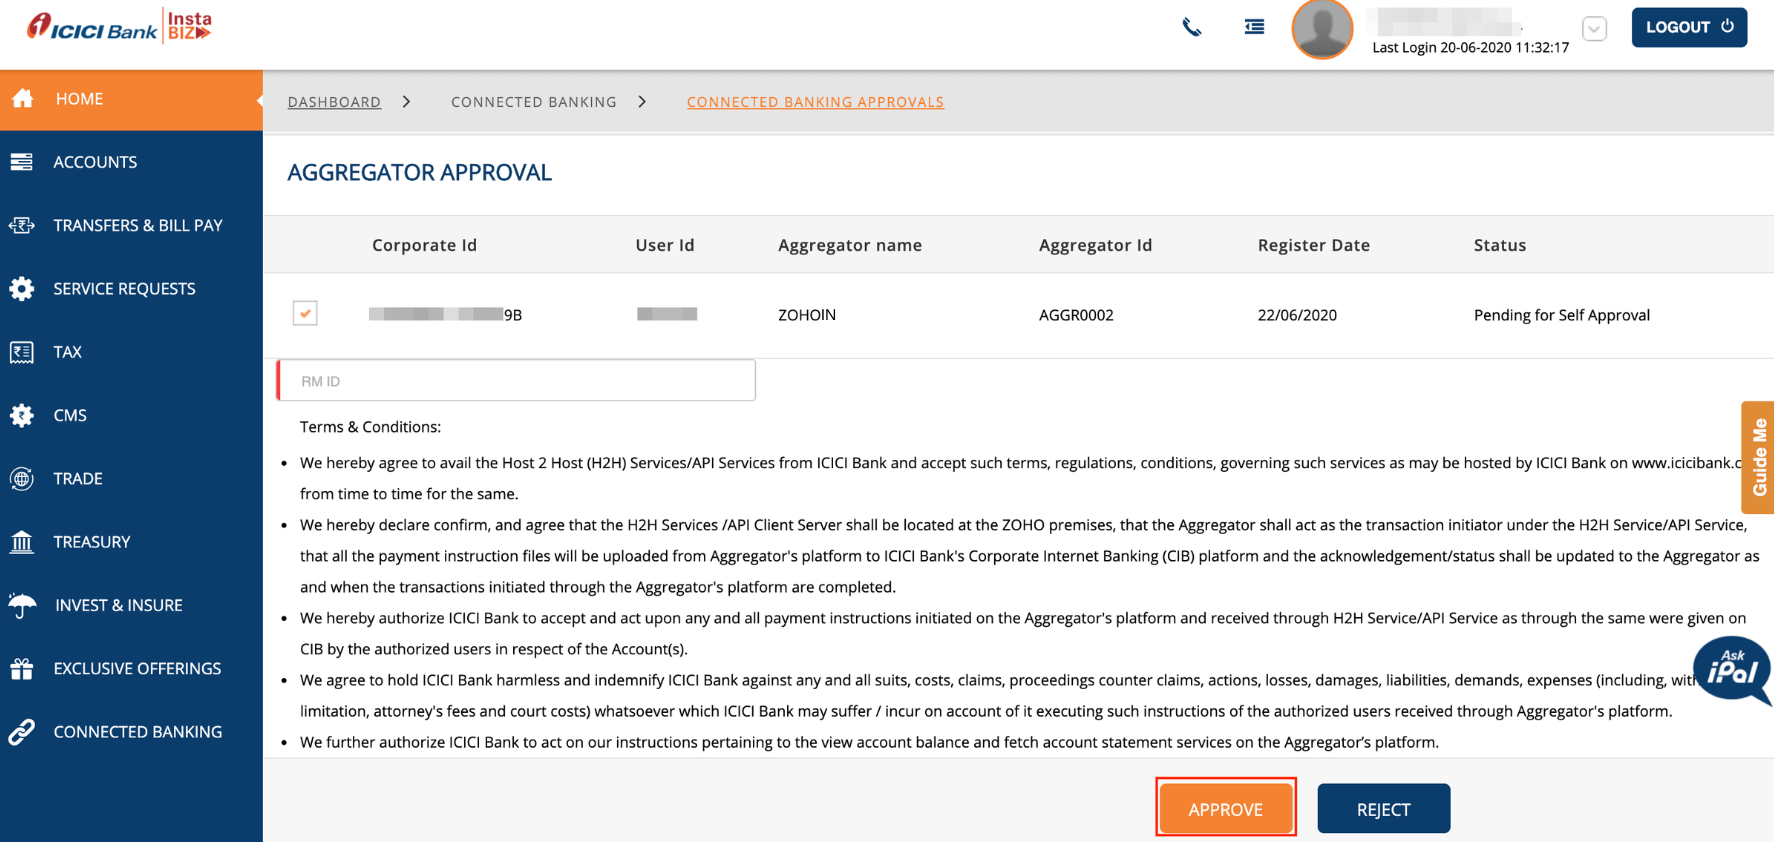
- Check the box near the Corporate ID that you would like to approve.
- Read the Terms and Conditions and click Approve.
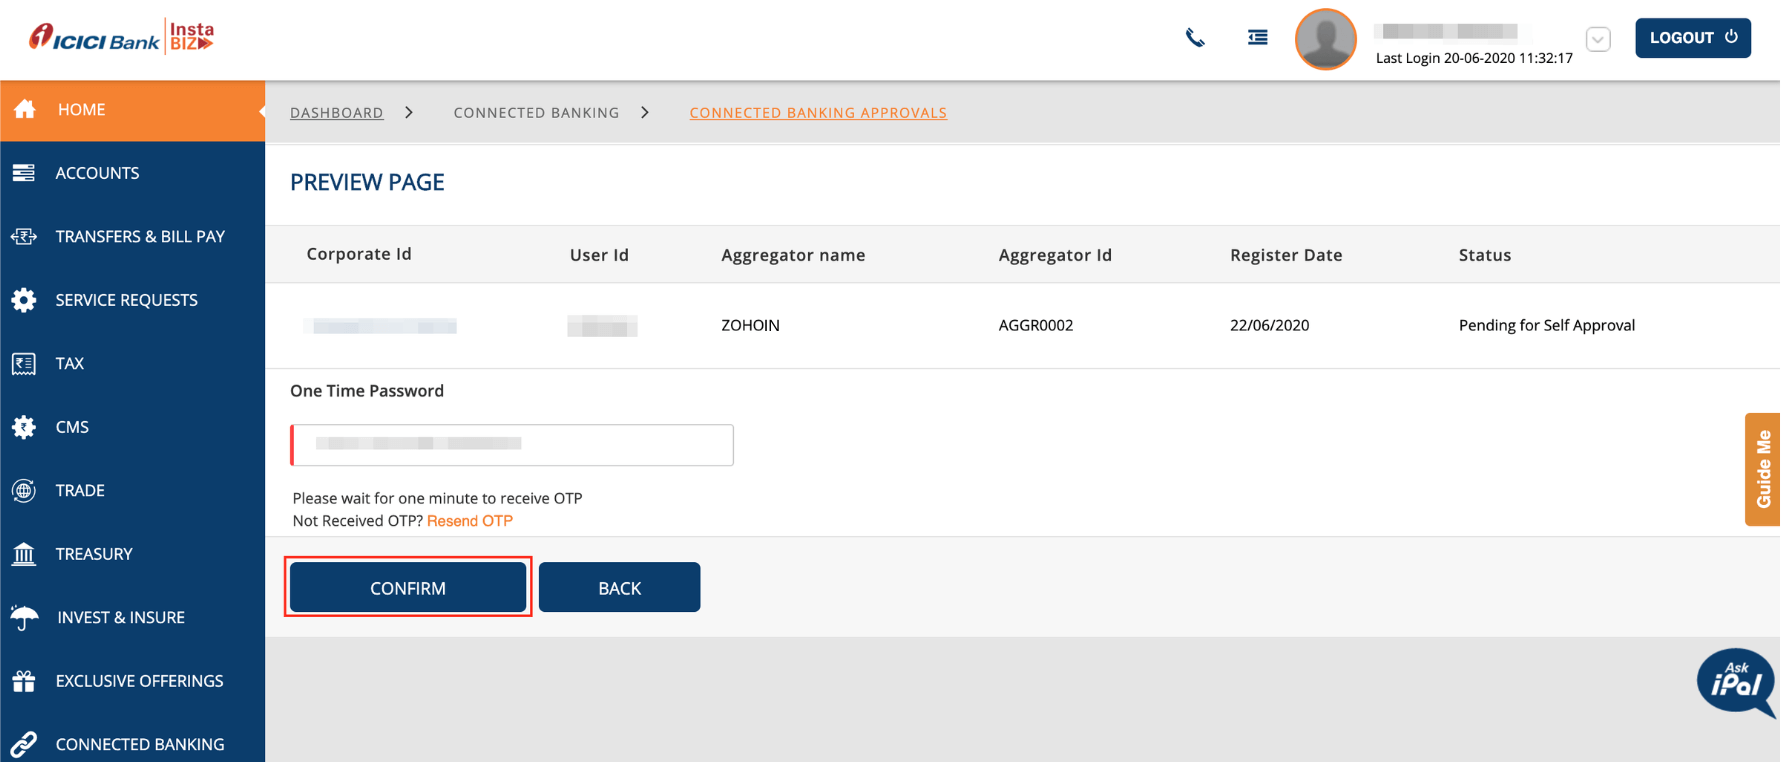
- In the screen that follows, enter the One Time Password sent to your registered mobile number.
- Complete the integration by clicking Confirm.
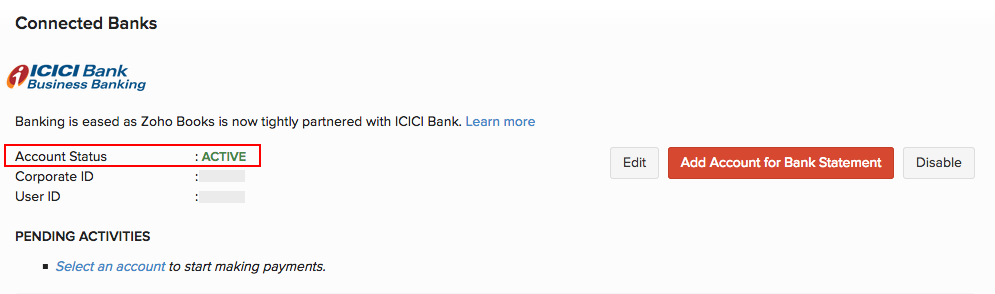
- Check the status of the integration in Zoho Books by clicking Check Status in the integrations page.
Once the integration is active, you will receive a notification in Zoho Books and your account status will be Active. You can also select your primary account to make payments under Pending Activities.
Adding vendor’s bank account details
Once you have integrated your bank account, you can add your vendor’s bank account details to start making payments from Zoho Books. To do so:
- Log in to Zoho Books.
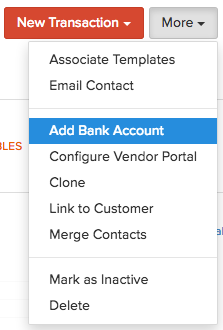
- Navigate to the Contacts module and select the particular vendor.
- Click the More dropdown and select Add Bank Account.
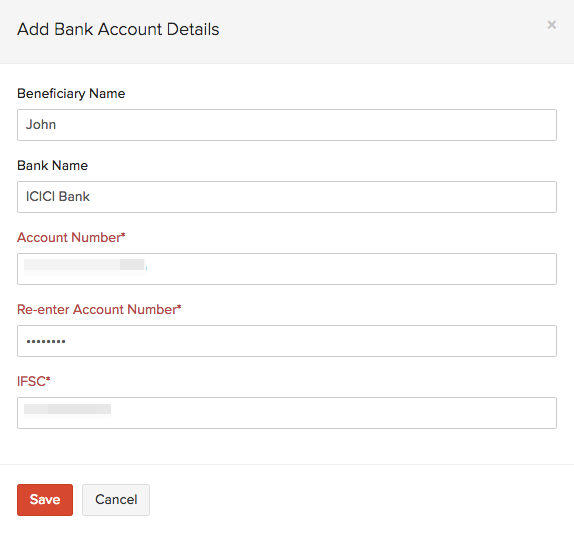
- Enter the vendor’s bank account details in the pop-up that appears and click Save.
Making payments via Zoho Books
Once you have added your vendor’s bank account details, you can start making payments. In Zoho Books, you can:
Make Bill Payments
Make quick payments to your vendors when a bill is received and settle dues. To start making payments:
- Navigate to Bills under the Purchase module in the left side bar.
- Choose/Record a New Bill that you have received from your Vendor.
- Mark the bill as Open if it is in the draft state to start making payments.
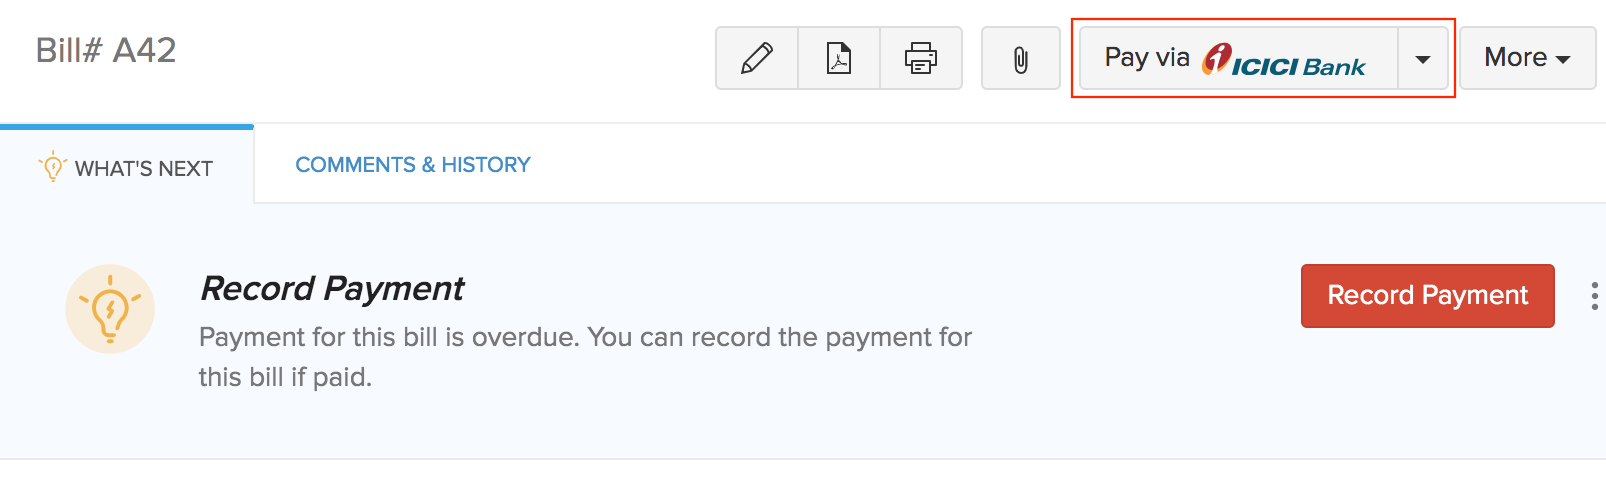
- Click the Pay via ICICI Bank button and a pop-up appears.

| Fields | Description |
|---|---|
| Balance Due | The total sum of money due for payment. |
| Amount | Enter the Amount you would like to pay. You can choose to make complete or partial payments towards the bill. |
| From Account | Select the From Account from the list of bank accounts linked to Zoho Books from the dropdown. You can view your account balance and also make it your primary account to make payments by checking the Make this primary option. |
| To Account | Select the account to which you would like to make the payment. |
| Transaction Type | Select the Transaction Type from the available fund transfer options.The modes of fund transfer available are ICICI Bank Fund Transfer / IMPS /RTGS and NEFT. |
- Click Proceed and in the screen that follows enter the One Time Password(OTP) sent to your registered mobile number.

- Click Submit to make your payment.
The status of your payment will be either Cleared or Uncleared in the Payments Made tab based on the transaction type and the approval workflow you’ve chosen.
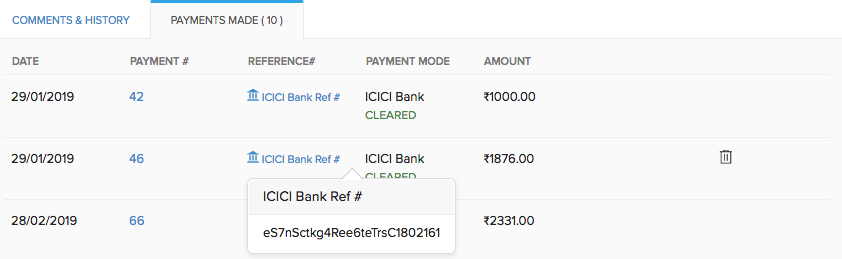
Insight: A transaction is in the Cleared status when the payment made has been deposited to the vendor’s account.
A transaction is in the Uncleared status when the payment has not yet been deposited in the vendor’s account. A few reasons for this include the transaction type chosen or the checker not approving the transaction.
If you have enabled an approval workflow in your CIB portal,
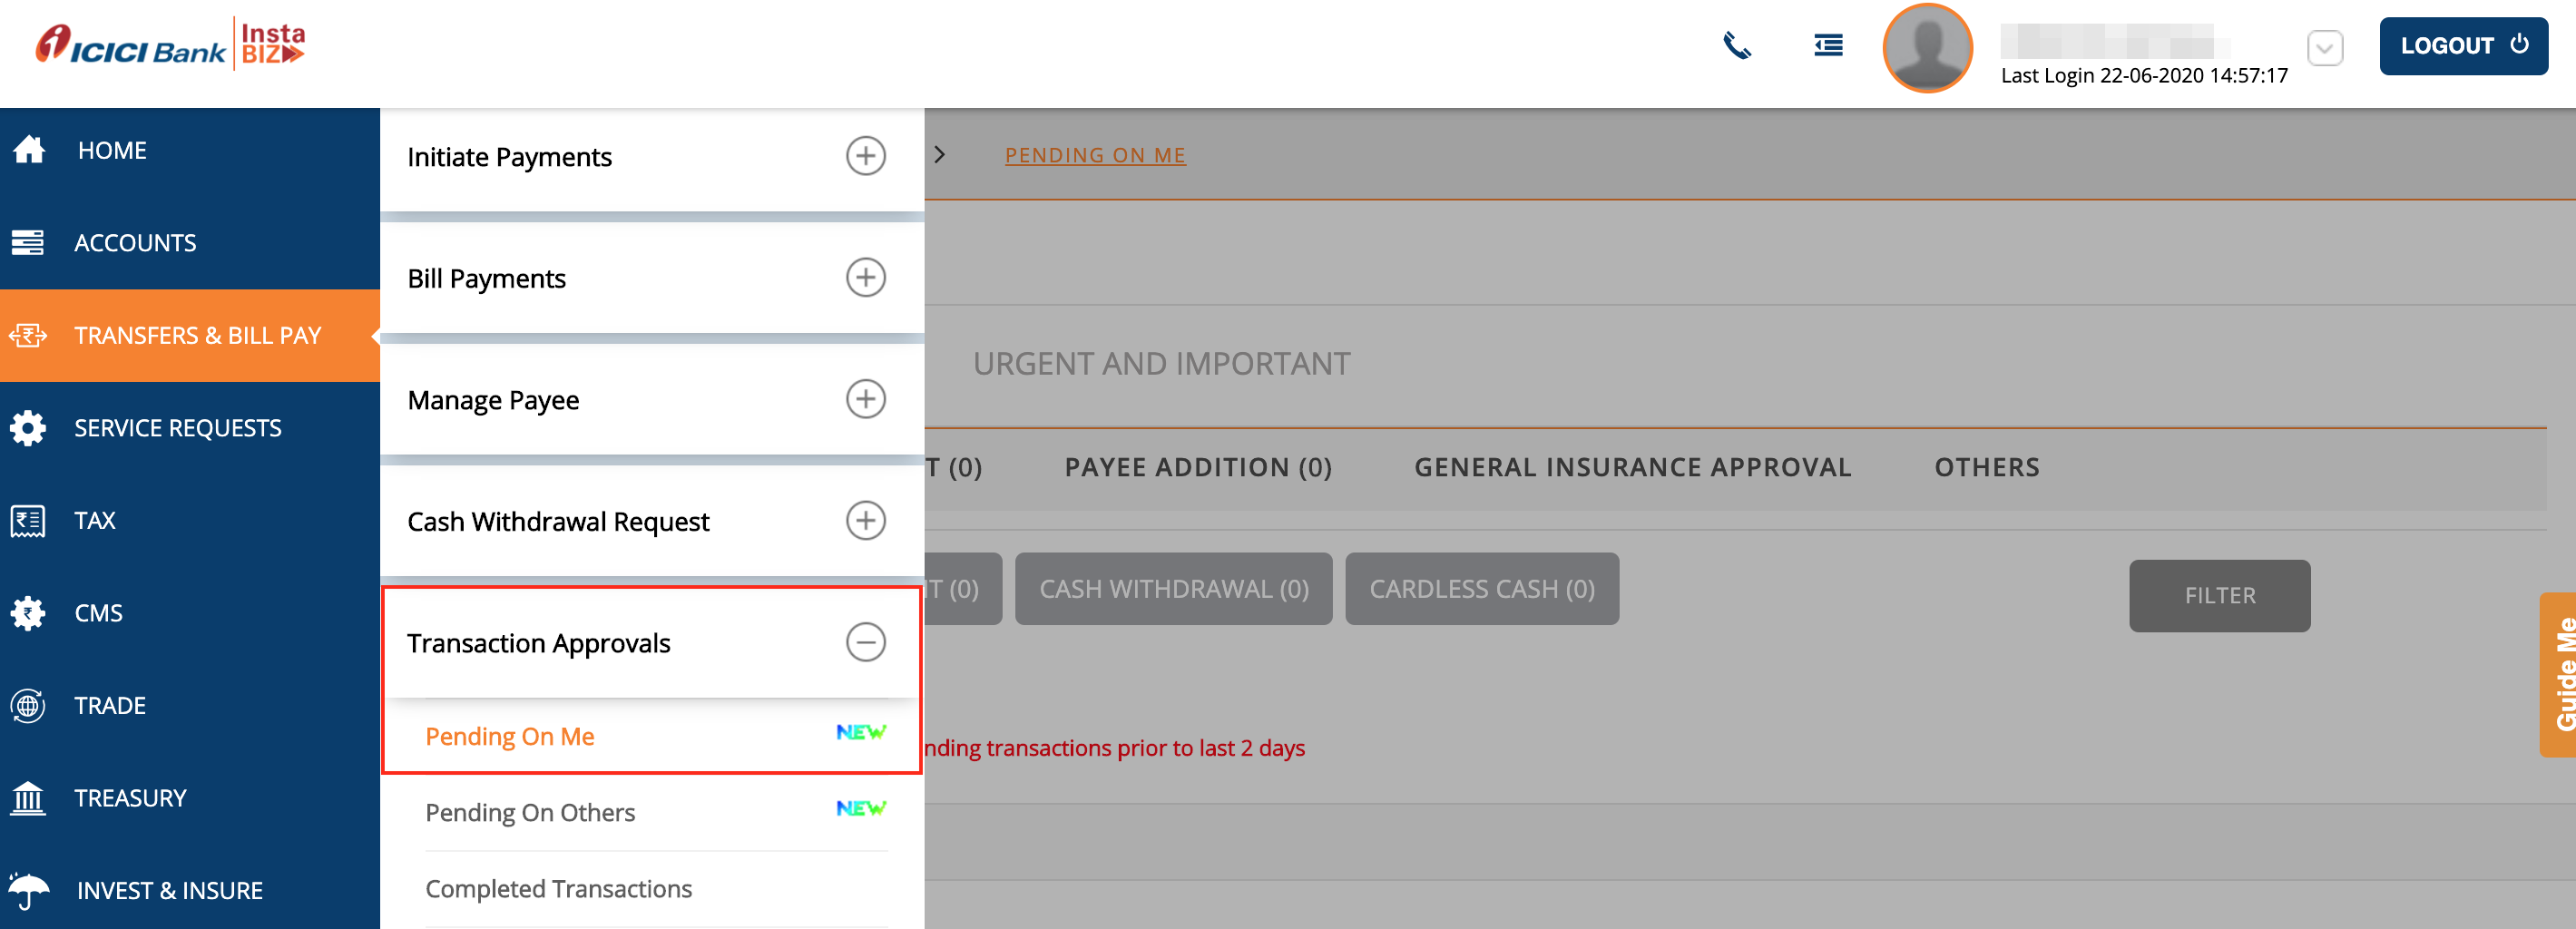
- Login to your ICICI Bank CIB Portal.
- Click the Pending on Me notification from the Dashboard. (or) Navigate to the Transfers module from the homepage and click Pending on Me.
- You will be able to find the transactions Pending for Approval listed under it.
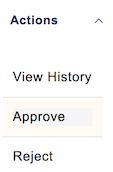
- Click the Actions dropdown to Approve or Reject the transaction.
Make Bulk Bill Payments
You will be able to make payments for multiple bills at once to a single vendor using this integration. Here’s how:
- Go to the Payments Made module from the left navigation page of Zoho Books.
- Click + New and go to the Bill Payment tab to initiate a new payment.
- Choose the vendor for whom you would like to make payment and select the option Initiate Payment via ICICI Bank.
- Enter the Amount. You can also click Pay Full Amount and make payment for all the bills at once.
- Select the From Account from which you want to initiate payment for all the bills.
- Select the To Account and the Transaction Type.
- Enter the split-up of the amount you’ll be paying towards each bill in the Payment column.
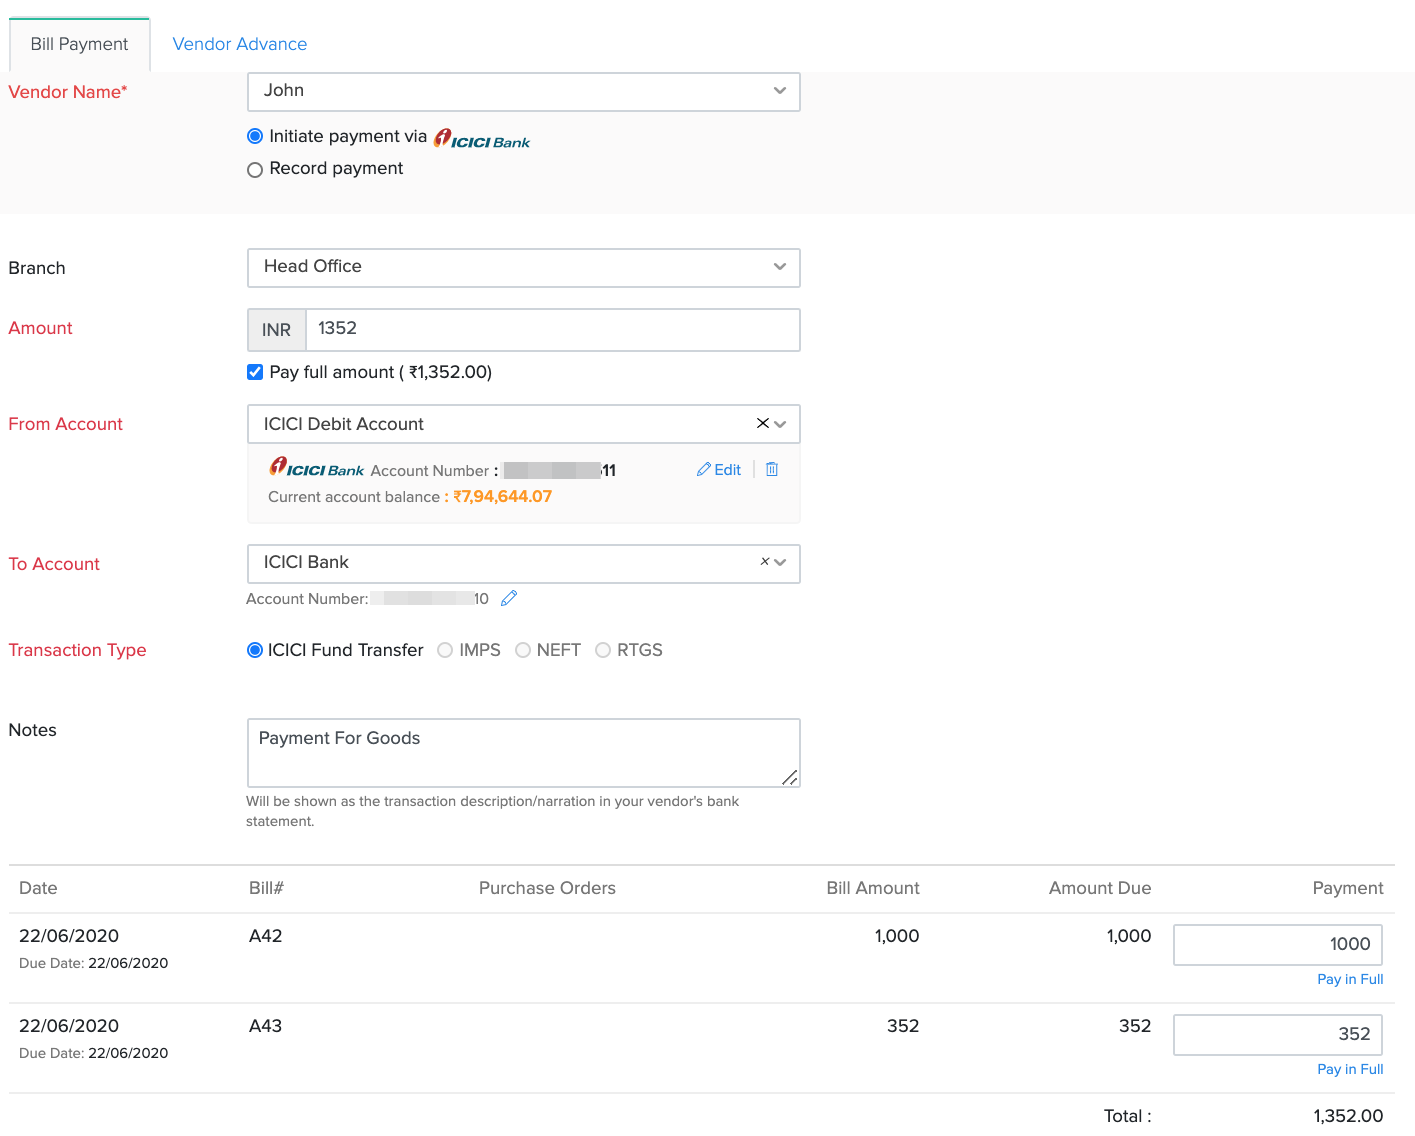
- Verify your details and click Initiate Payment.
- Enter the One Time Password(OTP) sent to your registered mobile number on the screen that follows.
- Click Submit and your payment will be initiated.
Make Advance Payments
You will be able to make advance payments for your vendors once you add their bank account details. To make advance payments:
- Go to the Payments Made module from the left navigation pane of Zoho Books.
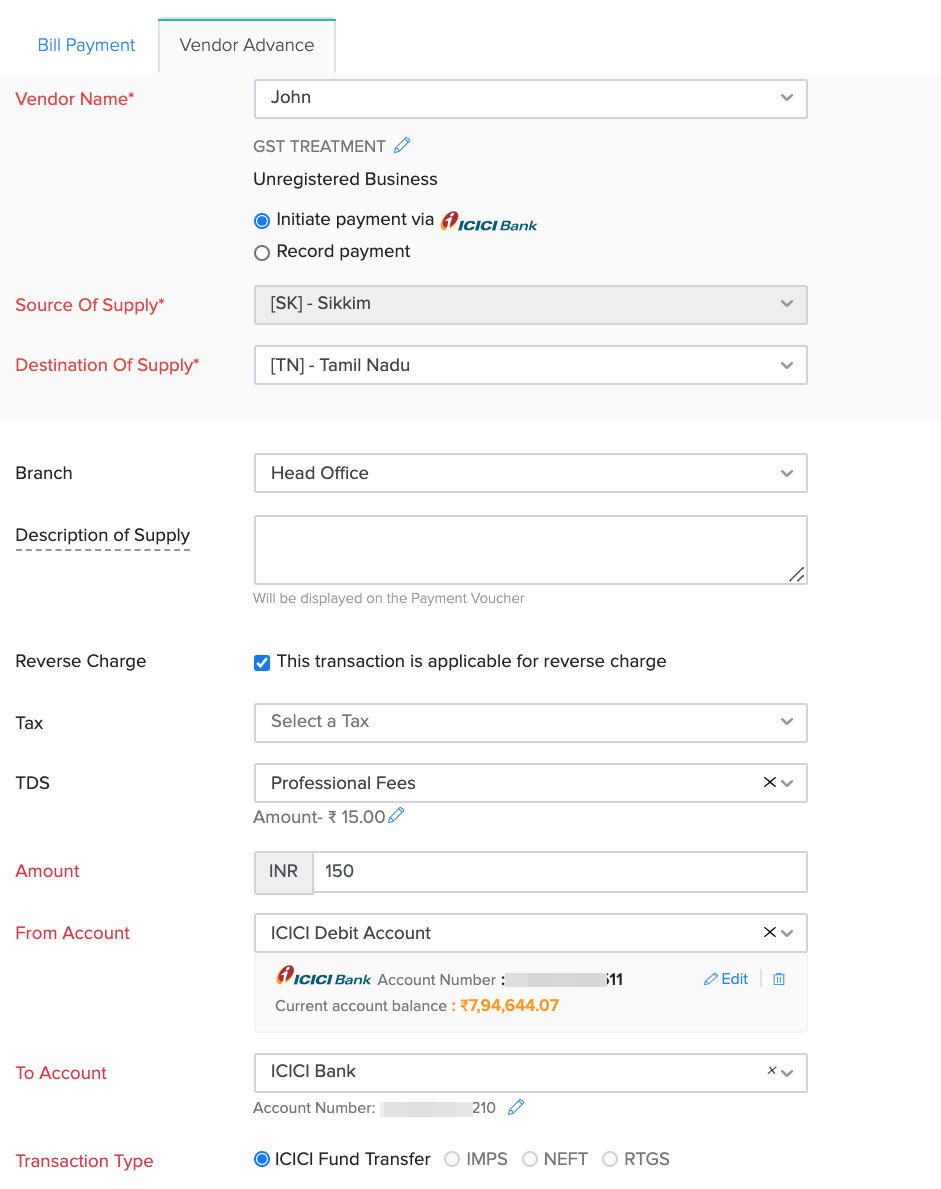
- Click + New and go to the Vendor Advance tab.
- Choose the vendor for whom you would like to make payment and select the option Initiate Payment via ICICI Bank.
- Enter all the tax related details such as the Source and Destination of Supply, Reverse Charge and TDS.
- Enter the Amount to be paid.
- Select the account from which you want to make the payment in the From Account option.
- Select the To Account and the Transaction Type.
- Verify your details and click Initiate Payment.
- Enter the One Time Password(OTP) sent to your registered mobile number.
- Click Submit and your payment will be initiated.
Make GST Payments
When you’ve integrated Zoho Books with ICICI Bank, you will be able to make payments for your GSTR-3B. Learn More.
Fetching Direct Feeds and Reconciling Bank Statements
This integration allows you to set up Direct Feeds to fetch feeds directly from your bank account to your Zoho Books organization. This allows you to reconcile your bank transactions with those in Zoho Books. Once you have finished setting up the ICICI Bank integration, you will be able to add your account to configure direct feeds. To receive direct feeds:
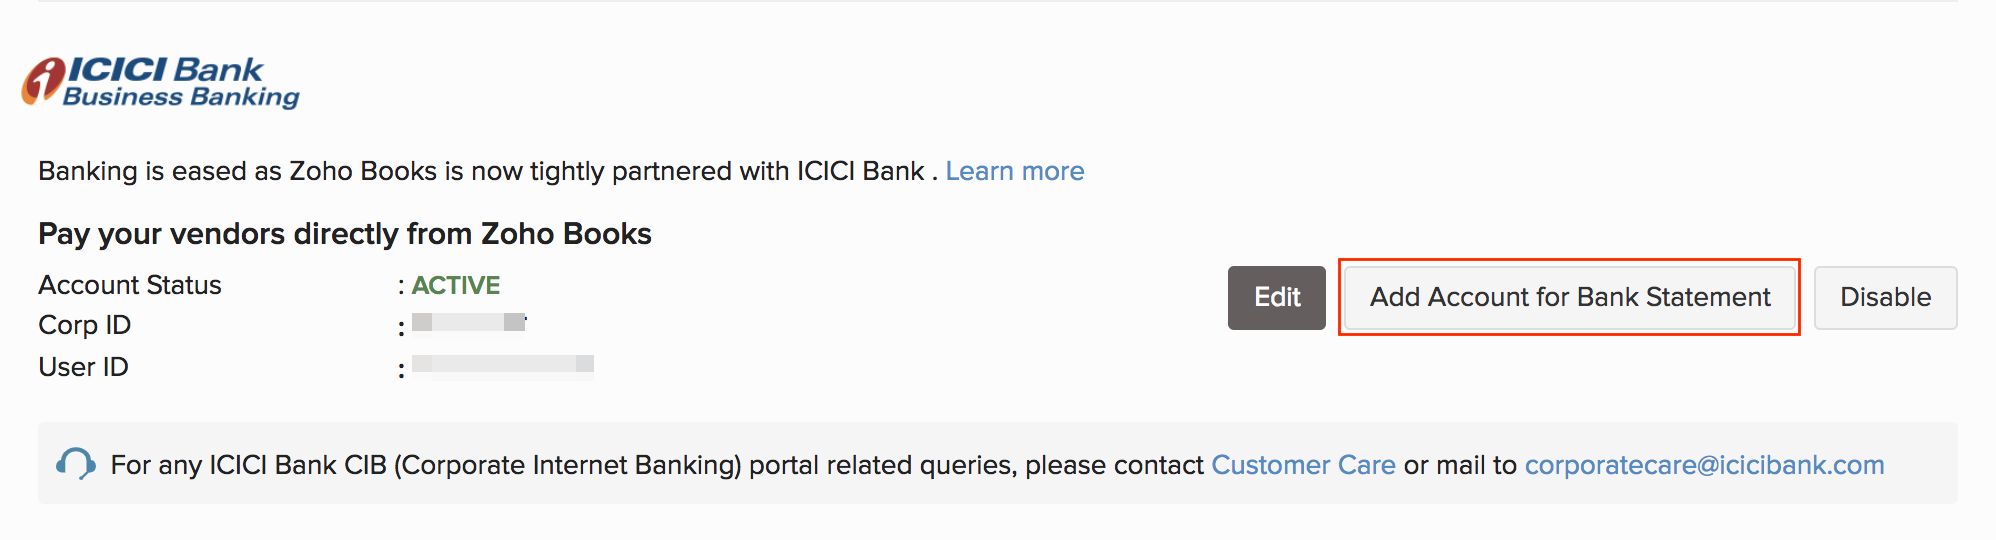
- Navigate to Settings > Integrations > Vendor Payments > ICICI Bank.
- Select the option Add Account for Bank Statement.
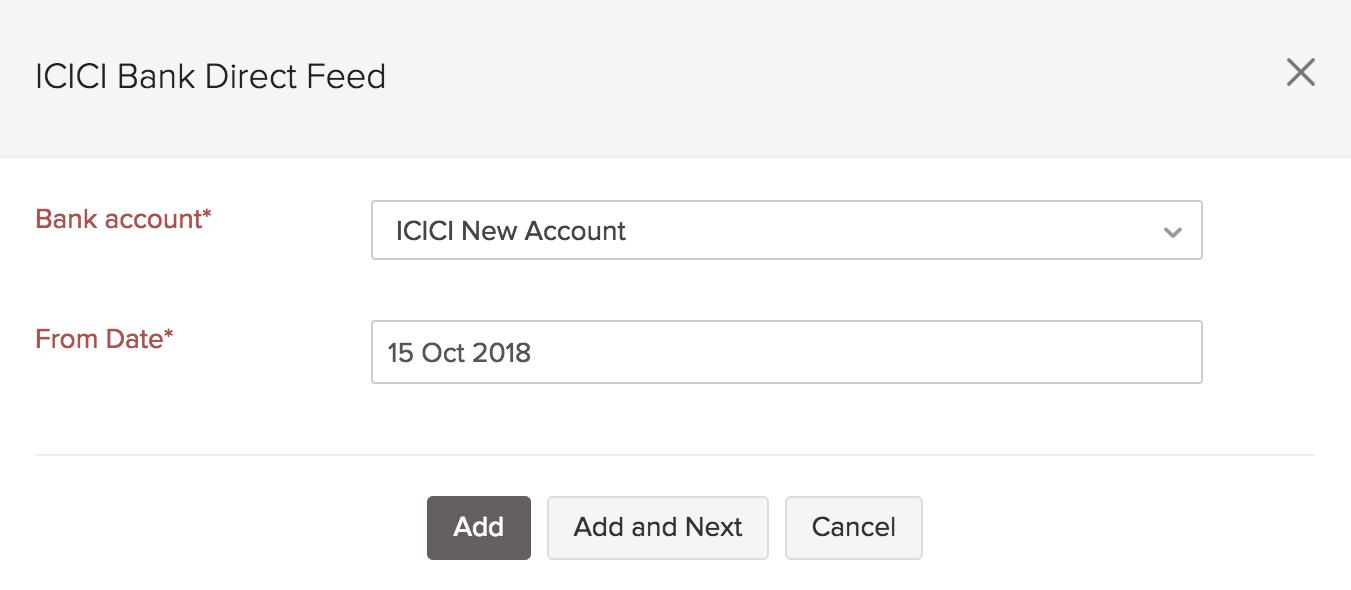
- Select the bank account for which you would like to receive direct feeds in the pop-up that appears.
- Select the date from which you would like to fetch your feeds and click Add.
- Click Add and Next to add a new bank account.
Note: You will also be able to add your bank account by navigating to Banking > Add Bank or Credit Card > ICICI Bank under Partner Banks.
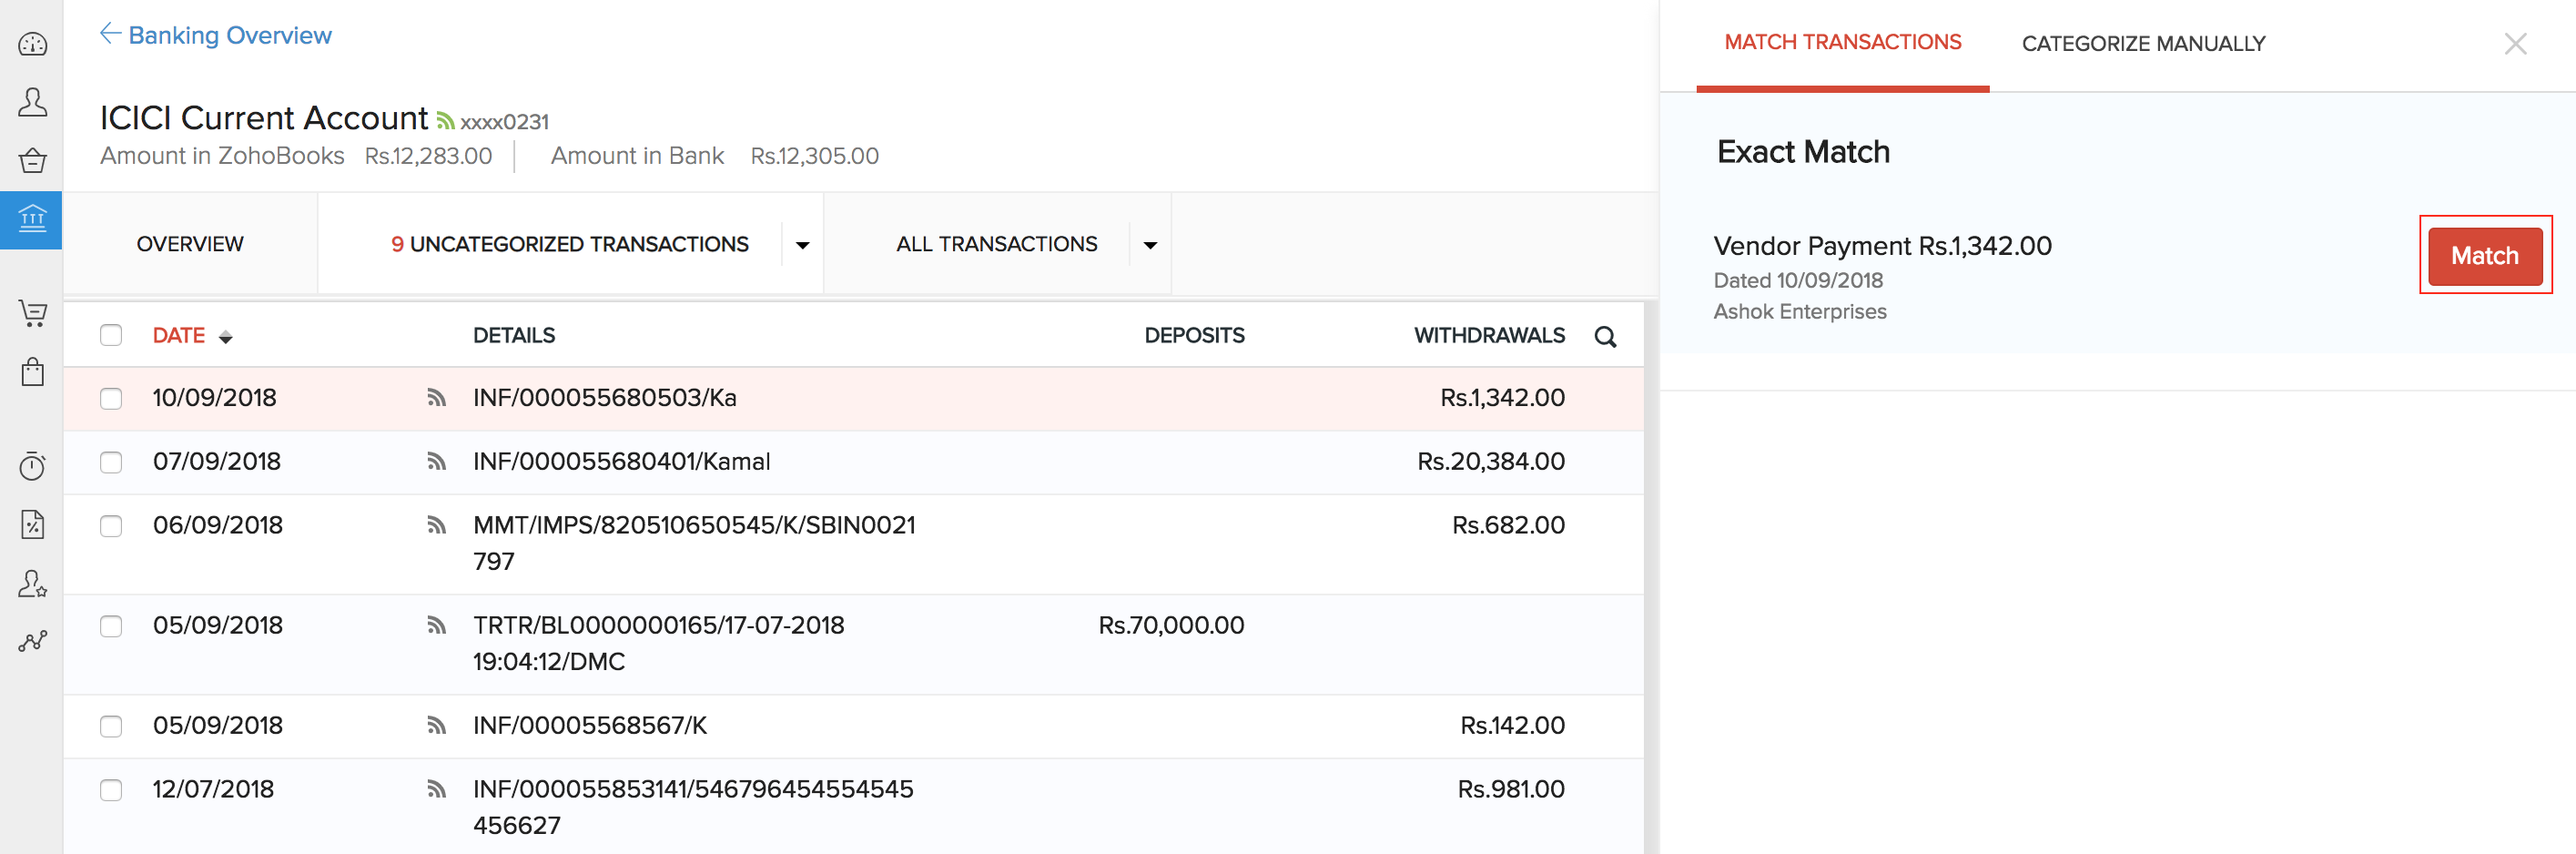
Once you have set up direct feeds, Zoho Books will fetch your bank feeds and you will be able to reconcile bank statements. To reconcile transactions:
- Navigate to the Banking module and select an ICICI Bank account.
- Bank feeds will be refreshed automatically on login.
- Go to the Uncategorized Transactions tab and the bank statements will be listed below.

- Select a transaction and Zoho Books automatically prompts the Exact Match for you.
- Click the Match button to match a transaction.
Learn more about the Banking module.
Note: If you have not migrated to ICICI Bank Direct Feeds, you will be prompted to switch your bank feeds to the direct feed integration. Direct feed integration helps you to receive feeds quickly without any third party interference and find exact matches for your transactions.
Disabling the Integration
If you ever want to stop making payments via your ICICI Bank account from Zoho Books or change your account details, you can disable the integration.
Warning: Disabling the integration in Zoho Books will disable it from other integrated Zoho Finance applications as well. Once disabled, you will not be able to track the status of any uncleared transactions. The direct feed integration will also be deactivated along with the payments integration.
To disable:
- Go to Settings > Integrations > Vendor Payments > ICICI Bank.
- Click the Disable button.
- Read the terms and click the option I understand, disable my integration.

Pro Tip: You can receive online payments from customers by integrating your ICICI Bank account with eazypay. Learn More.
Bring banking and accounting under one roof with the ICICI Bank integration.
 Yes
No
Yes
No
 Thank you for your feedback!