
Applying for Leave and Leave Views
- List View
- Applying for Leave
- Applying Leave for your Employee
- Notifying Team Regarding Absence
- Canceling Leave
- Notifying Team Regarding Leave Cancellation
- Calendar View
- Leave Applications
- Approvals
- Configuring Approvals for Compensatory Off
List View
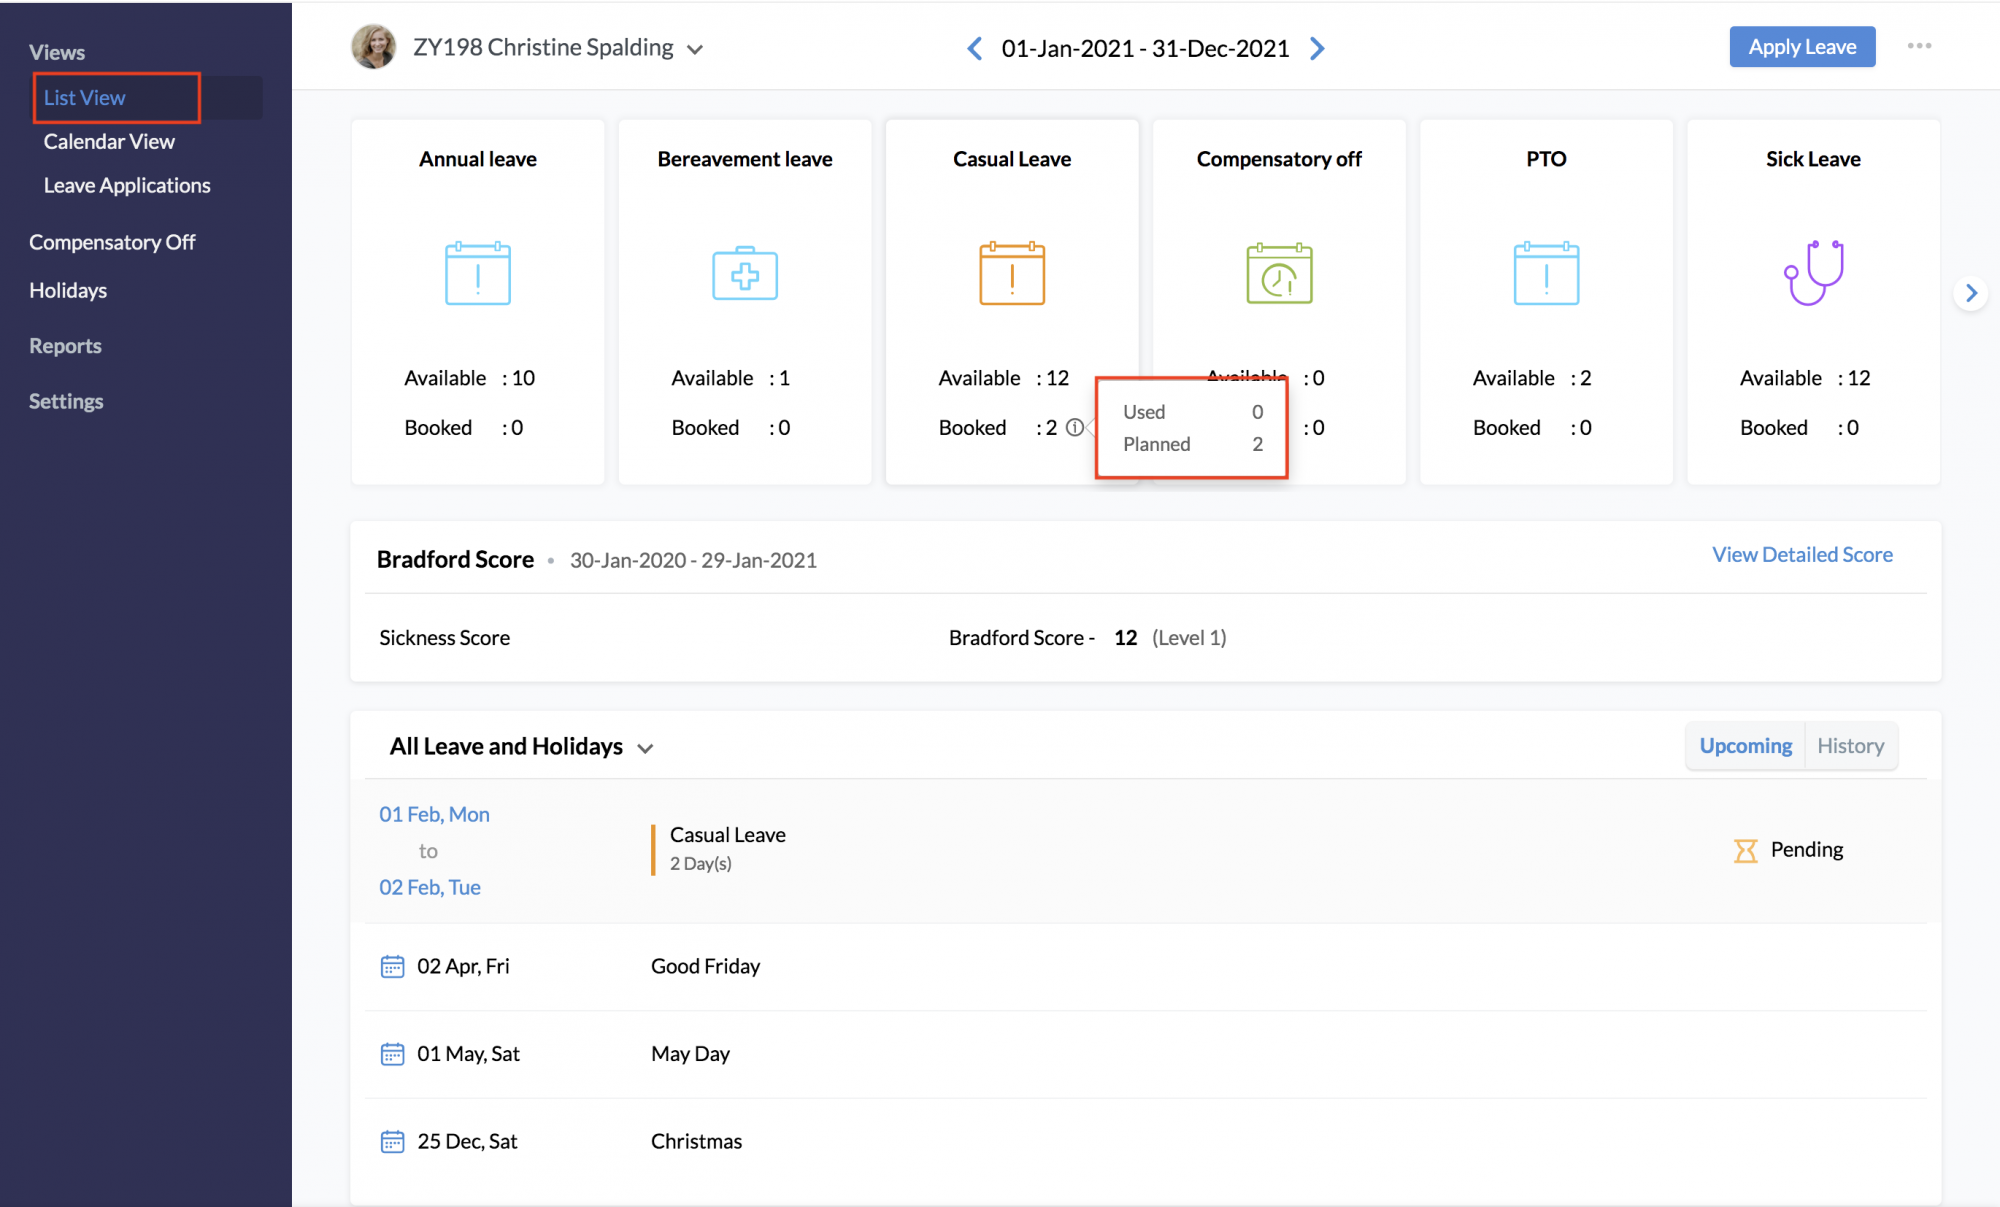
The List View features your complete leave details with their status of approvals.
To access list view navigate to Leave > Views > List View.
Here are the features of list view.
- You can apply for leave.
- See available and booked leave for each leave type at a glance. Under Booked leave, view the number of used and planned leaves.
- View your employee's leave details.
- View your leave history.
- See upcoming holidays.
- Import and export leave details.
- Calendar sync and more.
Upcoming Tab displays a list of upcoming holidays, and leave applications.
Use the History tab to view leave application from past dates.
Applying for Leave
Applying leave is a simple task which can be done by following the steps given below.
- From your home page, go to Leave > Views > Apply Leave
- Enter the details like Leave Type and Date
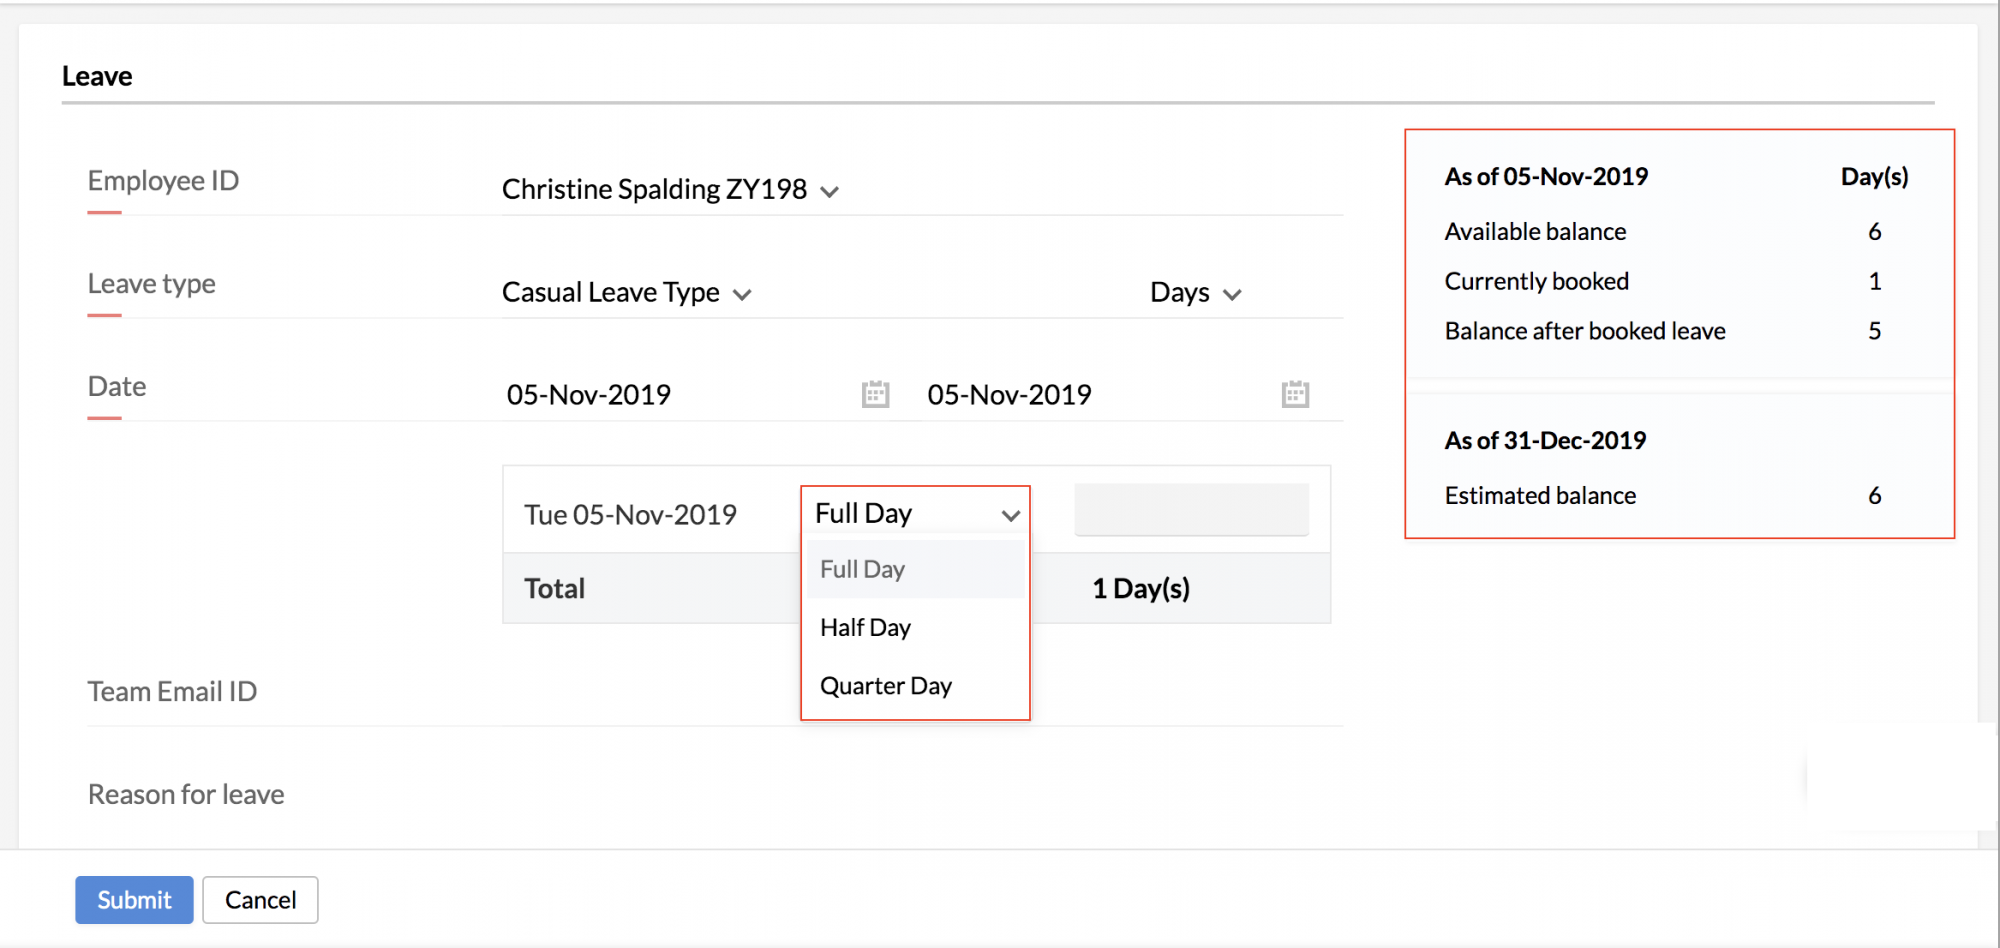
- Based on the settings for the leave type, you can also apply for hour based leave. For day based leave you can apply for half day leave ( first half, second half) or for quarter-day leave ( 1st quarter, 2nd quarter, 3rd quarter, 4th quarter)
- Enter the team mail ID and reason for leave as required.
- Click Submit
A leave summary will be displayed while applying for leave that will give a clear picture of the leave balance before and after the applied leave and the year-end ( 31st Dec) estimated balance for that leave type.
Applying Leave for your Employee
You can also apply for leave on behalf of your employee.
To do this,
- From your home page, go to Leave > Views
- Click Apply leave
- Under the Employee ID drop-down, select the employee name
- Select the leave type
- Select the From date and To date
- Enter the Team email id and Reason for leave if needed
- Click 'Submit'
Notifying Team Regarding Absence
While applying for leave, there is an option to notify the team of the person's absence. On clicking 'Apply Leave', an employee is taken to the page as shown in the image below.
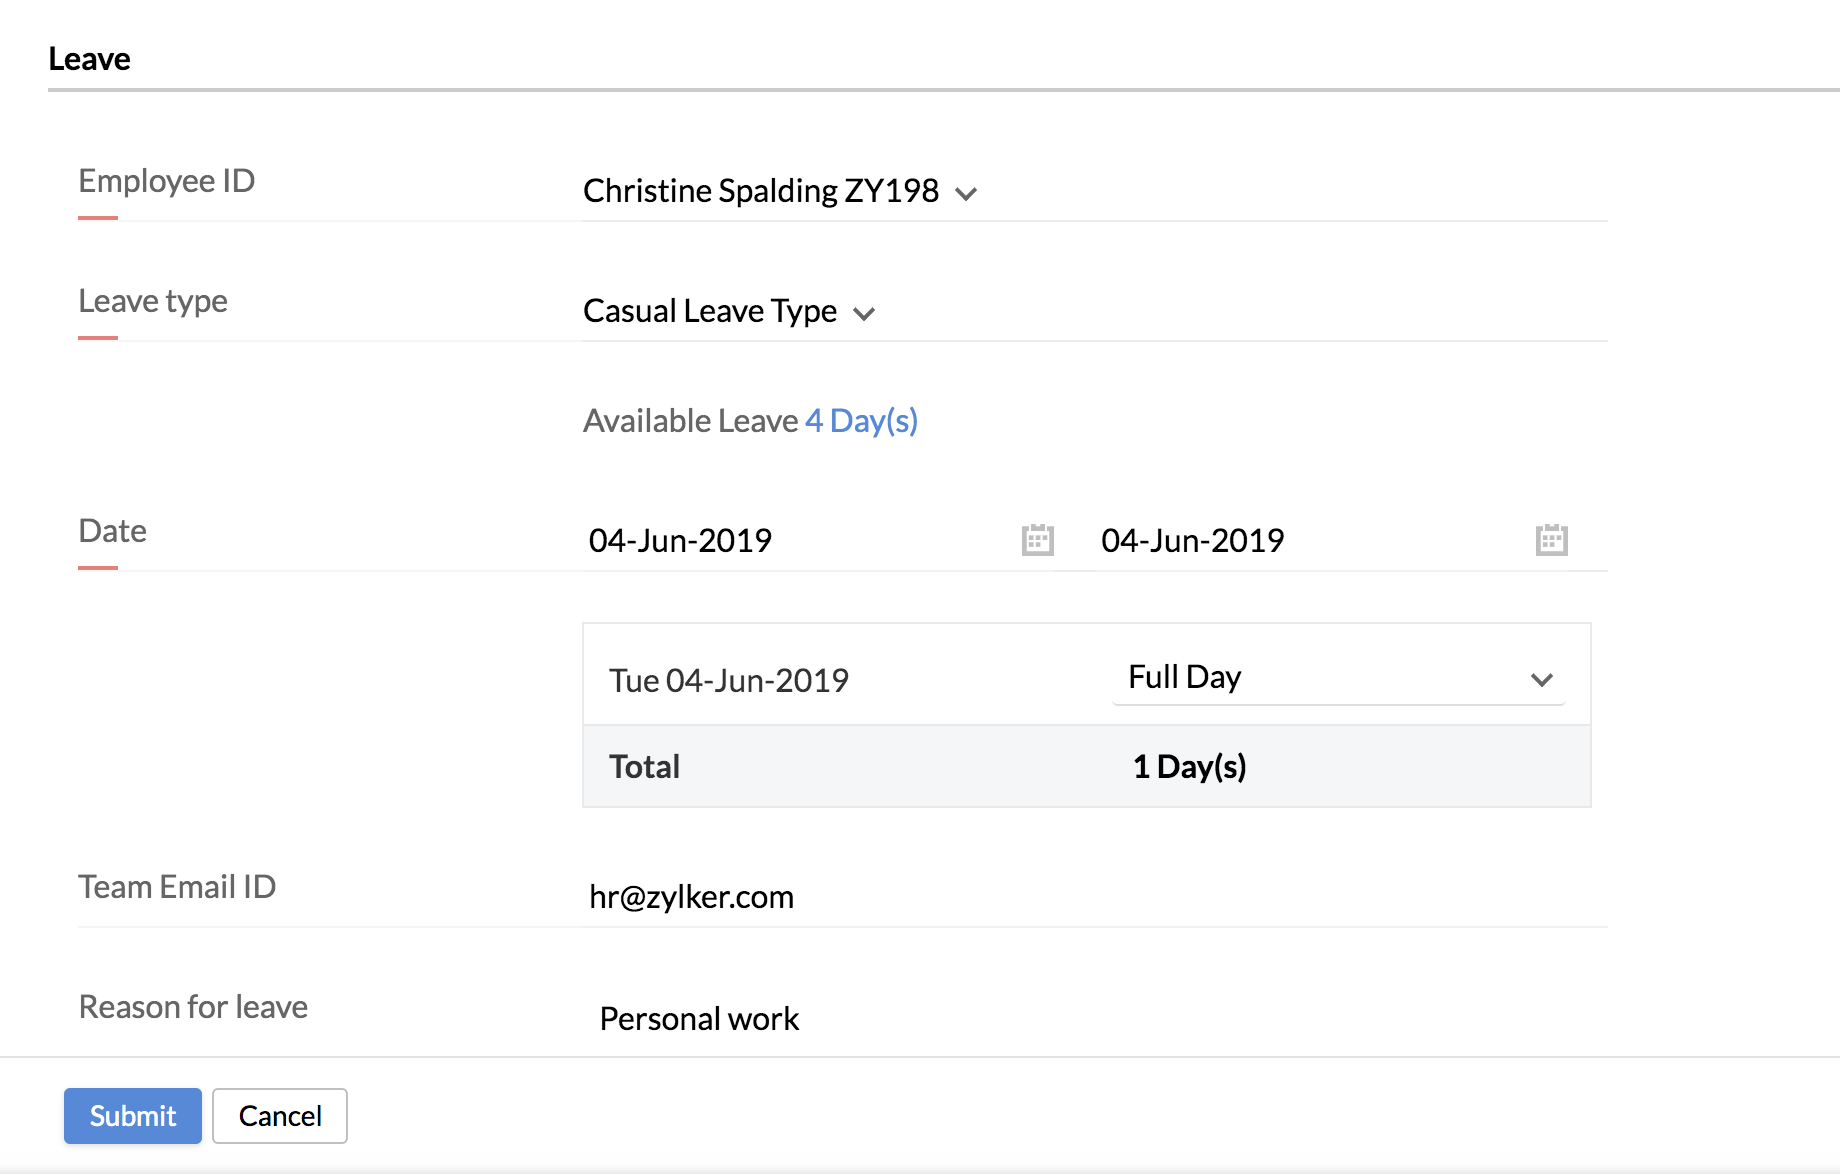
Here, under Team email ID, we can specify the email address of the team to be notified of the absence of the person who is on leave.
To view your employee's leave data,
- From your List View page, select the respective employee from the employee name drop down
Canceling Leave
To cancel leave requests,
Follow the steps given below to cancel leave requests.
- From your home page, go to Leave > Views
- Click on the leave request and click on Cancel Leave
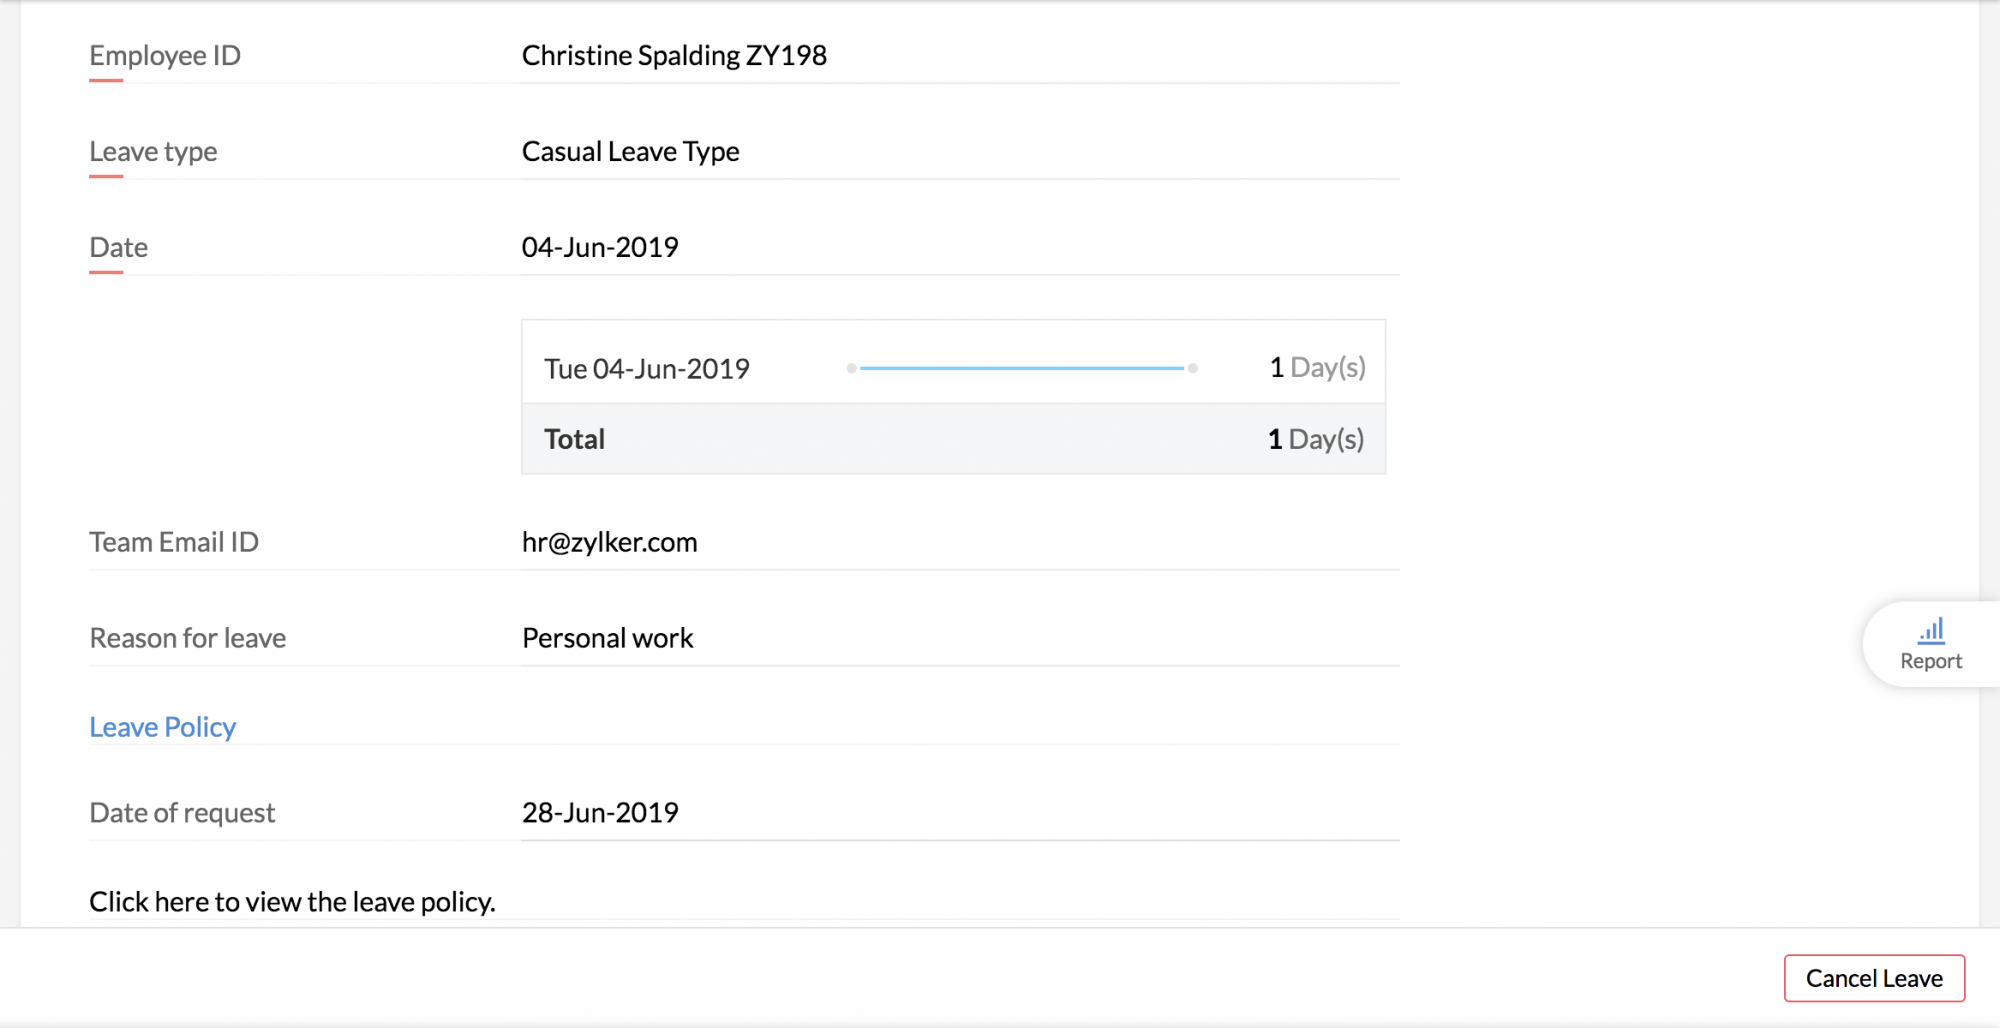
The leave gets canceled and you can see the status mentioned as 'Cancelled' in Views.
Notifying Team Regarding Leave Cancellation
Email alerts can be configured to notify the team when an employee cancels leave. Follow the steps given below to do this.
- From your home page, go to Settings (gear icon) > Automation > Workflows > Add Workflow.
- Select the Leave form under form name.
- Give a name for the workflow.
- Keep the status as Active.
- Under Trigger Process, check Cancel.
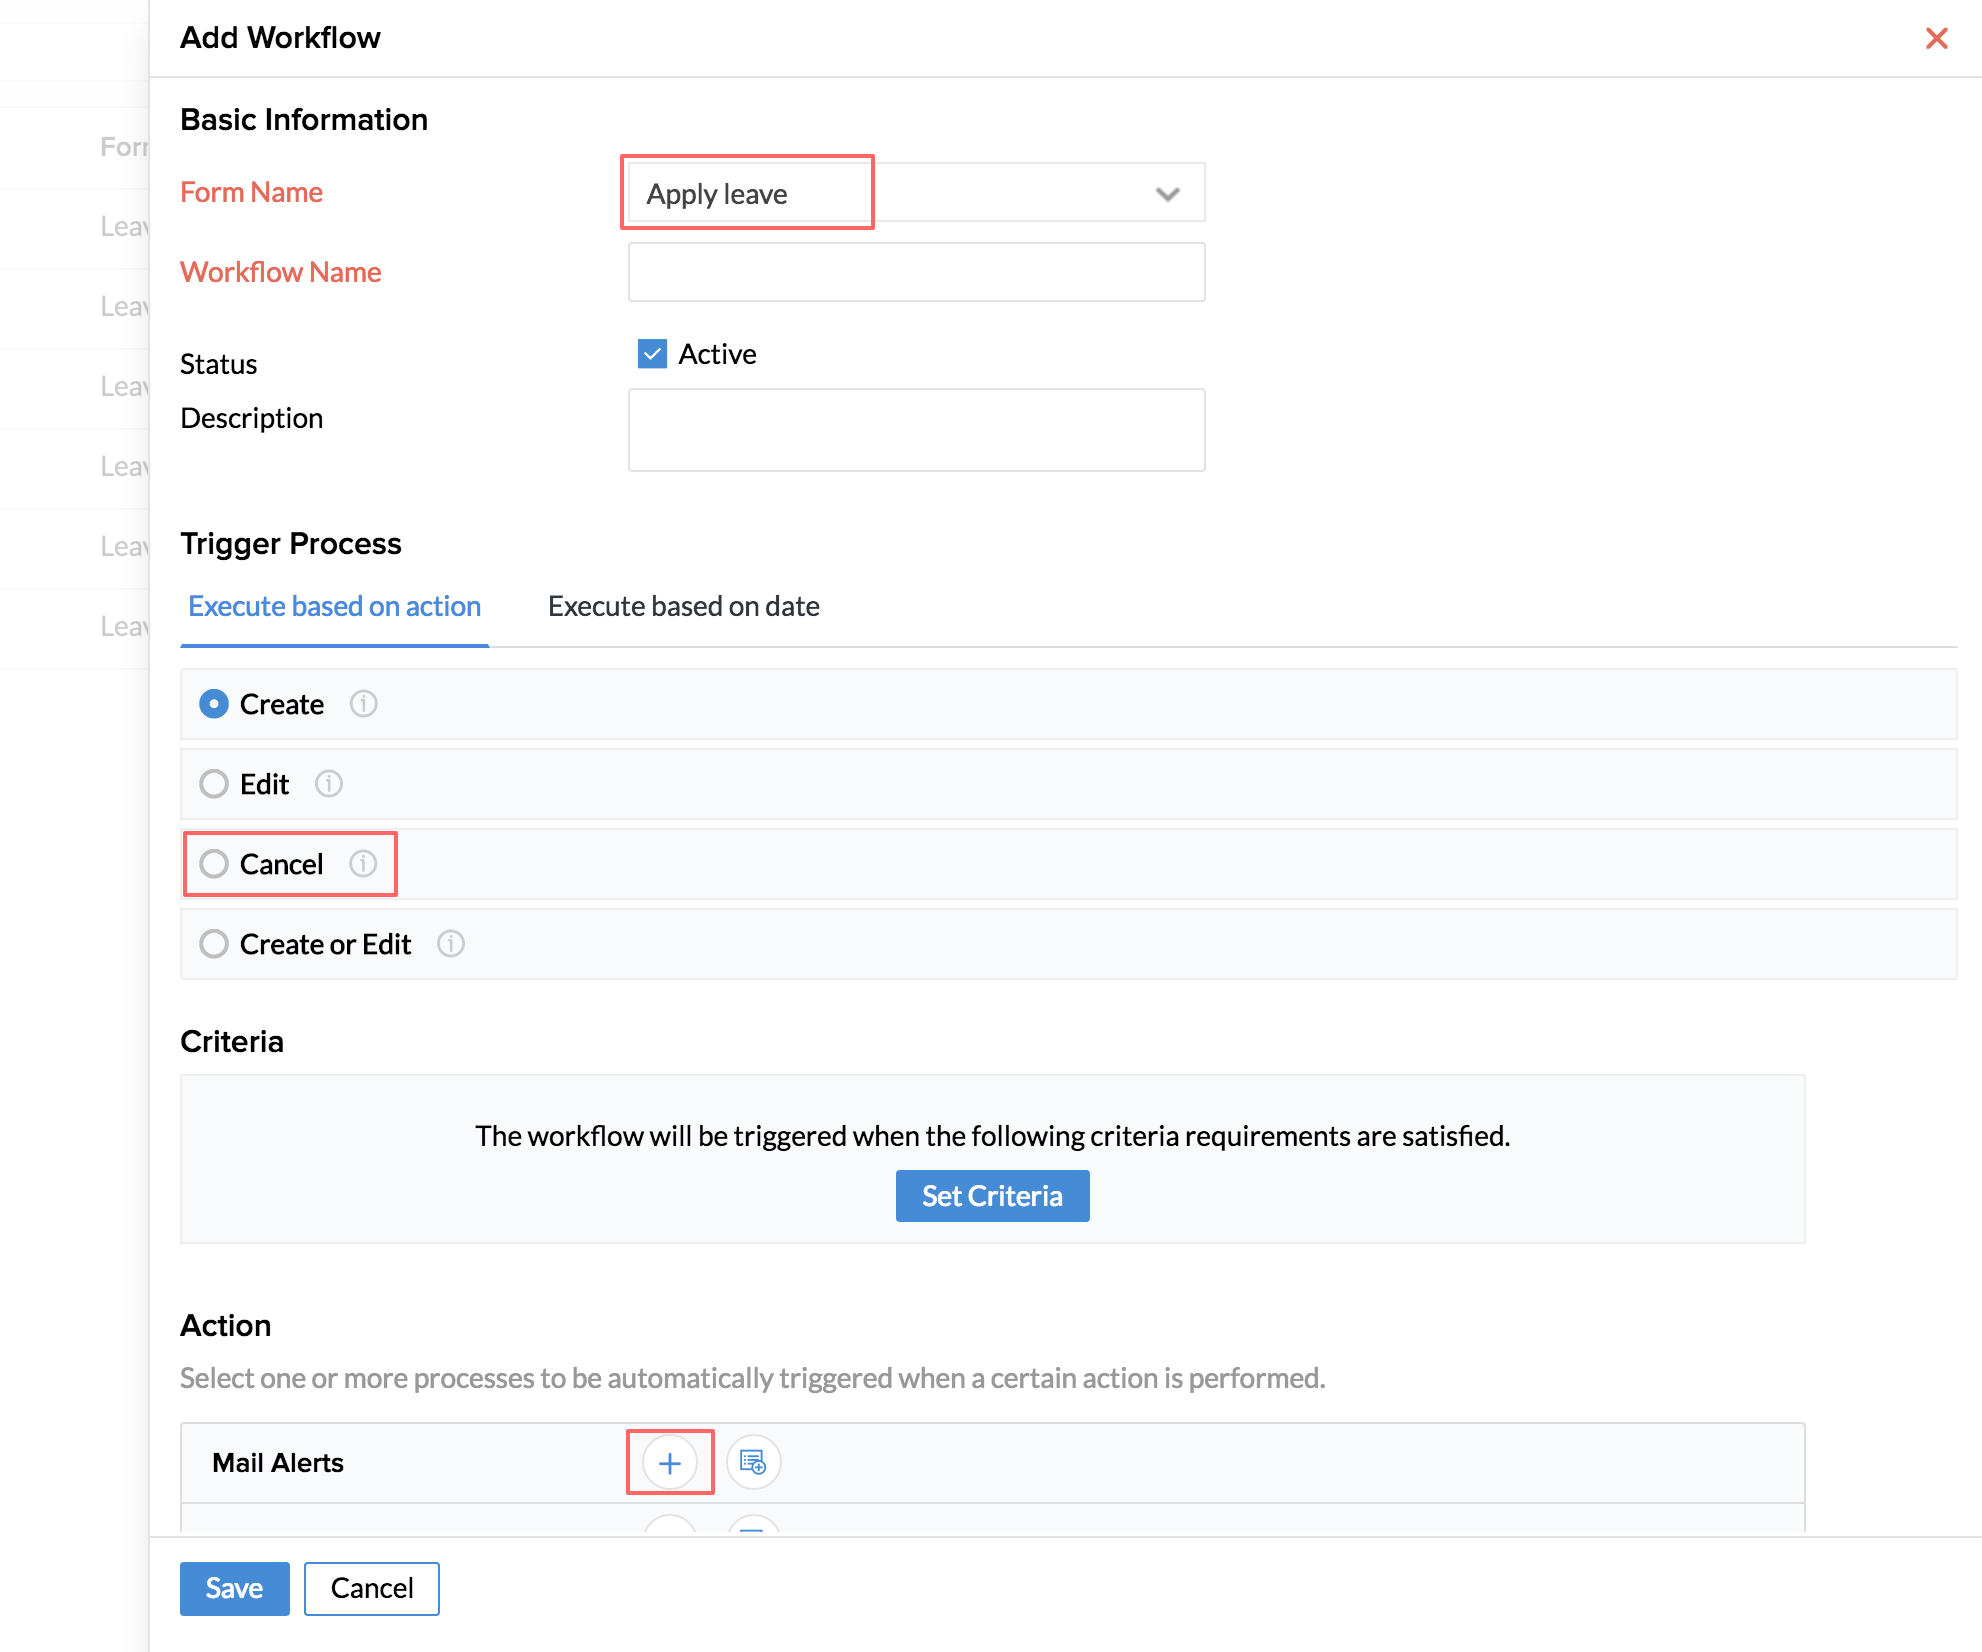
- Under Action, select the + icon to configure a new mail alert
- Give a name for the email alert
- Under From, select Person performing this action
- Under To, type the team email id in the contact email
- Give a Subject for the email
- Select Create new template

- Type the message using the available merge fields
For eg. "Dear Team, employee (insert first name and last name from the available merge fields), has canceled leave."
- Click Save
- Go back to the workflow page and select the email alert that you have created
Now the email alert is linked to the workflow
- Click Save
Note: Cancellation of leave is possible only for current and future-date irrespective of the approval status. Leave requests for the past date(s) cannot be canceled. They can be deleted by the approver and the administrator only.
Once this workflow is configured, the team members will receive an email notification if a cancellation of leave is done by any of the members of the team. This will help the team know the exact leave status of their peers.
Calendar View
This view displays your monthly leave details across the calendar. You can view past and future month-wise leave details by making use of the date bar(top middle). You can also view your subordinates' leave details across the month.
The Calendar View features:
User view- To view the leave details of a particular user across the calendar.
- From your home page, go to Leave > Views > Calendar View.
- Click on User.
- Select the desired User from the username drop down and hit Search.
- Use the left arrow key to go the previous month.
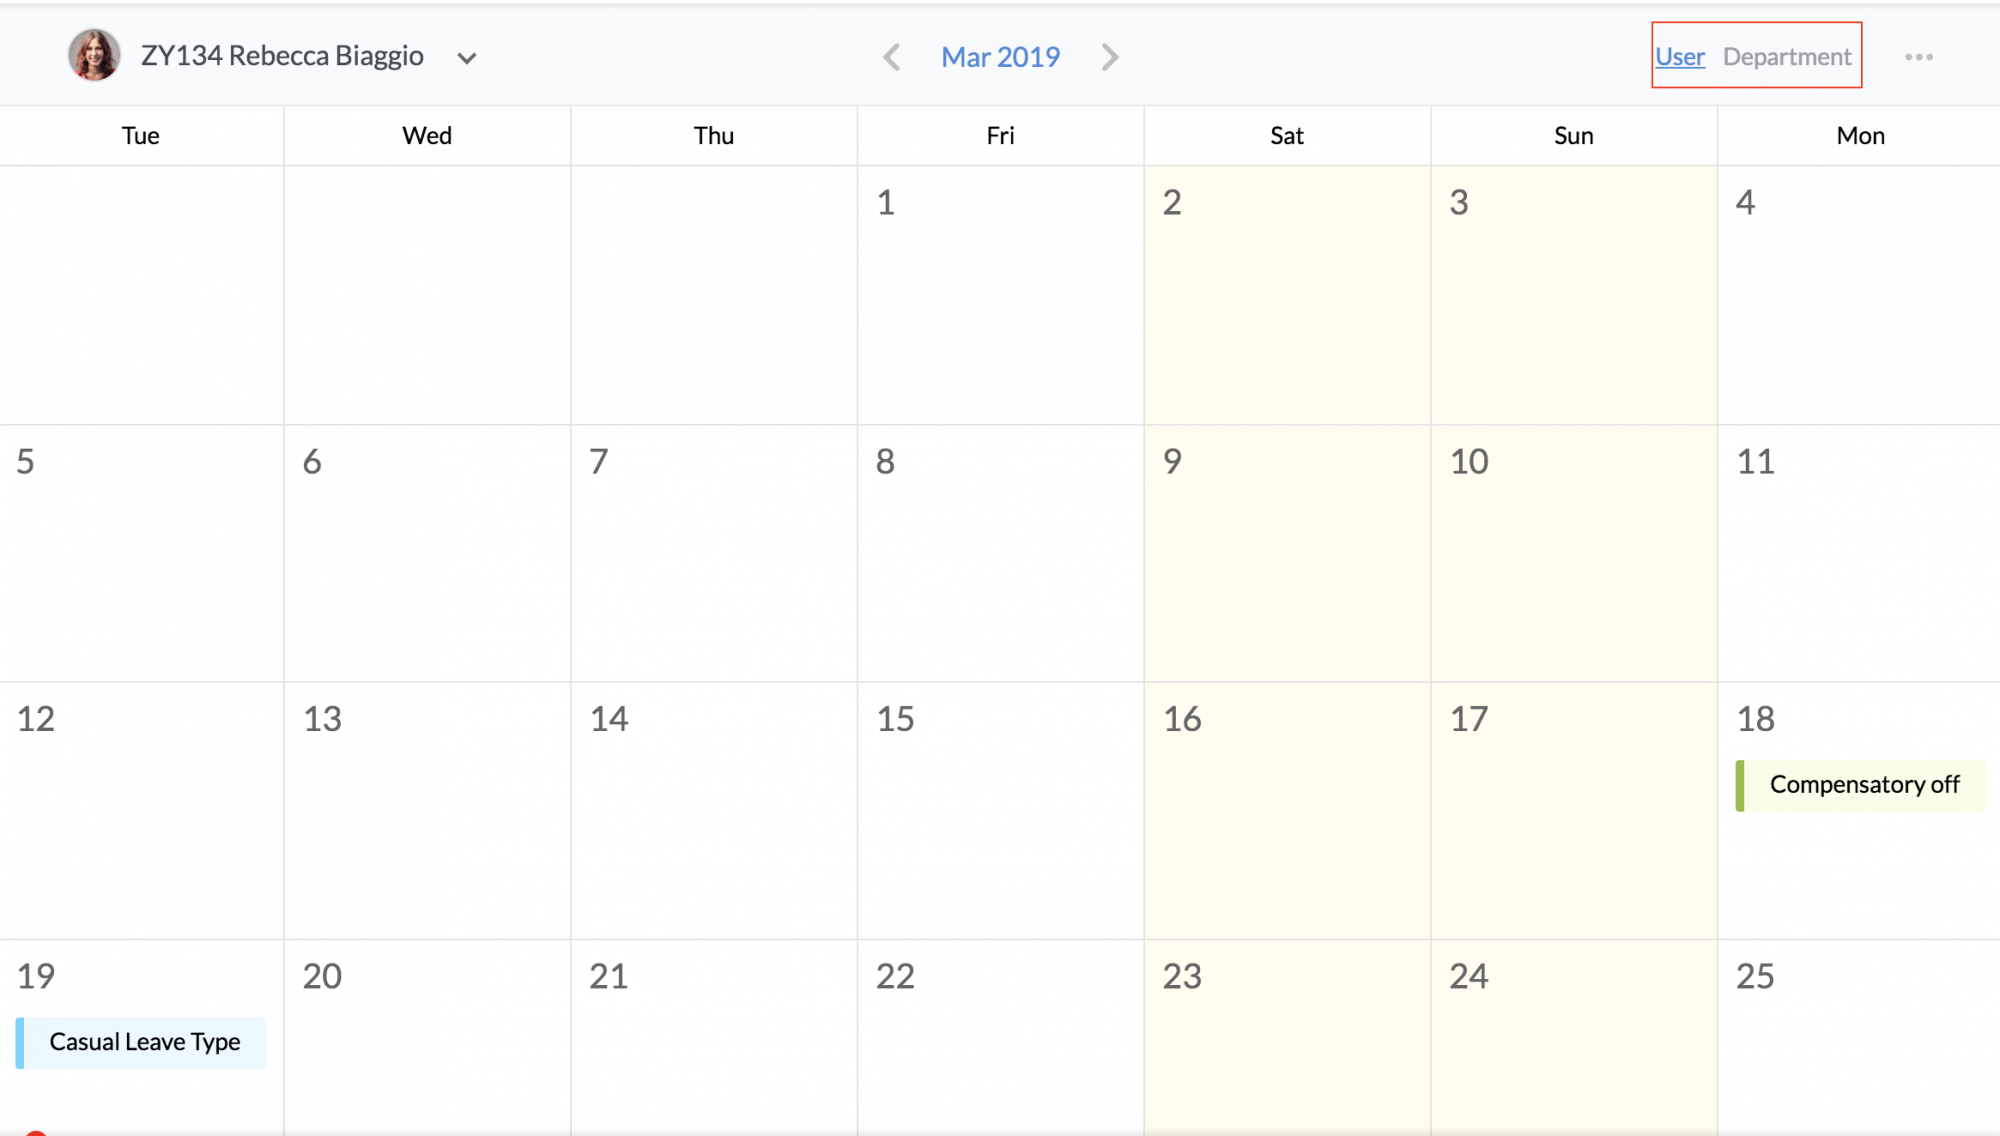
You will be able to see the details as required.
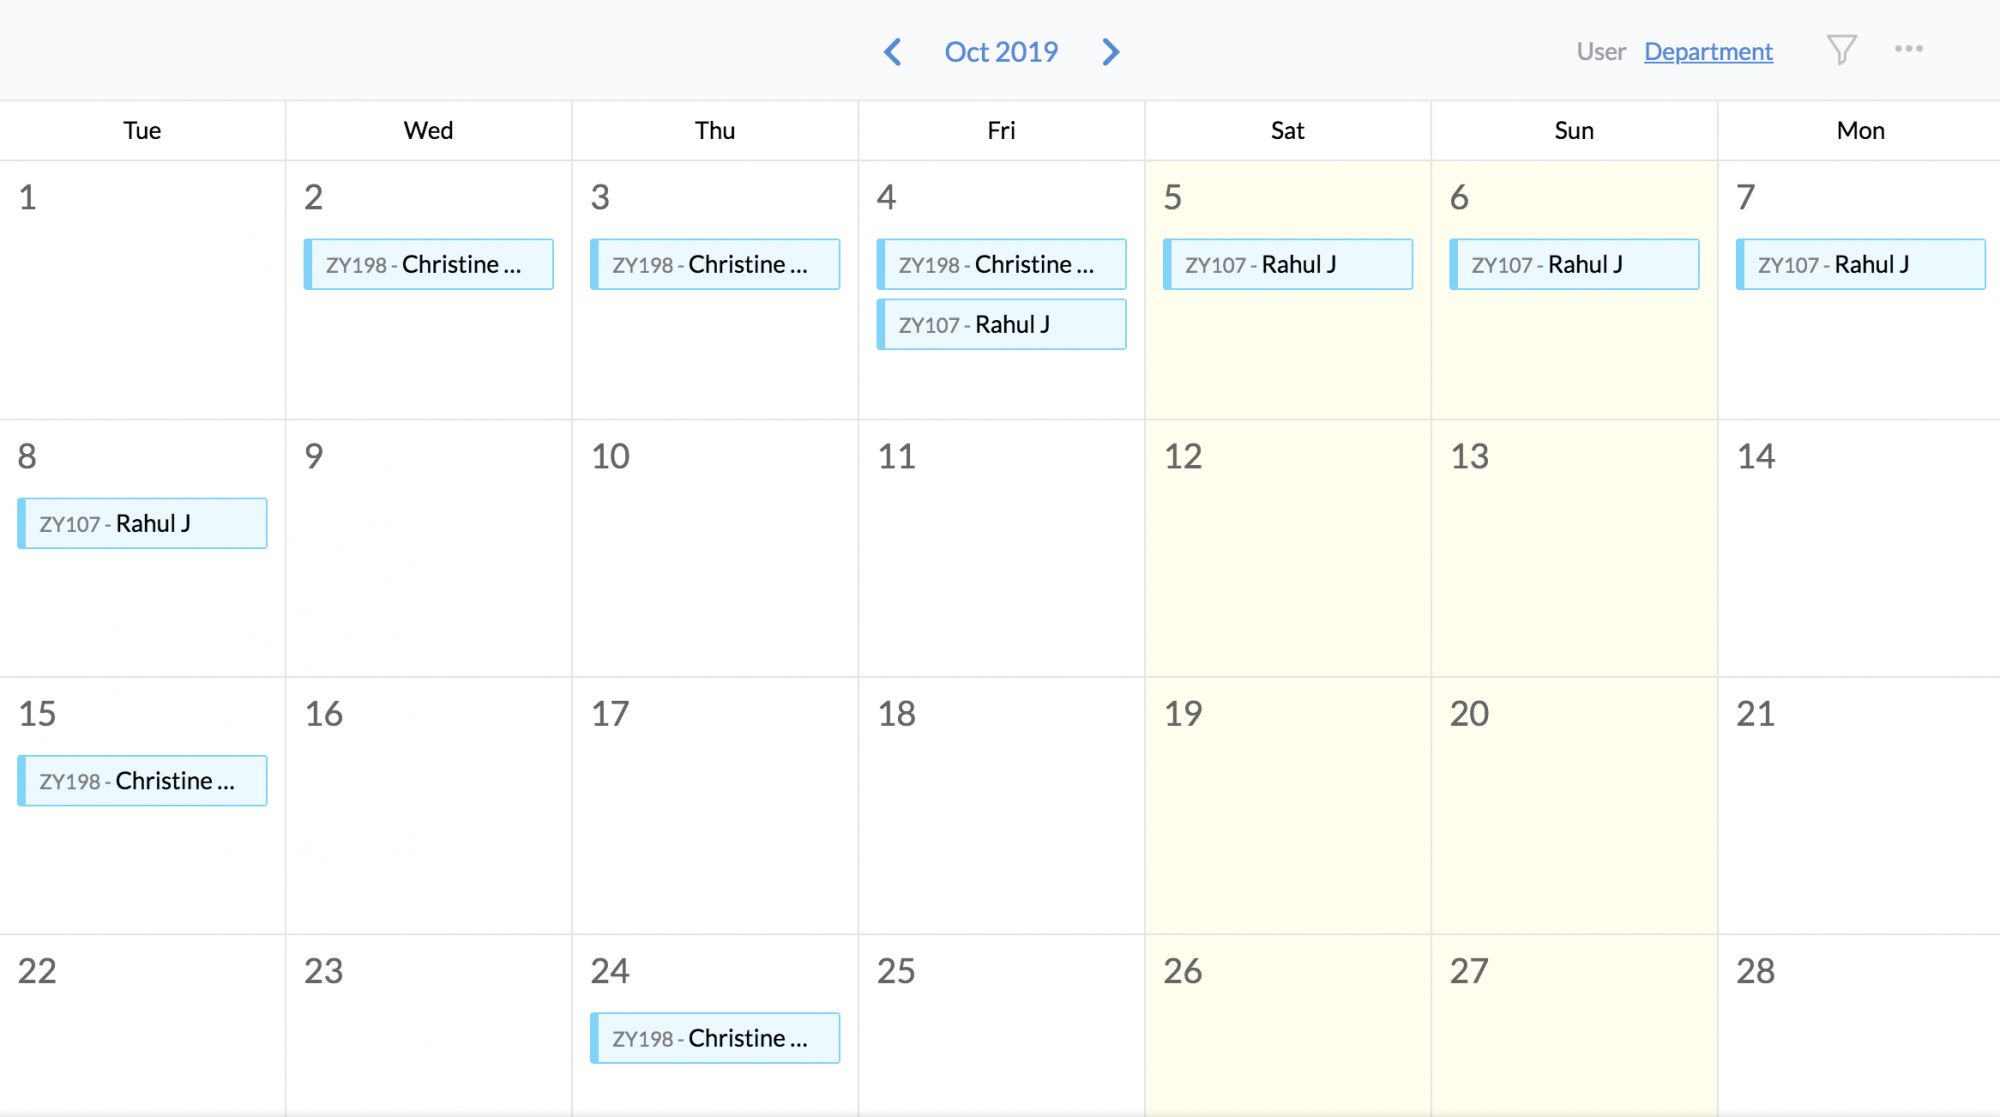
Department view-To view the leave details of the members of a department.
- From your home page, go to Leave > Views > Calendar View.
- Click on Department and click on the filter.
- Select the desired department in the 'Department' drop down and hit Search.
- Use the left arrow key to go the previous month.
You will find the leave details of the department members, listed.
The calendar view also features print and export options. Click on the ellipsis icon to print or export monthly leave details.
Leave Applications
All leave applications with their date of request, leave duration and leave type will be listed when you click on Leave Applications.
By making use of the filter, you can view the leave requests from a specific time frame across departments, locations and more.
If you would like to view all paid leave requests of all employees,
- From Home, go to Leave > Views > Leave Applications.
- Click on the filter icon.
- Select the required date range.
- From Employee dropdown, select All Employees.
- Choose Paid Type.
- Click Search.
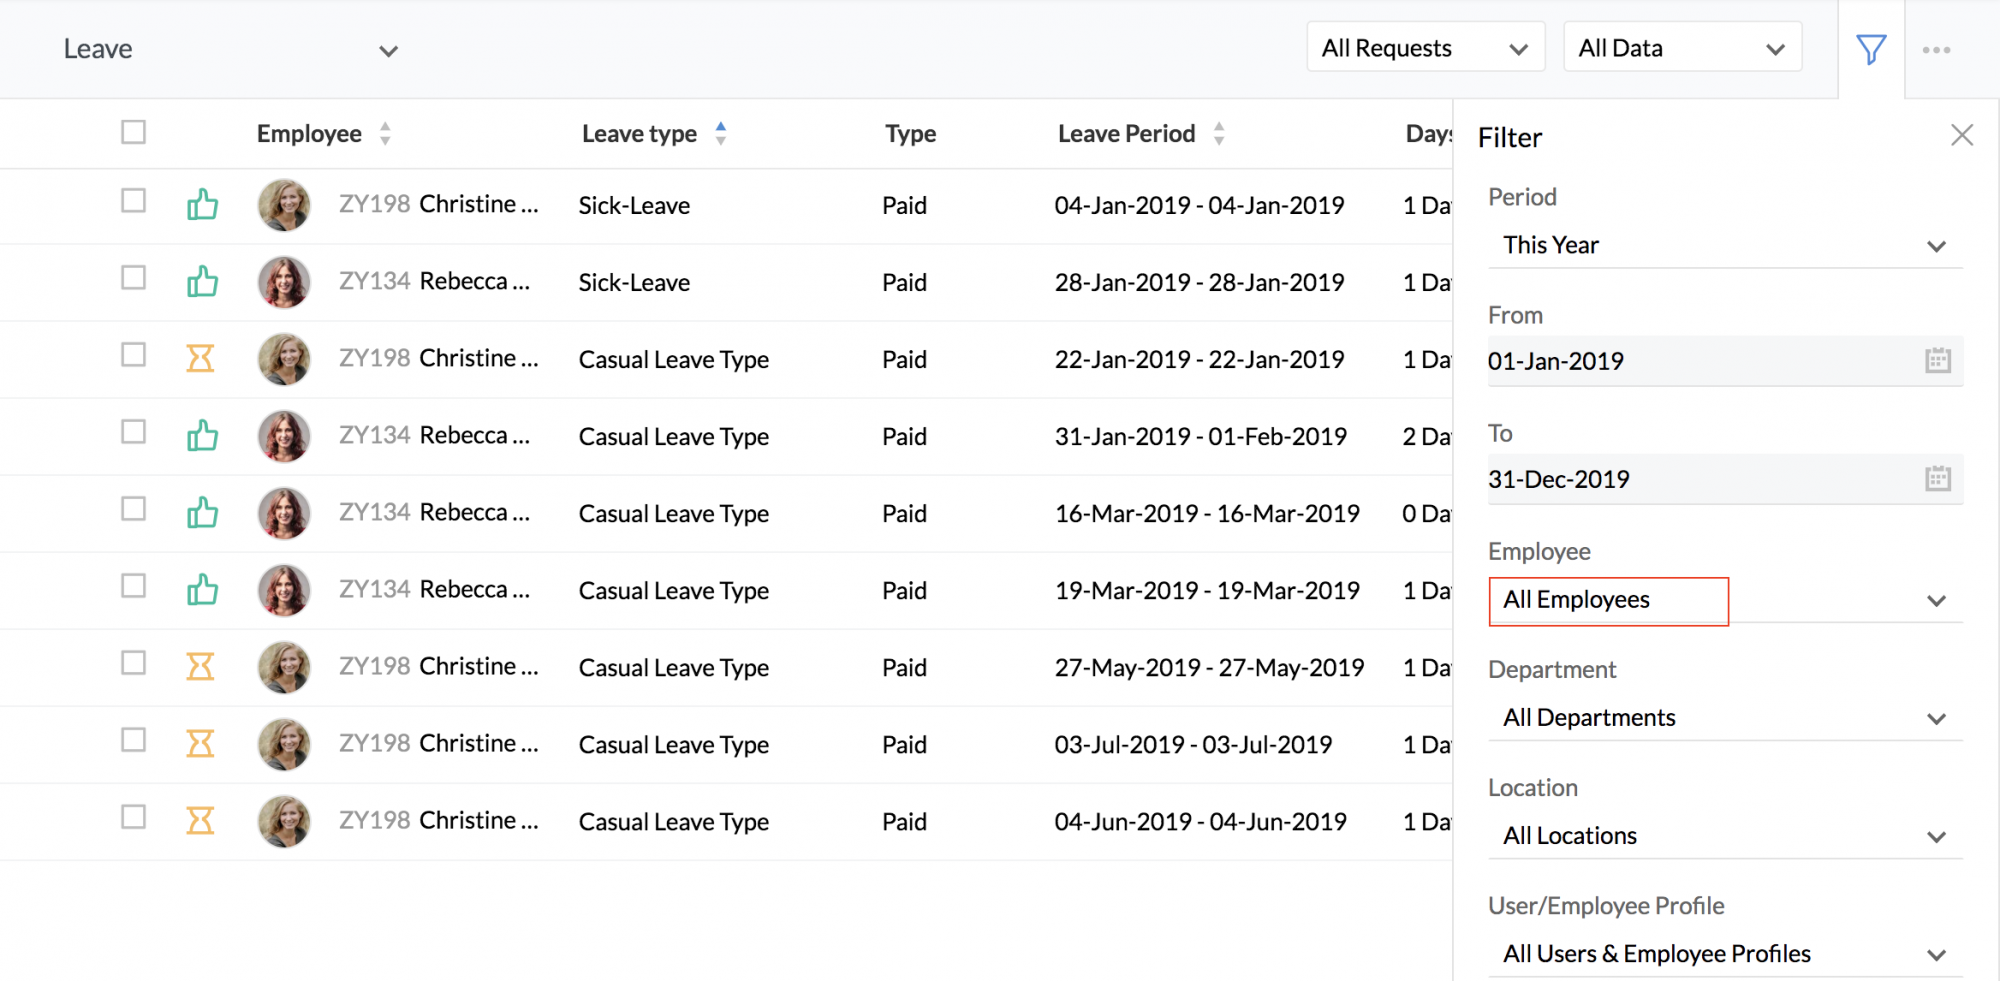
You would find the desired leave details listed.
Approvals
Configuring approvals for leave is an easy process with Zoho People's leave.
To add approvals,
- From your home page, go to Settings (gear icon) > Approval
- Click Add Approval
- Give the name of the form for which you need to add approval
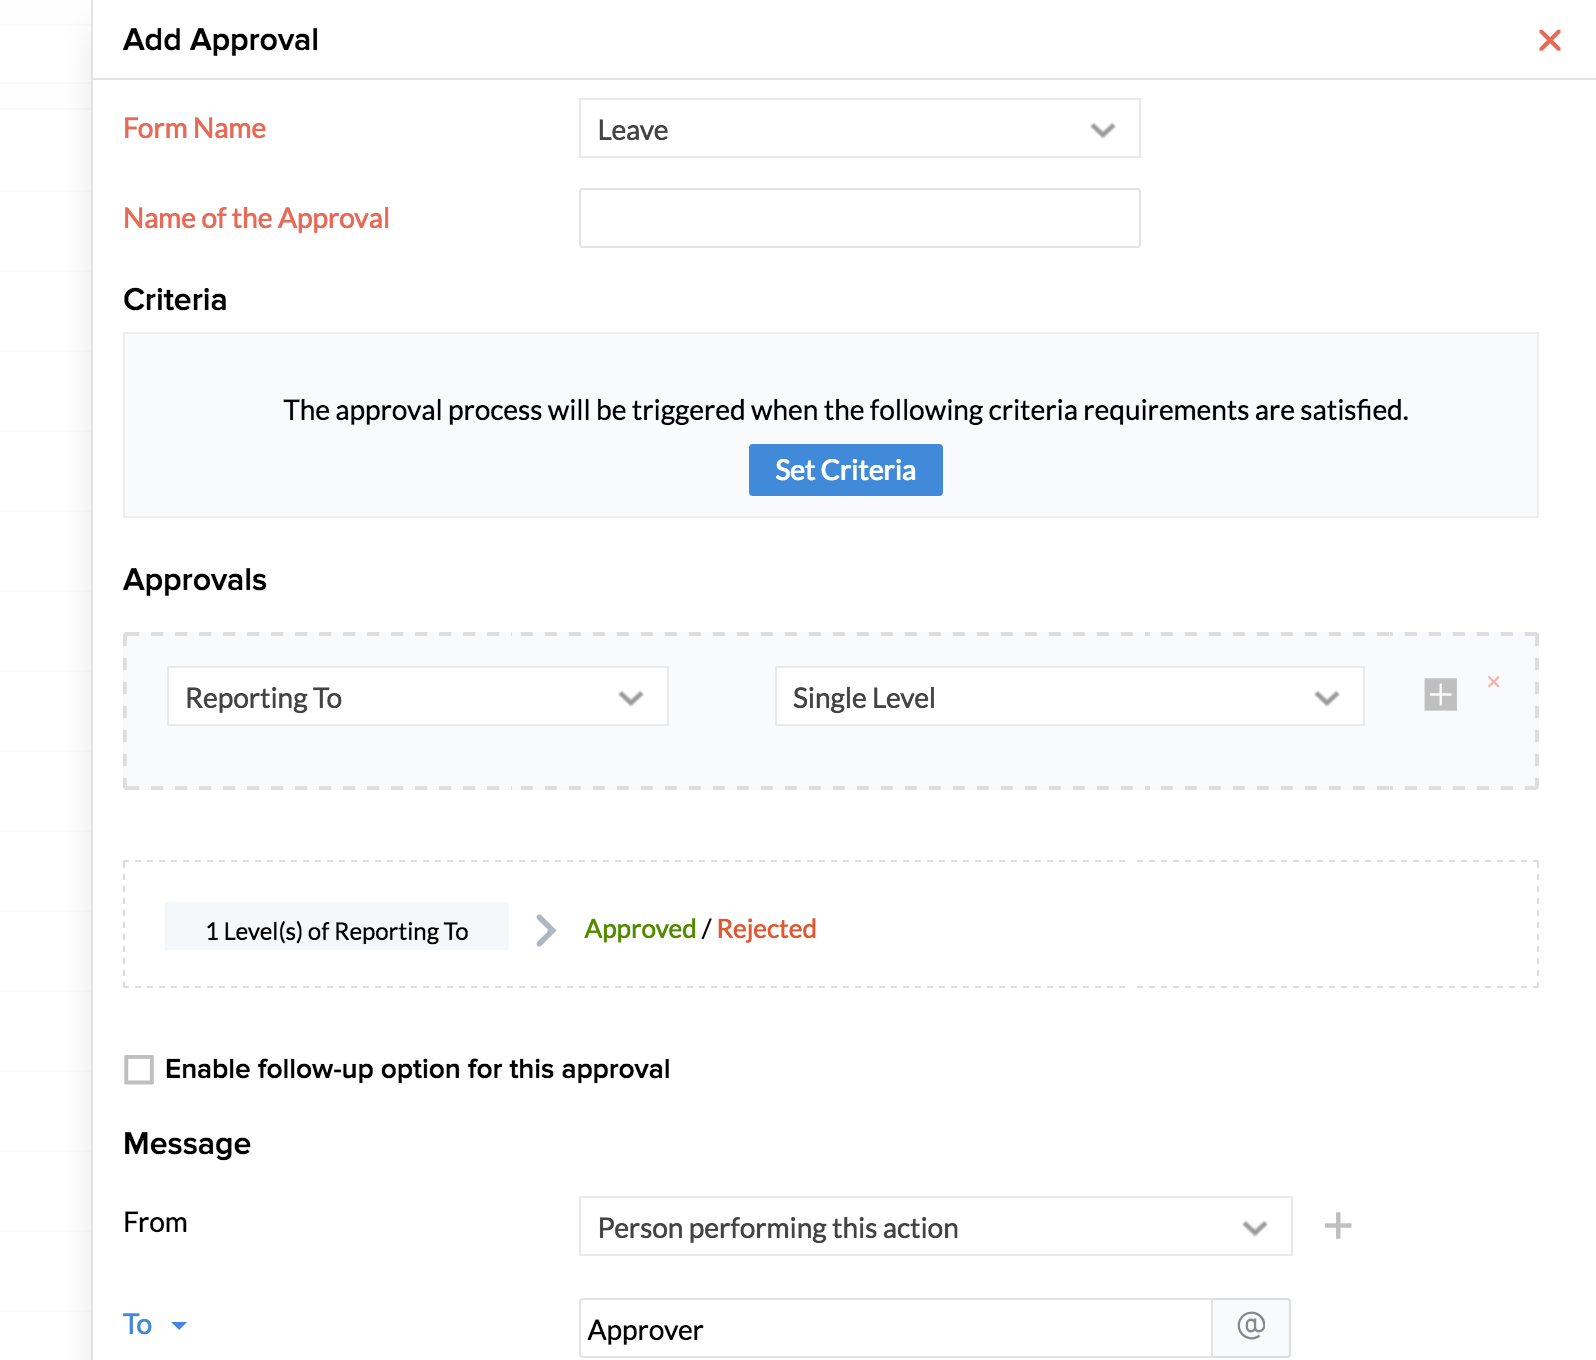
- Enter Name of the Approval
You can set a Criteria if needed. You can also set more than one criteria by using the Add new icon (add icon).
Under Approvals, You can either configure approver or allow the system to auto approve or auto reject the record based on the criteria requirements.
Follow the steps given below to configure an approver:
- Click Configure Approver
- In the first tab, there are various options given out of which, you can select one:
Reporting To - Approval goes to the Reporting To of the employee.
Department Lead of the Login User - Approval goes to the Department Lead of the user who is sending the approval request.
Approver based on Role - Approval goes to the people who are in the role that is selected.
Department Head - Approval goes to the head of the chosen department.
Department Members - Approval goes to the members of the Department of the user.
Employee - When this option is chosen, then the user can choose the name of a particular employee for the approval to be sent to.
Project Managers - Approval goes to all Project managers.
Allow Employees to Choose the Approver when adding a record - In this option, the employee has the option to select who the approver is, while the record is being added.
Note: Approvals can be set up to ten levels of Reporting To
- Check the 'Enable follow-up option for this approval' if you would like to do a follow-up for the approval.
When you click on this, you can define if the follow-up has to be a one-time or a repeat follow up and define the number of days after which the follow-up needs to be done.
This option is for sending automatic notifications for a follow-up to the approver. There is also an option in the request screen, to manually follow up while sending a request for approval.
- Under Message template details, you can define the follow-up email template
- In From, you can either select Person performing this action or give an email id
- In To, you have the options listed below:
System options:
Approver - If you select this option, the email will go to the Approver who is configured.
Team mail ID of the person performing this action - If you select this option, the approval email will be sent to the Team mail address of the person who submitted the approval request.
The person performing this action - Person performing this action refers to the user who is actually triggering the action like requestor(create/ edit actions), approver(approve/reject actions).
Reporting Manager of login user - If you select this option, the email will be sent to the Reporting manager of the person who submitted the approval request.
User list - This option pulls out the list of all users. You can select the person who needs to receive the approval email.
Role List- This option pulls out the list of all roles. You can select the role to which the email needs to be sent to.
Department List - This option pulls out the list of all departments. You can either select a department or do a search.
You can also check the Notify All box to send a mail to everyone in the Organization.
Note: Under CC, you can select 'Team email id' from system options for the team to get notified when a member of the team applies for leave.
- Once you are done with the 'From' and 'To', you can proceed to enter a Cc, Bcc, and Reply-To if there is a need
- Give a subject for the email
- Create a message using the Available merge fields as shown in the image below
- Click Save
Configuring Approvals for Compensatory Off
When an employee applies for compensatory off, the approvals that are configured for the leave form will become applicable for this. However, approvals or notifications (email alerts) can be configured even when an employee records TOIL to be taken as compensatory off later. Follow the steps given below to achieve this.
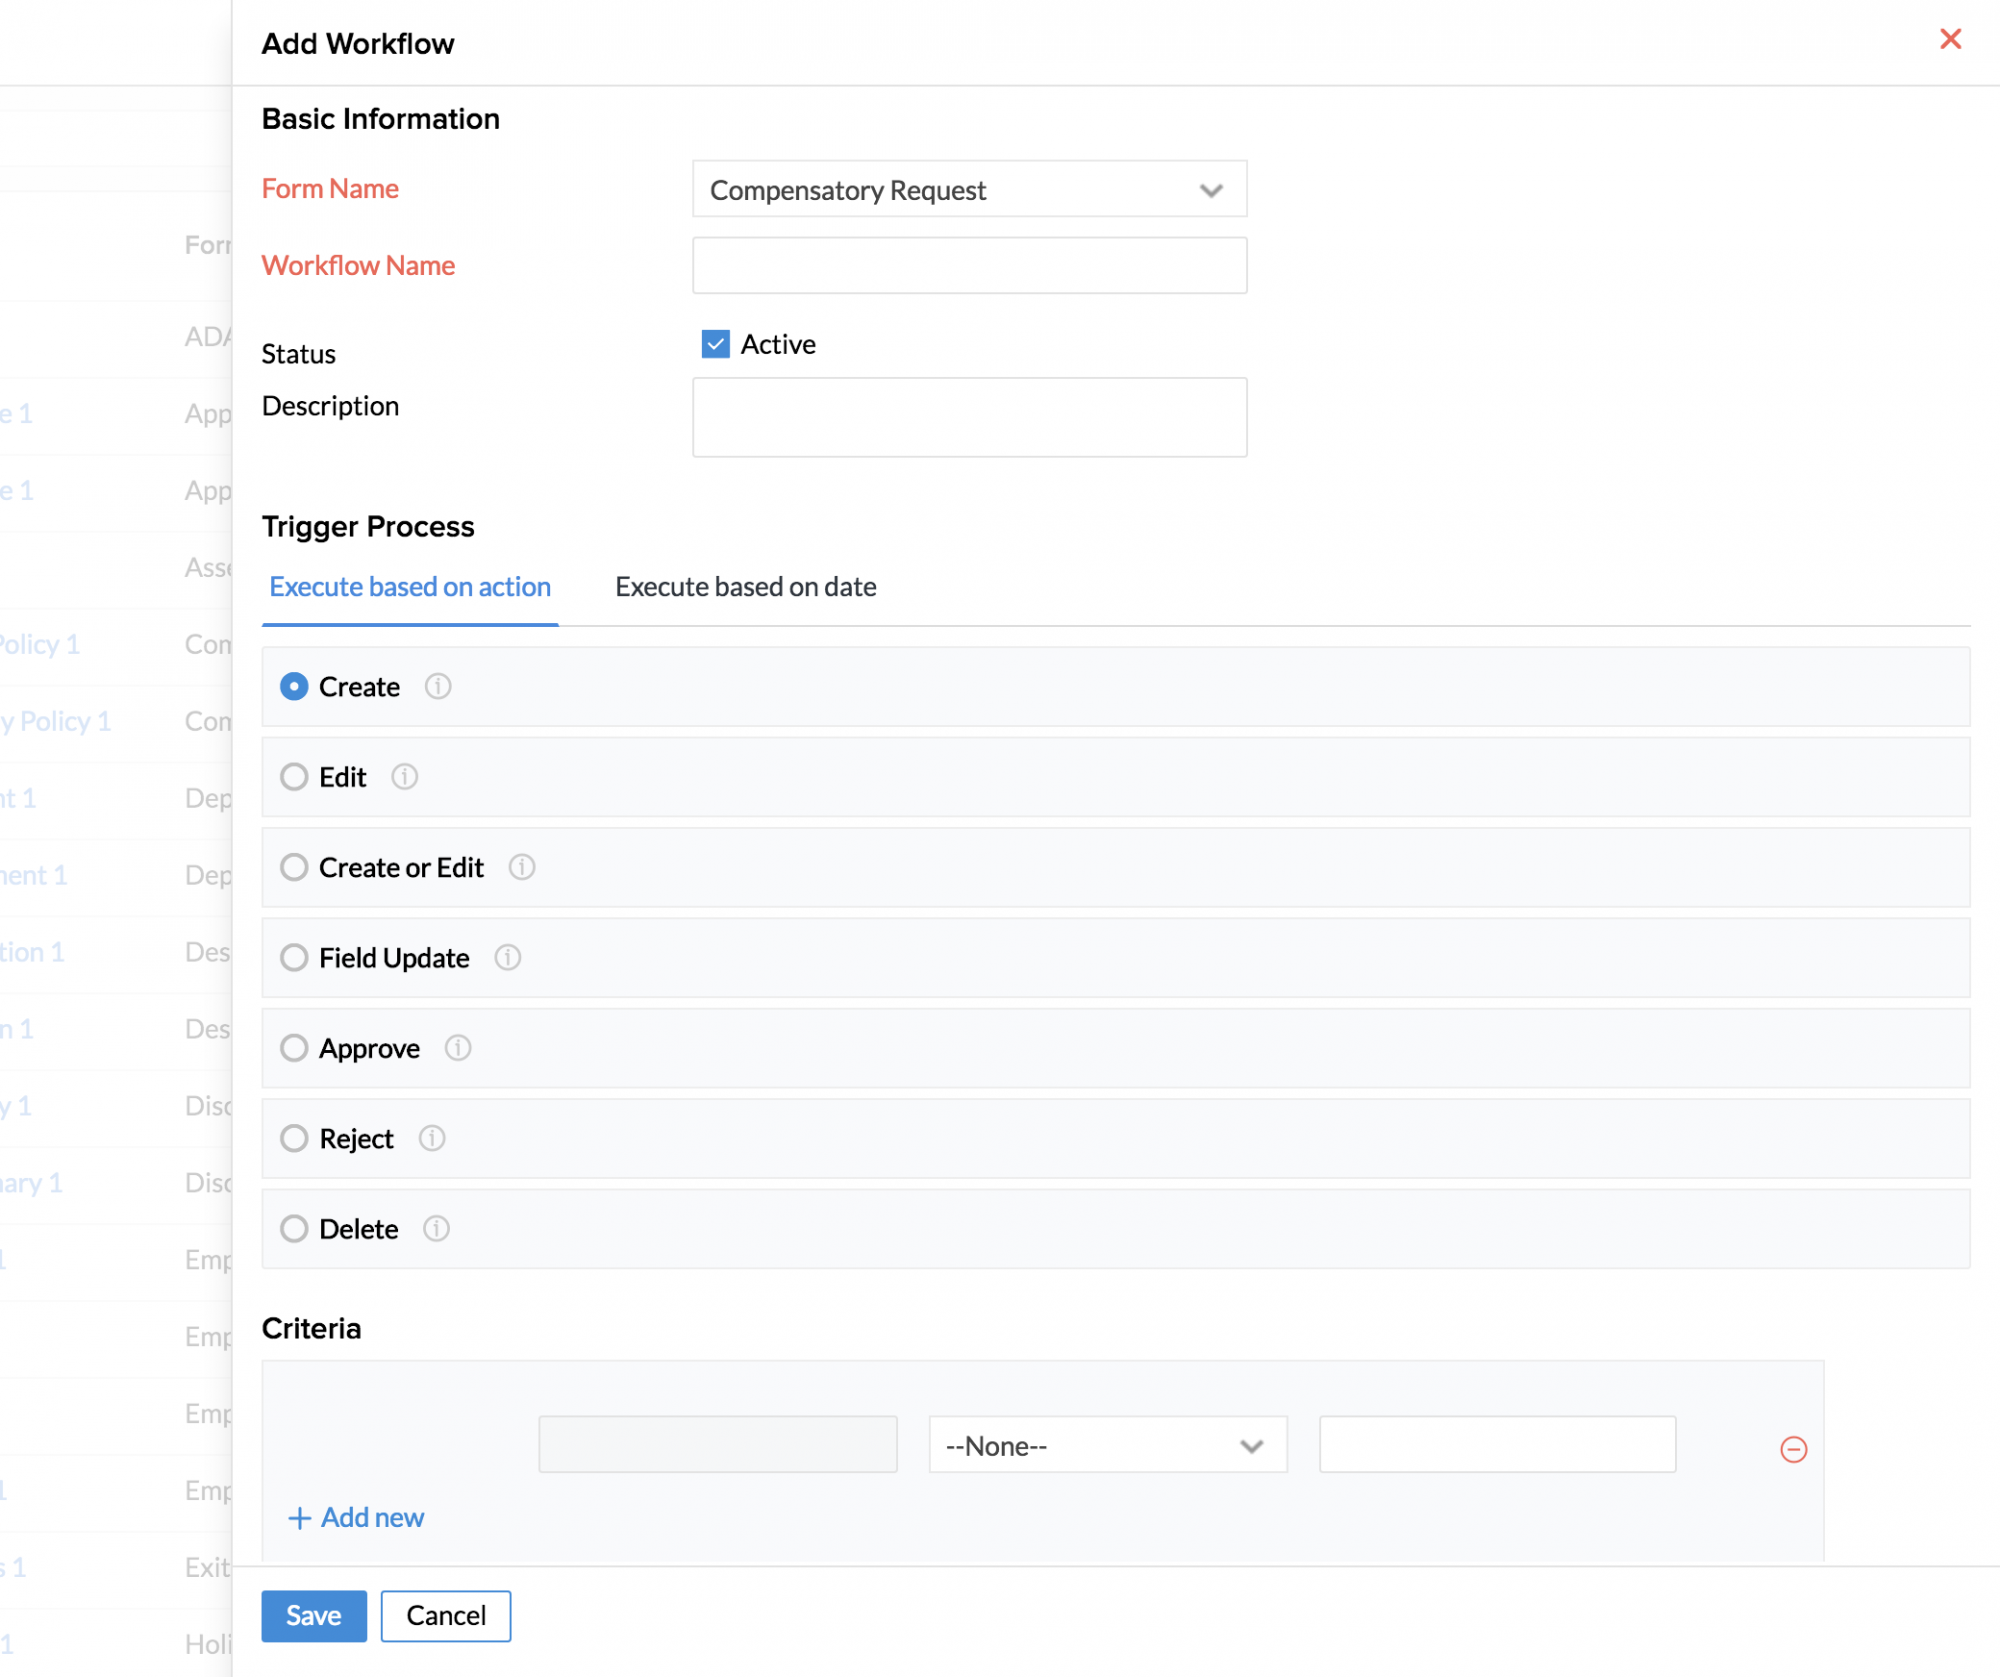
To configure approvals, the form name needs to be selected as 'Compensatory Request'. The other steps are the same as that of leave approval configuration.
- From your home page, go to Settings (Gear icon) > Automation > Workflows > Add Workflow
- Under Form Name, select 'Compensatory Request'
- Select Execute based on action, because the notification needs to be sent when a request is added for marking compensatory off
- Set criteria if needed
- Under Action, select Mail alerts
- Enter the details like From, To etc
- Give a subject to the mail alert. For eg. Compensatory Request
- Click Create new template if you would like to create a new template
- Use the merge fields to draft the message
- Click Choose from Existing template if you would like to map a template that has already been created
- Click Save
To view leave applications that are awaiting approval,
- From your home page, go to Leave > Views > Leave Applications
- Select 'Pending' under 'All Requests' drop down and hit Search

You will be able to see the list of all leave applications that are awaiting approval.