
Transfer Orders
Transfer Orders allow you transfer stock from one warehouse to another, thereby greatly reducing the hassle of manually updating the stock levels.
- Creating a new Transfer Order
- Transferring items with serial numbers
- Transferring batch tracked items
- Tracking your Inventory Transfers
- Receiving a Transfer
- Printing Transfer Orders
- Swapping Warehouses in a Transfer Order
- Deleting a Transfer Order
- Importing Transfer Orders
- Exporting Transfer Orders
Creating a new Transfer Order
To create a new Transfer Order,
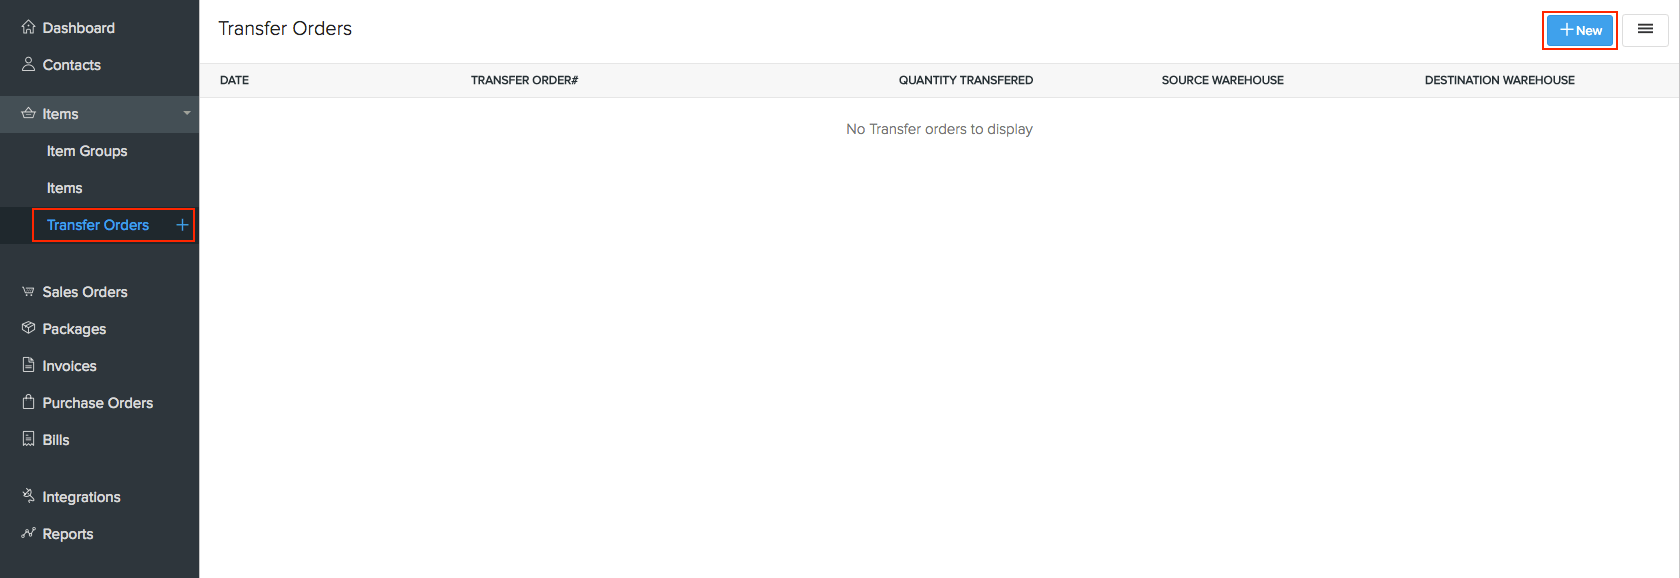
- Click on the Items tab on the left pane and select Transfer Orders in the drop-down list.
- Click on the New button on the top-right corner.
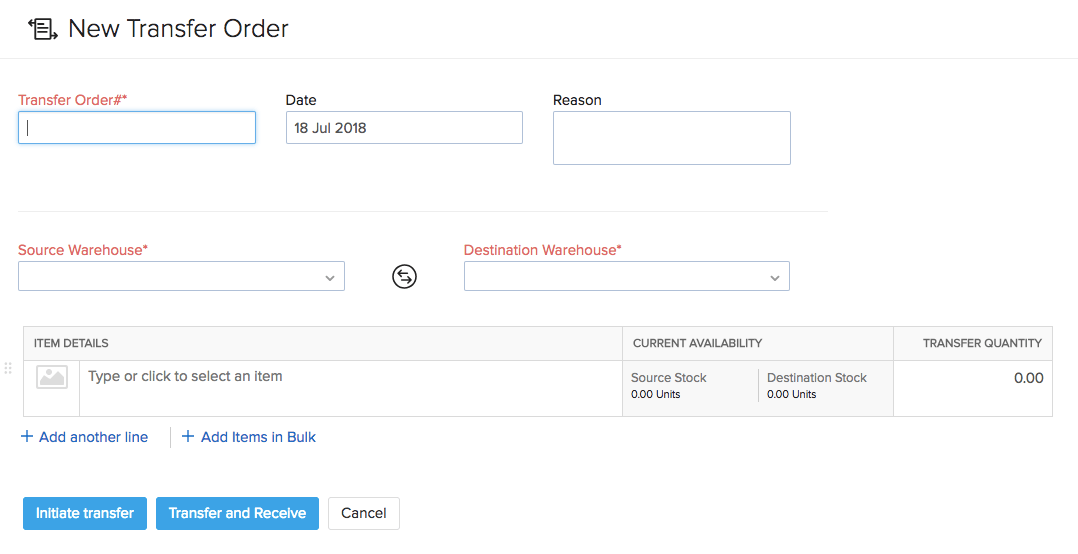
- Enter the transfer order number, source and destination warehouse.
- Select the goods to be transferred.
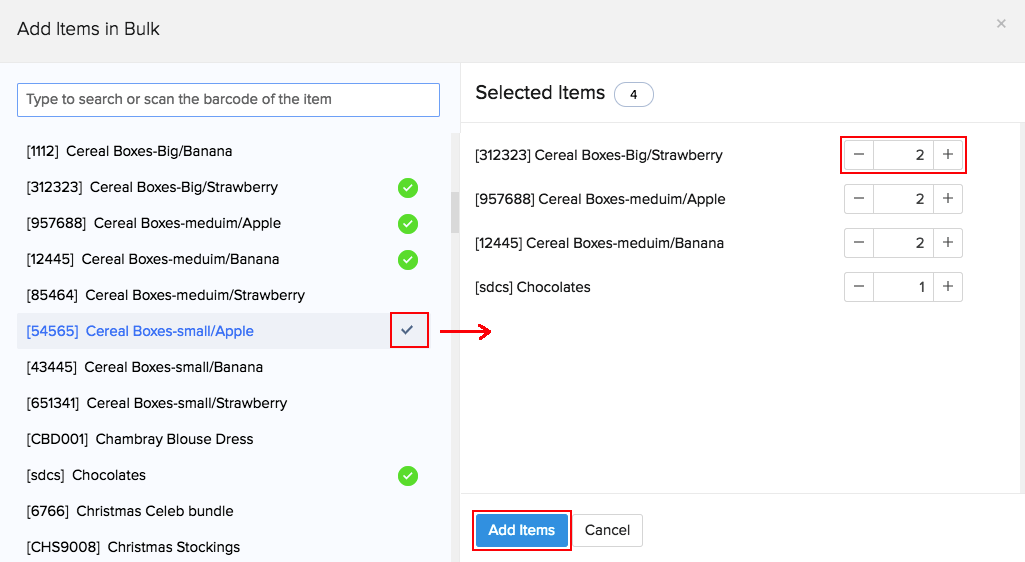
- Alternatively, you can click the Add items in bulk option to add several items at once to your transfer order.
Pro Tip: Instead of searching for the items from the list, you can select an item by scanning its barcode. When you scan the same barcode more than once, the quantity of the item gets incremented automatically.
Fields in the Transfer Order page:
| Field | Description |
|---|---|
| Transfer Order# | This is the unique identification number for the Transfer Order. This is a mandatory field and cannot be left blank. |
| Date | The date of stock transfer. |
| Reason | The reason why the stock is being transferred can be entered here. |
| Source Warehouse | The warehouse from where the stock is being transferred. |
| Destination Warehouse | The warehouse to which the stock is being transferred. |
| Quantity | The amount of stock to be transferred. |
| Source Stock | The current stock in the Source Warehouse. |
| Destination Stock | The current stock in the Destination Warehouse. |
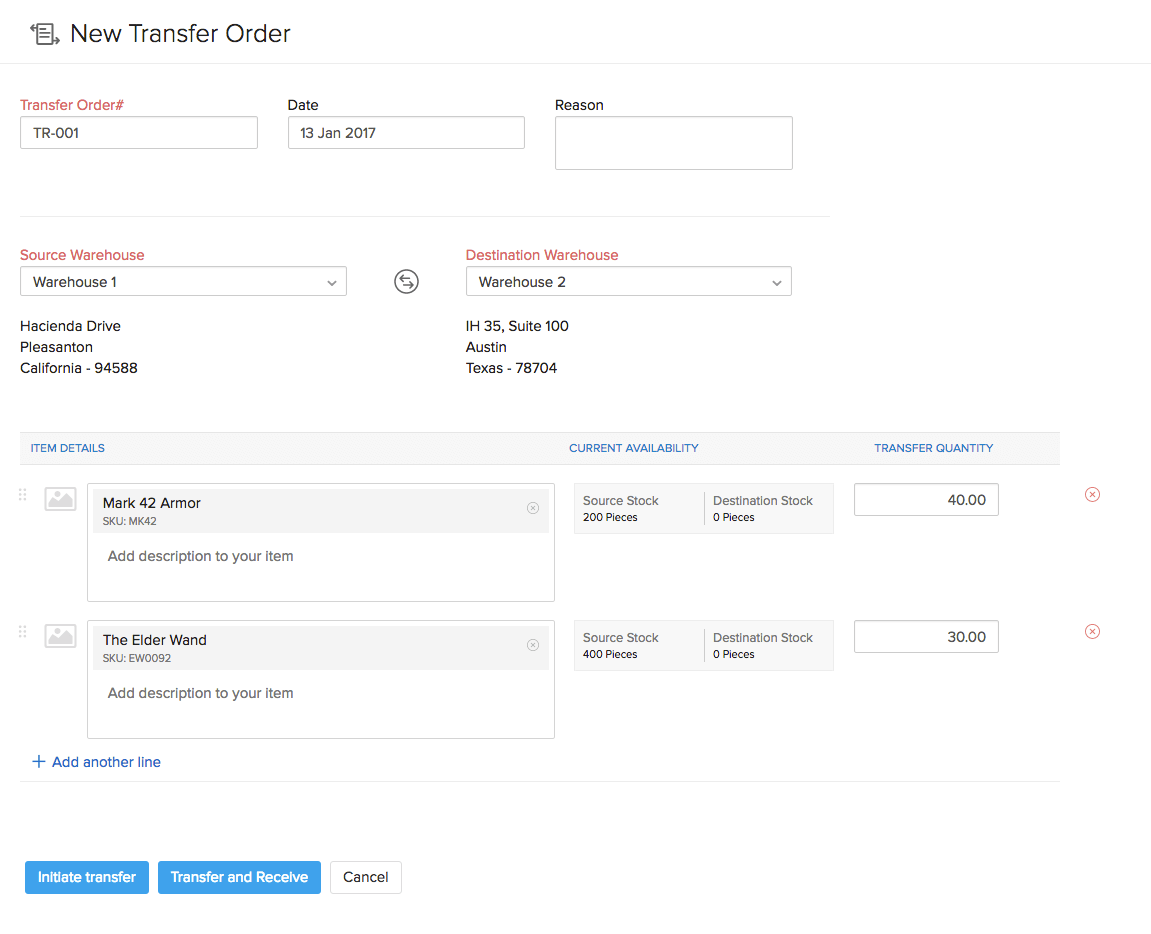
- If you wish to start a transfer and receive it later, click Initiate Transfer. The Transfer Order’s status will be set as In Transit, and the stock receipt has to be done manually.
If you wish to instantly complete the transfer, click Transfer and Receive. In this case, the stock will be transferred right away.
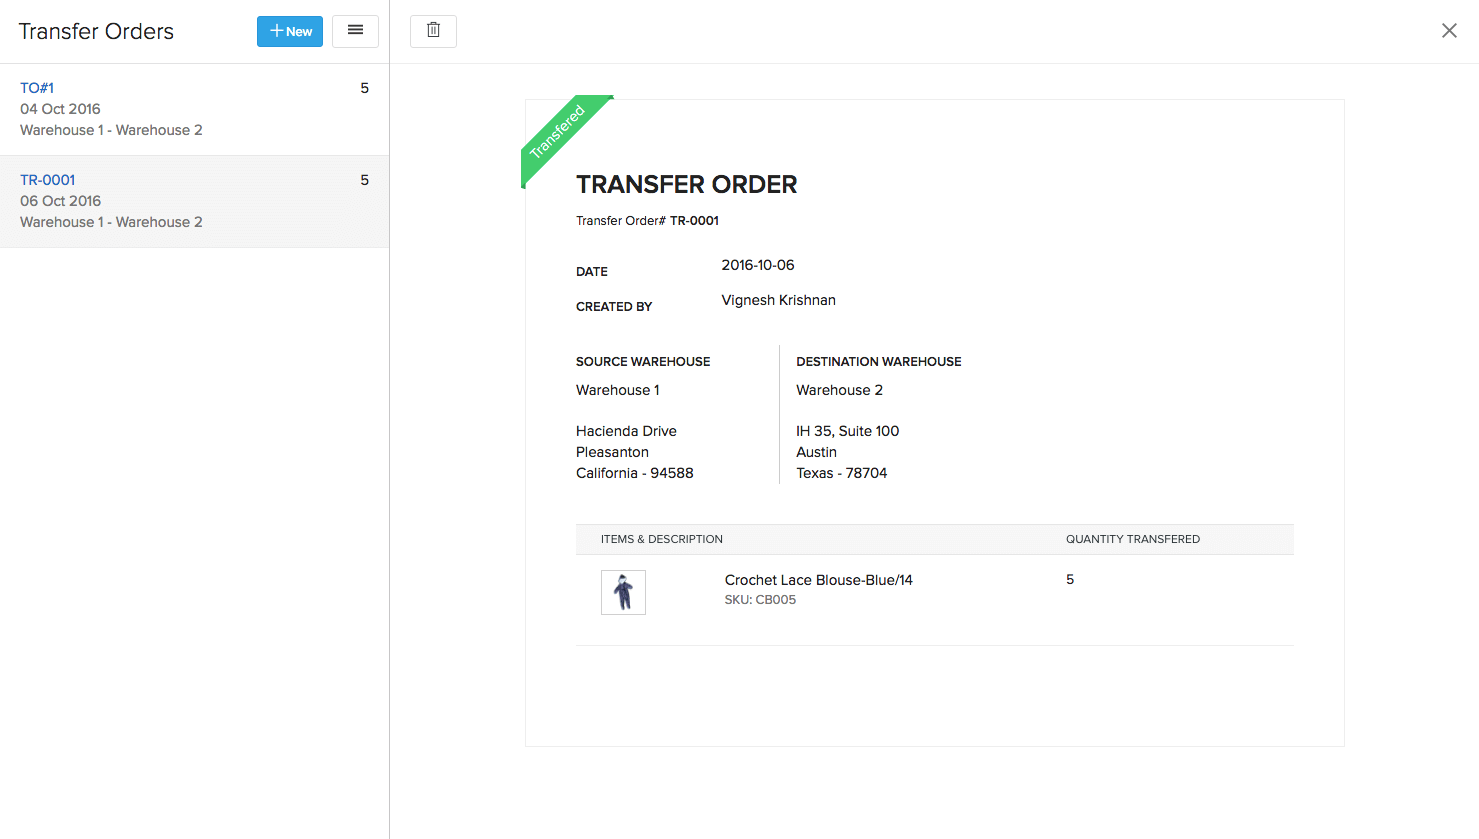
The list of all Transfer Orders done and their details can be found in the Transfer Orders section.
Transferring items with serial numbers
- If you’re transferring items with serial numbers, you’ll have an option to select the serial numbers to be transferred from one warehouse to another.
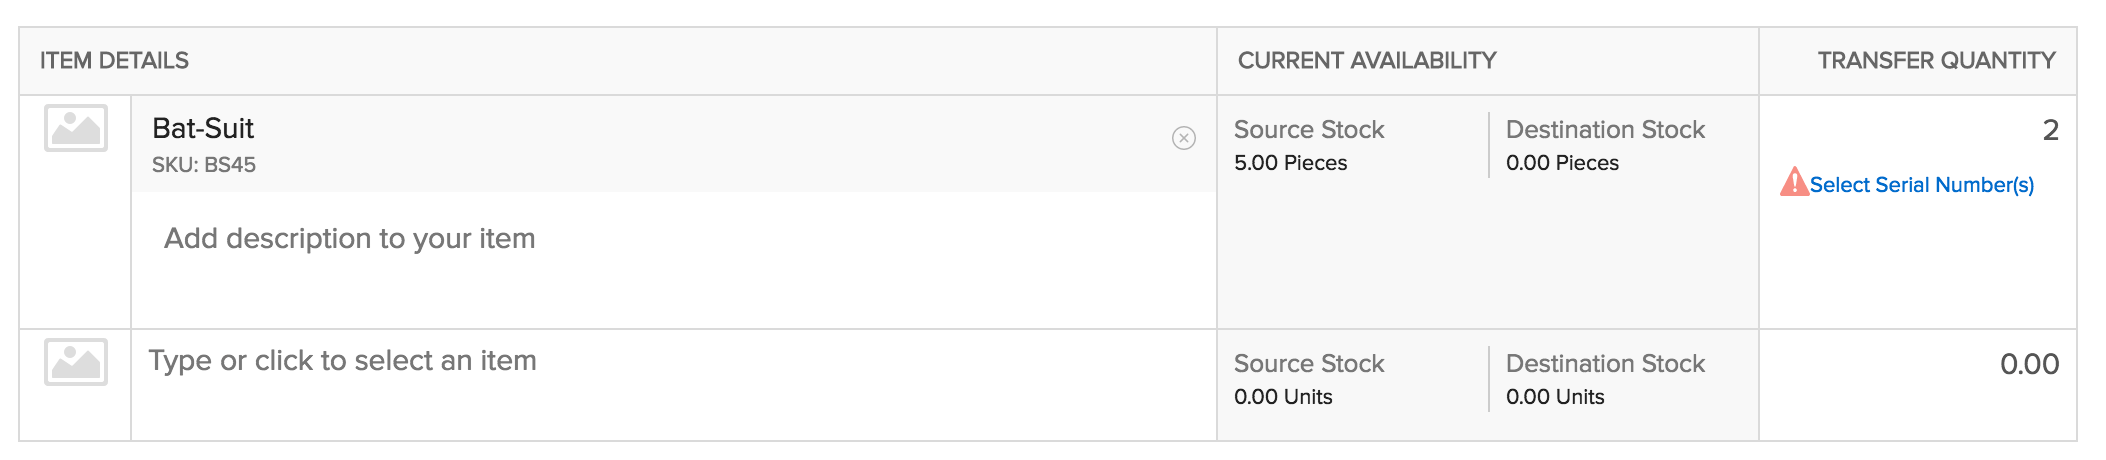
- Clicking the option will open a dialog box, where you can choose the serial numbers to be transferred, from a list of existing serial numbers present for the item.
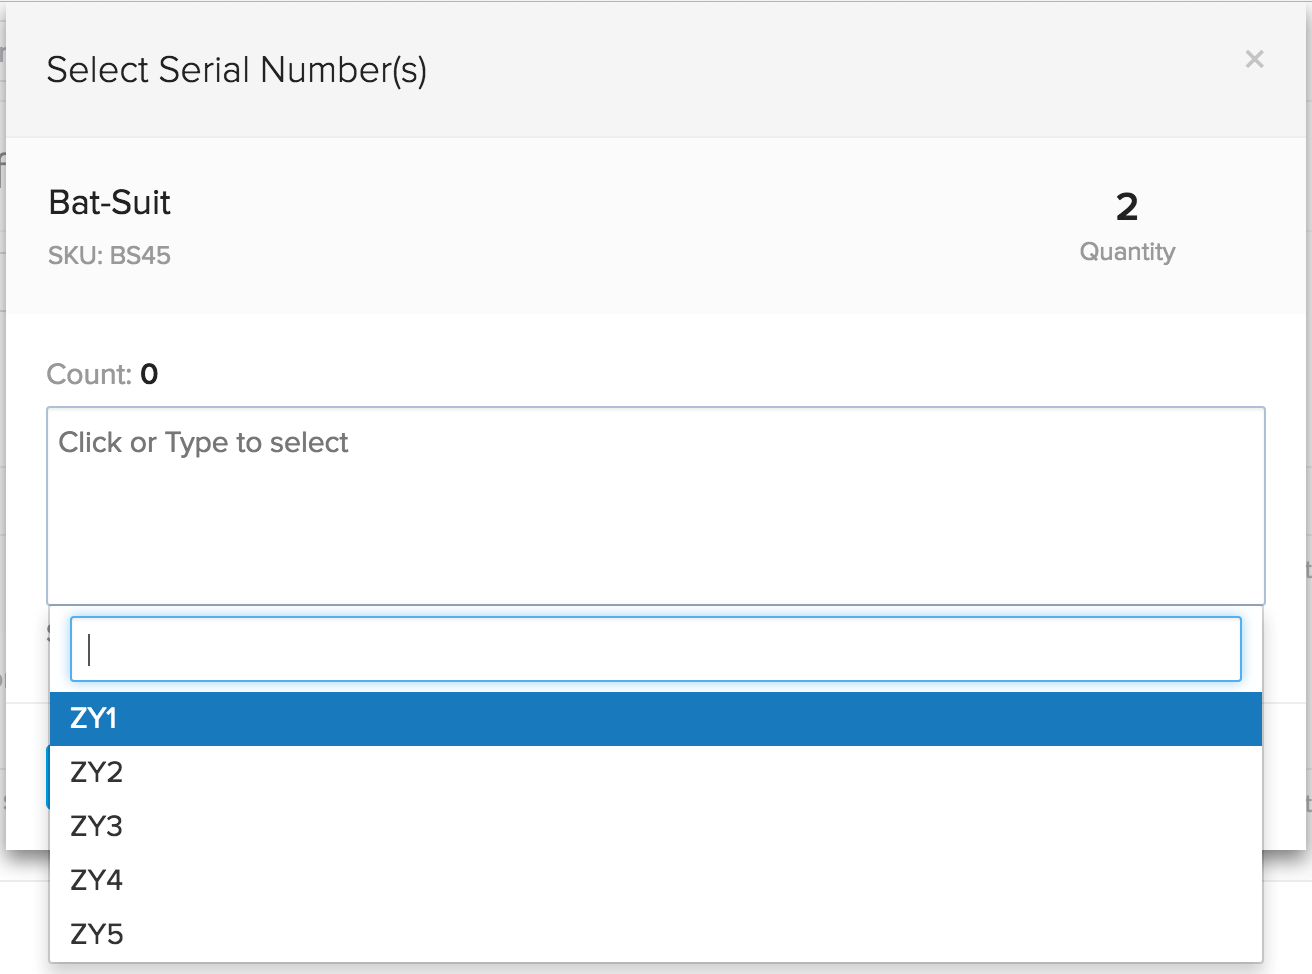
- Click Save to confirm your selection.
Transferring batch tracked items
- To transfer batch tracked items from one warehouse to another, you’ll have an option to select the batches from which the specified quantity of items will be picked.
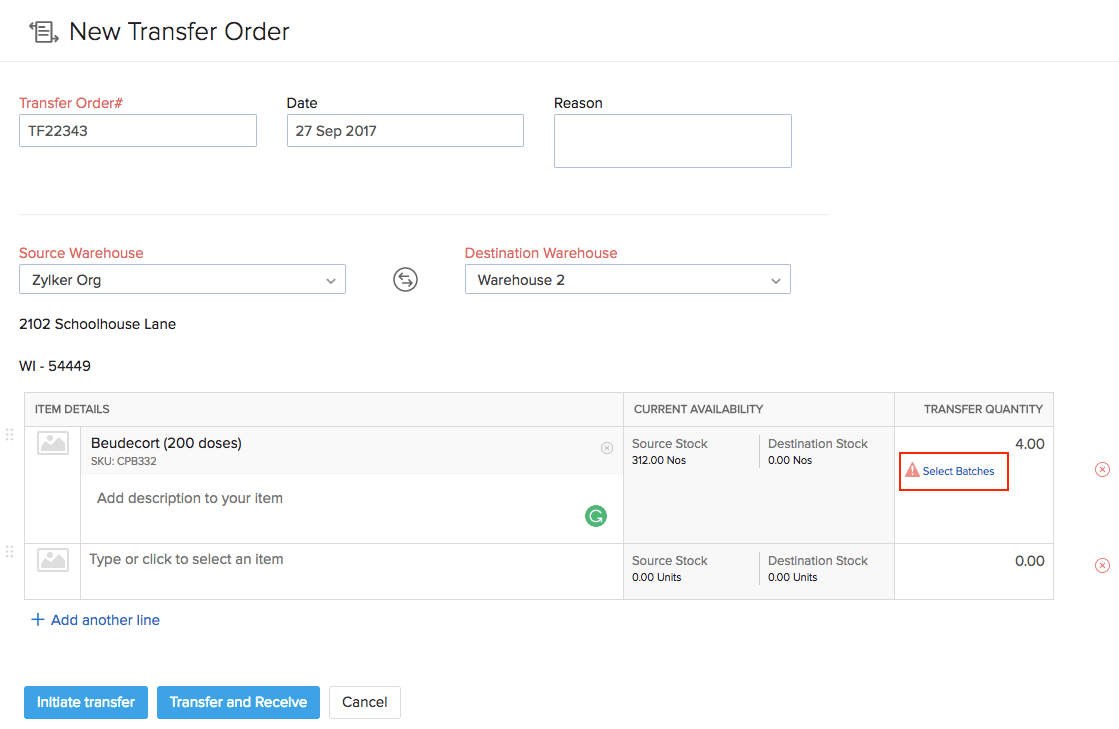
- Clicking the option will open a dialog box where you can choose the batches from which you need the items to be transferred.
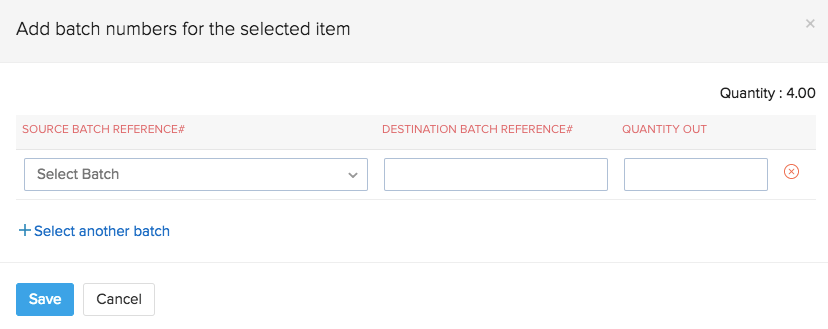
Mandatory Fields in the dialog box:
- Source Batch Reference# : Reference number of the existing batches in the source warehouse.
- Destination Batch Reference# : A unique reference number with which the new batches will be saved in the destination warehouse for that item.
- Quantity out: The quantity that will be transferred from each of those batches. The aggregate of the quantity taken from each batch must match the quantity specified in the transfer order.
Click Save to confirm your selection.
Tracking your Inventory Transfers
Businesses with multiple warehouses often transfer goods from one warehouse to another when they are immediately in need of supplies. Hence, it is essential for the warehouse managers to know exactly when they will receive the goods from the source warehouse to effectively manage sales and order fulfillment.
With the AfterShip integration, you can track your transfer order and receive real-time updates in the whereabouts of your stock.
Prereqisites:
- You need to be integrated with AfterShip. Learn how.
- You cannot track transfer orders for which you have already received the goods.
- You can enable tracking for a transfer order only if you have shipped the goods via a carrier service.
To activate tracking on your transfer order:
- Go to the Items module on the sidebar and click on Transfer Orders from the drop-down.
- Open the transfer order that you wish to track. The transfer order must be in the In-Transit status.
- Otherwise, create a new transfer order and click Initiate Transfer.
- Click the Track Stock Transfer button on the transfer order details page.
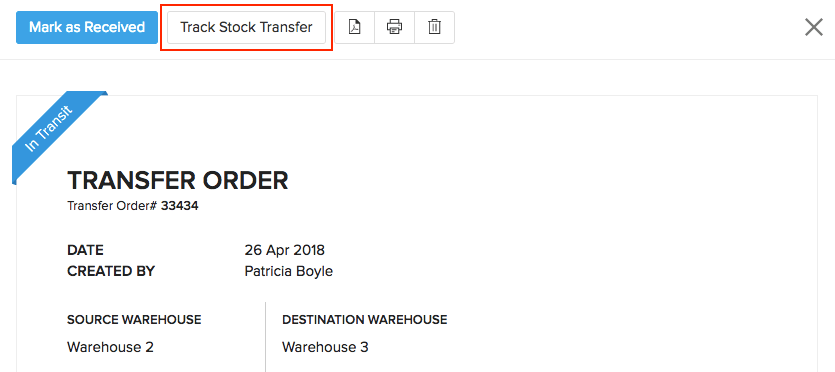
- Enter the tracking details provided by your shipment carrier service.
- Check the option - Send Status Notification to receive timely updates on the transfer status. This option will be available if you have enabled instant activation while integrating with AfterShip.
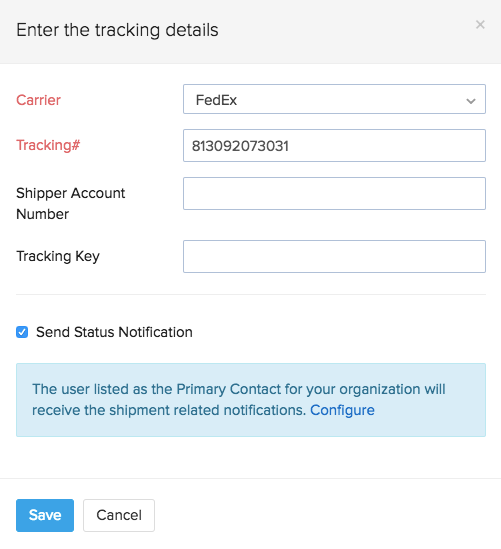
- Otherwise, provide your email or SMS information to receive tracking updates. This option will be available if you have integrated your own AfterShip account with Zoho Inventory.
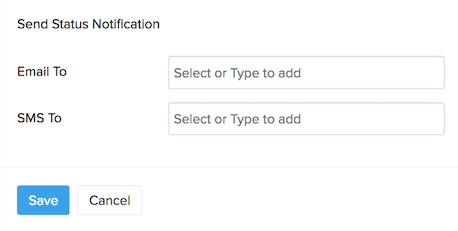
- Click Save to activate real-time tracking of your transferred goods.
To view your transfer status:
- Open a tracked transfer order.
- Click on Transfer Timeline option at the top. A slider window opens from the right where you can view the current location and the complete history of your stock transfer in a timeline fashion.
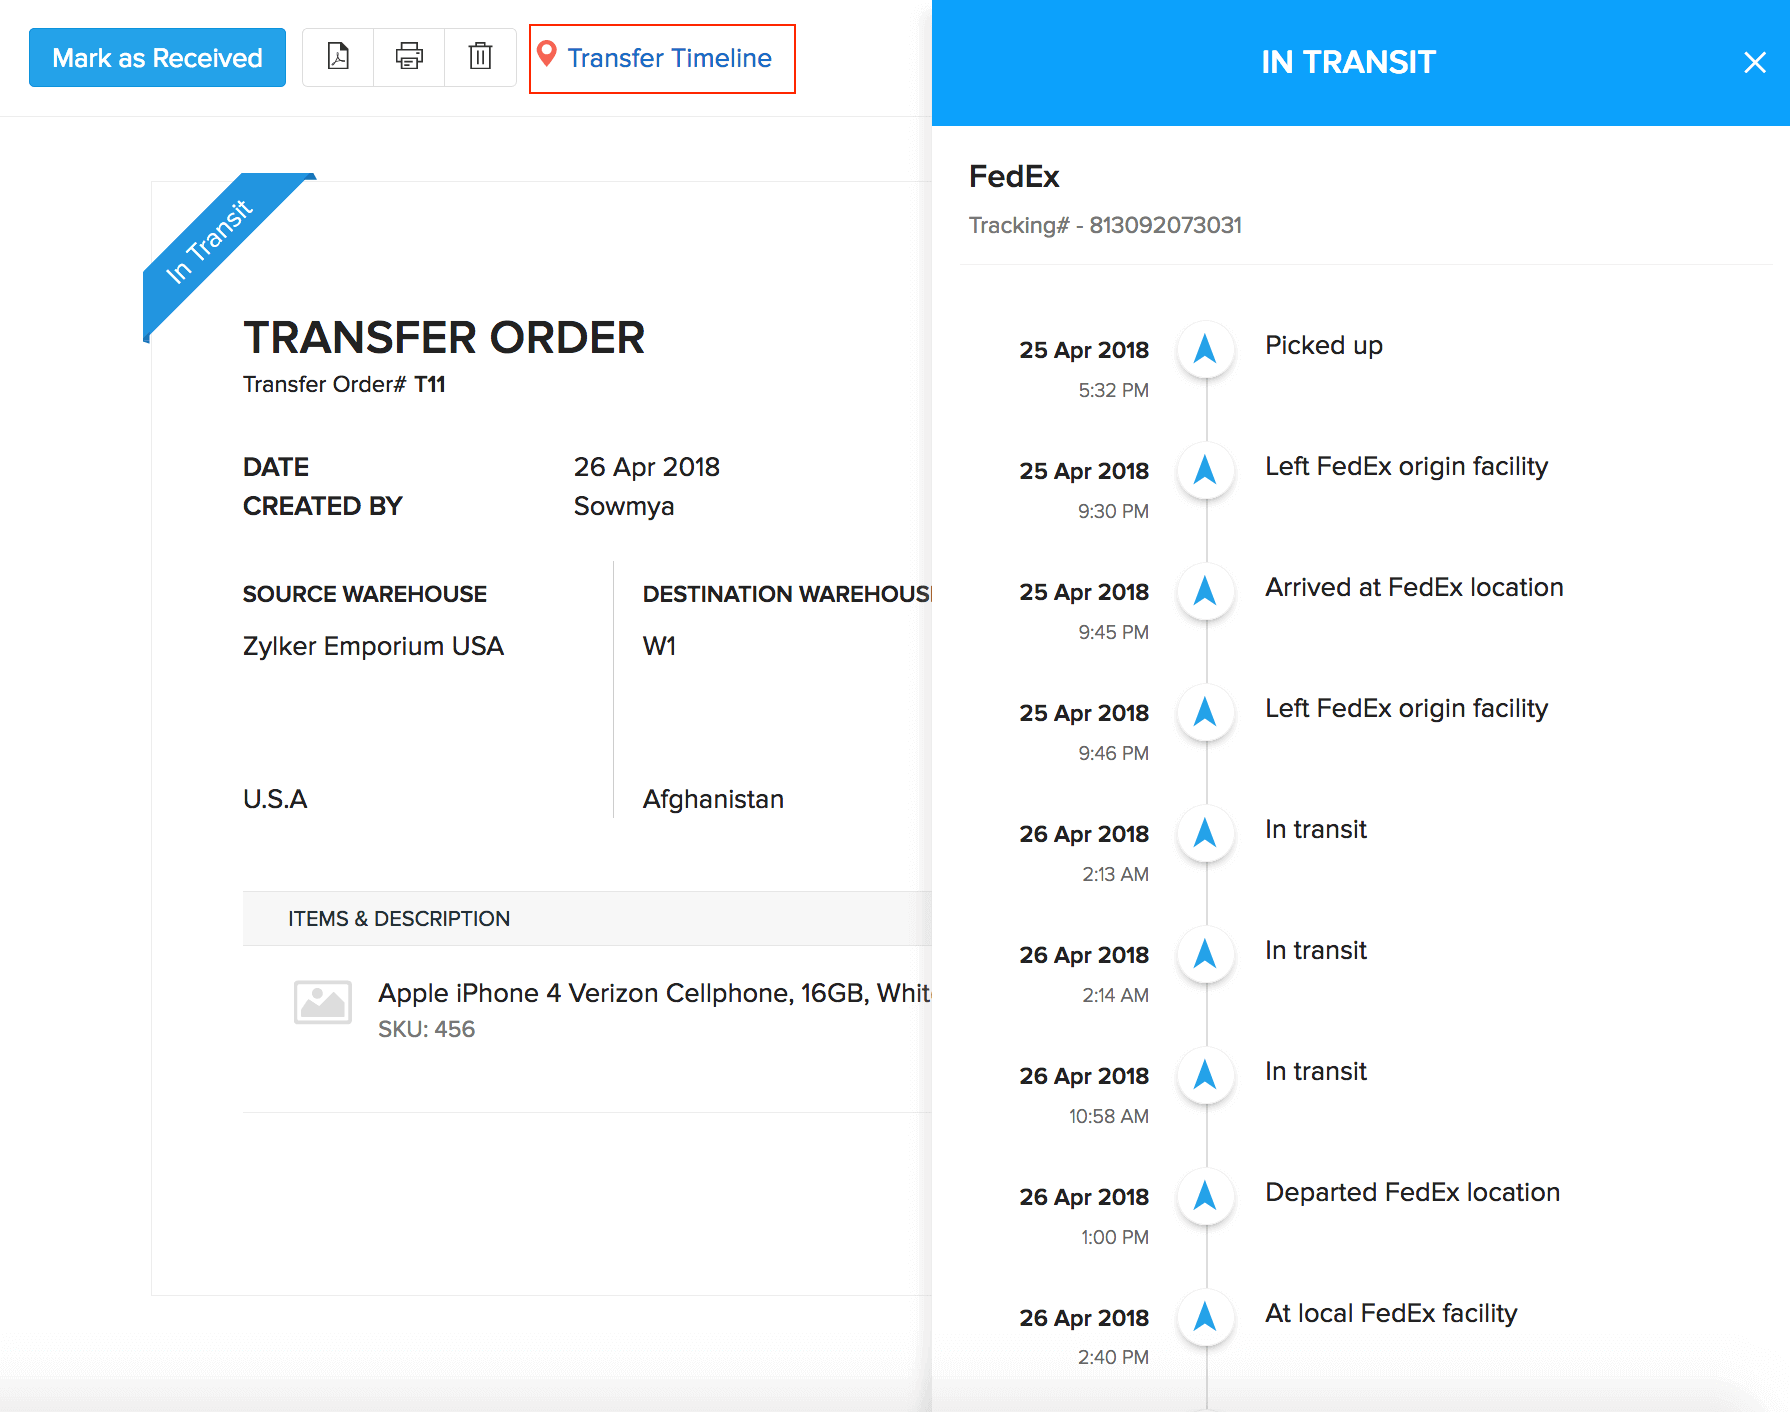
Important Note: Even when the stock is delivered, you will have to manually record a receive on the transfer order as of now.
Receiving a Transfer Order
To receive a Transfer Order which is in transit,
- Click on the Items tab on the left pane and select Transfer Orders in the drop-down list.
- Select the Transfer Order which you wish to receive.
- In the details page, click on the Mark as Received button.
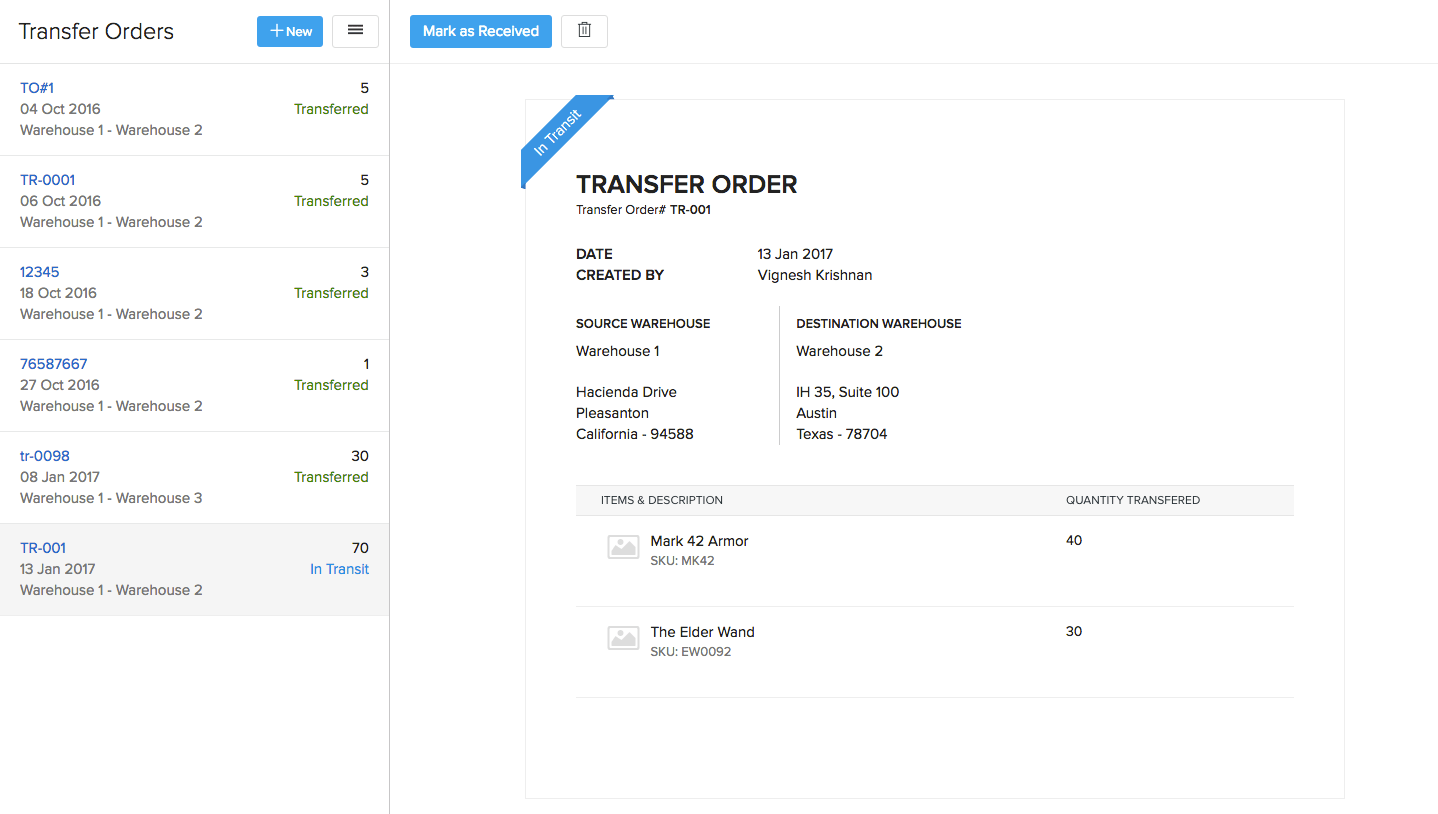
- Select the Receive Date and click on Save. The stock will now be transferred to the warehouse.
Printing Transfer Orders
To print a Transfer Order,
- Click on the Items tab on the left pane and select Transfer Orders in the drop-down list.
- Select the Transfer Order which you wish to receive.
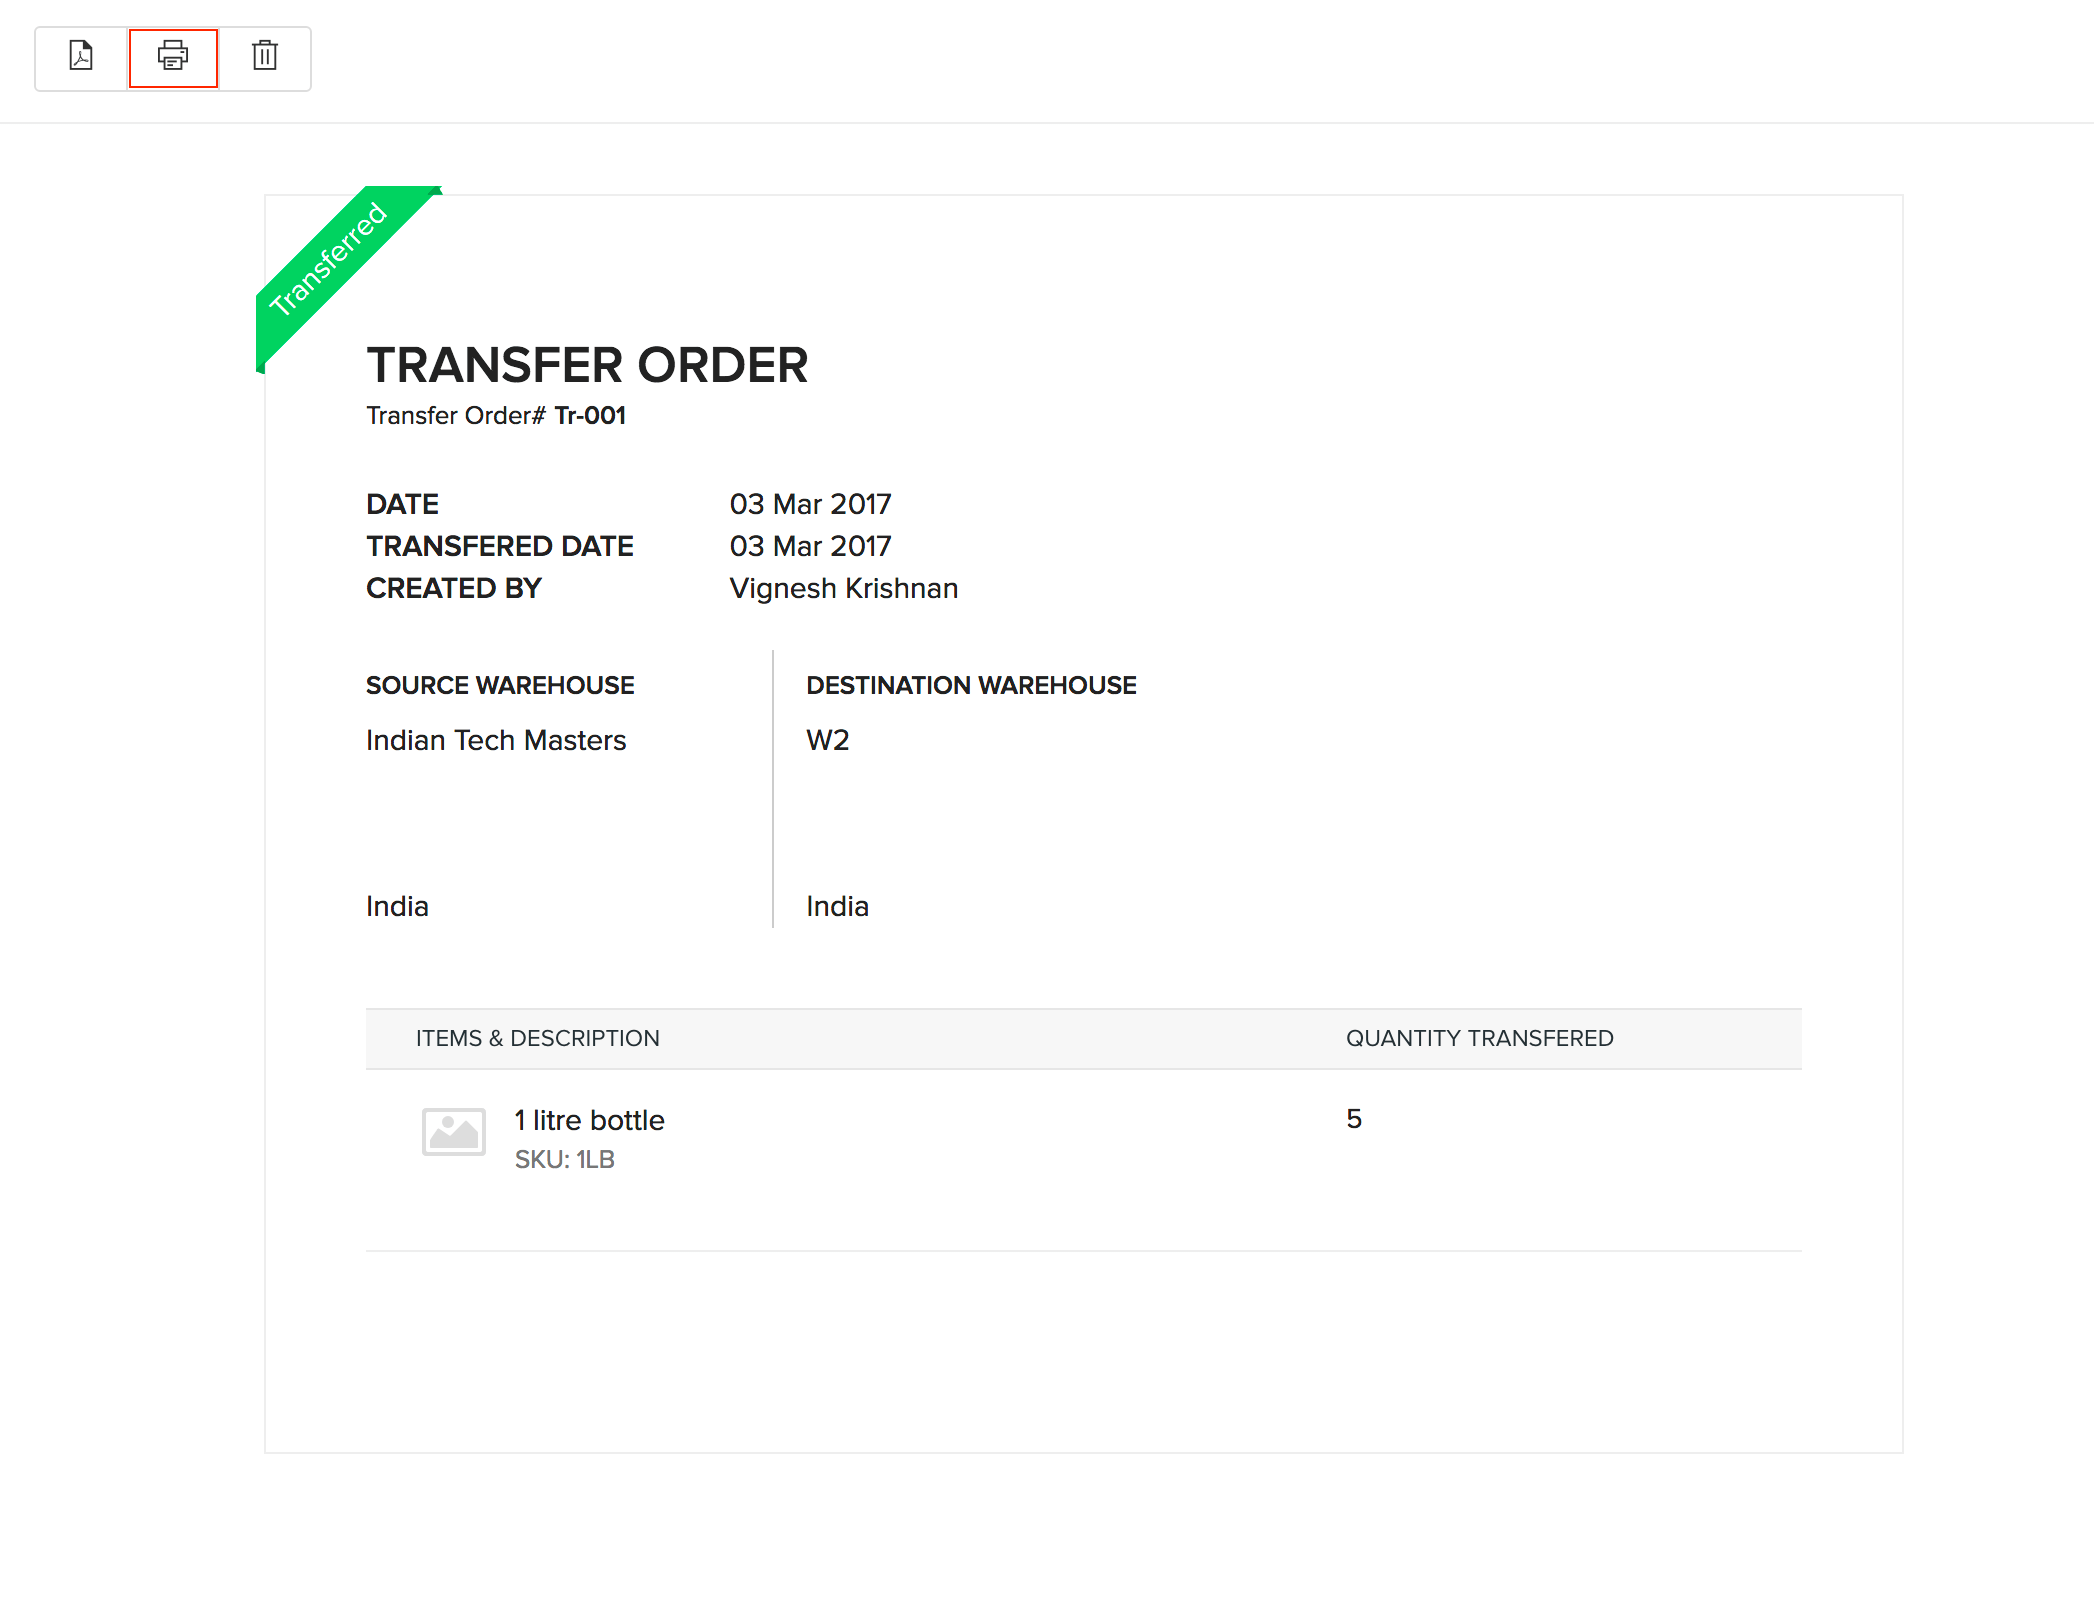
- In the details page, click on the Print icon to print your transfer order.
Swapping Warehouses in a Transfer Order
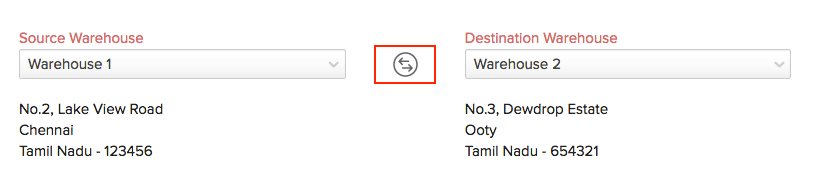
When creating a new Transfer Order, it is also possible to swap the positions of the Warehouses, i.e., from Source to Destination and vice-versa.
Deleting a Transfer Order
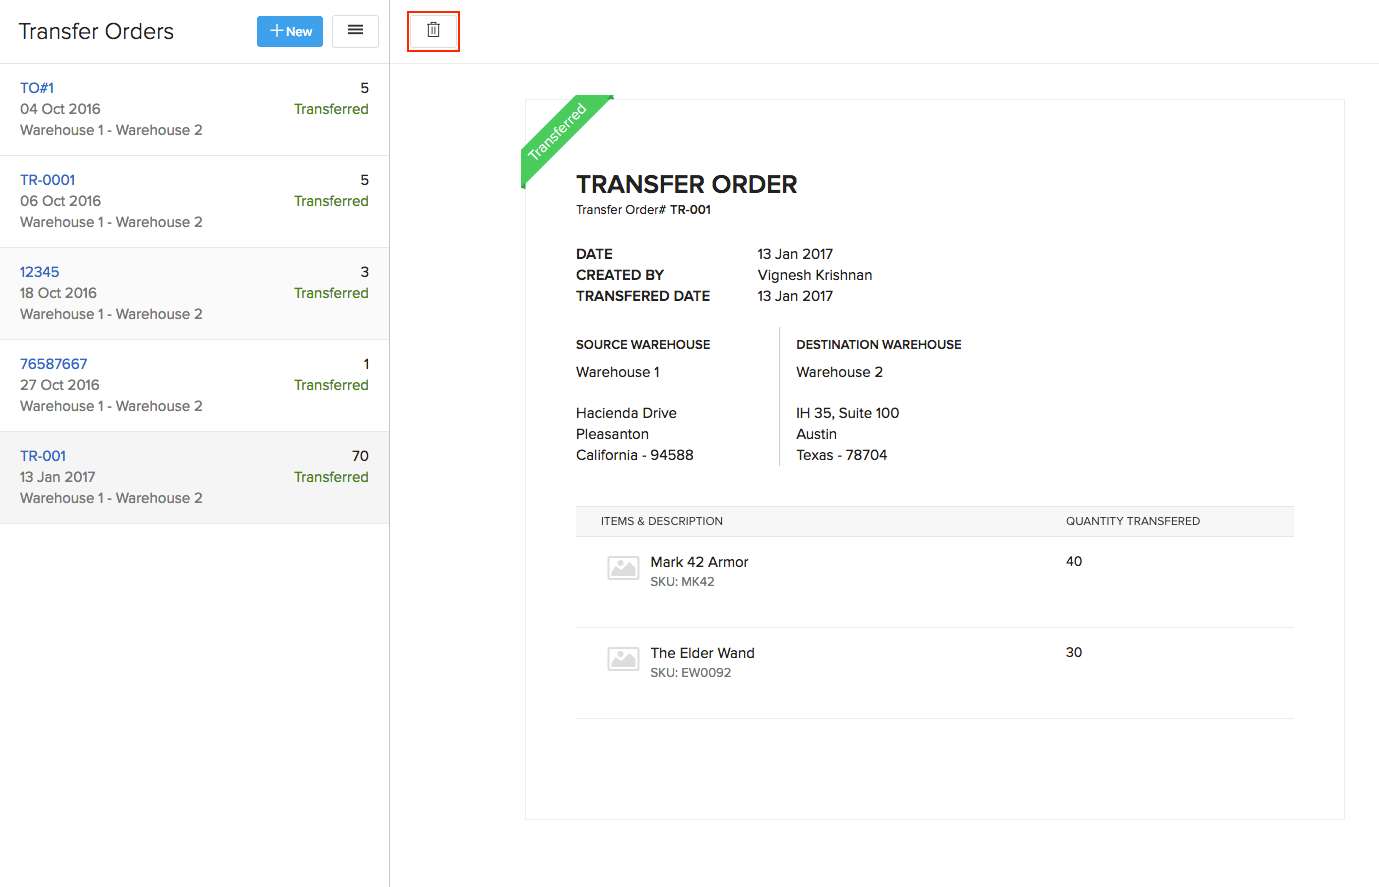
To delete a Transfer Order,
- Select the Transfer Order that you wish to delete.
- Click on the Delete (bin) icon above the Transfer Order to delete it.
- Confirm your deletion in the pop-up that follows.
- Your Transfer Order will now be deleted.
Importing Transfer Orders
To import transfer orders,
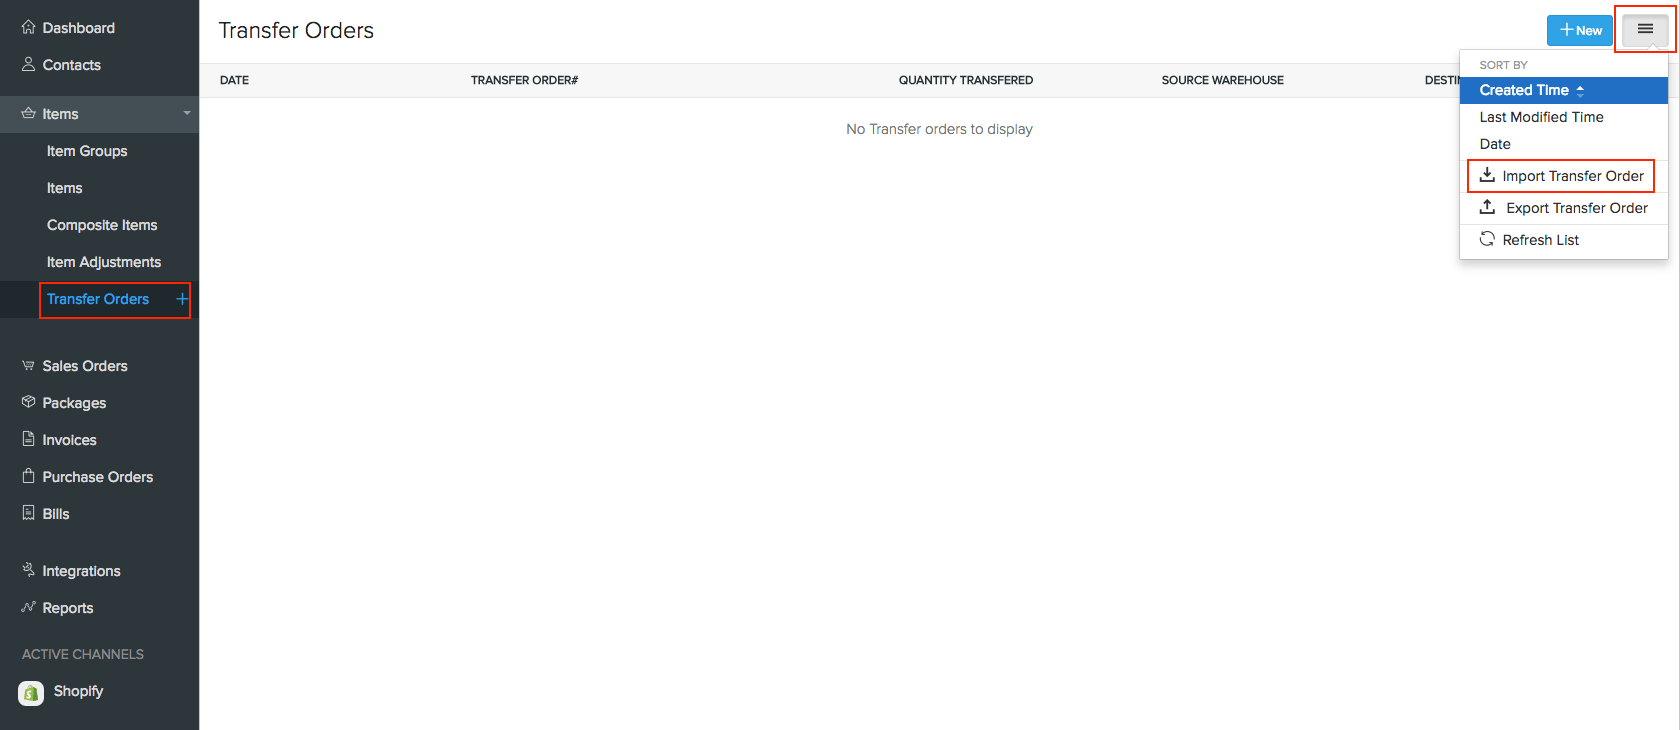
- Go to the Items module in the sidebar and open Transfer Orders.
- Click the hamburger icon and click Import Transfer Order.
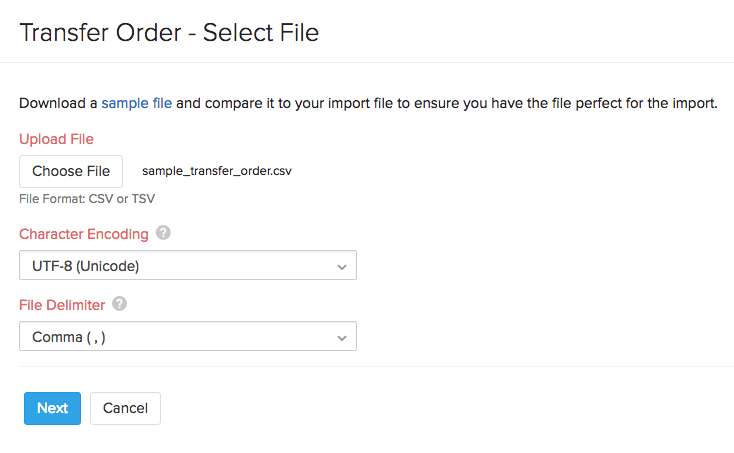
- Click Choose file and upload the relevant CSV file.
- Click Next.
Map the fields present in your file (Right) with the ones in Zoho Inventory (Left).
You can also import the tracking details in bulk to track the position of your inventory transfers in Zoho Inventory. You can only track those transfer orders whose items have been shipped via a professional carrier (ex: FedEx, UPS etc.).
Insight: To track your inventory transfers, you must integrate your Zoho Inventory organization with AfterShip. Learn how inventory tracking works here.
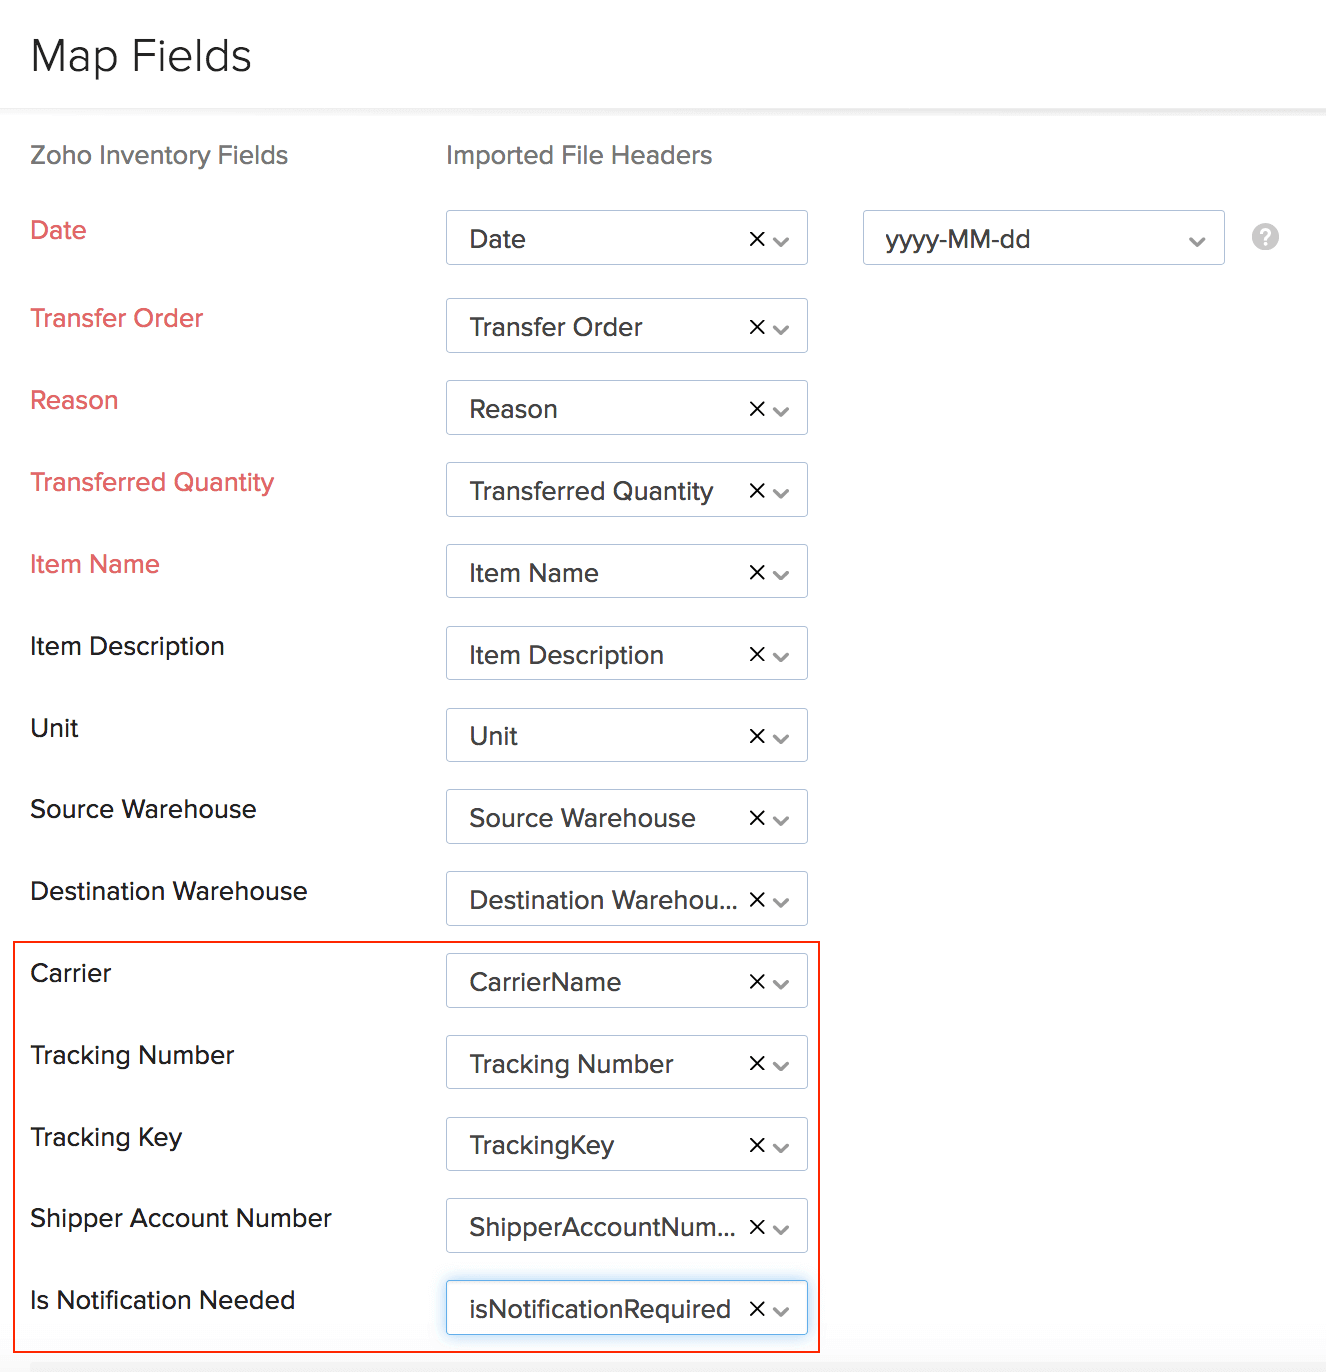
- Click the Next button. In the following page, if you don’t have any errors in the file, click the Import button to import the transfer orders into Zoho Inventory.
Exporting Transfer Orders
To export Transfer Orders,
- Navigate to the Items module in the left pane.
- Click on Transfer Orders.
- Select the hamburger menu icon near the New button (refer below screenshot) and select Export Transfer Orders.
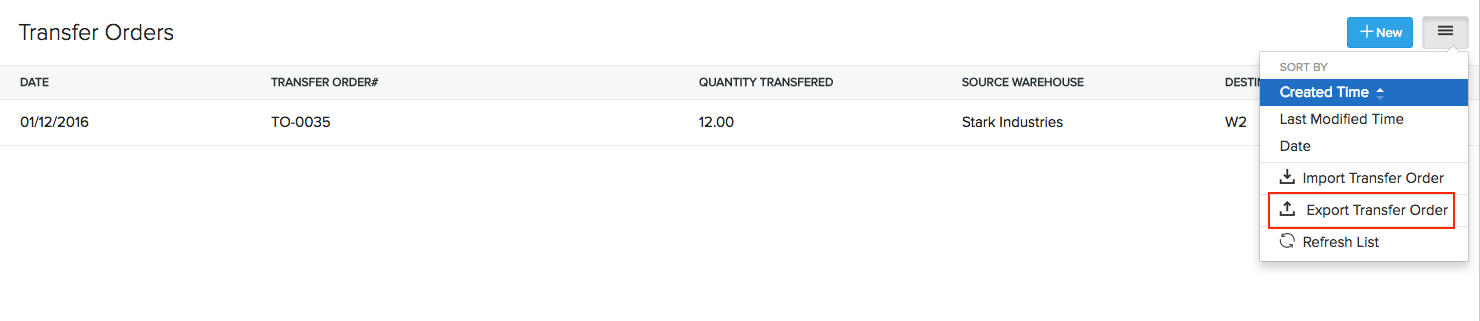
- Export your Transfer Orders to the desired format.
Filtering Transfer Orders
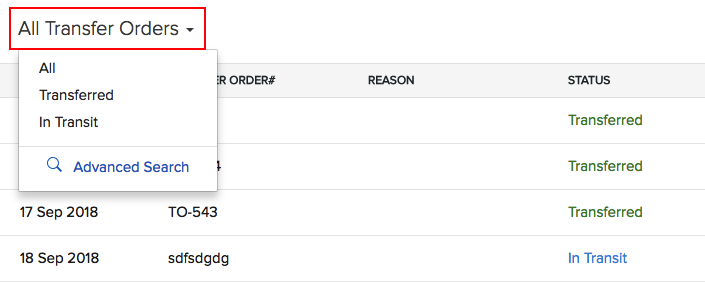
You can apply filters to transfer orders to refine your results. Here, you can view the successful transfers by applying the ‘Transferred’ filter and the transfers that are still in progress with the ‘In Transit’ filter.