Clients
In Zoho Practice, a client refers to a business or an individual for whom you provide accounting services. You can add them to your Zoho Practice organization and record their details, create client profiles, client requests, and tasks to manage their accounting needs.
ON THIS PAGE
Add Clients to Zoho Practice
You can add the clients in Zoho Practice to five Zoho Finance applications: Zoho Books, Zoho Expense, Zoho Payroll, Zoho Inventory, and Zoho Ledger. To create a client:
Go to Clients on the left sidebar.
Click + New Client in the top right corner.

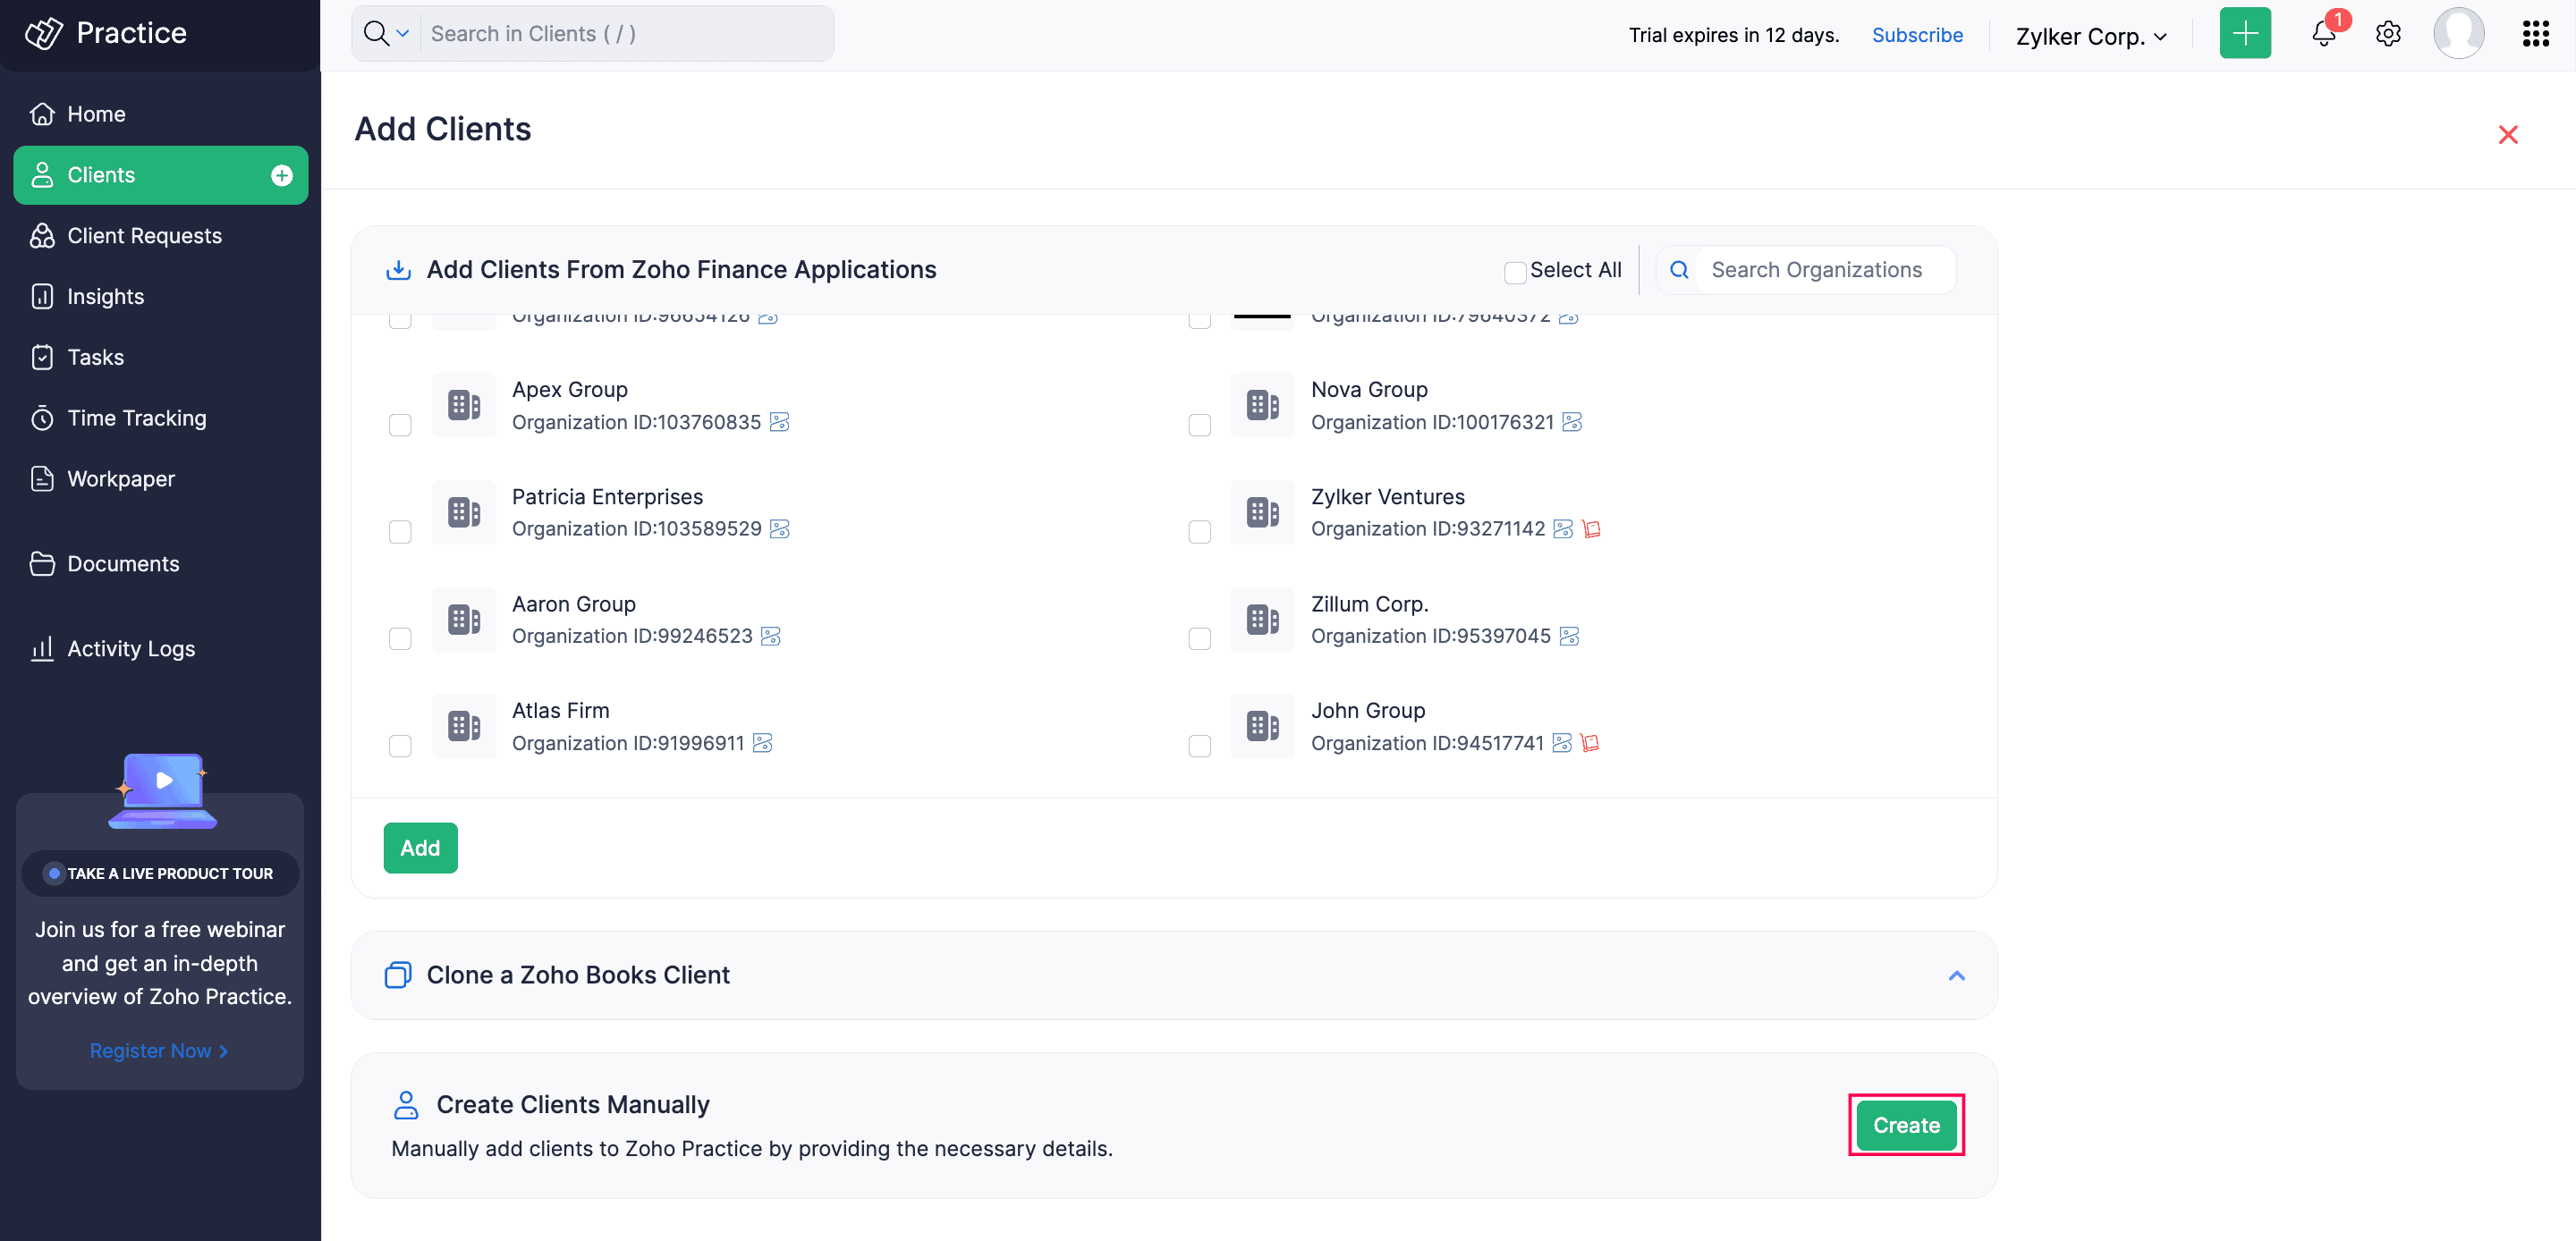
In the Add Clients page, you add clients to your Zoho Practice organization in three ways:
- Add Clients From Zoho Finance Applications
- Clone a Zoho Books Client
- Create Clients Manually
Add Clients From Existing Zoho Finance Applications
You can add clients to Zoho Practice who are already part of Zoho Finance applications. Here’s how:
In the Add Clients From Zoho Finance Applications section, select the required clients you want to add to Zoho Practice.
- To add all the clients, check Select All next to Add Clients From Zoho Finance Applications.
Click Add.

The selected clients will be added to your Zoho Practice organization.
Clone a Zoho Books Client
If you’ve already added a Zoho Books client in Zoho Practice and want to create an other client with similar details, you can clone the Zoho Books client. Here’s how:
In the Clone a Zoho Books Client section, select the client you want to clone from the Choose your client dropdown.
Select the preferences you’d like to clone from the existing client. The available preferences are: Organization Profile, Templates, Email Templates, Chart of Accounts, and Fields.
Click Clone & Create.

In the New Client page, enter the other required details and click Save.
The client will be cloned and stored as a separate client in Zoho Practice, and a new organization will be set up for the client in Zoho Books.
Create Clients Manually
You can use this option to create clients who do not use any Zoho Finance applications. To create a client manually:
In the Add Clients page, click Create next to Create Clients Manually.

In the New Client page, fill in the following fields:
- First Name: Enter your client’s first name.
- Last Name: Enter your client’s last name.
- Business Name: Enter your client’s business name or organization name.
- Client Display Name: Choose how your client’s name should appear in transactions.
- Industry: Select your client’s business industry.
- Email Address: Enter your client’s email address.
- Contact Number: Enter your client’s contact number.
In the Address Details section, fill in the following fields:
- Country: Select the country where your client’s business is based.
- State/Province: Select the state or province of your client’s business location.
- Address: Enter your client’s business address, for tax purposes.
In the Regional Settings section, fill in the following fields:
- Currency: Select the default currency for transactions with your client.
- Language: Select your client’s preferred language.
- Time Zone: Select the time zone where the client’s business operates.
Click Next.

In the next page, under Suggested Zoho Apps, select the Zoho Finance application you want to associate with the client so they can explore the additional accounting features. If not, under Other Apps, select Zoho Ledger, and click Save.


If your client isn’t using any Zoho Finance application at the moment, you can activate them later, and proceed to click Save.
The client will be created in Zoho Practice, and a new organization will be set up in the respective Zoho Finance application, based on chosen preferences.
Note:
If you create a client without selecting a Zoho Finance application, they will be categorized as Other Clients in your Zoho Practice application.