Integrate Zoho Practice With WhatsApp
Using WhatsApp for client communication offers an easy way to send messages with a personalized touch. Integrating with WhatsApp keeps your client informed about the tasks you perform with their business.
Once you enable integration with WhatsApp, you’ll have to buy IM credits to send notifications to your clients. Read our help document to know more about WhatsApp credits.
Prerequisites:
- Once you set up this integration, Zoho will become your Business Service Provider (BSP). Ensure that your WhatsApp Business account is not associated with any other BSPs.
- The phone number you want to use for this integration must be valid and owned by you. If it’s associated with any other BSPs, WhatsApp Personal, or WhatsApp Business accounts, you may lose your existing chats.
- You should have a verified Facebook Business Manager account.
ON THIS PAGE
Connect With WhatsApp
To send WhatsApp notifications to your clients, you must integrate it with your Zoho Practice organization. To do this:
Go to Settings.
Select WhatsApp under Integrations.
Click Connect near WhatsApp Business.

In case you already have an existing WhatsApp Business account, the Set Up WhatsApp Business pop-up will appear.
- Click Use the existing WhatsApp Business account registered with Zoho and select the account from the dropdown to continue using the account that is integrated with other Zoho apps, or
- Click Connect a new WhatsApp Business account with Zoho to connect a new WhatsApp Business account.
Click Continue.
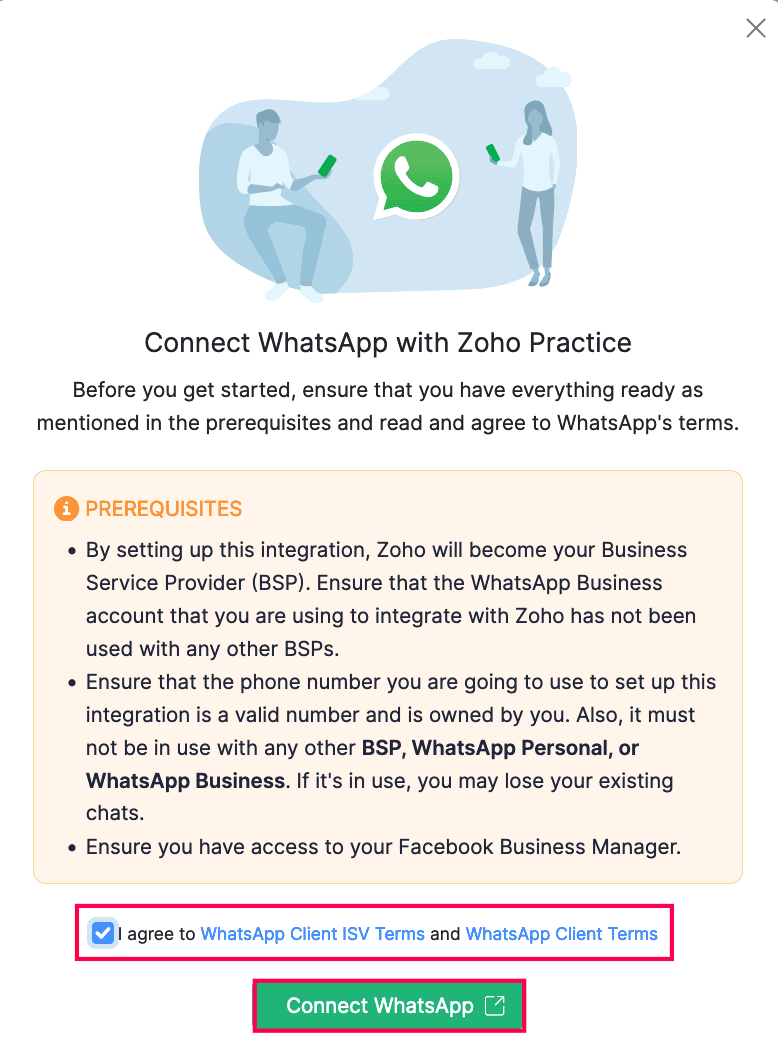
In the pop-up that appears, read the terms and check I agree to WhatsApp Client ISV Terms and WhatsApp Client Terms, and click Connect WhatsApp. You’ll now be redirected to the Facebook login page.
Enter the registered email address and password, and click Log in.

Insight: If you don’t have a facebook account, create one by clicking Create New Account.
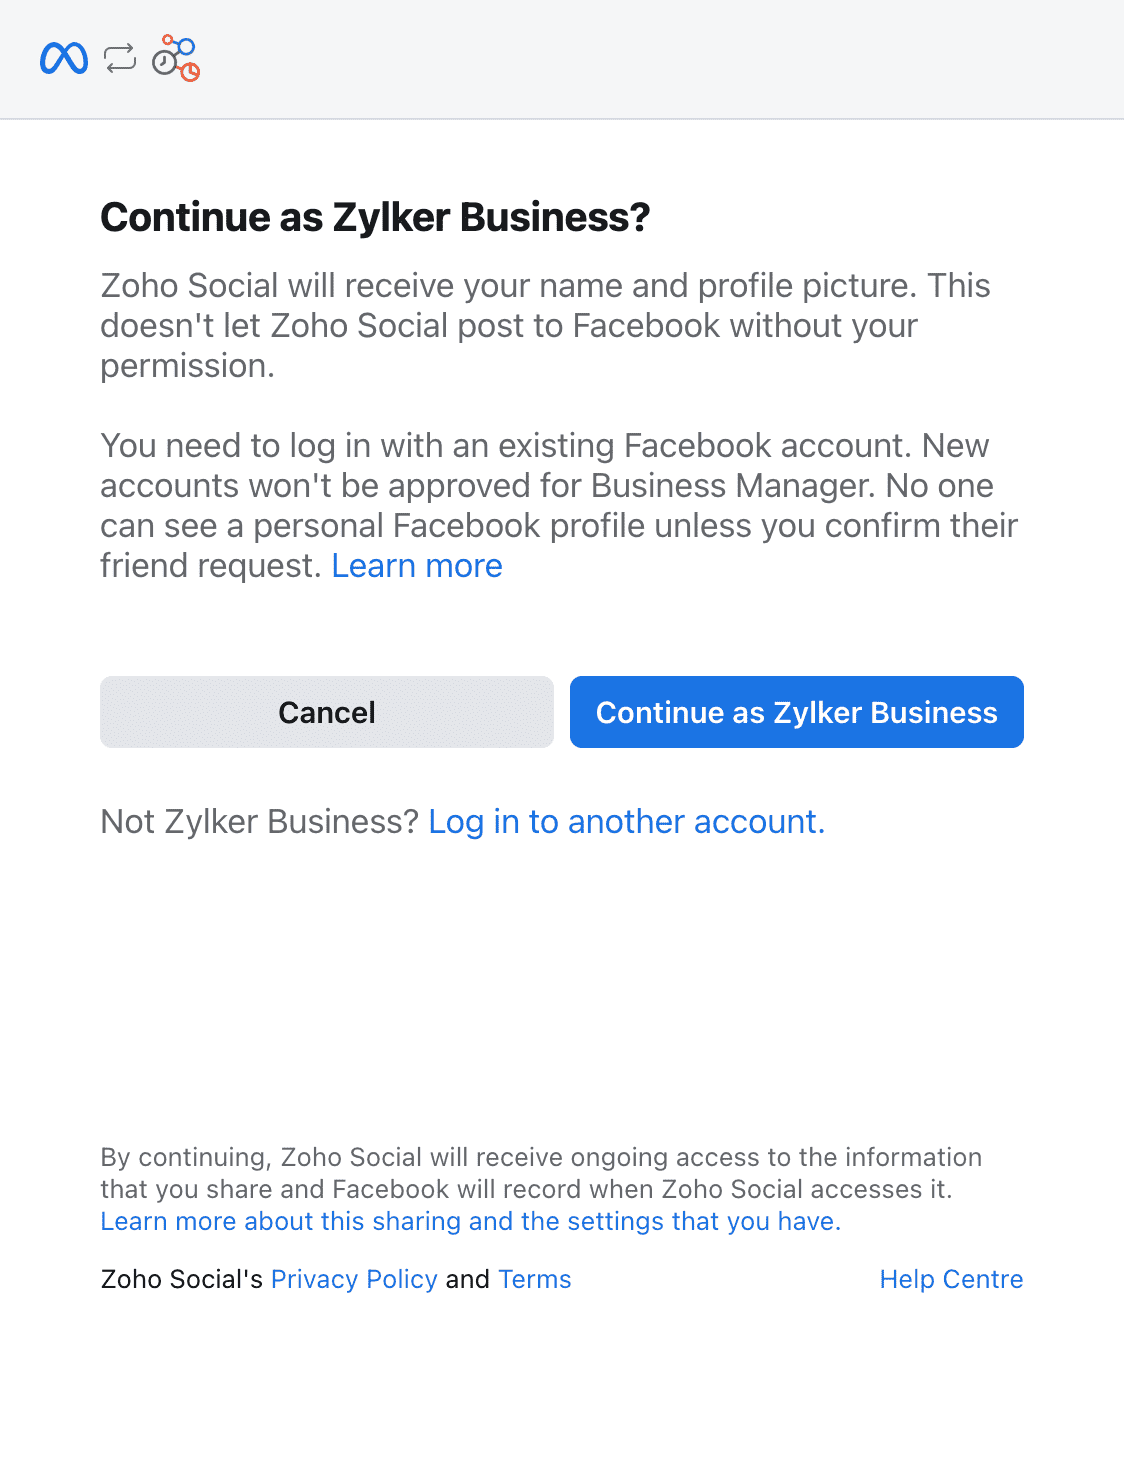
In the next page, verify your account and click Continue as ‘Your Account Name’. If you want to log in using another account, click Log in to another account.
Read the WhatsApp Business Terms of Service and Meta Terms of Service, and click Get Started.

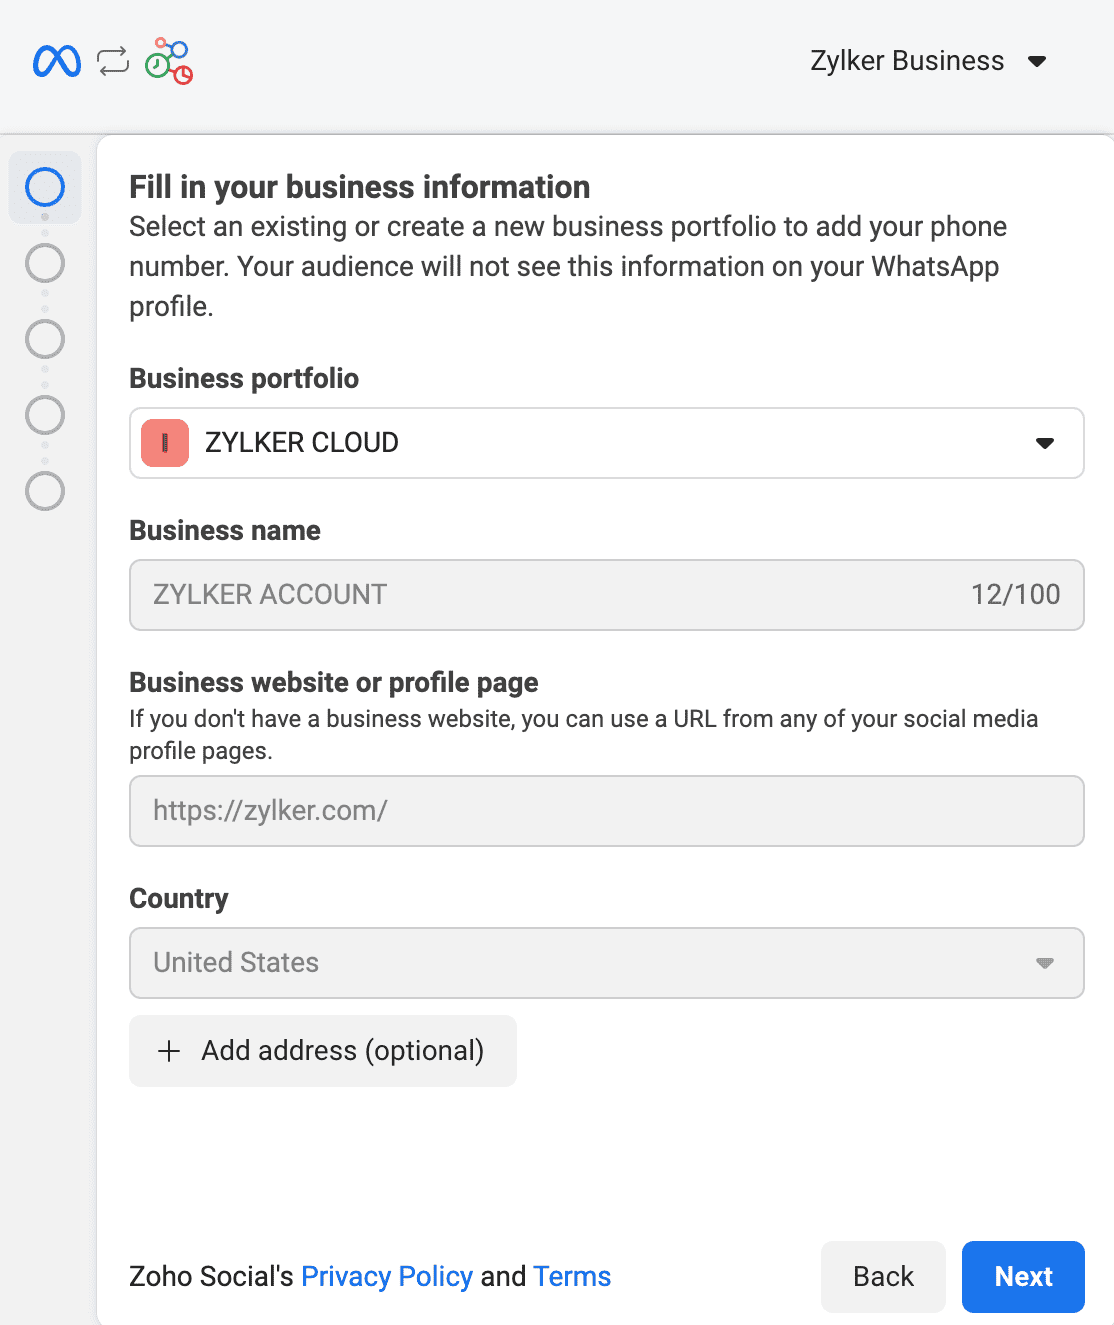
Fill in your business details and click Next.
In the page that follows, select a WhatsApp Business Account and WhatsApp Business Profile.
Click Next, and in the page that follows, click Finish.

Your Zoho Practice organization will be connected with WhatsApp.
- In the Connected to WhatsApp pop-up, click Continue.
- Check the WhatsApp default number from which notifications will be sent to your client’s contact persons, and click Continue.
You can now purchase credits to send notifications, or purchase them when you create message templates.
Configure WhatsApp Templates
To send notifications through WhatsApp, create a template in Zoho Practice, submit it for Meta’s approval.
Create Templates
To create a template:
Go to Settings.
Select WhatsApp under Integrations.
In the Message Templates section, select the respective module (for example, Clients) for which you want to create a template.
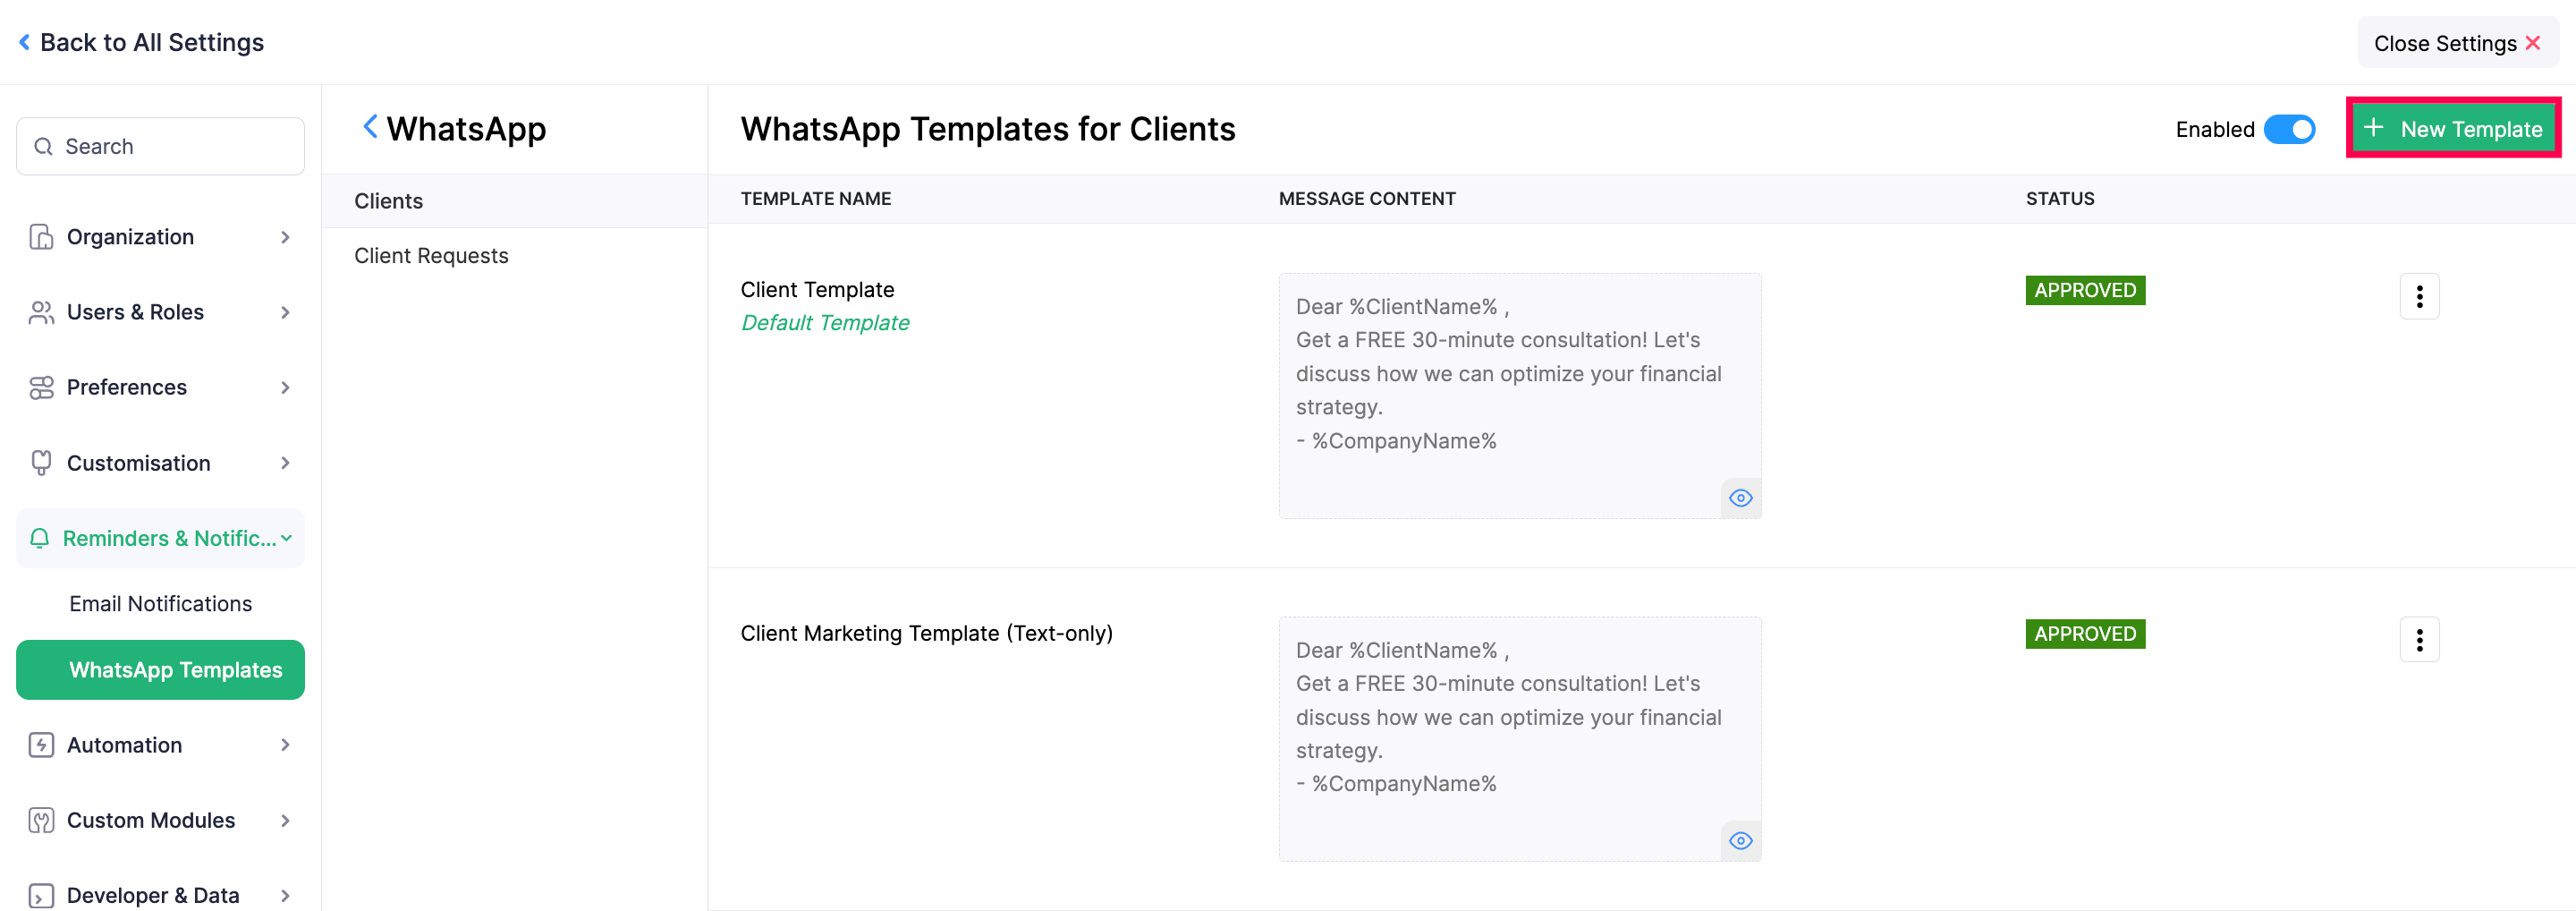
In the next page, click + New Template in the top right corner.
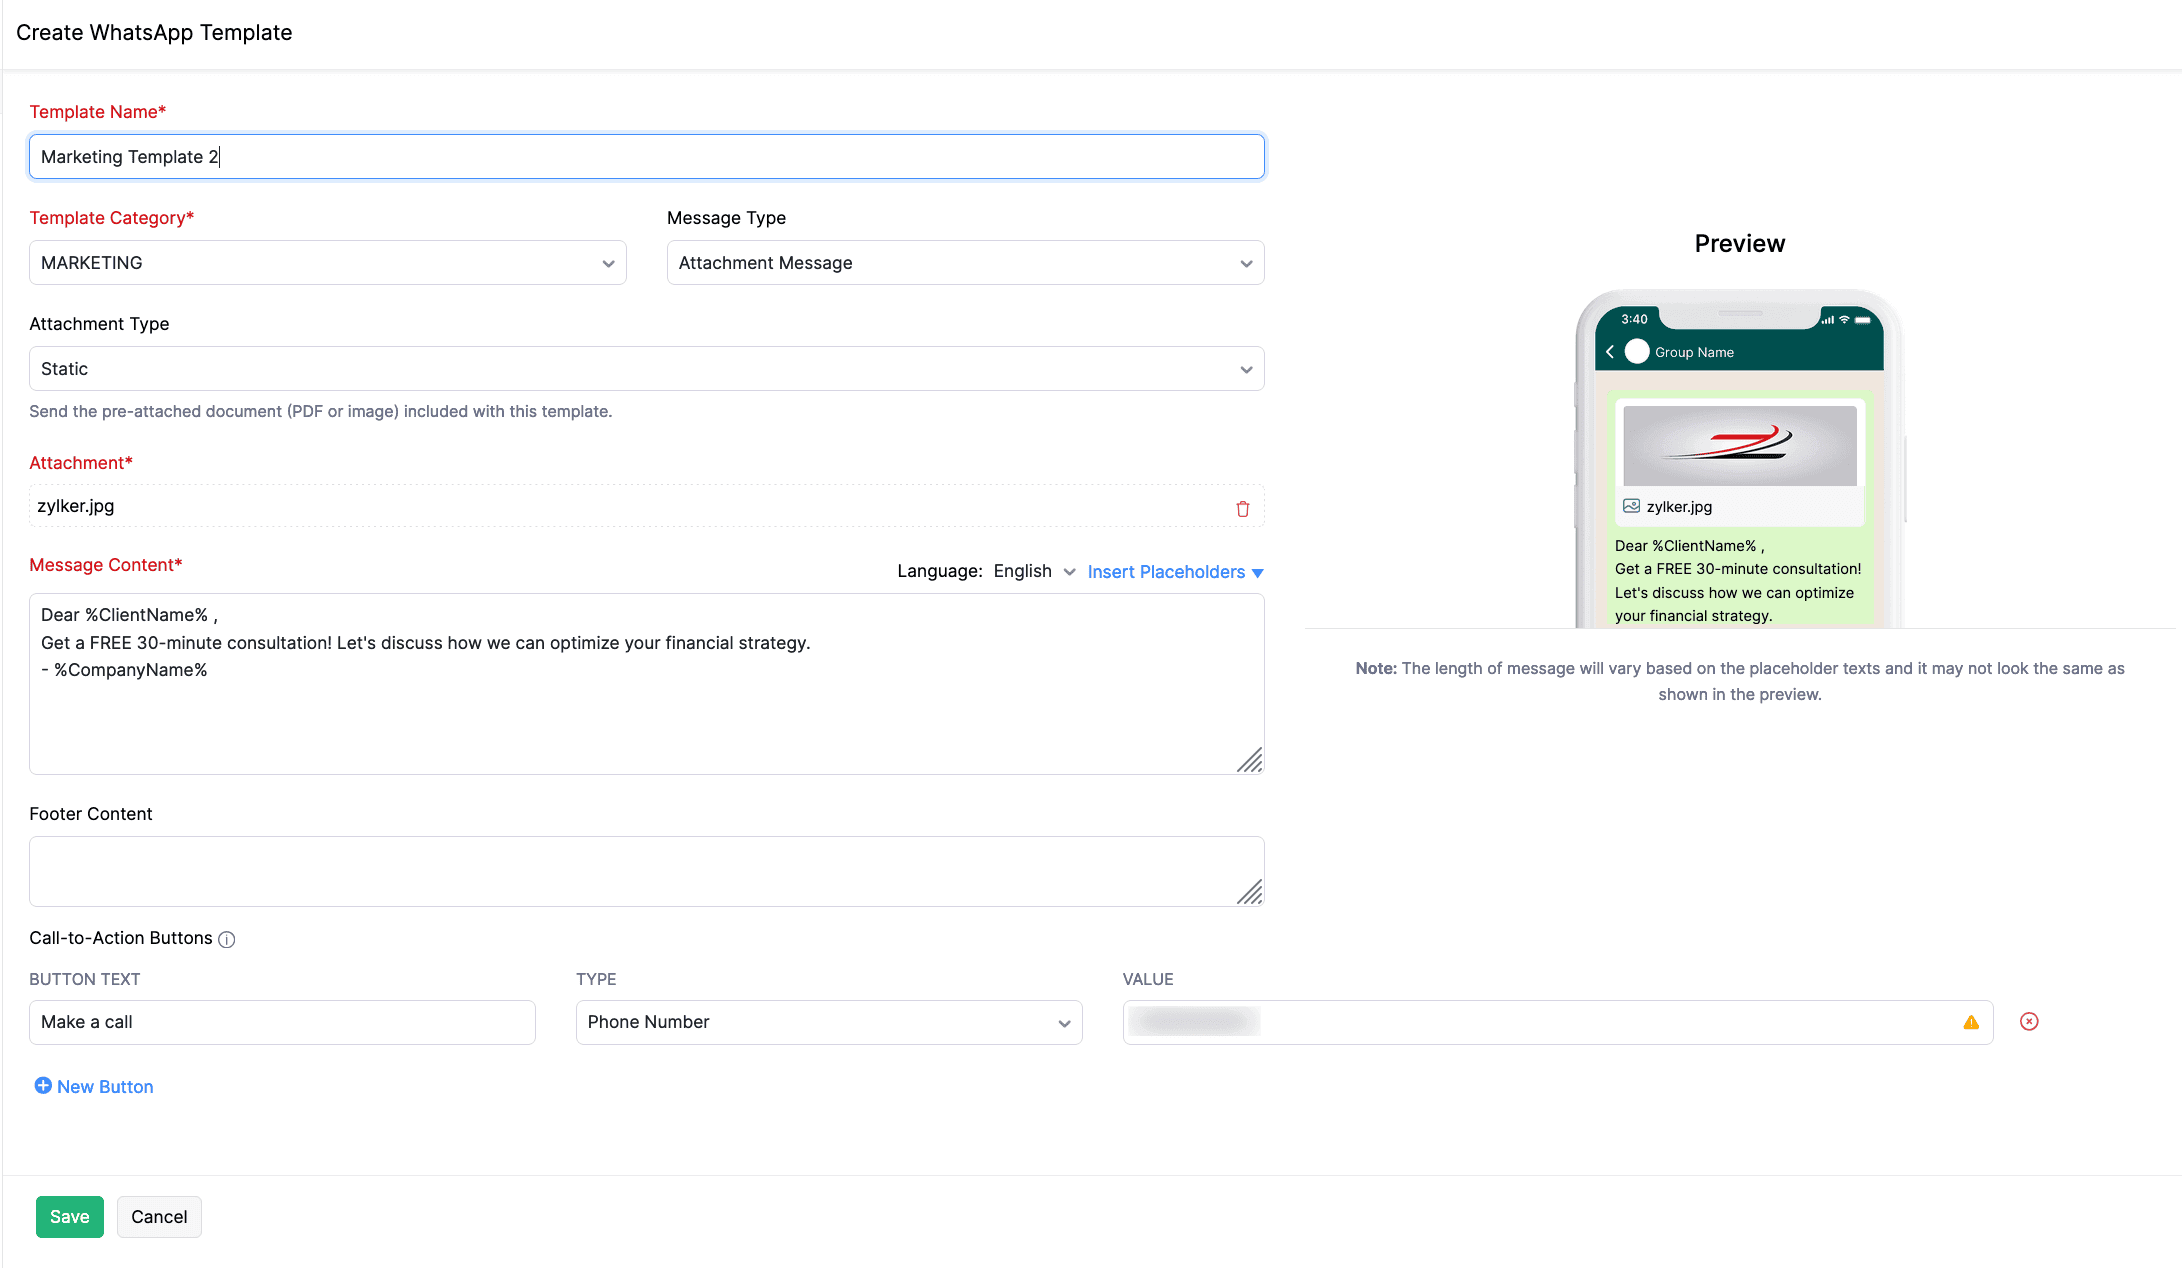
In the Create WhatsApp Template page, fill in the following details:
- Enter the Template Name, and select the required Template Category.
- Enter the content to be included in the Header section, or select Attachment Message as the Message Type, and select the required Attachment Type.
- If you’ve selected the Static attachment type, upload the required Attachment you wish to include in the message template. Note that you can create static message templates only for the Clients module.
- Edit the content under the Message Content field if required. You can insert placeholders by clicking the dropdown next to Insert Placeholders.
- In the Call-to-Action Buttons section, enter the Button Text, select the required Type (phone number or URL), and enter the Value of the CTA. Click + New Button to include additional CTAs in your template. You can create up to two CTAs for a message template.
- Click Save.
- Click the dropdown next to Language to select the preferred language in which you can send messages to your contacts. Enter the content to be included in the Footer section.
The template will be created and sent for approval to Meta. Once Meta approves your template, you can use it to send notifications to your clients and their contact persons.
Notes:
Here are some points to keep in mind while you create a WhatsApp message template:
- You can include a header if required for the Text Only Message type, or include attachments for the Attachment Message type.
- You can only use one placeholder in the Header field.
- You cannot use any placeholders in the Footer field.
- The footer should have only one line of text and should not contain any emojis.
- When you add CTAs to the message template, you can include one URL, one phone number, or both.
Template Approval
Once you create a message template, it will be submitted for approval. It can take up to 24 hours for the WhatsApp team to approve it. Once approved, it will be displayed next to the respective template in Zoho Practice.
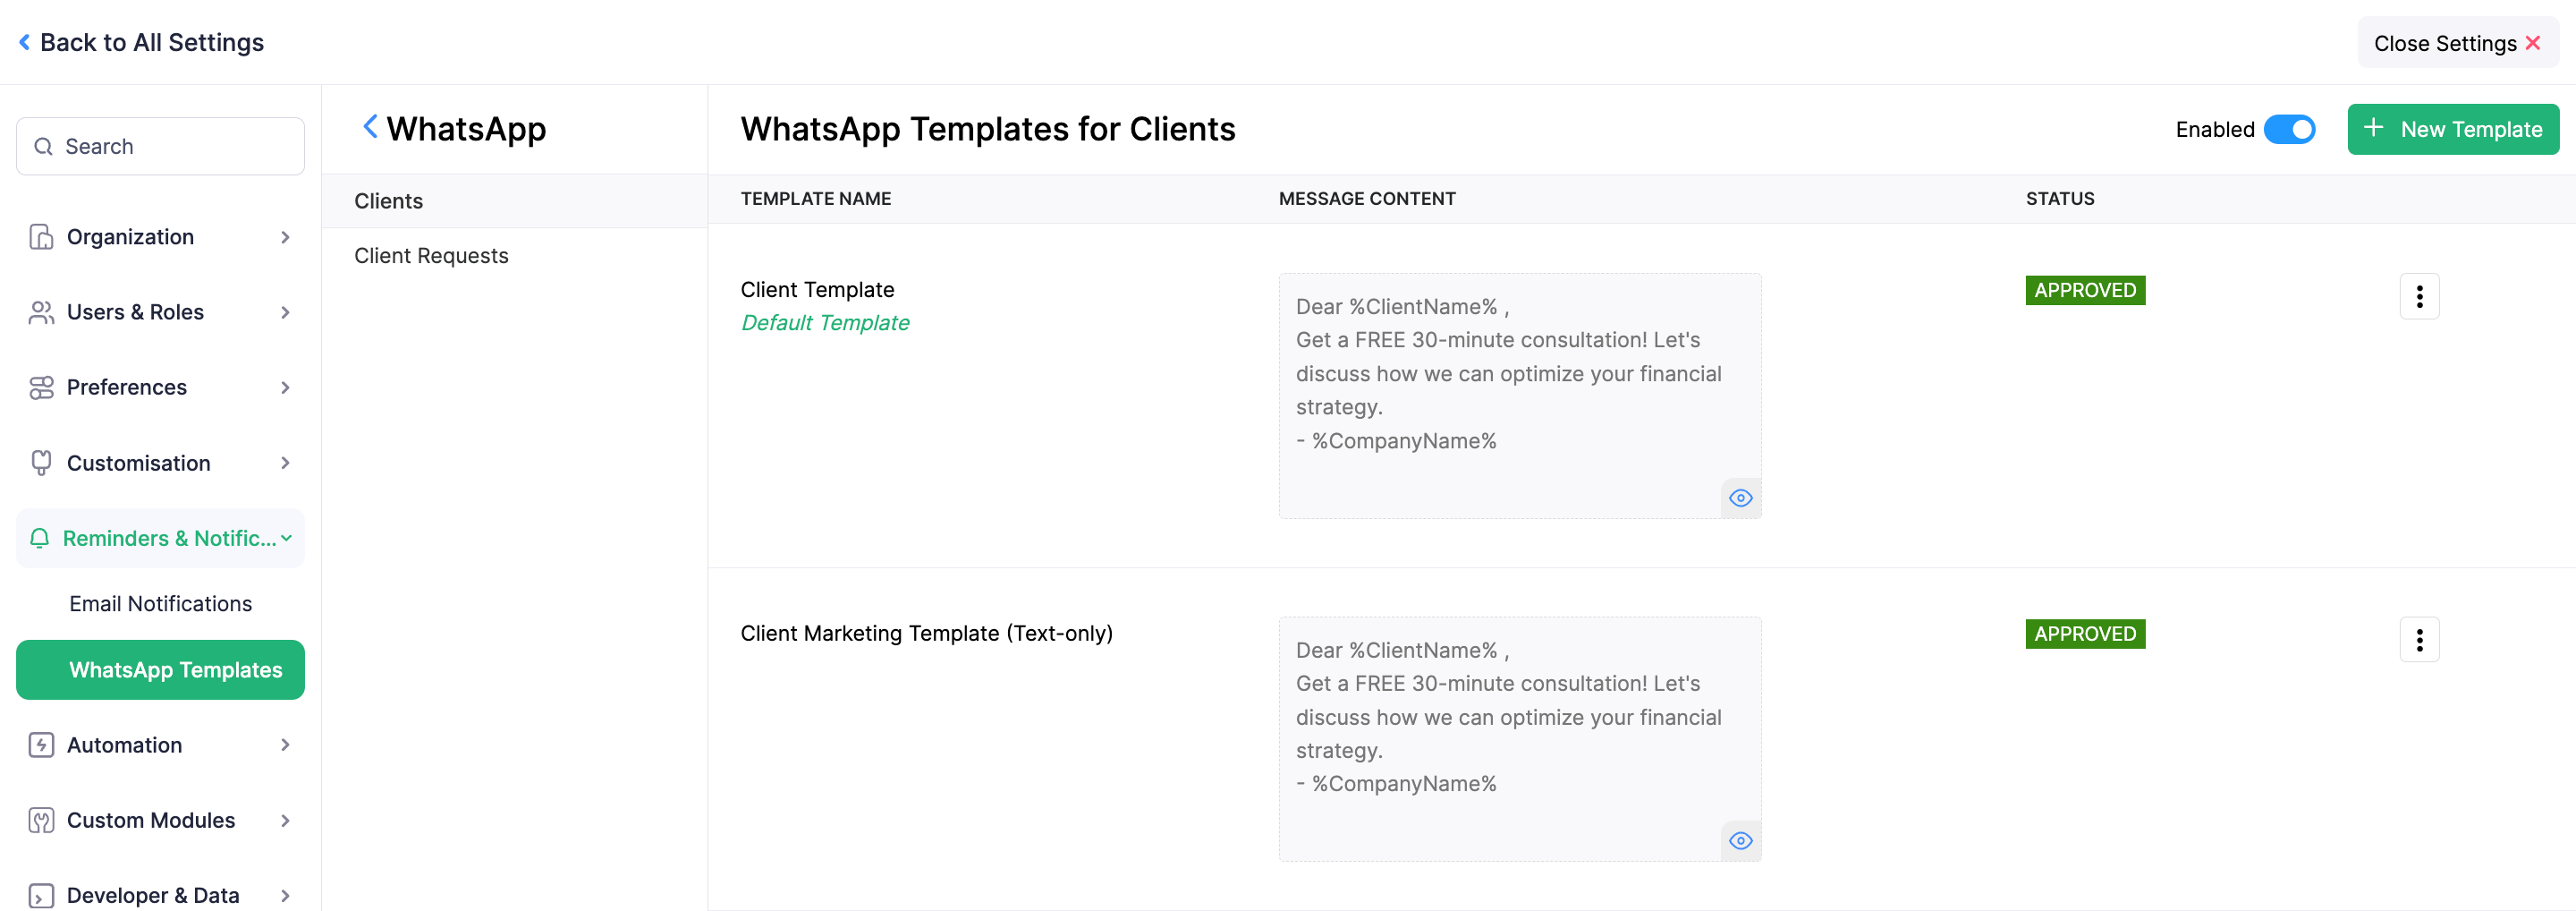
A template will have the following statuses:
| Status | Description |
|---|---|
| Approved | The WhatsApp Business team has approved the template, and it can now be sent to clients. |
| Rejected | The WhatsApp Business team has rejected the template. Edit or create a new template, and submit it for approval. Learn why templates get rejected. |
| Pending Approval | The template has been submitted to the WhatsApp Business team and is awaiting approval. It may take up to 24 hours for the status to be updated. |
| Deletion in Progress | The WhatsApp Business team is processing your request to delete the template. |
| Deletion Failed | The template could not be deleted due to network issues. Please initiate the deletion process again. |
| Deleted | The WhatsApp Business team has successfully deleted the template. This action cannot be undone. |
Other Actions
There is a list of actions you can perform while you create and submit a template for approval:
Edit Templates
If you want to update any details in the templates you’ve created, you can edit them. To do this:
Go to Settings.
Select WhatsApp under Integrations.
In the Message Templates section, select the module in which you want to edit a message template.
In the next page, click the More icon next to the required template, and select Edit from the dropdown.

In the Edit WhatsApp Template page, make the required changes, and click Save.
The template will be updated.
Set as Default
If you want to use any template as a default choice to send message notifications, you can set that template as default. Here’s how:
Go to Settings.
Select WhatsApp under Integrations.
In the Message Templates section, select the required module.
In the next page, click the More icon next to the required module, and select Set As Default from the dropdown.

The selected template will be set as default.
Clone Templates
If you want to create new templates similar to an existing one, you can clone the template. Here’s how:
Go to Settings.
Select WhatsApp under Integrations.
In the Message Templates section, select the module in which you want to clone a message template.
In the next page, click the More icon next to the required module, and select Clone from the dropdown.

In the Clone WhatsApp Template page, enter the required details, and click Save.
The new templates will be submitted for approval.
Delete Templates
Warning: Deleting a template is permanent and cannot be undone. However, you can create a new template and submit it to the Meta Business Suite for approval.
To delete a template:
Go to Settings.
Select WhatsApp under Integrations.
In the Message Templates section, select the module in which you want to delete a message template.
In the next page, click the More icon next to the required module, and select Delete from the dropdown.

In the pop-up that appears, click Delete to confirm.
A request will be sent to the WhatsApp Business team to delete the template, which will subsequently be deleted.
Enable WhatsApp
Enable WhatsApp for Clients and Contact Persons
Once you set up the templates, you can enable WhatsApp notifications for your clients and their contact persons in Zoho Practice. Here’s how:
Prerequisite: Ensure that you provide your client’s phone number with a ‘+’ followed by the country code to enable WhatsApp for them.
Go to Clients on the left sidebar.
Select the client for whom you want to enable WhatsApp messaging, click the More icon in the top right corner of the client’s Details page, and select Edit.

- If you want to create a new client and enable WhatsApp for them, click + New Client in the top right corner and enter the required details.
Click Yes next to Enable WhatsApp Communication Channel and click Save.
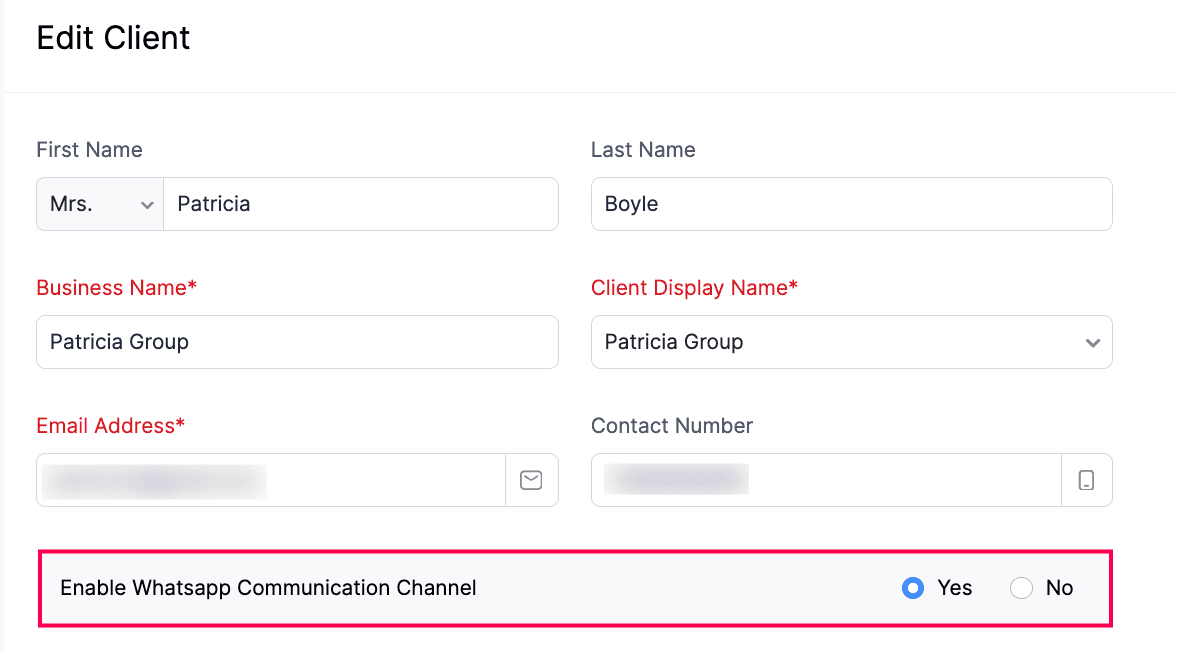
You’ll be able to send message notifications through WhatsApp for the respective client.
To enable WhatsApp for the client’s contact persons:
Prerequisite: Ensure that you provide phone numbers for your contact persons with a ‘+’ followed by the country code to enable WhatsApp for them.
Go to Clients on the left sidebar.
Select the client for whose contact persons you want to enable WhatsApp.
In the client’s Details page, navigate to the Profile tab.
In the Contact Persons section, hover over the required contact person, click the More icon, and select Edit from the dropdown.

- If you want to ceate a new contact person and enable WhatsApp for them, click + New Contact Person and enter the required details.
Click Yes next to Enable WhatsApp Communication Channel and click Save.
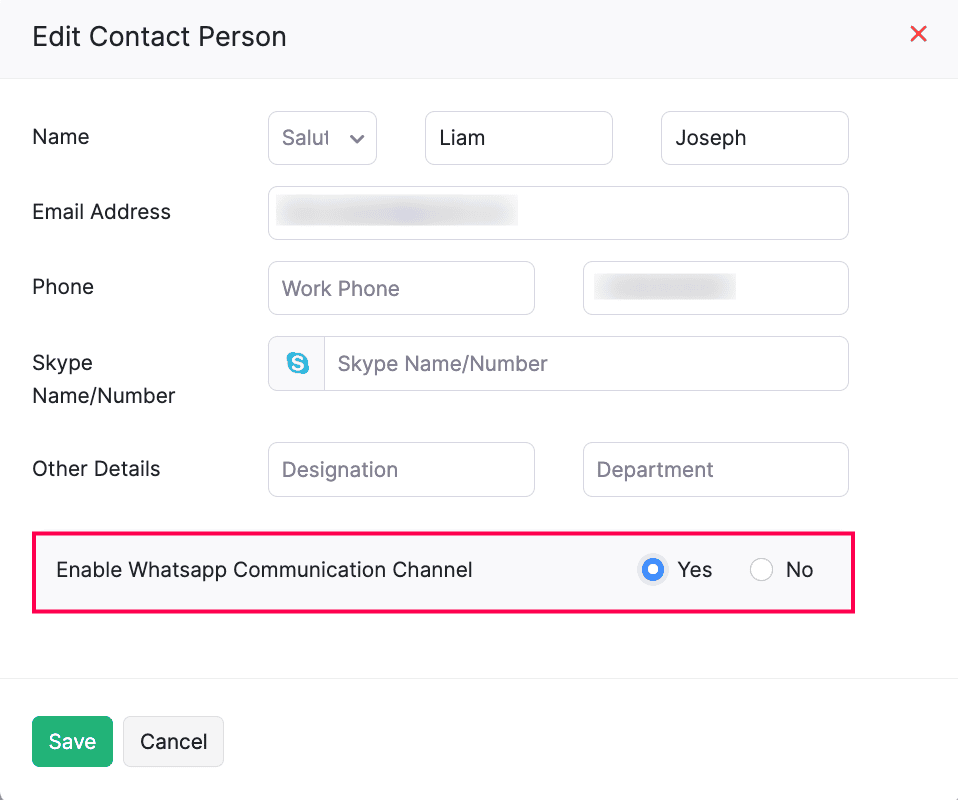
WhatsApp will be enabled for the respective contact person.
Enable Notifications in Bulk
To enable WhatsApp messaging for clients in bulk:
Go to Clients on the left sidebar.
Select the clients for whom you want to enable WhatsApp.
Click Configure Communication Preferences at the top of the page.

In the Configure Communication Preferences pop-up, select if you want to configure WhatsApp only to your clients or as well as their contact persons.
Click Save.
WhatsApp notifications will be enabled for the clients, based on the chosen preferences.
Similarly, you can also enable WhatsApp messaging for a client’s contact persons in bulk. To do this:
Go to Clients on the left sidebar.
Select the client for whose contact persons you want to enable WhatsApp messaging in bulk.
Navigate to the Profile section on the left sidebar.
Under the Client Details section, click the Gear icon next to WhatsApp status.

In the Configure WhatsApp Access section, select the required contact persons, and click Save.
WhatsApp notifications will be enabled for the selected contact persons.
Manage WhatsApp Credits
WhatsApp Instant Messaging (IM) Credits
Once you enable WhatsApp in your Zoho Practice organization and create templates, you’ll have to purchase IM (Instant Messaging) credits to send notifications through your WhatsApp Business account. Learn more about how credits work.
Buy IM Credits
To buy WhatsApp IM credits in Zoho Practice:
- Go to Settings.
- Select WhatsApp under Integrations.
- Click Buy IM Credits at the top of the WhatsApp configuration page.
- In the Buy IM (Instant Messaging) Credits pop-up, enter the number of IM credits you want to purchase. The price for one IM credit will be displayed next to the field.
- Click Calculate Payment. The total amount (including tax) will be displayed.
- Click Make Payment.
You’ll be redirected to the payment gateway, where you can make payment for the IM credits you want to purchase. Once done, the credits will be added to your organization. You can also buy credits from the Zoho Store.
Note: The amount used to purchase IM credits for WhatsApp may vary, depending on the currency you use for purchase.
IM Credit Usage Report
In Zoho Practice, you can view and keep track of your IM (Instant Messaging) credits usage directly from the Reports module. This helps you monitor and manage your IM credits efficiently.
To view the IM Credit Usage report:
- Go to Reports on the left sidebar.
- Select IM Credits Usage under Activity.
You can view the details of the IM credits you had used for your WhatsApp Business account.
WhatsApp Notifications Report
In Zoho Practice, you can view and monitor the messages you send your clients from your WhatsApp Business account. This allows you to keep track of the notifications sent to your clients and its status.
To view the WhatsApp Notification report:
- Go to Reports on the left sidebar.
- Select WhatsApp Notifications under Activity.
You can view the details of the notifications sent to your clients, and you can also customize this report. Here’s how:
- In the WhatsApp Notifications page, select the Date Range for which you want to generate the customized report.
- Click + More Filters at the top of the page.
- In the pop-up that appears, apply the required filters and click Run Report.
The custom report will be generated, based on chosen preferences. Subsequently, you can view the original report again. You can also schedule, export, or share the custom report.
Send Notifications Through WhatsApp
Send Client Notifications
To send notifications to your client’s contact persons through your WhatsApp Business account:
- Go to Clients on the left sidebar.
- Select the required client to send WhatsApp notifications.
- Navigate to the Discussions section on the left sidebar.
- Click WhatsApp at the top of the page.
- Click + New Chat in the top right corner of the Client Chats section.
- Select the required contact person to send notifications.
The chat screen will be opened, and you can now send WhatsApp notifications to the respective clients and contact persons.
To send WhatsApp notifications for clients in bulk:
Go to Clients on the left sidebar.
Select the required clients to send WhatsApp notifications.
Click the Send WhatsApp Notifications icon at the top of the page.

In the Send WhatsApp Notifications pop-up, fill in the following fields:
- Send To: Choose if you want to send notifications to the Primary Contact Person or All Contact Persons.
- Message Template: Select the preferred message template to send the notification. You can also create a new template if required, by clicking + Add template.
Click Send.
WhatsApp notification will be sent to the client, based on chosen preferences.
Send Client Request Notifications
You can send WhatsApp notifications to your clients when you create a client request for them in Zoho Practice. Here’s how:
Go to Client Requests on the left sidebar.
Select the required client request to send the WhatsApp notification.
Click WhatsApp Message at the top of the client request’s Details page.

In the Send WhatsApp Notifications pop-up, fill in the following fields:
- Send To: Select the contact persons for whom you want to send the client request notification.
- Message Template: Select the required template you want to send to the contact persons. You can also create a new template, if required, by clicking + Add template.
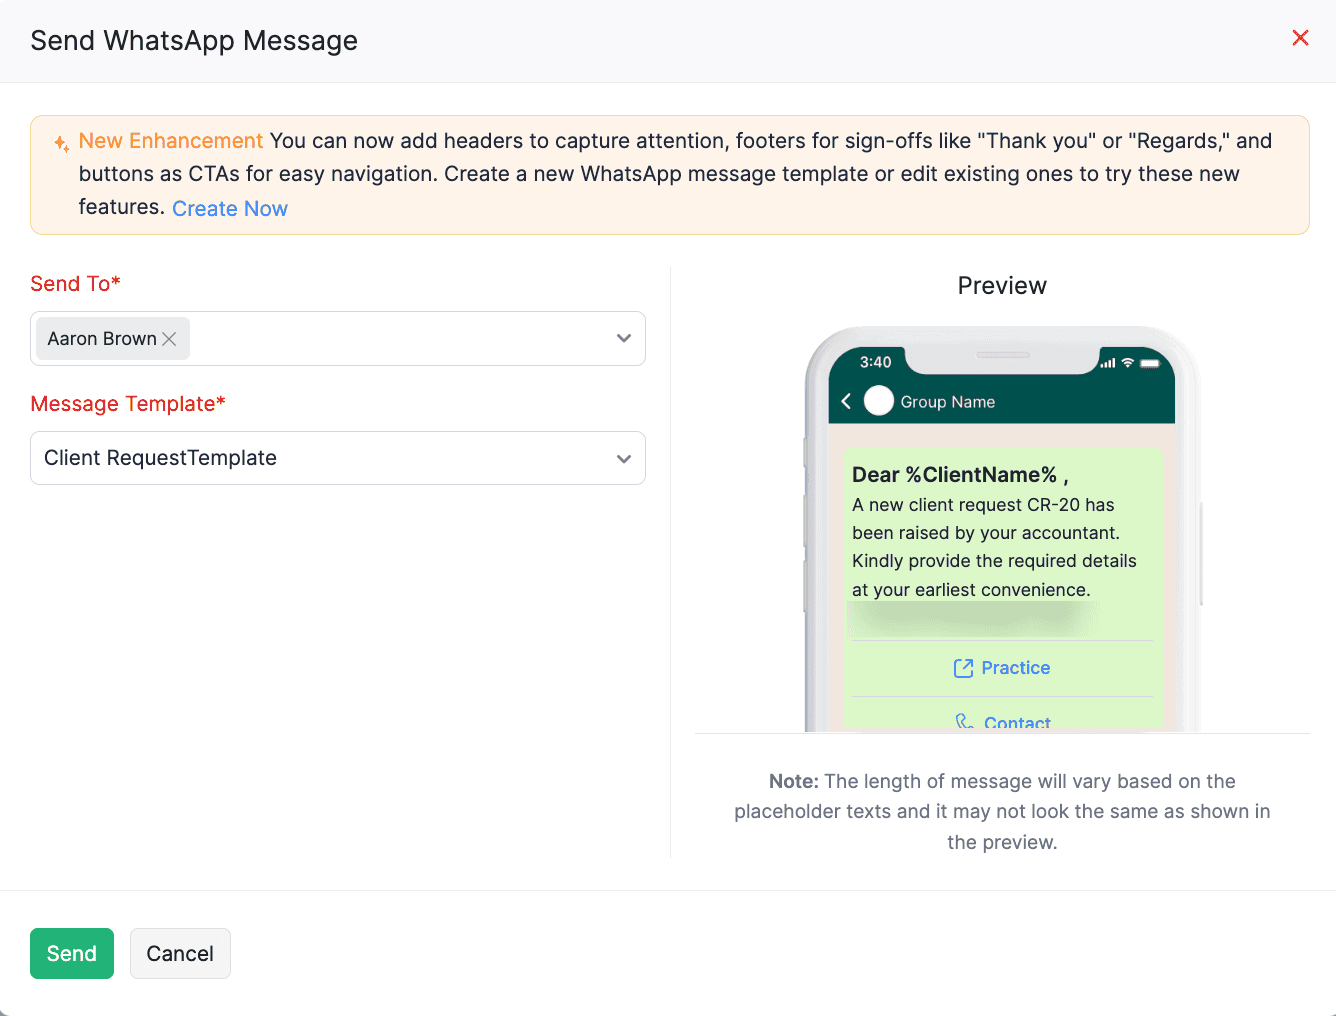
Click Send.
The client request notification will be sent to the respective client and contact persons.
You can also send client request notifications in bulk. To do this:
Go to Client Requests on the left sidebar.
Select the required client requests to send WhatsApp notifications.
Click the Send WhatsApp Notifications icon at the top of the page.

In the Send WhatsApp Notifications pop-up, fill in the following fields:
- Send To: Select the contact persons for whom you want to send the client request notification.
- Message Template: Select the required template you want to send to the contact persons. You can also create a new template, if required, by clicking + Add template.
Click Send.
The client requests notifications will be sent in bulk to the respective contact persons.
Get Notified for Incoming WhatsApp Messages
You can get notified when your client sends a message in WhatsApp. To enable WhatsApp notifications in Zoho Practice:
Click the Notifications icon in the top right corner of Zoho Practice.

In the Notifications pane, click the Gear icon.
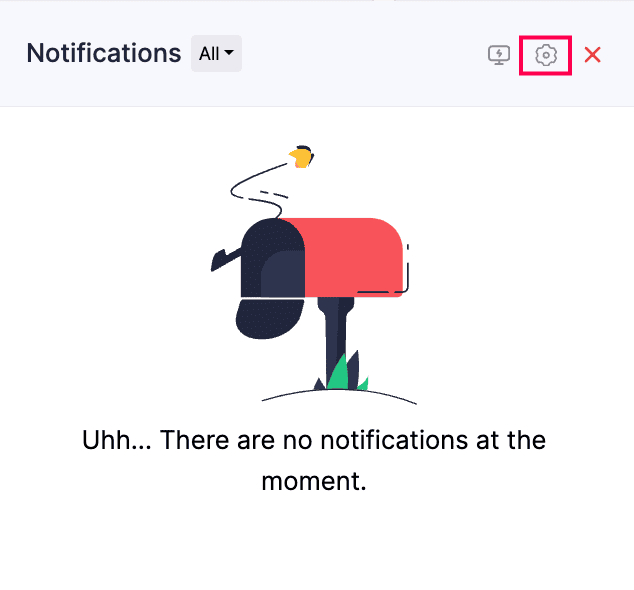
In the Signals Notification Preference pop-up, slide the toggle next to WhatsApp.

You’ll be notified whenever you receive notifications in your WhatsApp Business account. To view them, click the Notifications icon in the top right corner.
Chat With Clients
To message your clients from the WhatsApp Business account integrated with Zoho Practice:
- Go to Clients on the left sidebar.
- Select the client to whom you want to send WhatsApp messages.
- Navigate to the Discussions section on the left sidebar.
- Click WhatsApp at the top of the page.
- In the Client Chats section, select the chat in which you want to initiate sending messages.
- Initiate the chat by sending notification templates.
- Send replies and attachments to follow up as soon as your client responds.
Note: You can only send predefined notification templates until your client responds.
Insight: You can add an attachment by clicking the + icon. Note that you can only send one attachment at a time, and the supported file formats are JPG, JPEG, PNG (up to 5 MB), and PDF (up to 10 MB).
- Once the conversation with the client is over, click the More icon in the top right corner of the chat screen, and select End Session from the dropdown.
- In the pop-up that appears, click End Session to confirm.
The session will be terminated. Click Chat at the bottom of the chat screen if the session has not expired.
Note: The chat session will automatically expire if there’s no activity for 24 hours since the last message. Once expired, click Initiate Chat and send message notifications until your client responds to initiate the chat.
Take Over Client Chat
The users with communication preferences in your organization can initiate chat with your clients. However, only one user can chat with a client at a time.
Insight: To enable communication preferences for a user in your organization, go to Settings, select Roles under Users & Roles, and edit the required role.
You can enter the chat if another user is chatting with a client, and if they face a question of your expertise, you can click Take Over at the bottom of the chat screen.
You can now continue to chat with the respective client. Other users cannot chat with the client until they take over the chat
Note: The client won’t be notified when a user takes over the chat.
Common Chat Window
You can chat with a client through Zoho Practice at the organization level using the common chat window. Only users with the Manage Integration permission can access chats at the organization level.
To provide this permission:
- Go to Settings.
- Select Roles under Users & Roles.
- Click New Role to create a new role and configure permissions, or click Edit next to an existing role.
- In the next page, scroll down to the Settings section, and check Manage Integration.
- Click Save.
The permissions will be configured. Any user with this permission can access chats at the organization level.
To access the chats:
- Click the WhatsApp icon in the top right corner of Zoho Practice.
- In the chat pane that appears, click the All Chats dropdown to view All Chats, Client Chats, and Unknown User Chats.
To add an unknown user as a client or contact person in the chat pane:
- Open the respective chat, and click Add.
- In the Contact Person pop-up, select the required client and enter the required details.
- Click Save.
The unknown user will now be saved as a client or contact person in Zoho Practice.
Note: You can only send custom messages to unknown numbers.
Other Actions
There is a list of actions you can perform in the WhatsApp integration page:
Mark WhatsApp as Inactive
If you want to disable your WhatsApp Business account temporarily, you can mark it as inactive. Here’s how:
Go to Settings.
Select WhatsApp under Integrations.
Click Configure next to WhatsApp Business and select Mark as Inactive from the dropdown.

Your WhatsApp Business account will be disabled. To enable it again, click the Configure dropdown and select Mark as Active.
Change Default WhatsApp Number
To change the default WhatsApp number, you must first delete the existing WhatsApp channel. Here’s how:
Go to Settings.
Select WhatsApp under Integrations.
In the Overview tab, click the Delete icon next to the Default WhatsApp Business Number.

In the pop-up that appears, click Delete to confirm.
The default WhatsApp Business number will be deleted. Once the existing channel is deleted, you can set up a new WhatsApp channel with a new phone number. Here’s how:
Click Set Default Number in the Default WhatsApp Business Number section.
In the Configure the default WhatsApp number pop-up, select the required phone number, and click Continue.
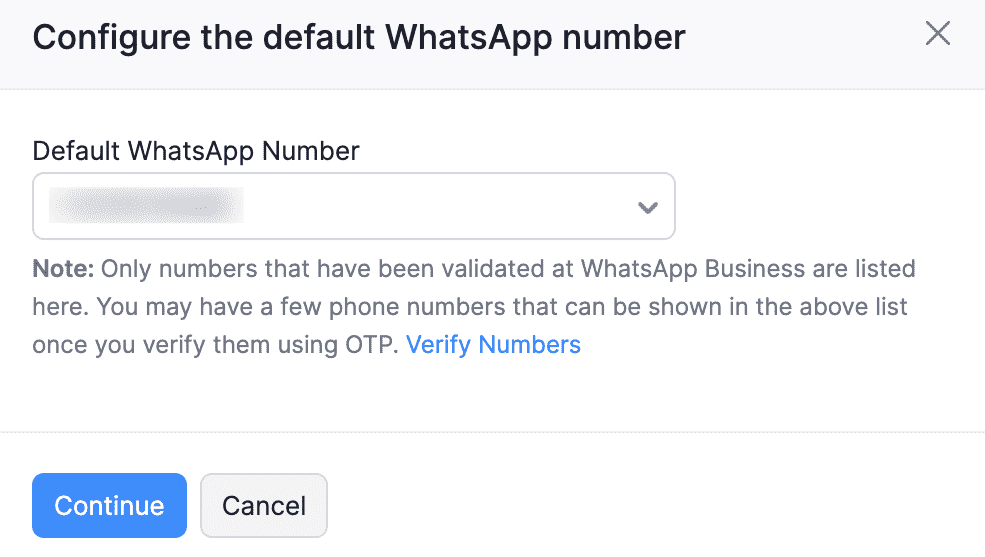
- If you haven’t verified the WhatsApp Business number, it will not be listed in the pop-up. In that case, click Verify Numbers.
- Select the desired phone number and click Send OTP. You can also choose to get the OTP via call.
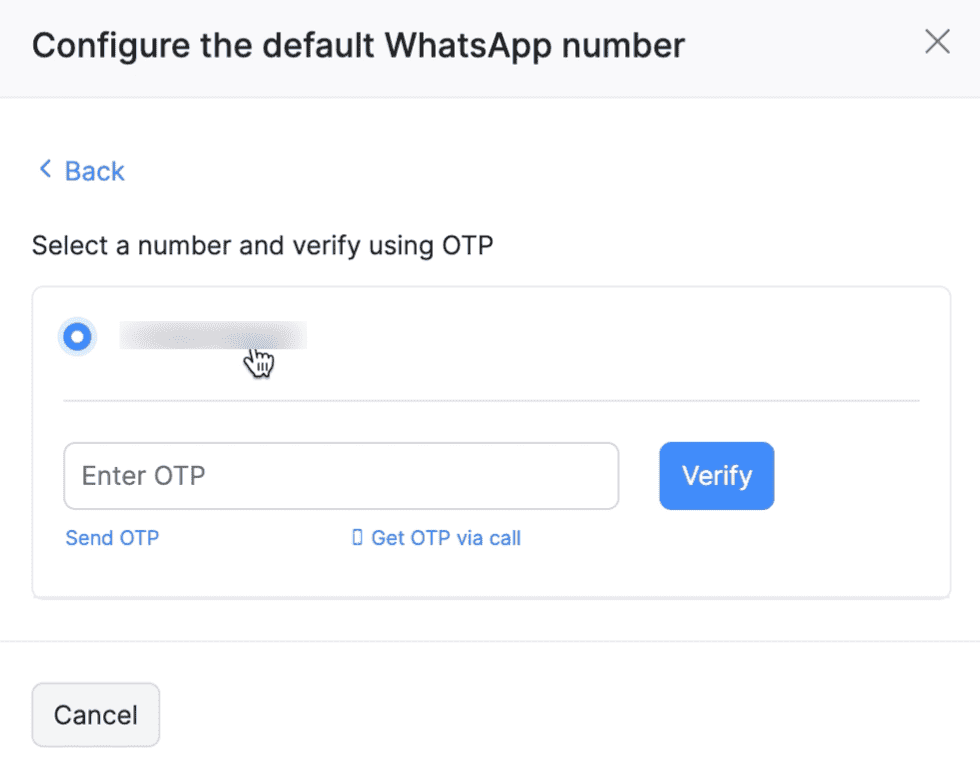
- Enter the OTP and click Verify.
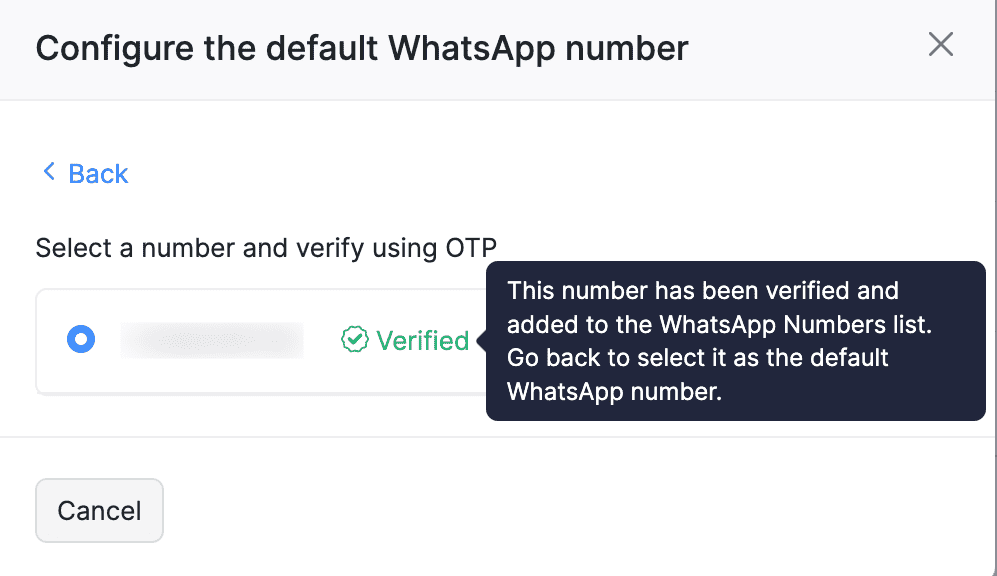
- Once verified, click Back and select the number in the Default WhatsApp Number dropdown.
Your default WhatsApp Business number will be updated.
Change WhatsApp Business Account
You can also change the WhatsApp Business account if you already have an existing account. Here’s how:
Go to Settings.
Select WhatsApp under Integrations.
Click Configure next to WhatsApp Business and select Change Account from the dropdown.

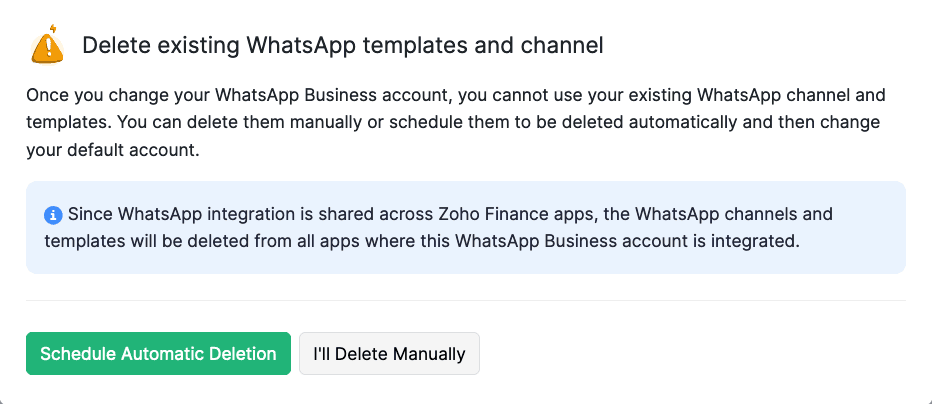
Note: Once you change your WhatsApp Business account, you will not be able to use your existing WhatsApp channel and templates. Therefore, you will be required to delete the templates before proceeding.
Warning: Ensure that you delete the templates from Zoho Practice and not from Meta to avoid syncing issues.
In the pop-up that appears, you can click one of the following preferences:
- Schedule Automatic Deletion to initiate the automatic deletion process. The time duration for deletion depends on the process at Meta’s end.
- I’ll Delete Manually to remove certain templates. To do this, click the More icon next to the desired template and click Delete.
Once the deletion process is completed, the status of your WhatsApp Business account will be changed to SETUP PENDING. You can also check whether the number of templates for each module has been changed to zero to confirm that they have been deleted. Once done:
- Click Configure and select Change Account from the dropdown.
- In the Change WhatsApp Business Account pop-up:
- Click Use the existing WhatsApp Business account registered with Zoho and select the account from the dropdown to continue using the same account, or
- Click Create a new WhatsApp Business account with Zoho to create a new WhatsApp Business account.
- Click Continue.
The WhatsApp Business account will be changed.