n8n Integration with Zoho Calendar
n8n is a powerful, open-source workflow automation software that allows you to connect different apps and automate tasks with ease. Its intuitive visual editor and drag-and-drop interface makes building complex workflows accessible to everyone.
The core functionality of n8n is to build workflows and integrations with various applications. It offers customizable triggers, actions, and logic, with features like self-hosting, error handling, and scheduling. With its visual interface, n8n enables both technical and non-technical users to create complex automations effortlessly.
n8n's integration with Zoho Calendar helps you to stay on track with your schedules, meetings, and events. You can custom-design your workflow by applying triggers and actions to automate your business processes.
Triggers
Triggers are events that start a workflow. They are executed when a specific set of conditions are met. For example, you can set up Zoho Calendar to send updates or check for new events regularly, and n8n can trigger a workflow whenever an event is added or updated.
The supported triggers are:
- Event Created - Triggers when an event is created.
- Event Deleted - Triggers when an event is deleted.
- Event Updated - Triggers when an event is updated.
Actions
Actions are the tasks or operations that a node can perform within a workflow. For example, when an event is added or updated in Zoho Calendar, it triggers an action in n8n, such as sending email notifications or creating tasks in other applications.
The supported actions are:
- Create an event - Creates an event in the specified calendar.
- Delete an event - Deletes an event from the specified calendar.
- Quick add an event - Creates an event from a piece of text.
- Update an event - Updates an event in the specified calendar.
Setting up n8n Integration
Setting up n8n integration with Zoho Calendar involves the following steps:
Install Nodes
To start with n8n integration, you need to install the required node. Follow the below steps to install the node:
- Log in to your n8n account.
- Click Create Workflow from the top-right corner of the home page.
- Select the + icon (Add first step), search and select Zoho Calendar on the right pane.
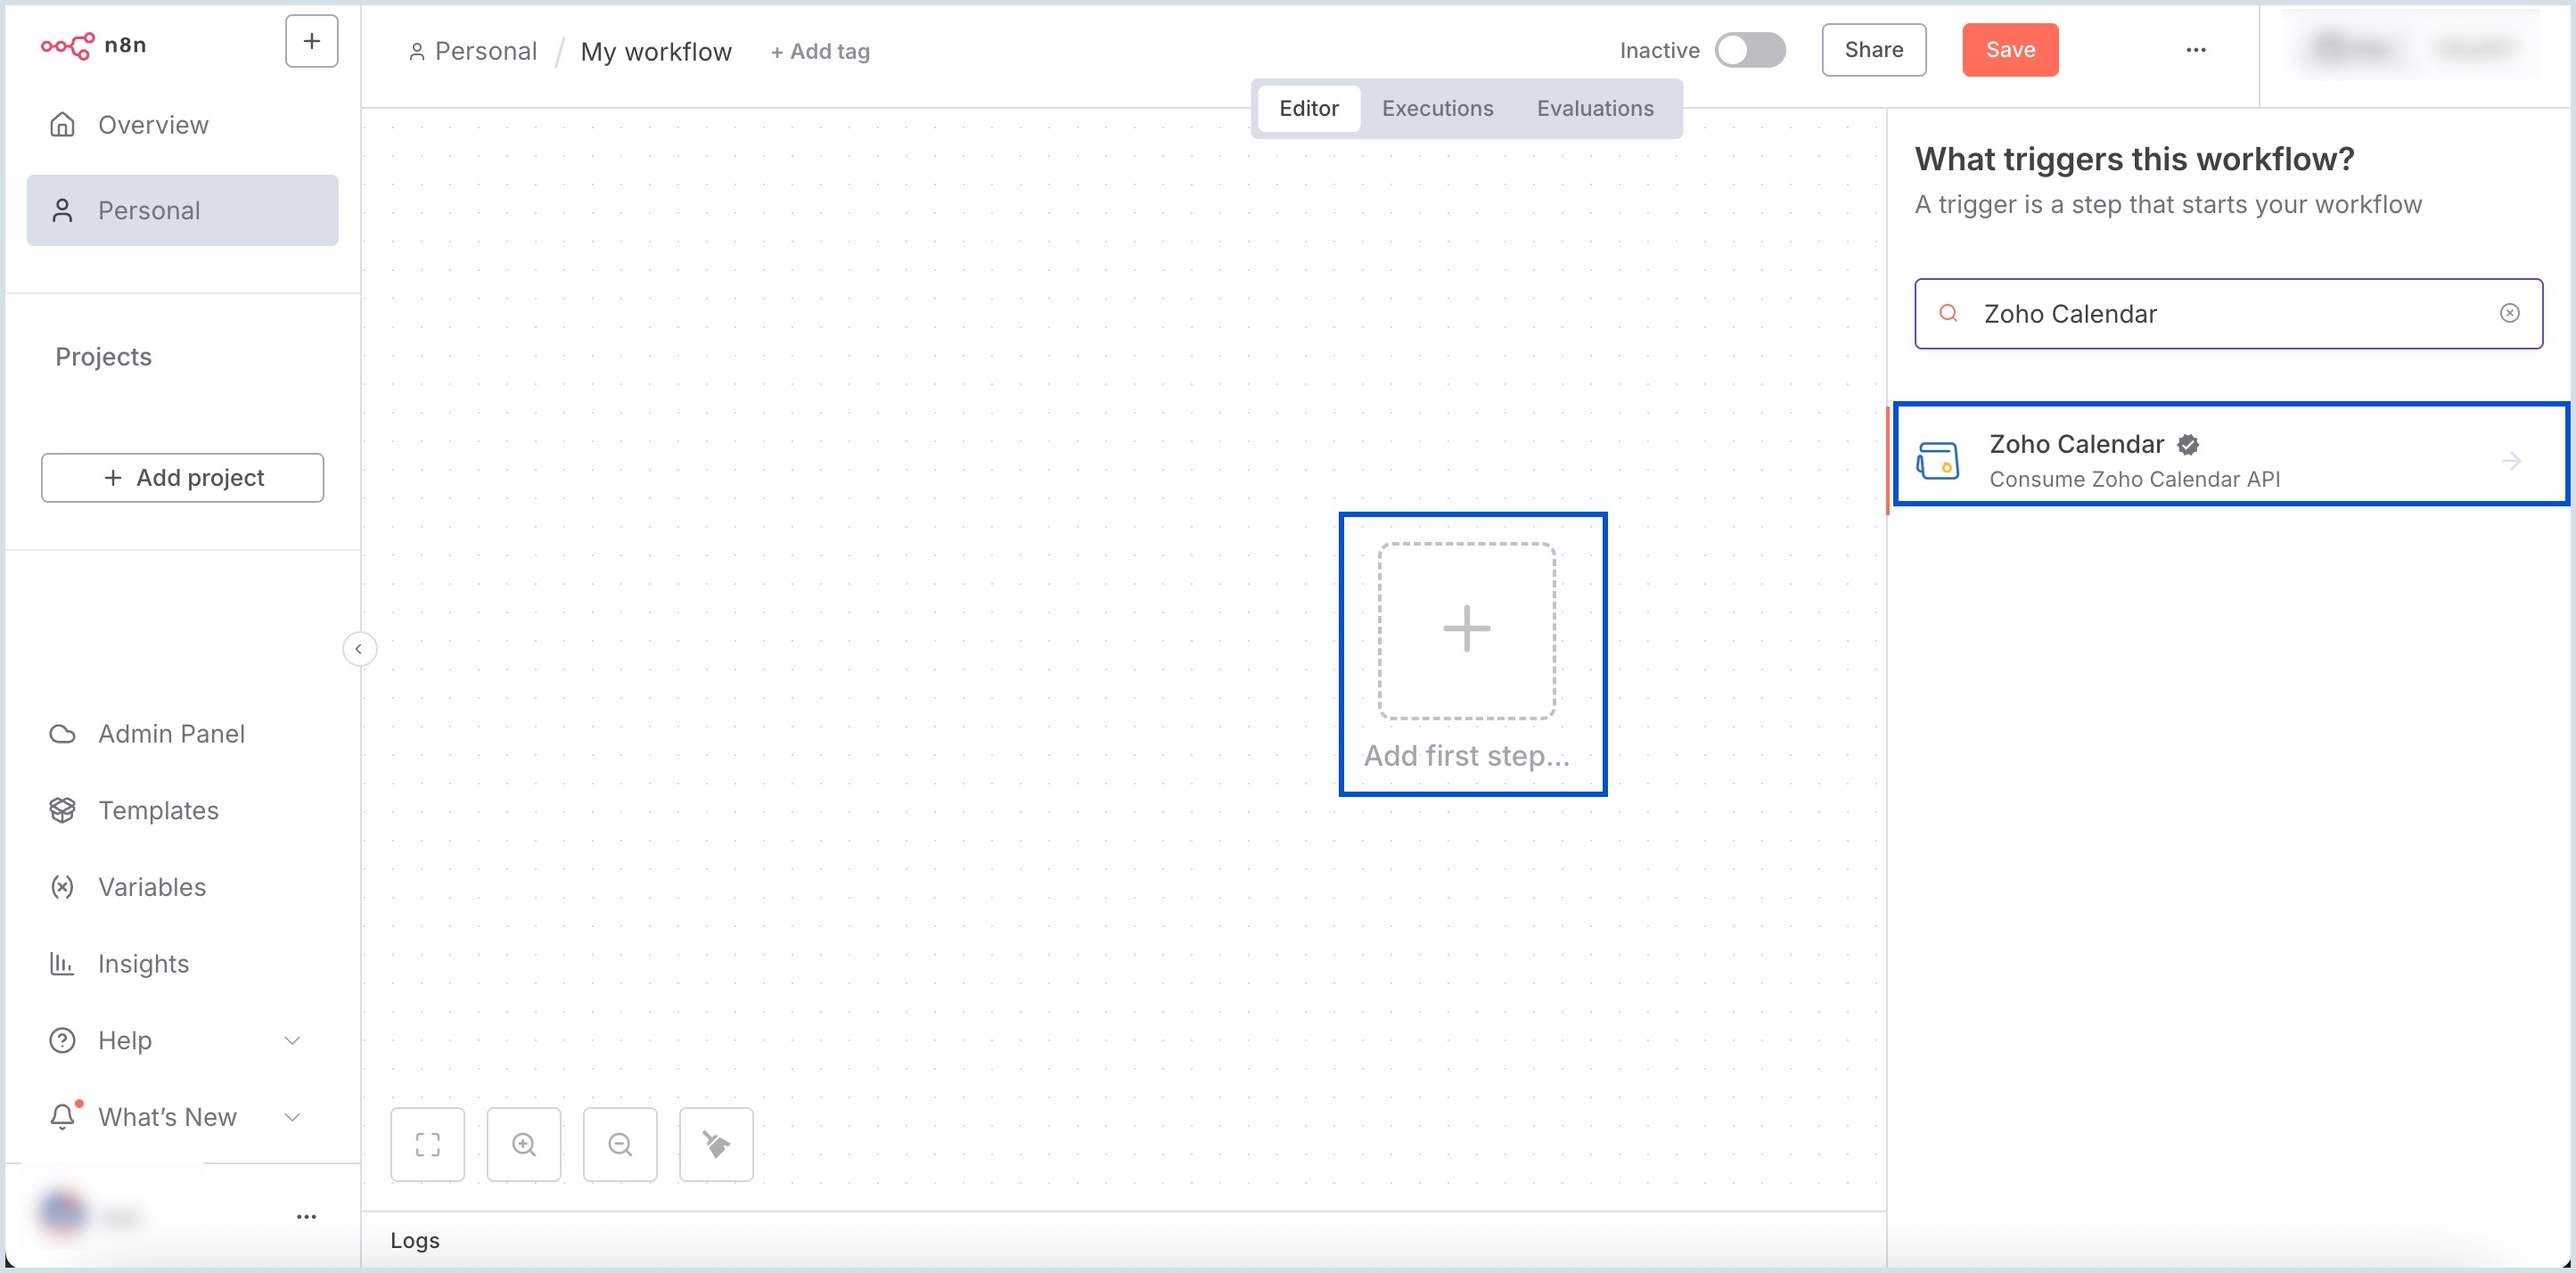
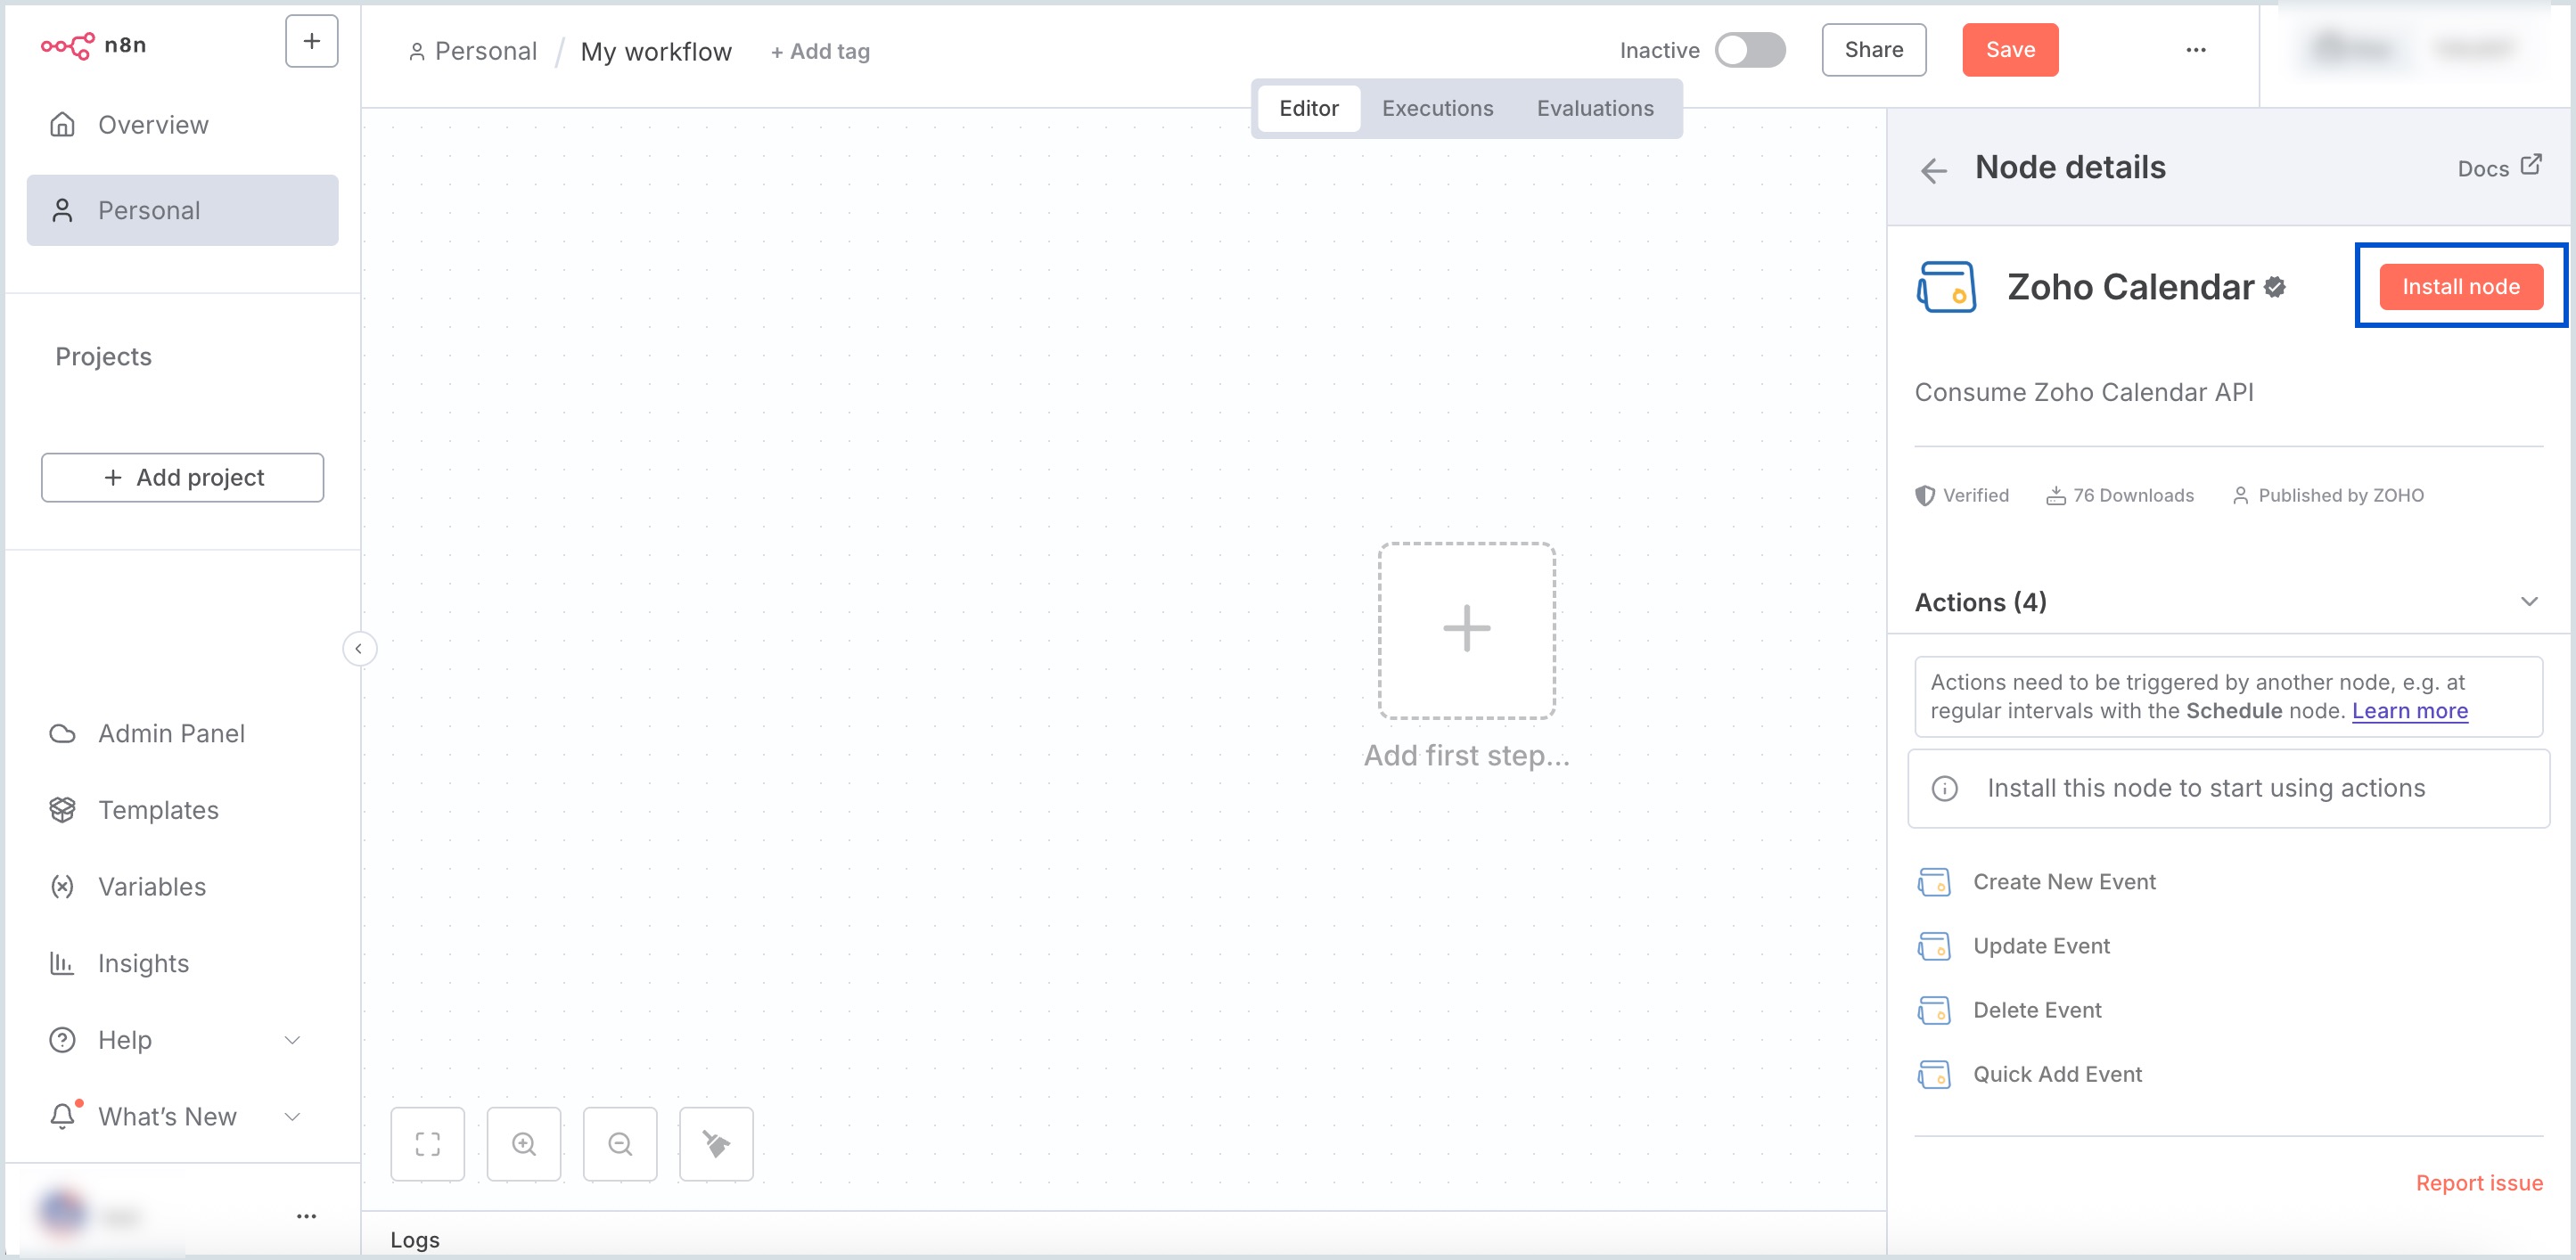
- Click Install node next to Zoho Calendar. The package will be successfully installed.
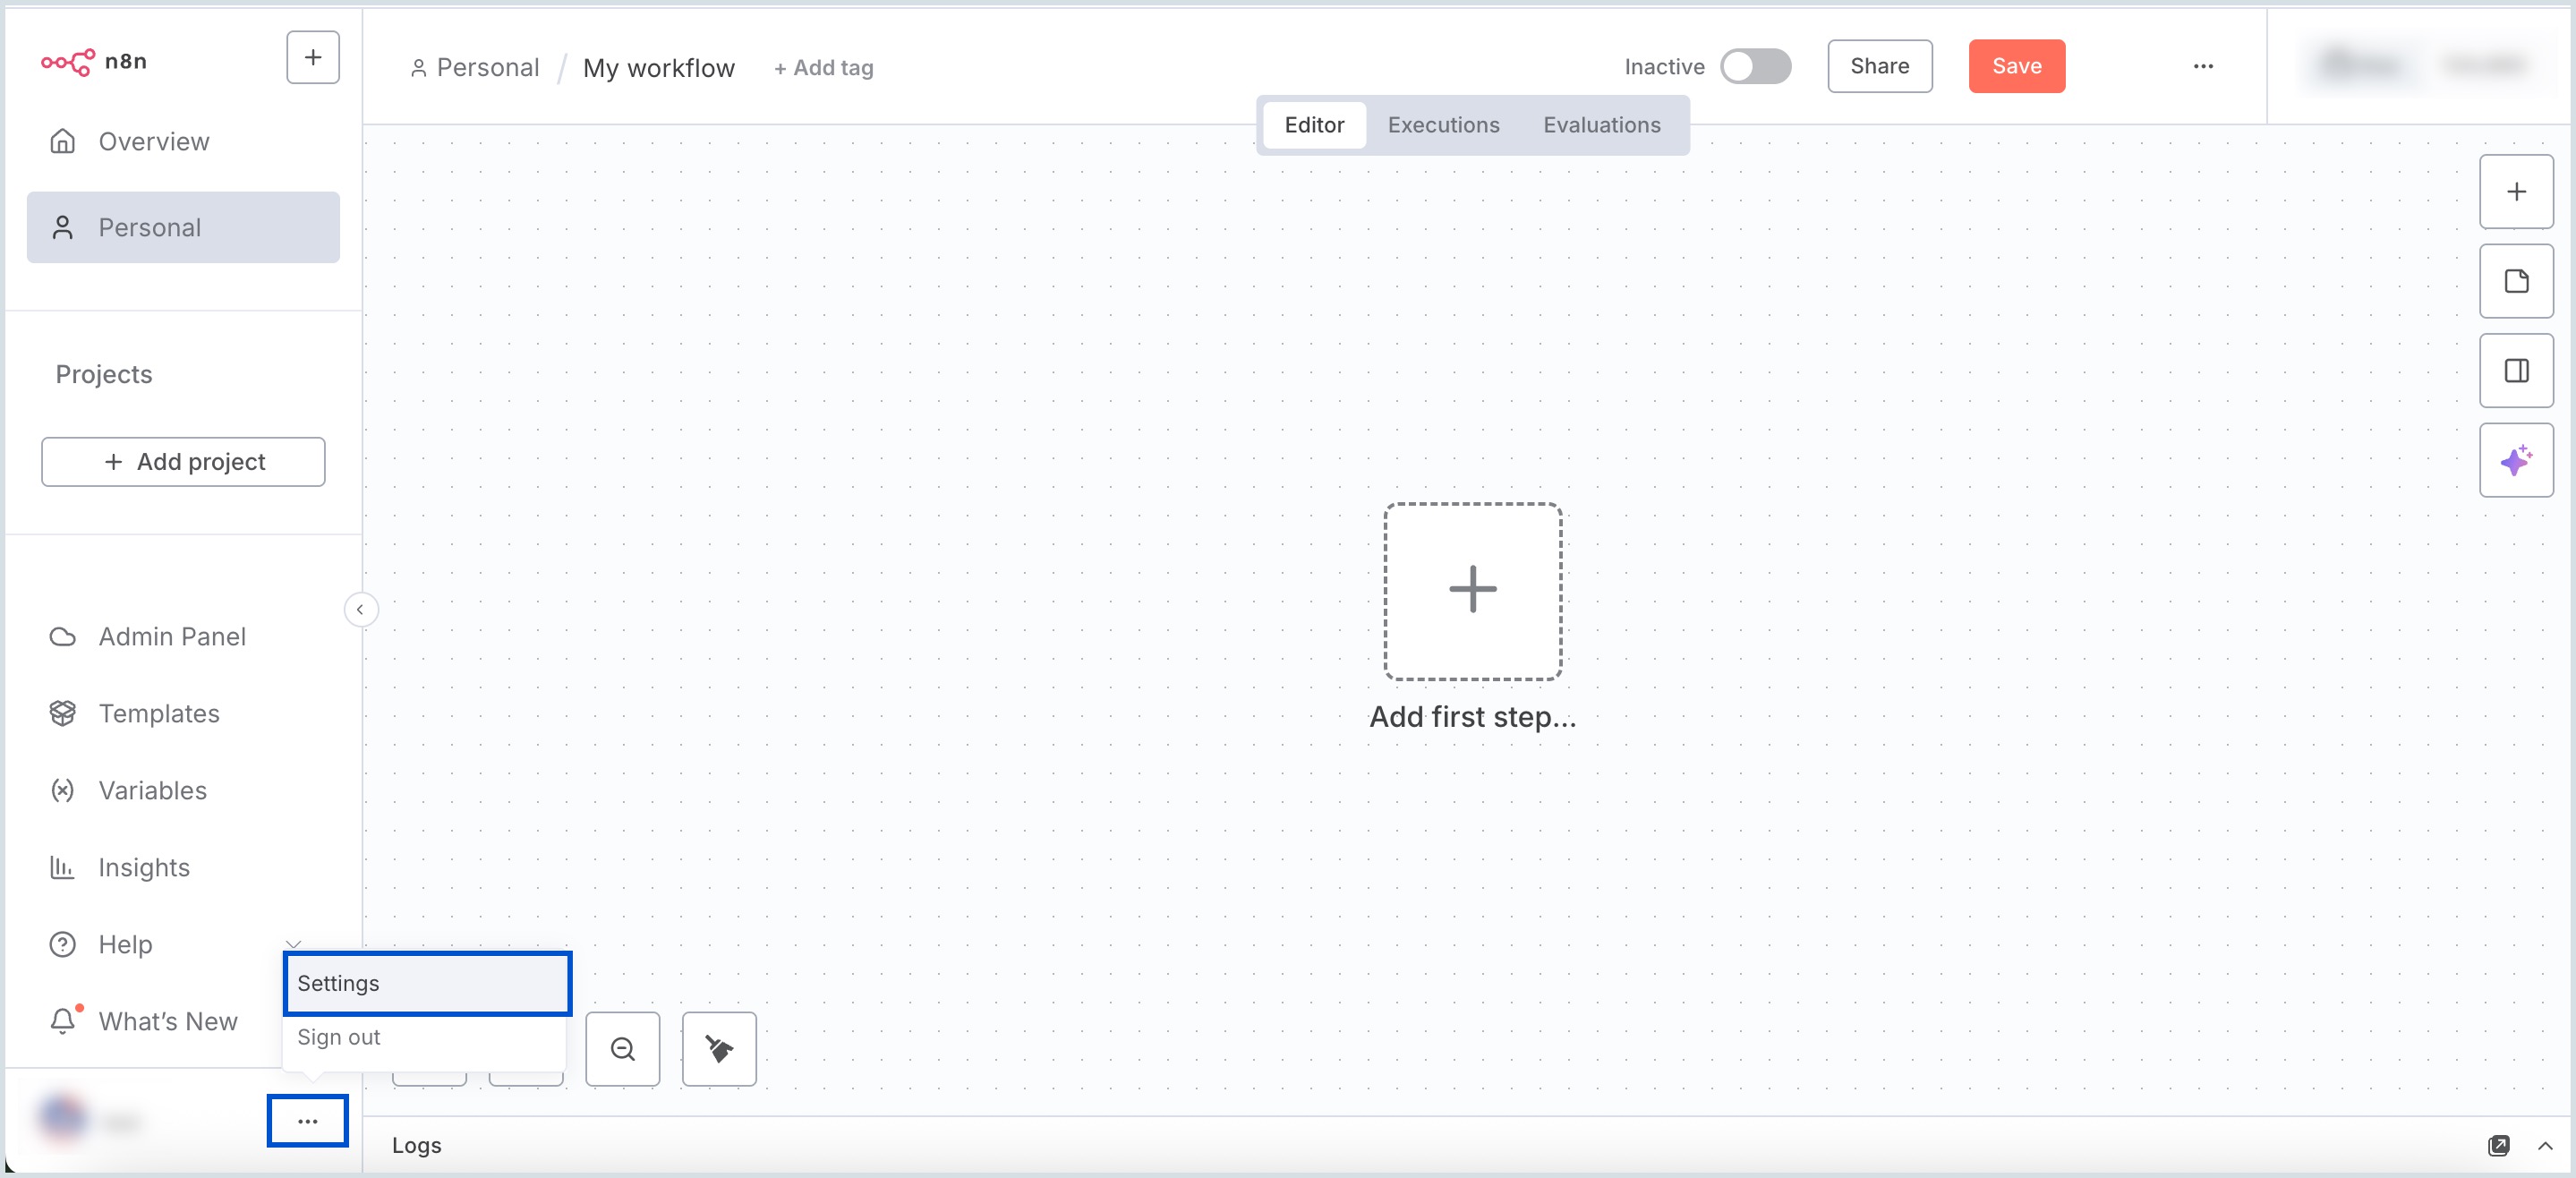
- To view the installed node, scroll down to the left bottom of the home page and click the more options icon.
- Select Settings from the displayed list.
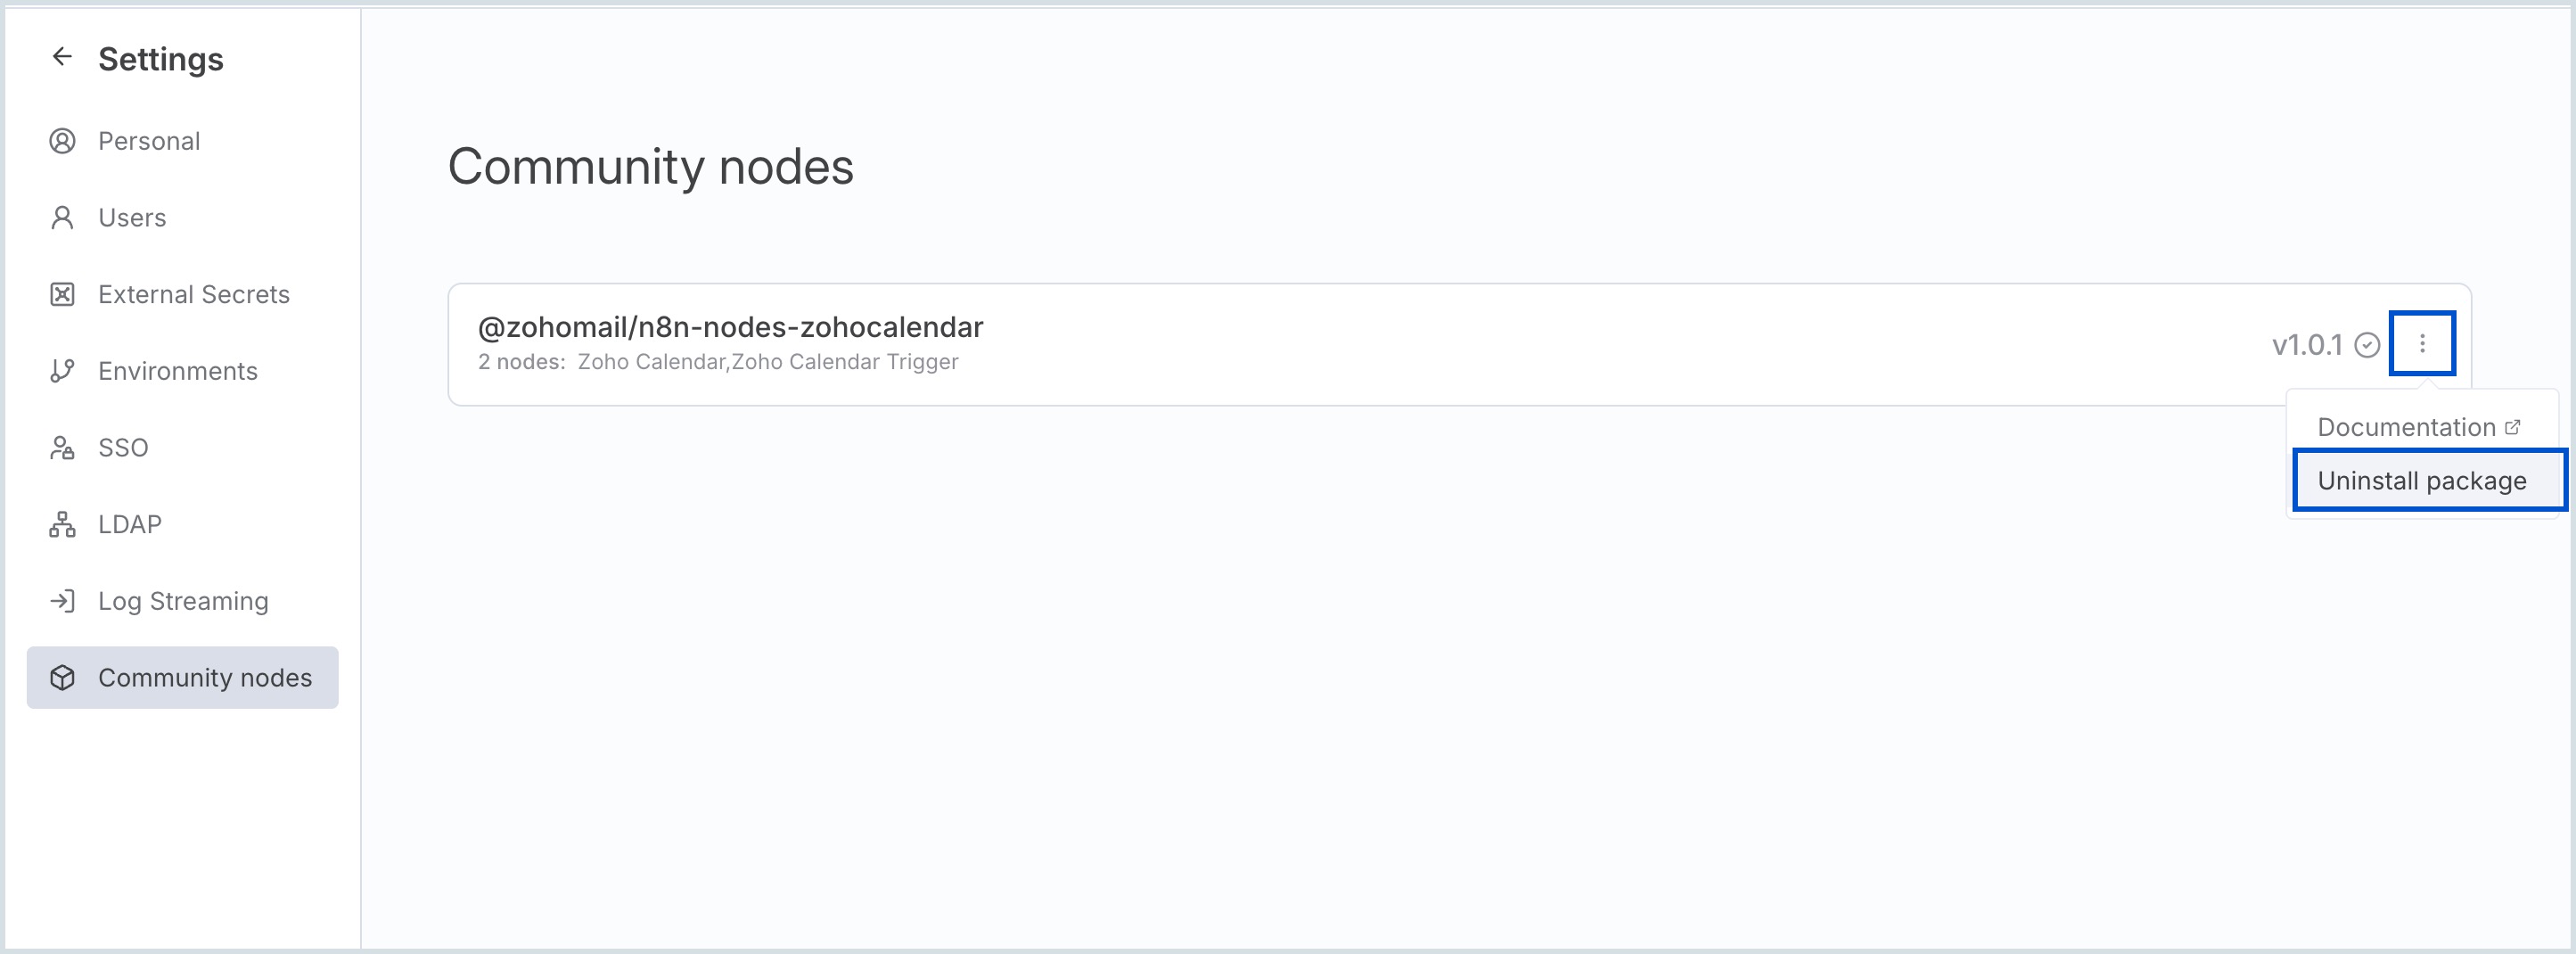
- Select Community nodes from the left pane and the installed nodes will be displayed.

Click more options icon and select Uninstall package to delete a particular node.
Create Credential
To create a credential, follow the below-mentioned steps:
- Log in to your n8n account.
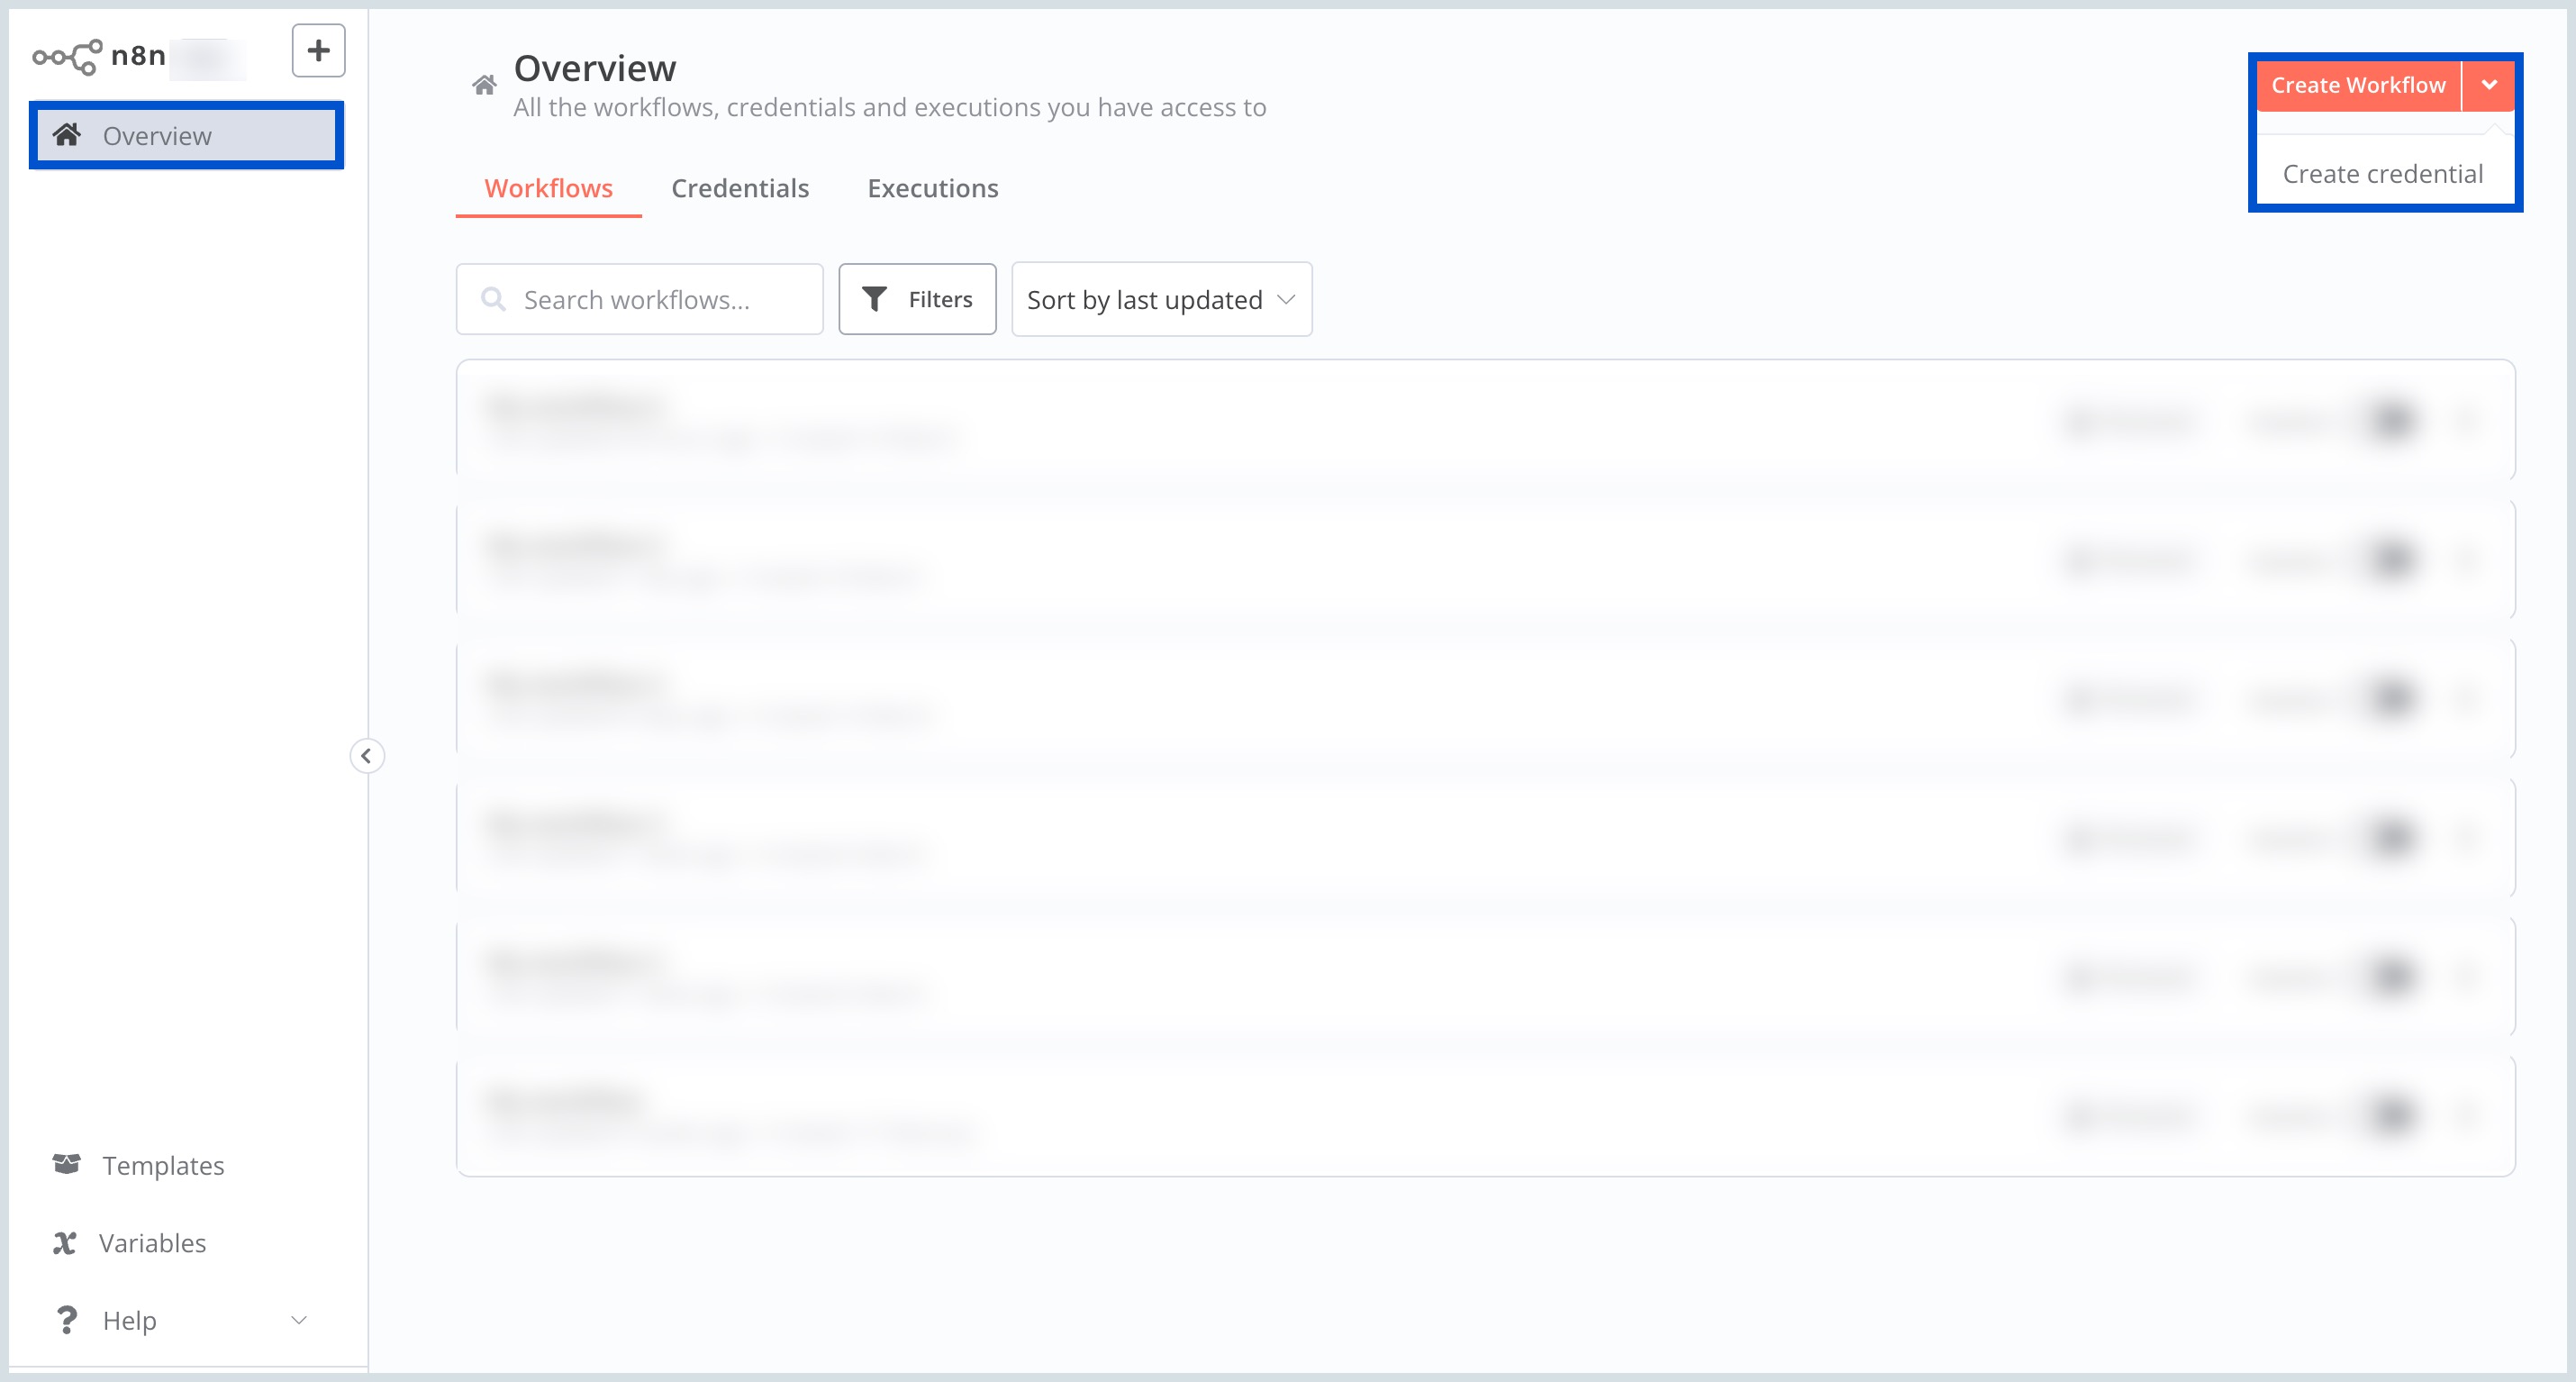
- Select Create credential from the drop-down available on the top right corner in the Overview section of the home page.
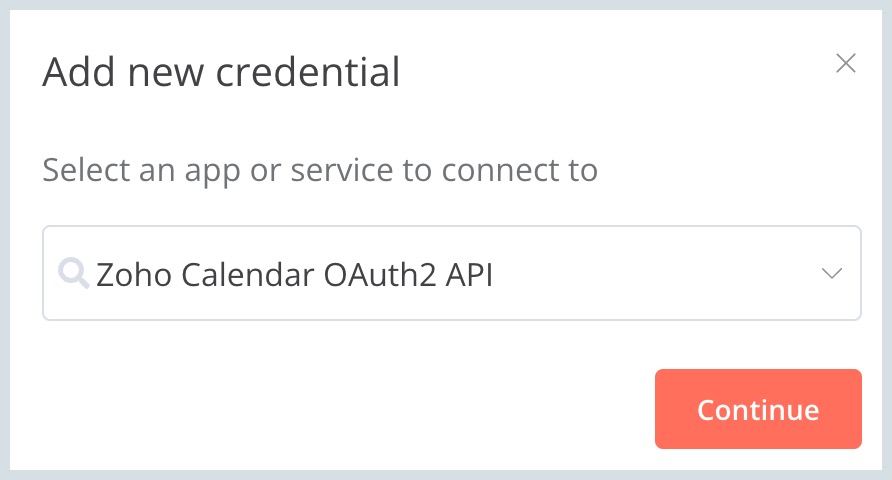
- In the Add new credential dialog box, select the Zoho Calendar OAuth2 API from the list of apps in the drop-down and click Continue.
In the Connection page, fill in the required details as follows:
- Copy and paste the OAuth Redirect URL mentioned in the connection page when prompted at the steps in API console site.
- Select the Authorization URL and Access token URL from the drop-down menu listed.
- Follow the steps mentioned in the API Console to generate the Client ID and Client Secret.
- Once the Client ID and Client Secret are filled, click Connect my account on the connections page.

Click Accept when prompted. The connection is now successfully established.
Create Workflow
Now that the connection is made, the next step is to create workflow. Follow the below steps to create a workflow:
- Click Create Workflow on the top right corner of the home page.
- Click Add first step and select Zoho Calendar in the search bar available on the right pane.
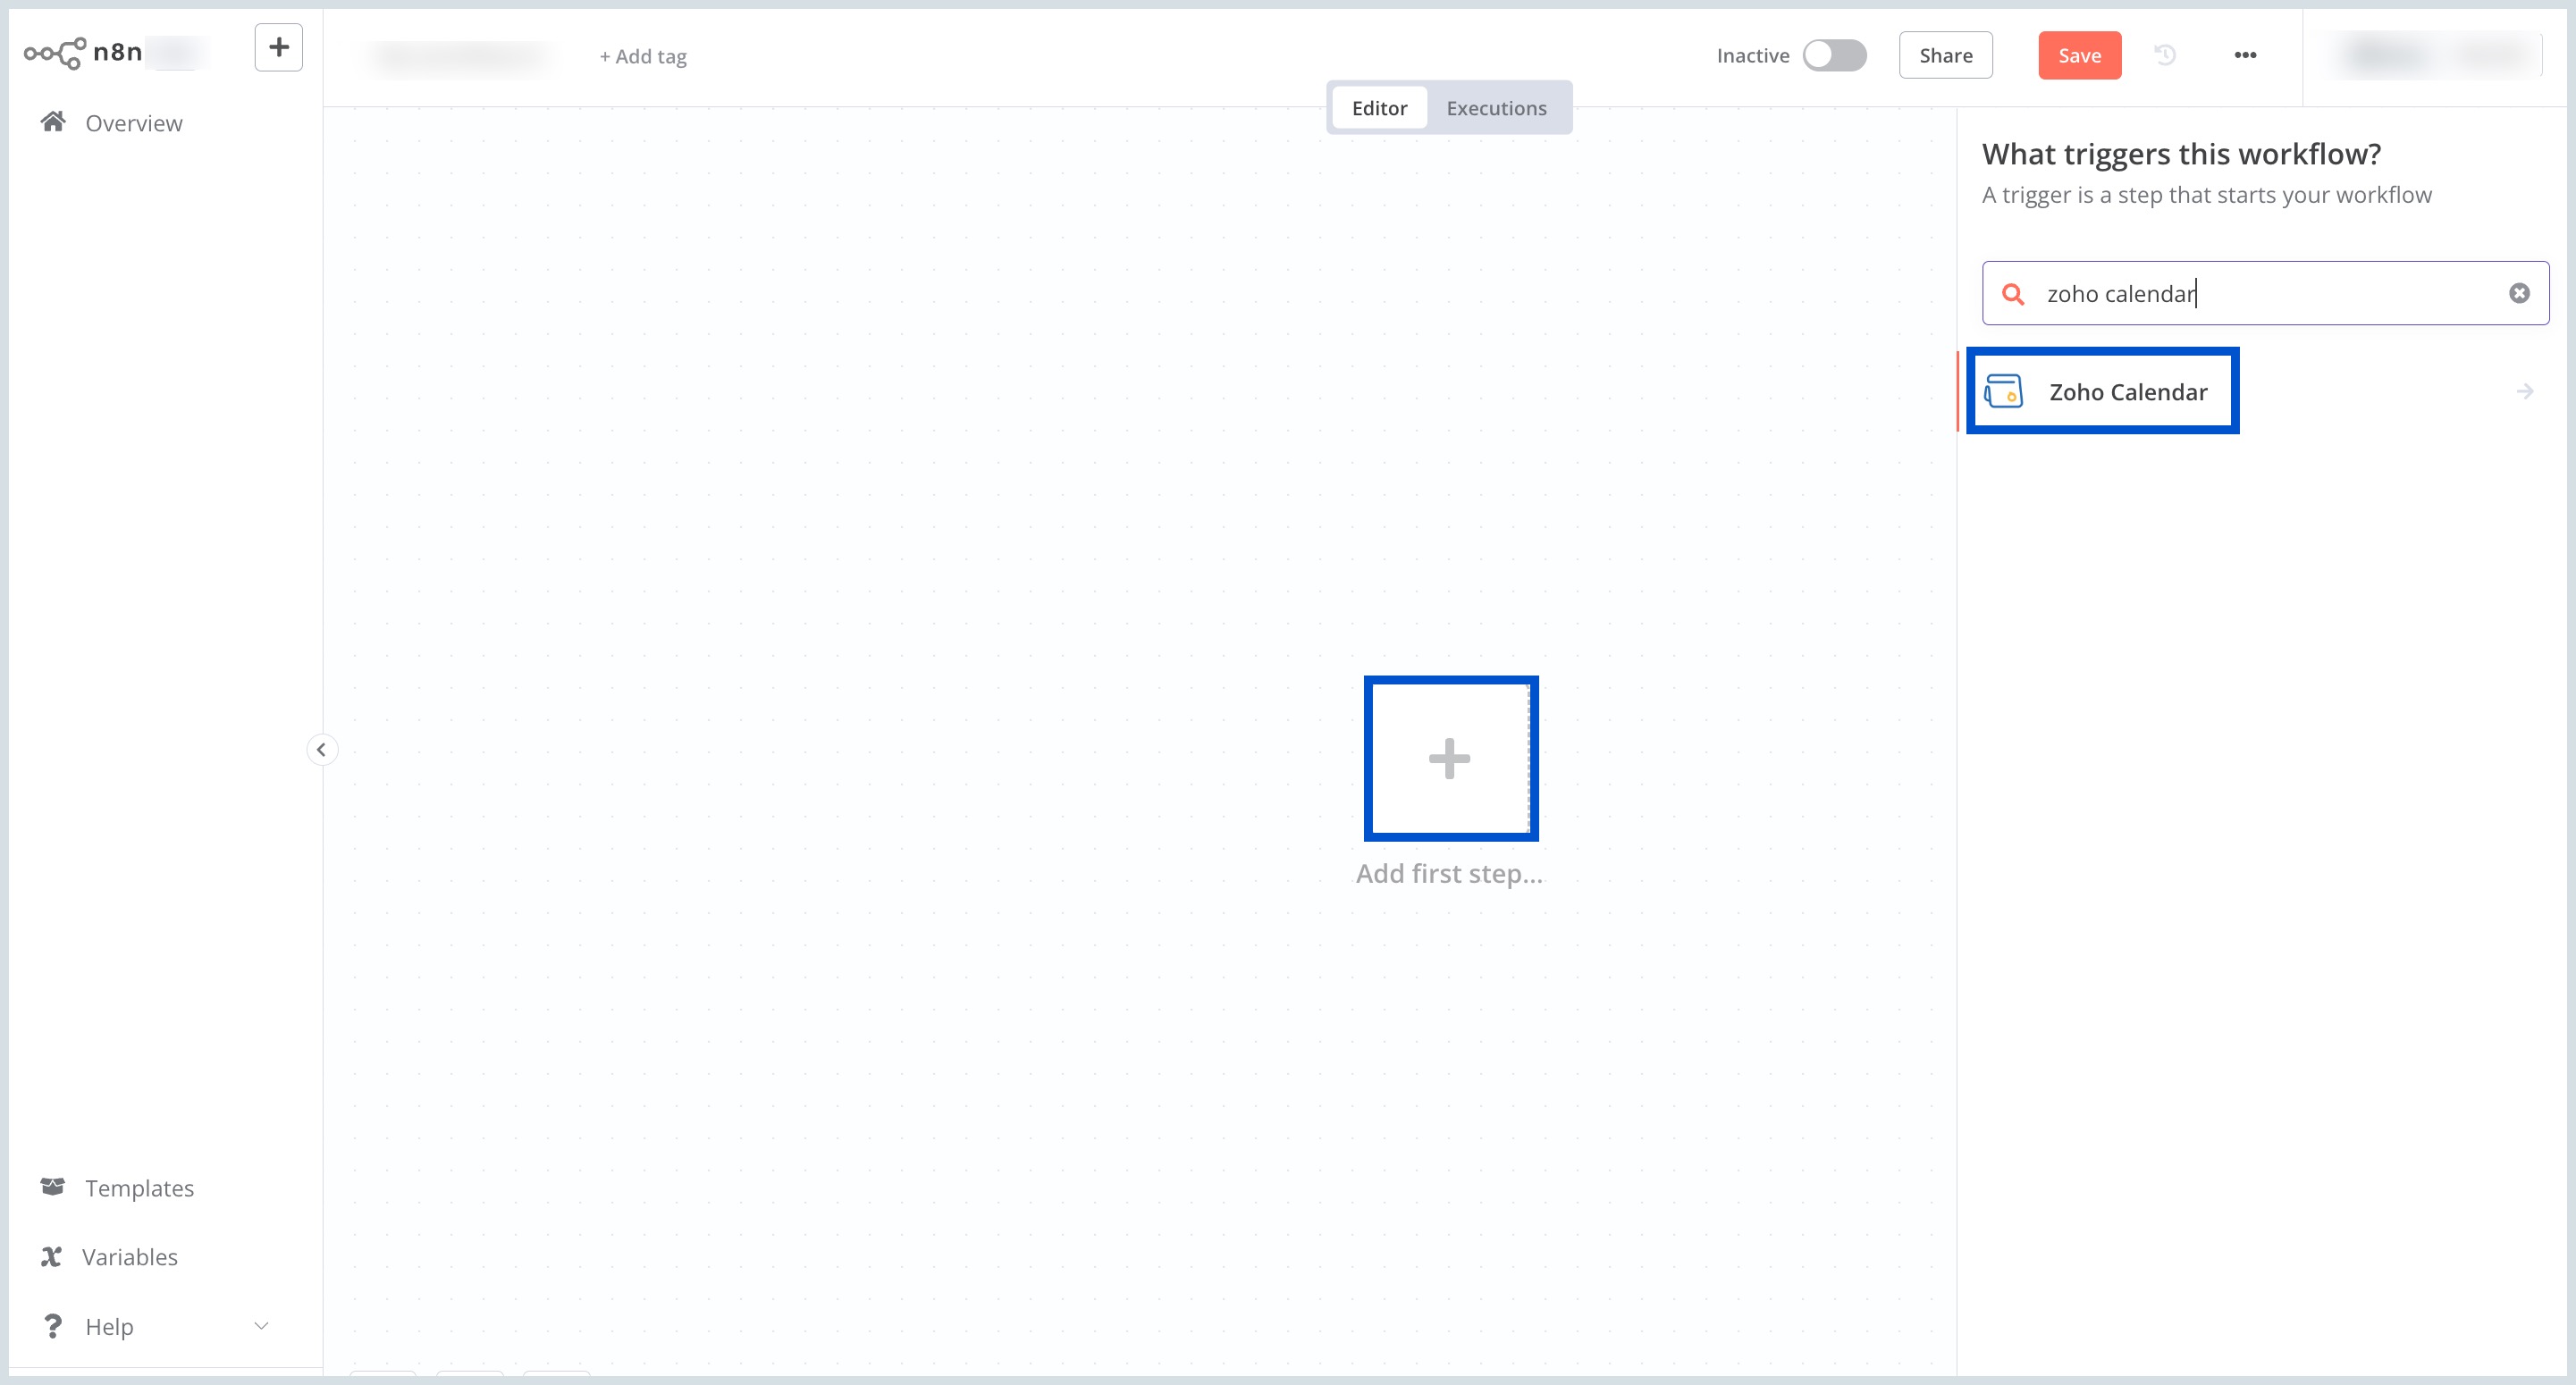 The triggers and actions are listed under Zoho Calendar.

Build an Action
Follow the below steps to create an action in the workflow:
- Select desired actions according to your preference from the list available on the right pane.
- Fill in the mandatory fields mentioned below in the pop-up window.
- Calendar - Select the Calendar name you wish to make the connection.
- Title - Provide a suitable title for the workflow action.
- Start Time - Enter the start date and time for the event to occur.
- End Time - Enter the end date and time for the event to occur.
- Click the Test Step on the top right corner.
 The event is created and the output is displayed. You can select the output type displayed as one of the following:
- Table
- JSON
- Schema

Build a Trigger
Next step is to create a trigger. Follow the below steps to create a trigger:
- Click the add icon in the workflow.
- Search and select Zoho Calendar on the right pane.
- You can select the preferred trigger from the list available.
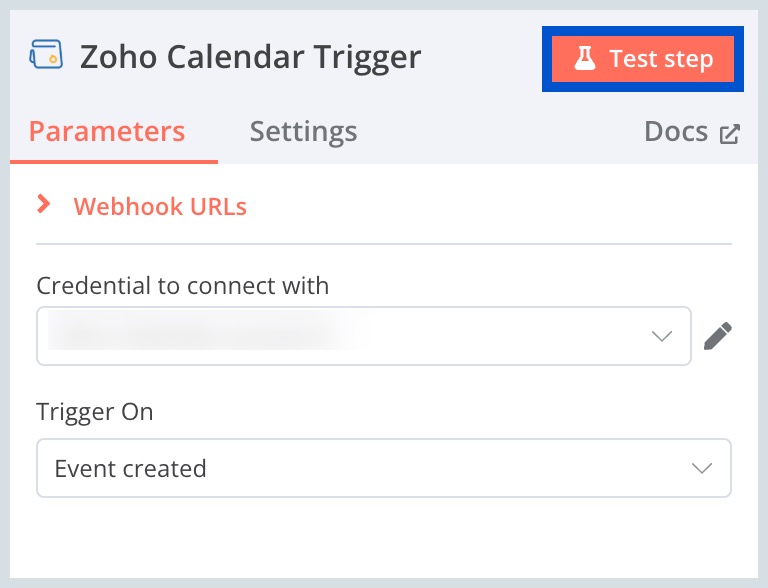
- In the Zoho Calendar Trigger pop up window, fill in the parameters and click the Test step on the top right corner.
Now the workflow is created and you can click Test workflow to check the flow of events created. 
Steps in API Console
Go to the API console. Follow the below steps to generate client ID and client secret:
- Select Server-based Applications from the client types listed.
- Fill in your custom Client Name on the Create New Client page. For example, the Client Name can be "Connection", "Project", or custom name of your choice.
- Next, fill in the Homepage URL from where the connection has to be made.
- Enter the Authorized Redirect URIs field. This value is provided in the n8n's connection page.
- Click CREATE in the API Console.
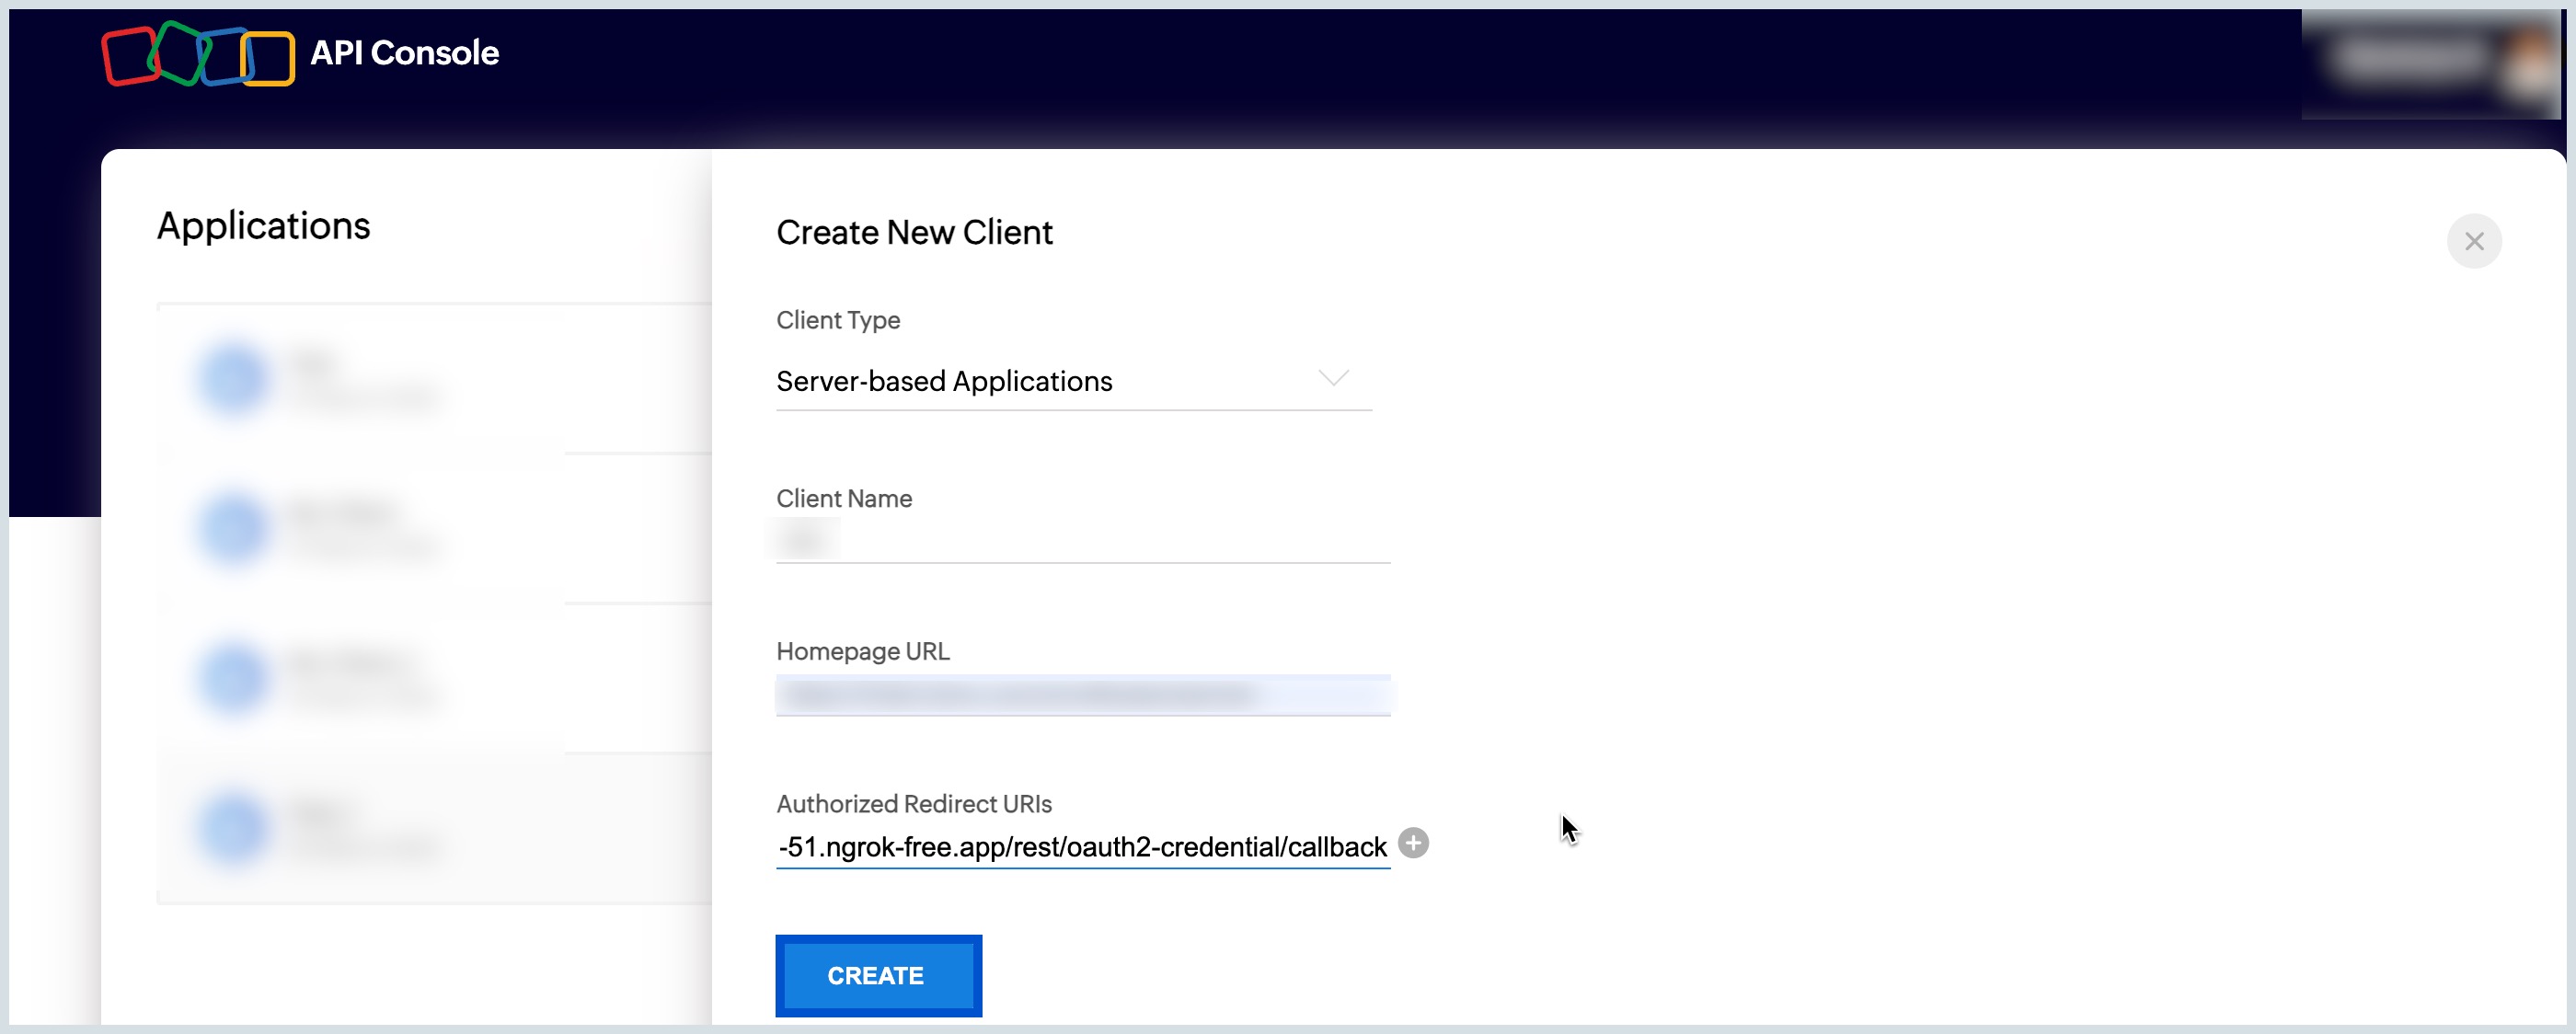
Your client ID and client secret are now generated. Scroll back to the Connection step.
Explore DC Settings in the API Console given below.
Settings in API Console
Once the Client ID and Client Secret are generated, navigate to the Settings tab in the API console. Check the option "Use the same OAuth credentials for all data centers" to enable Multi-DC settings.
However, you can choose to select particular DCs by enabling the toggle button ON .
Note:
When a particular DC is selected, the SHOW CODE button is enabled to generate a unique Client Secret exclusive to that DC alone.


 The triggers and actions are listed under Zoho Calendar.
