User Management Settings
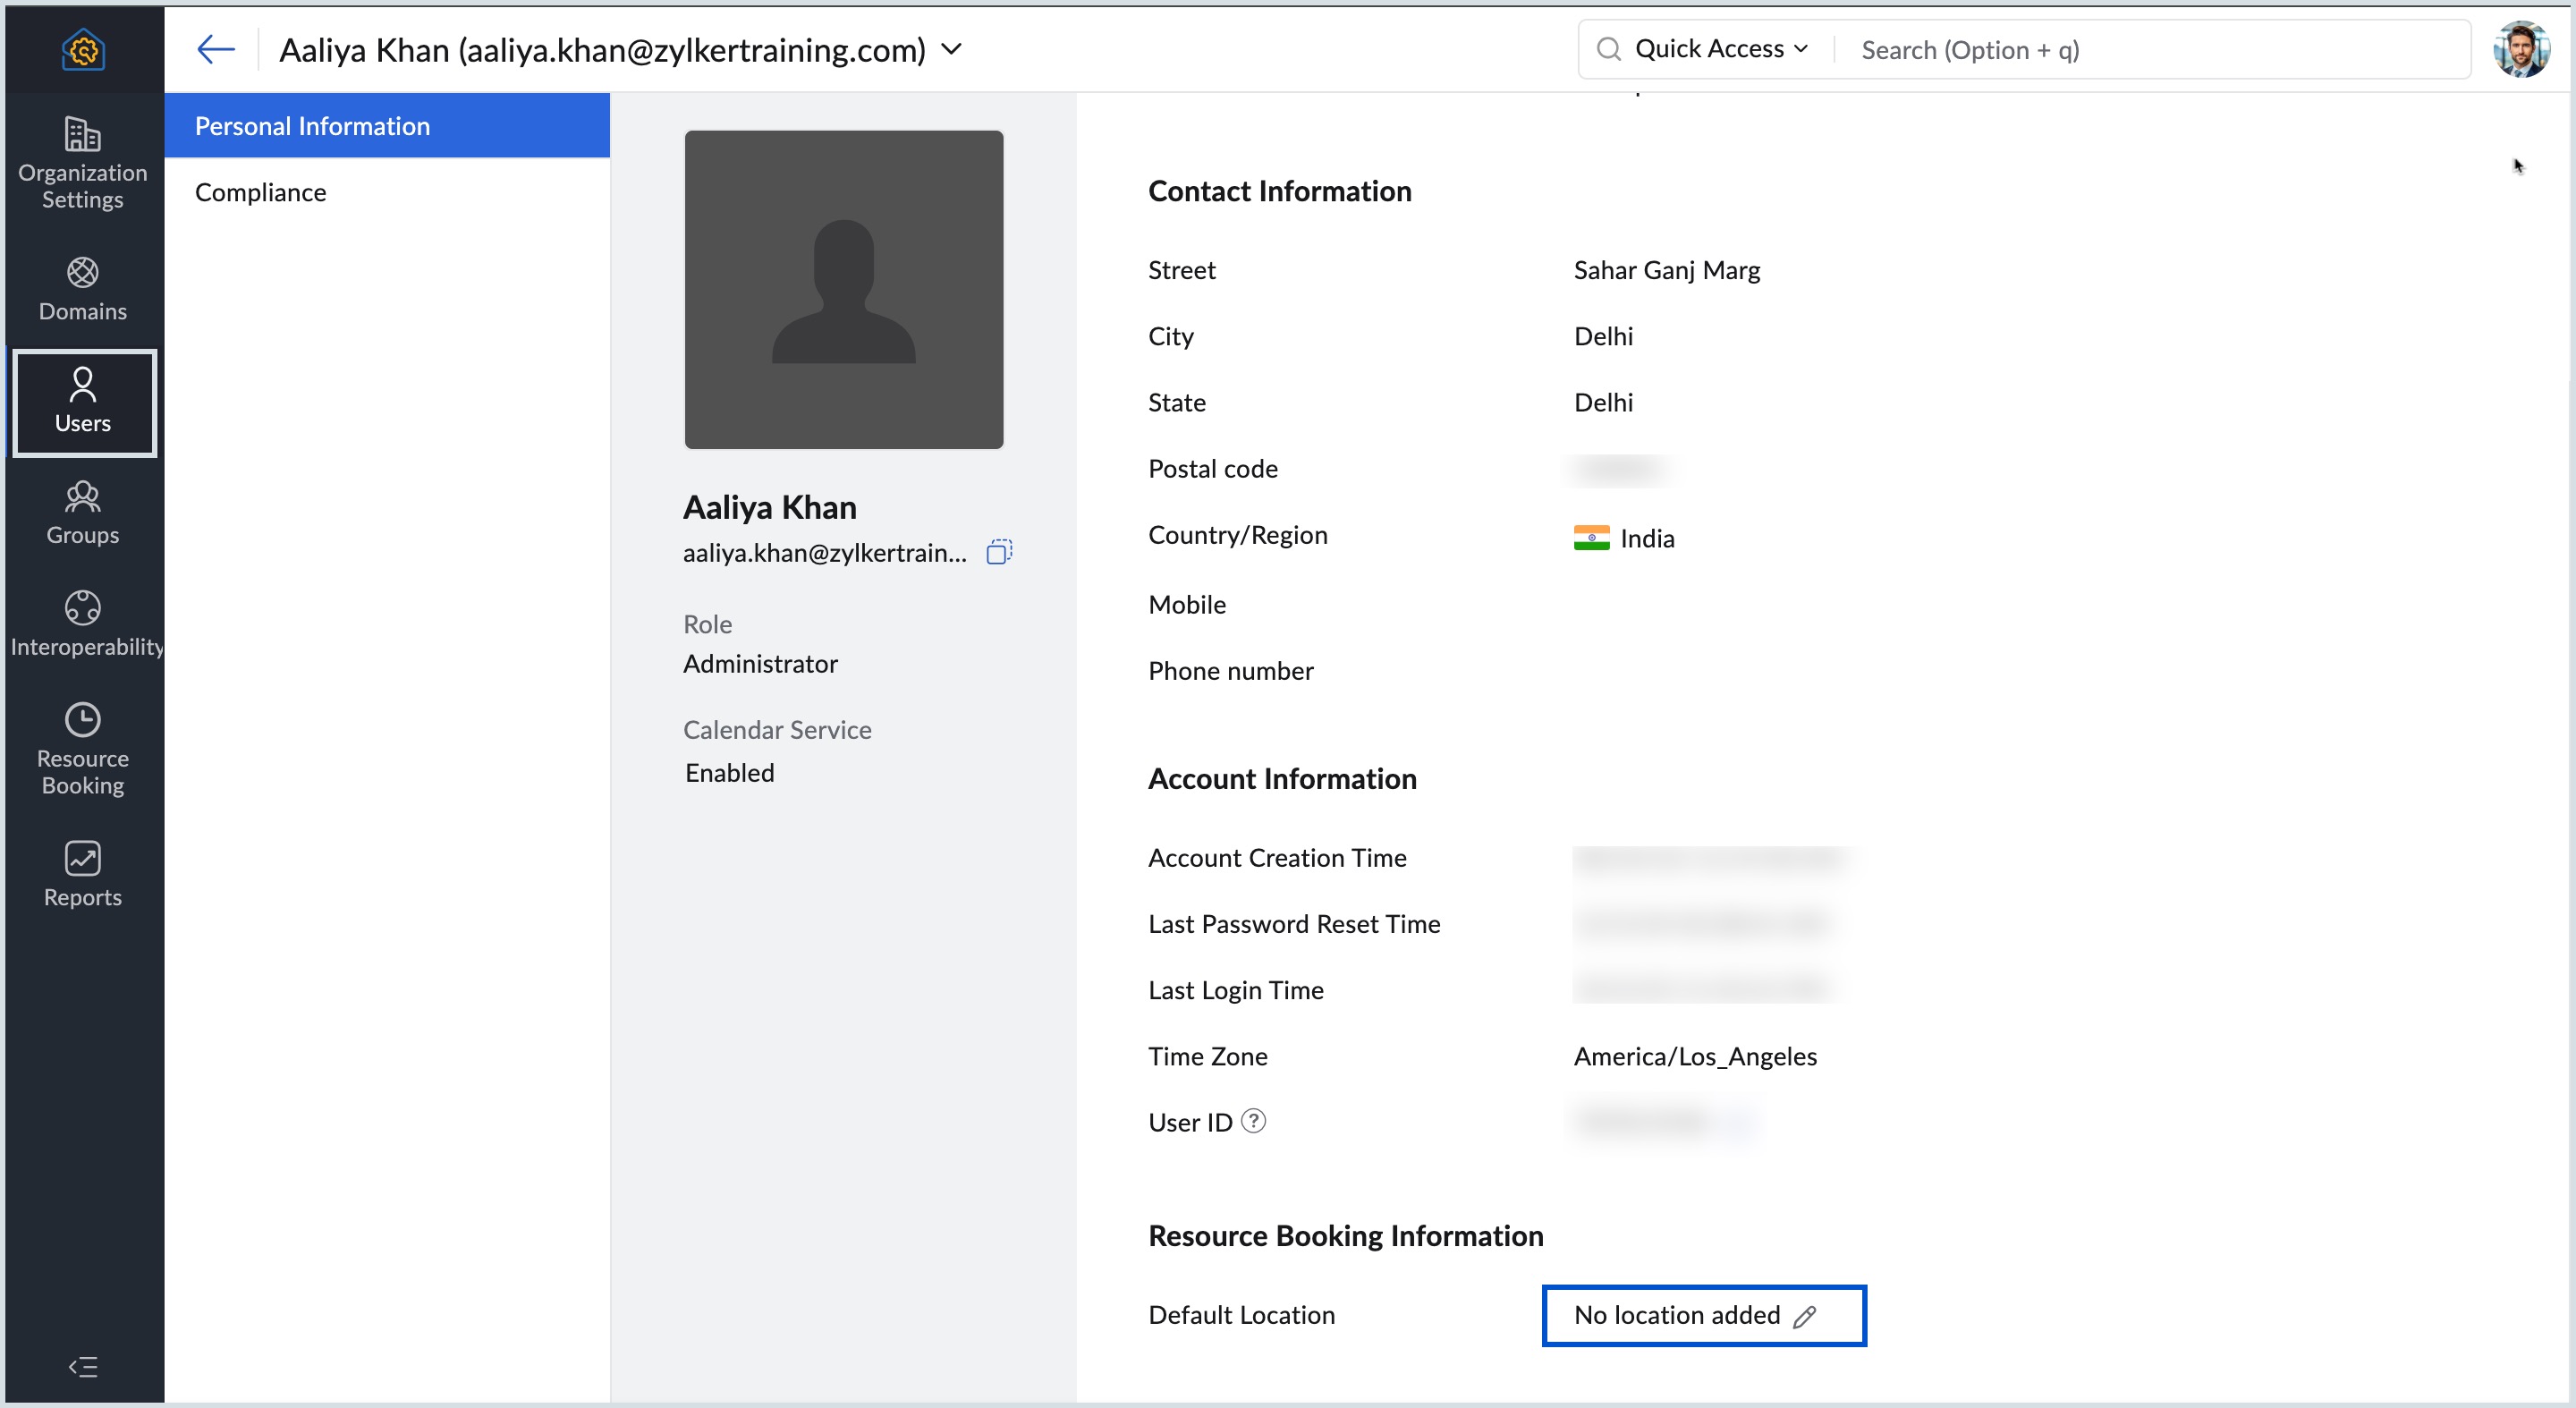
The user admin settings on the Zoho Calendar admin console provide an extensive view of all the users already added to the organisation. The list provides all the users' names, email addresses, locations, and last sign-in details. When you click on each user, you have a detailed view of the particular user, under the personal information section.
Change User Default Location
Follow the below steps to add/edit user's location:
- Log in to Zoho Calendar Admin Console.
- Click Users from the left pane.
- Select the user whose location needs to changed.
- Click Personal Information from the left pane.
- Navigate to the Resource Booking Information section.
- Click the Edit icon next to the Default Location field.

- Select the respective Branch, Building, and Floor name.

- Confirm the changes made in the Update Default Location dialog box and click Yes.
Now the user's personal information is updated with new location details.
Note:
If you do not wish the user to edit their location, follow these steps to disable Change User Location settings.
Compliance
The compliance section under users in the Zoho Calendar Admin Console provides the Calendar admins- an option to export the calendars of any user in the organisation. It can be either to comply with the backup policies or to back up an account before an employee leaves the organisation.
Export User Calendar
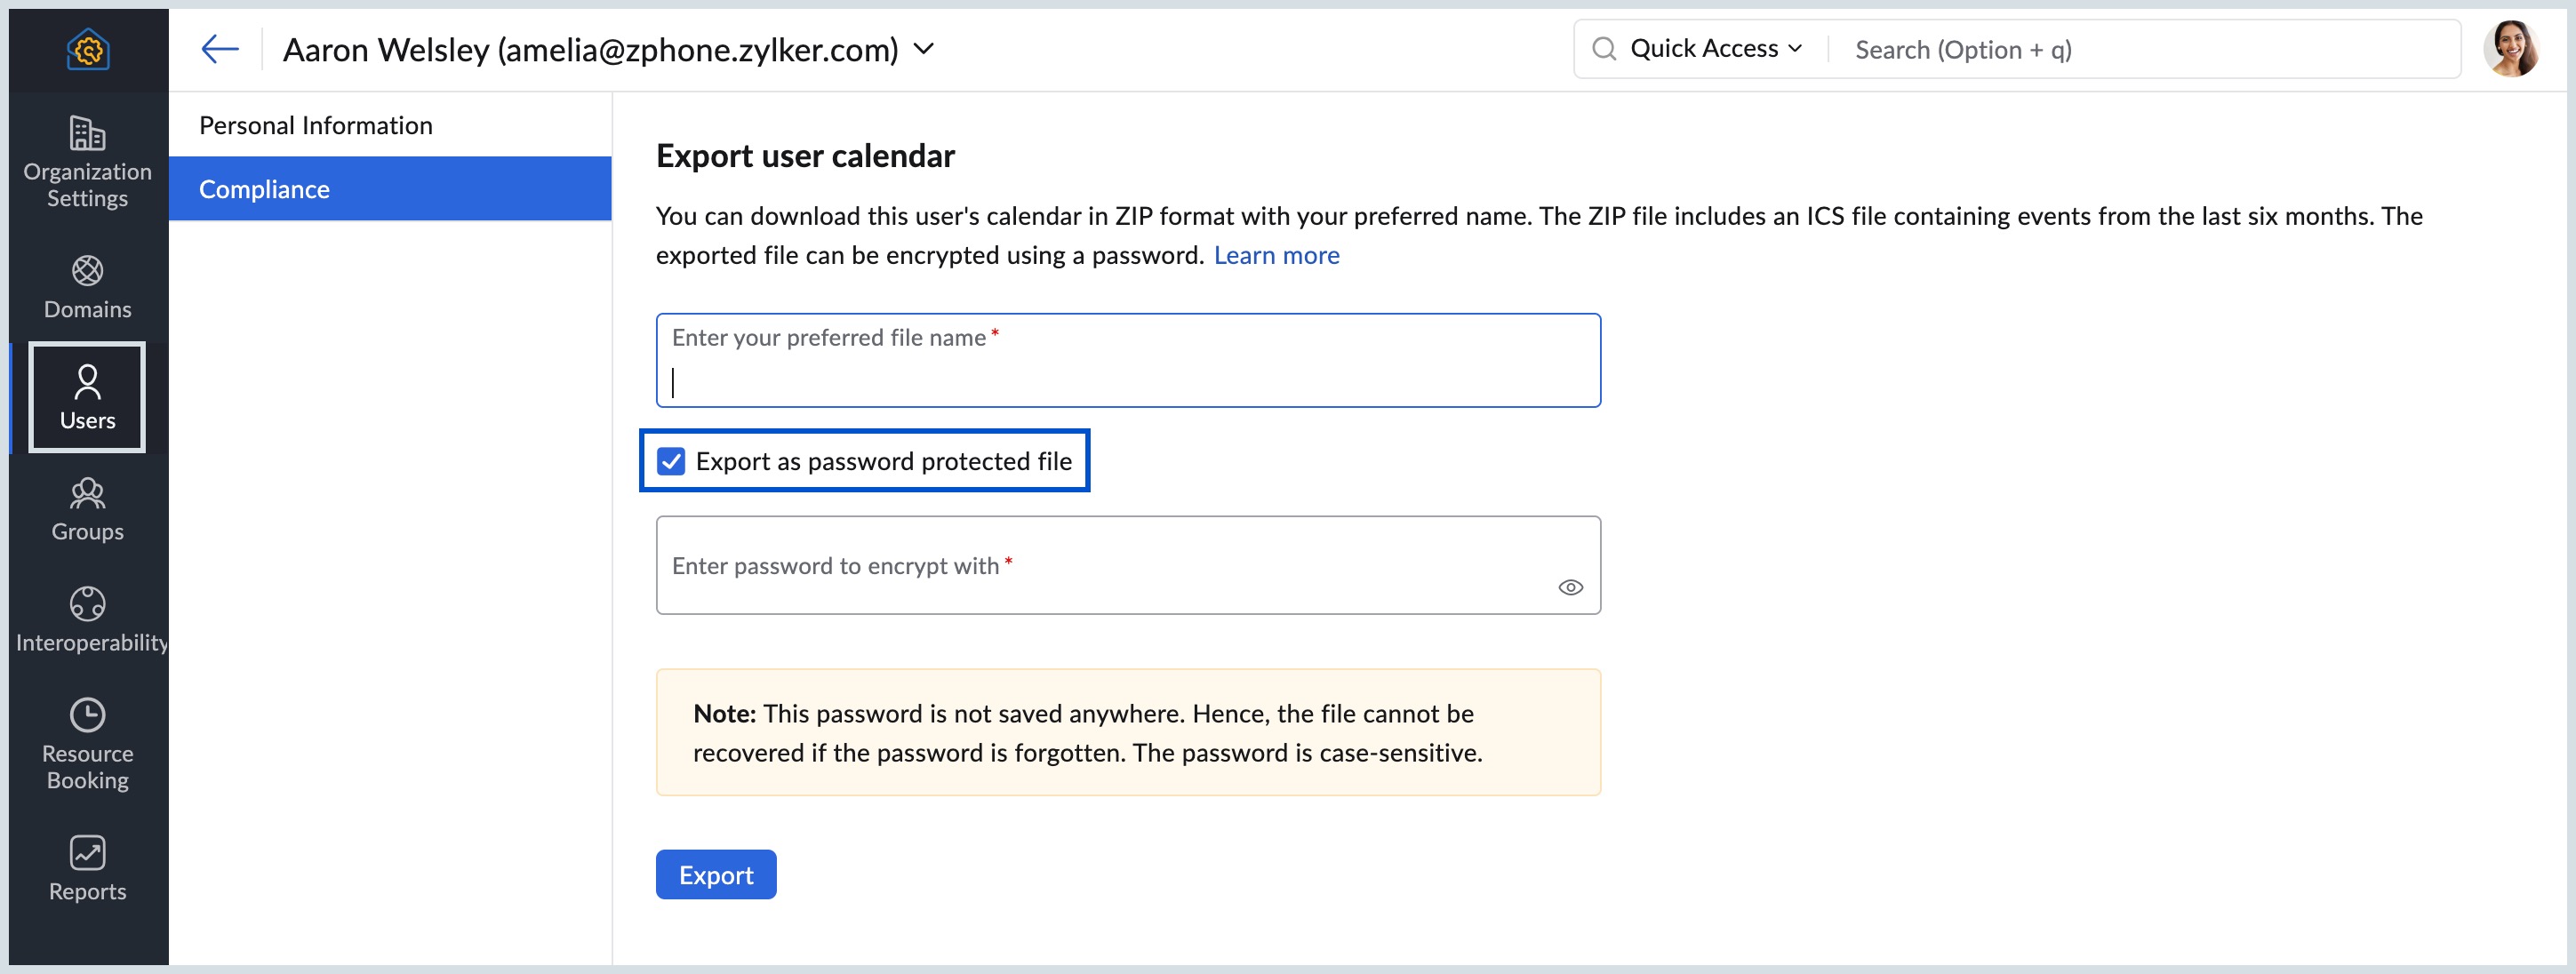
The Calendar admin can export the calendar of any user from the Users section in the Admin console that belongs to the user. The calendar will be downloaded in ZIP format which includes an ICS file containing events from the last 6 months.
Steps to Export User Calendar
- Log in to Zoho Calendar Admin Console.
- On the left pane, click on the Users section.
- Select the user whose calendar you want to export.
- Select the compliance section from the left pane.
- Enter a preferred name for your export file.
- Click on the checkbox- 'Export as password protected file' to add a layer of protection to your export file.

- Enter the password to encrypt your file.
- Click Export.
- The Calendar data of the particular user is downloaded as a password-protected file.


