Freshservice
Integrate Freshservice with Zoho Assist to resolve tickets quickly by initiating instant or scheduled remote support sessions directly from the tickets detail page in a single click. No software installation is necessary for the integration. Upon completion of the remote support session, you can update the ticket status and add notes to the ticket for future use.
To Configure Freshservice in Zoho Assist:
- Log in to Zoho Assist.
- Navigate to Settings > Integrations.
Click Configure beside Freshservice.
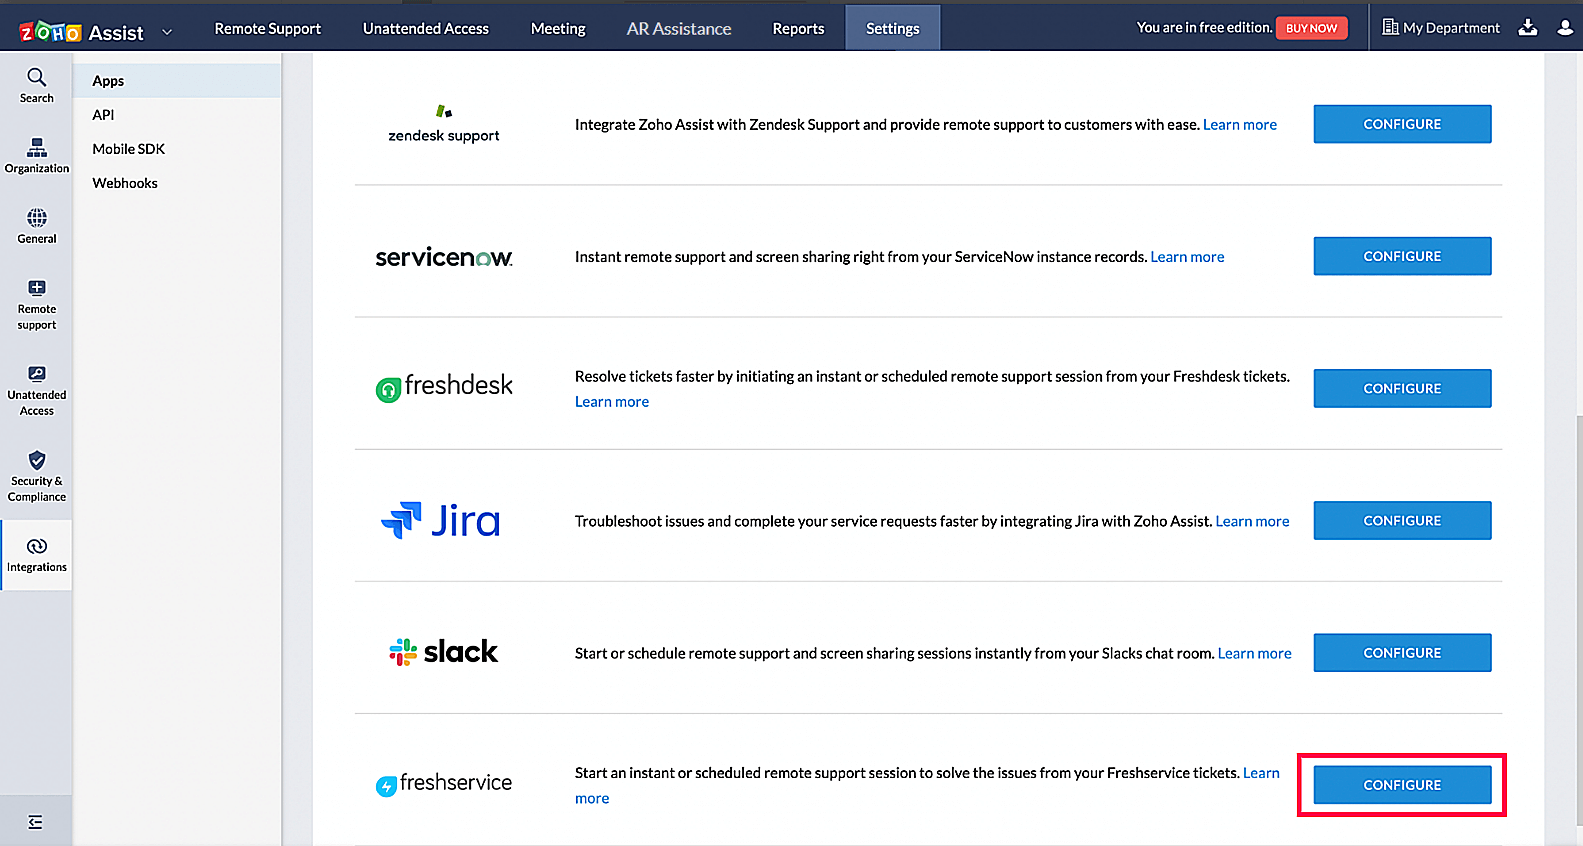
Fill in your Subdomain and API-Key to complete the configuration process.
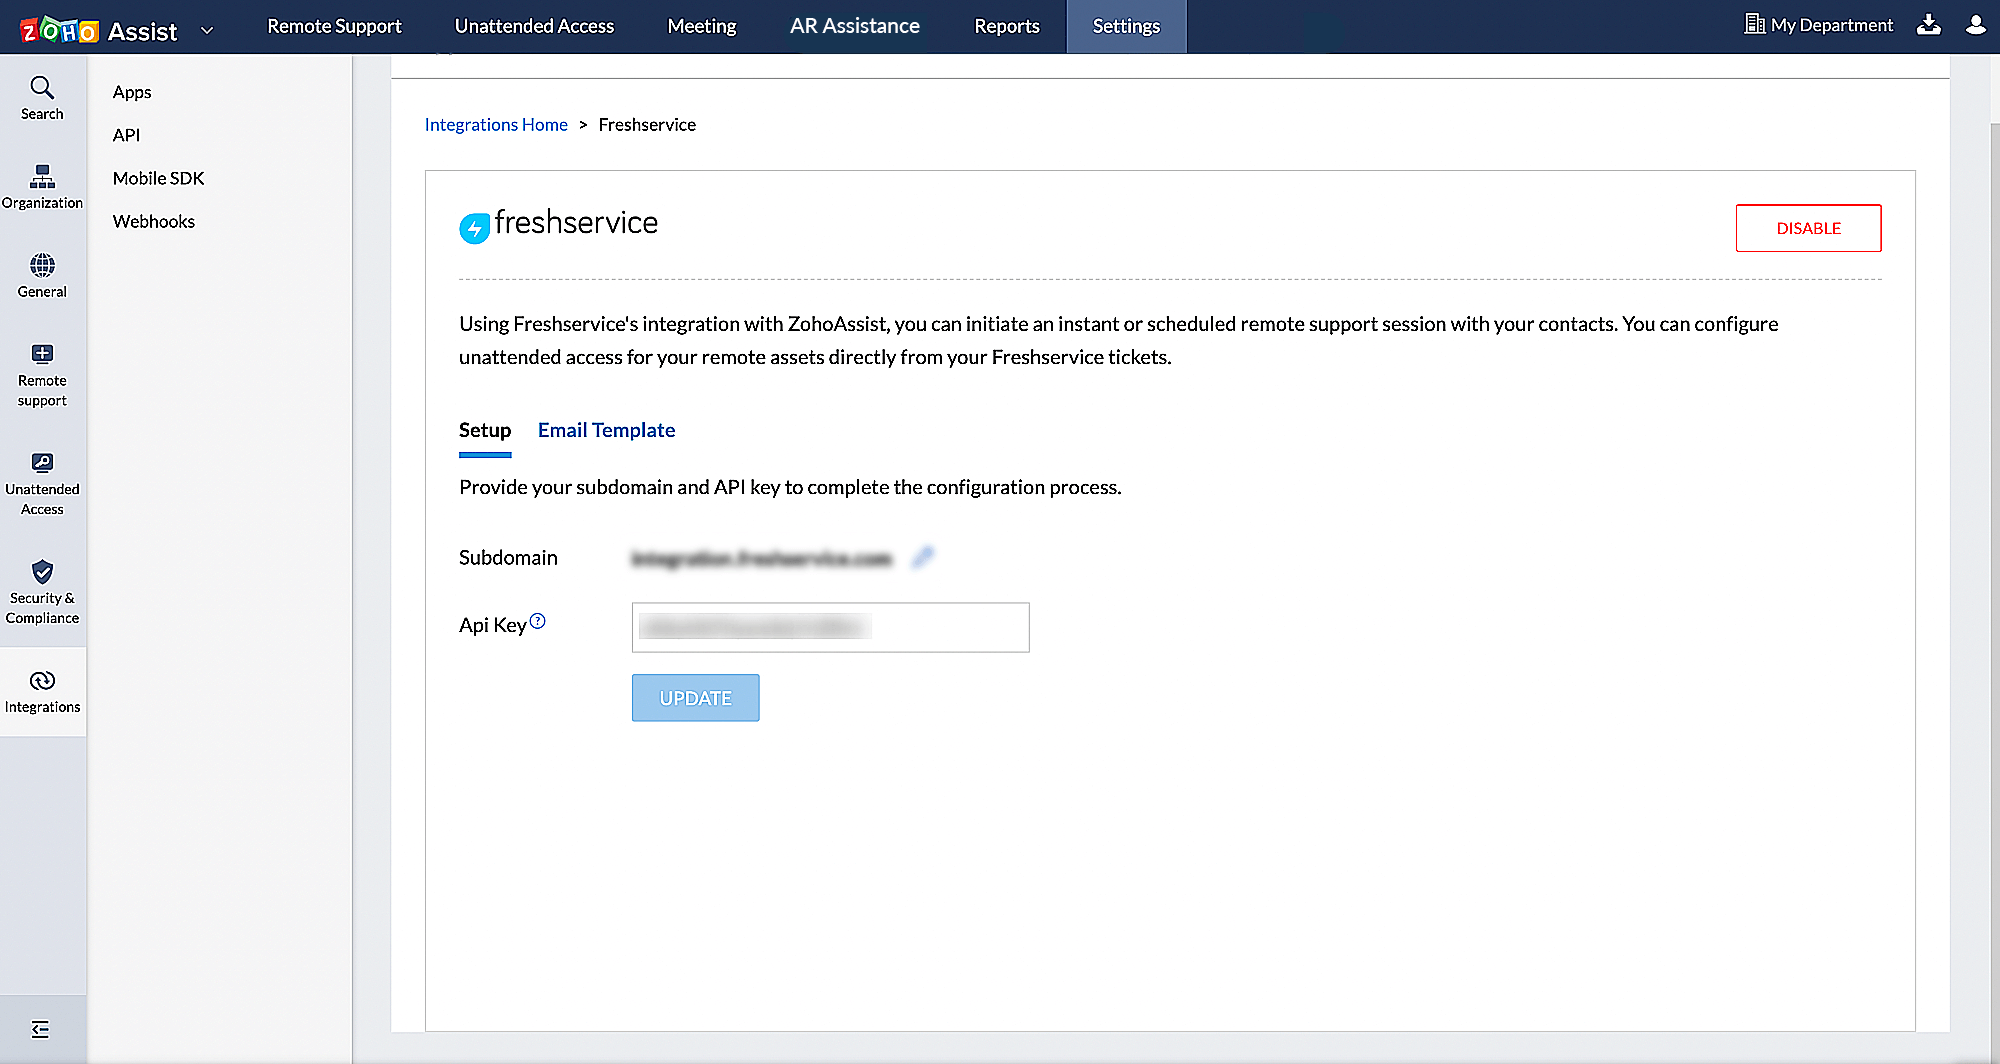
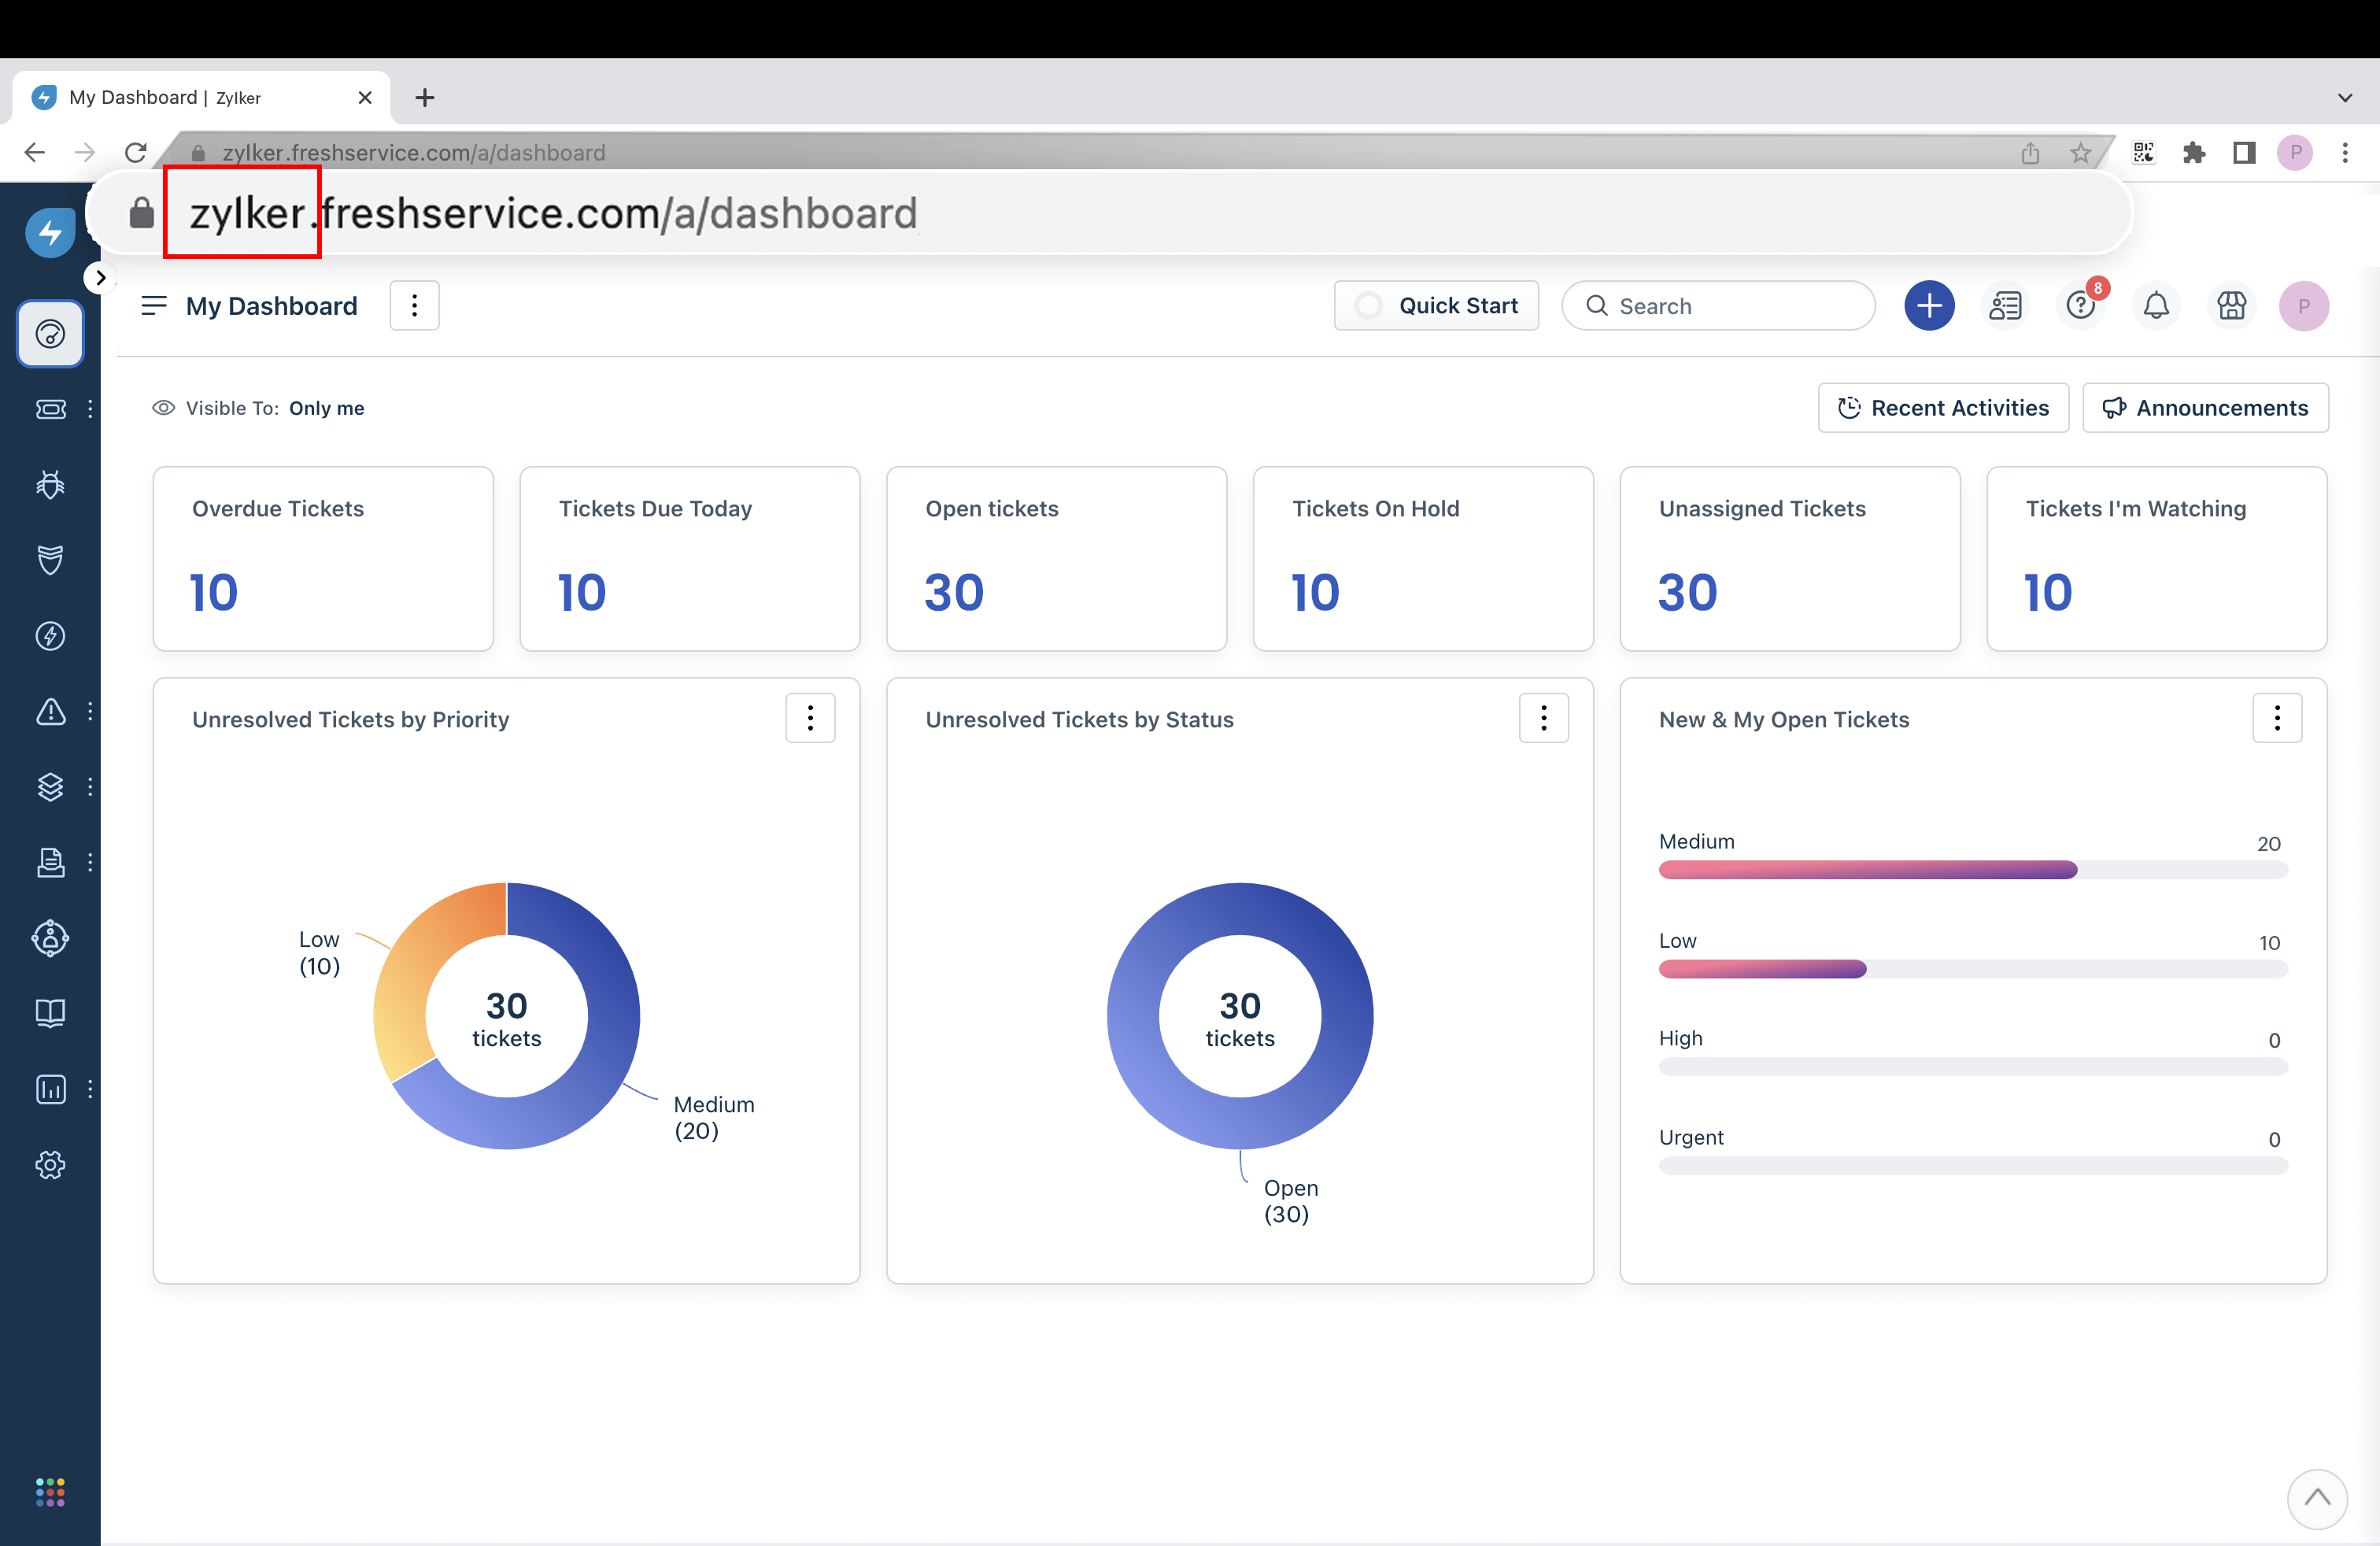
Note: To locate your Freshservice subdomain, log in to your Freshservice account and check the URL. Your subdomain can be identified as the first part of the URL that appears before ".freshservice.com".
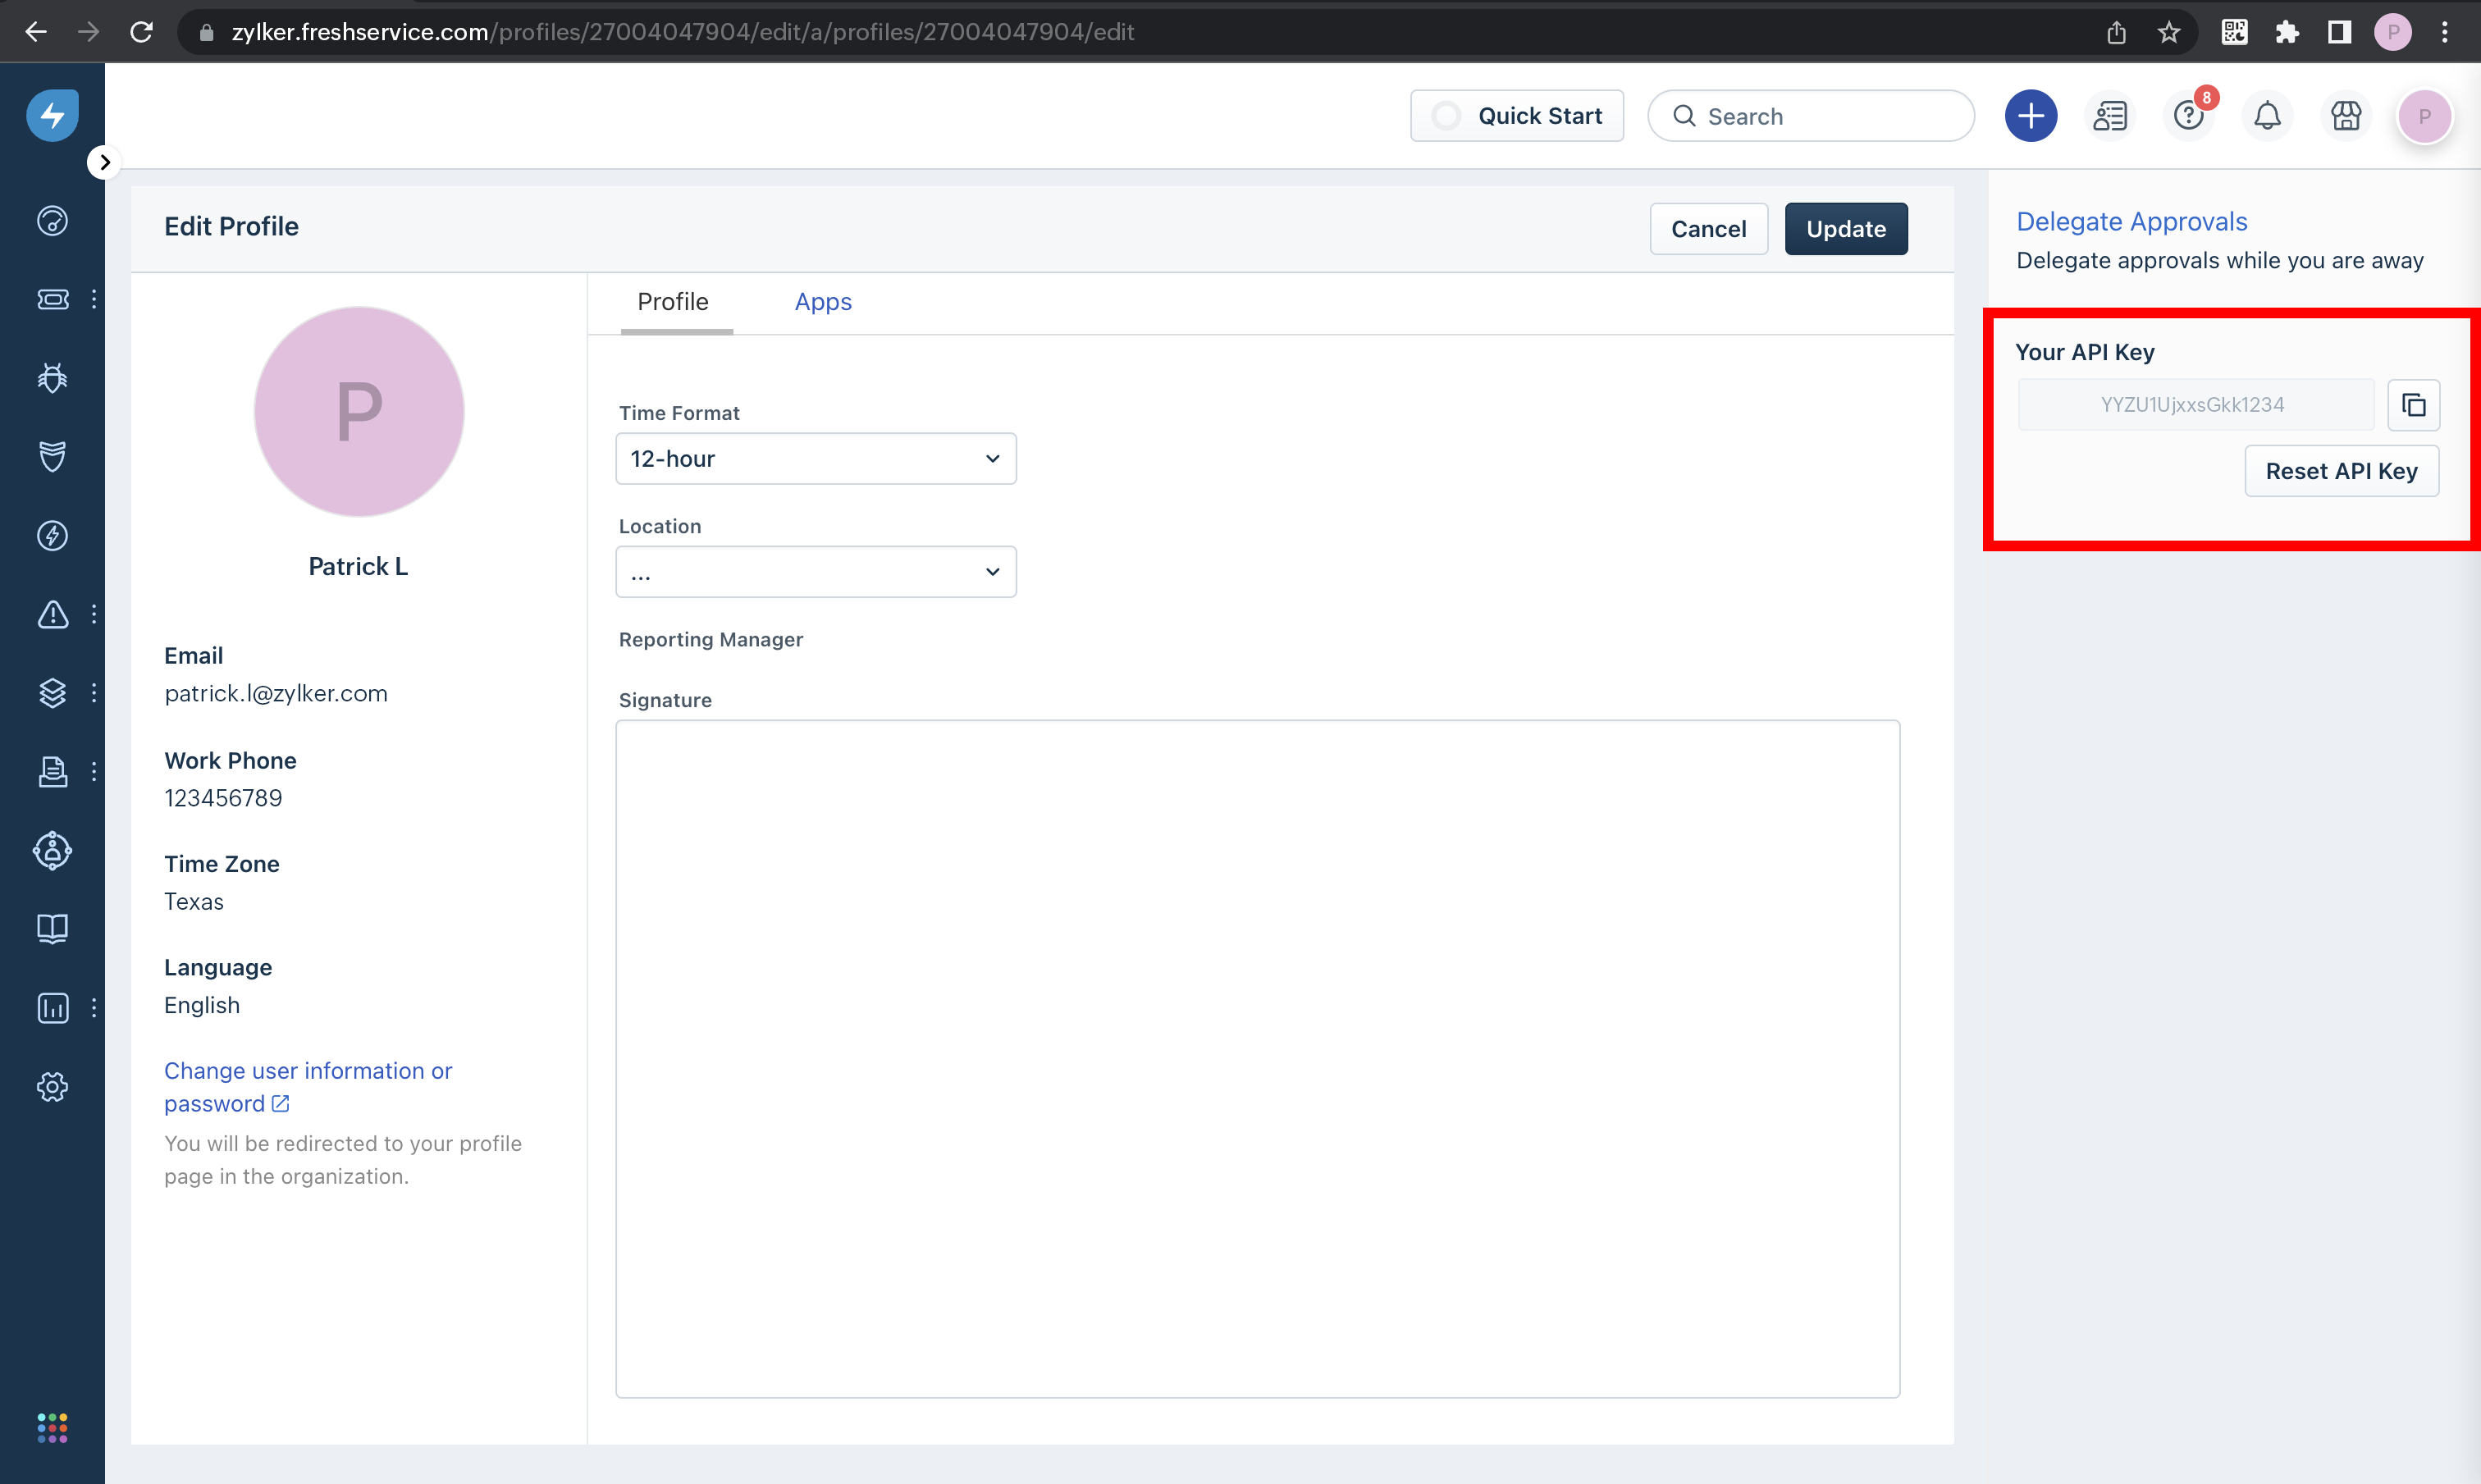
To locate your API key, go to the Profile Settings tab of your Freshservice account.
To install Zoho Assist from Freshservice marketplace:
- Log in to your Freshservice account.
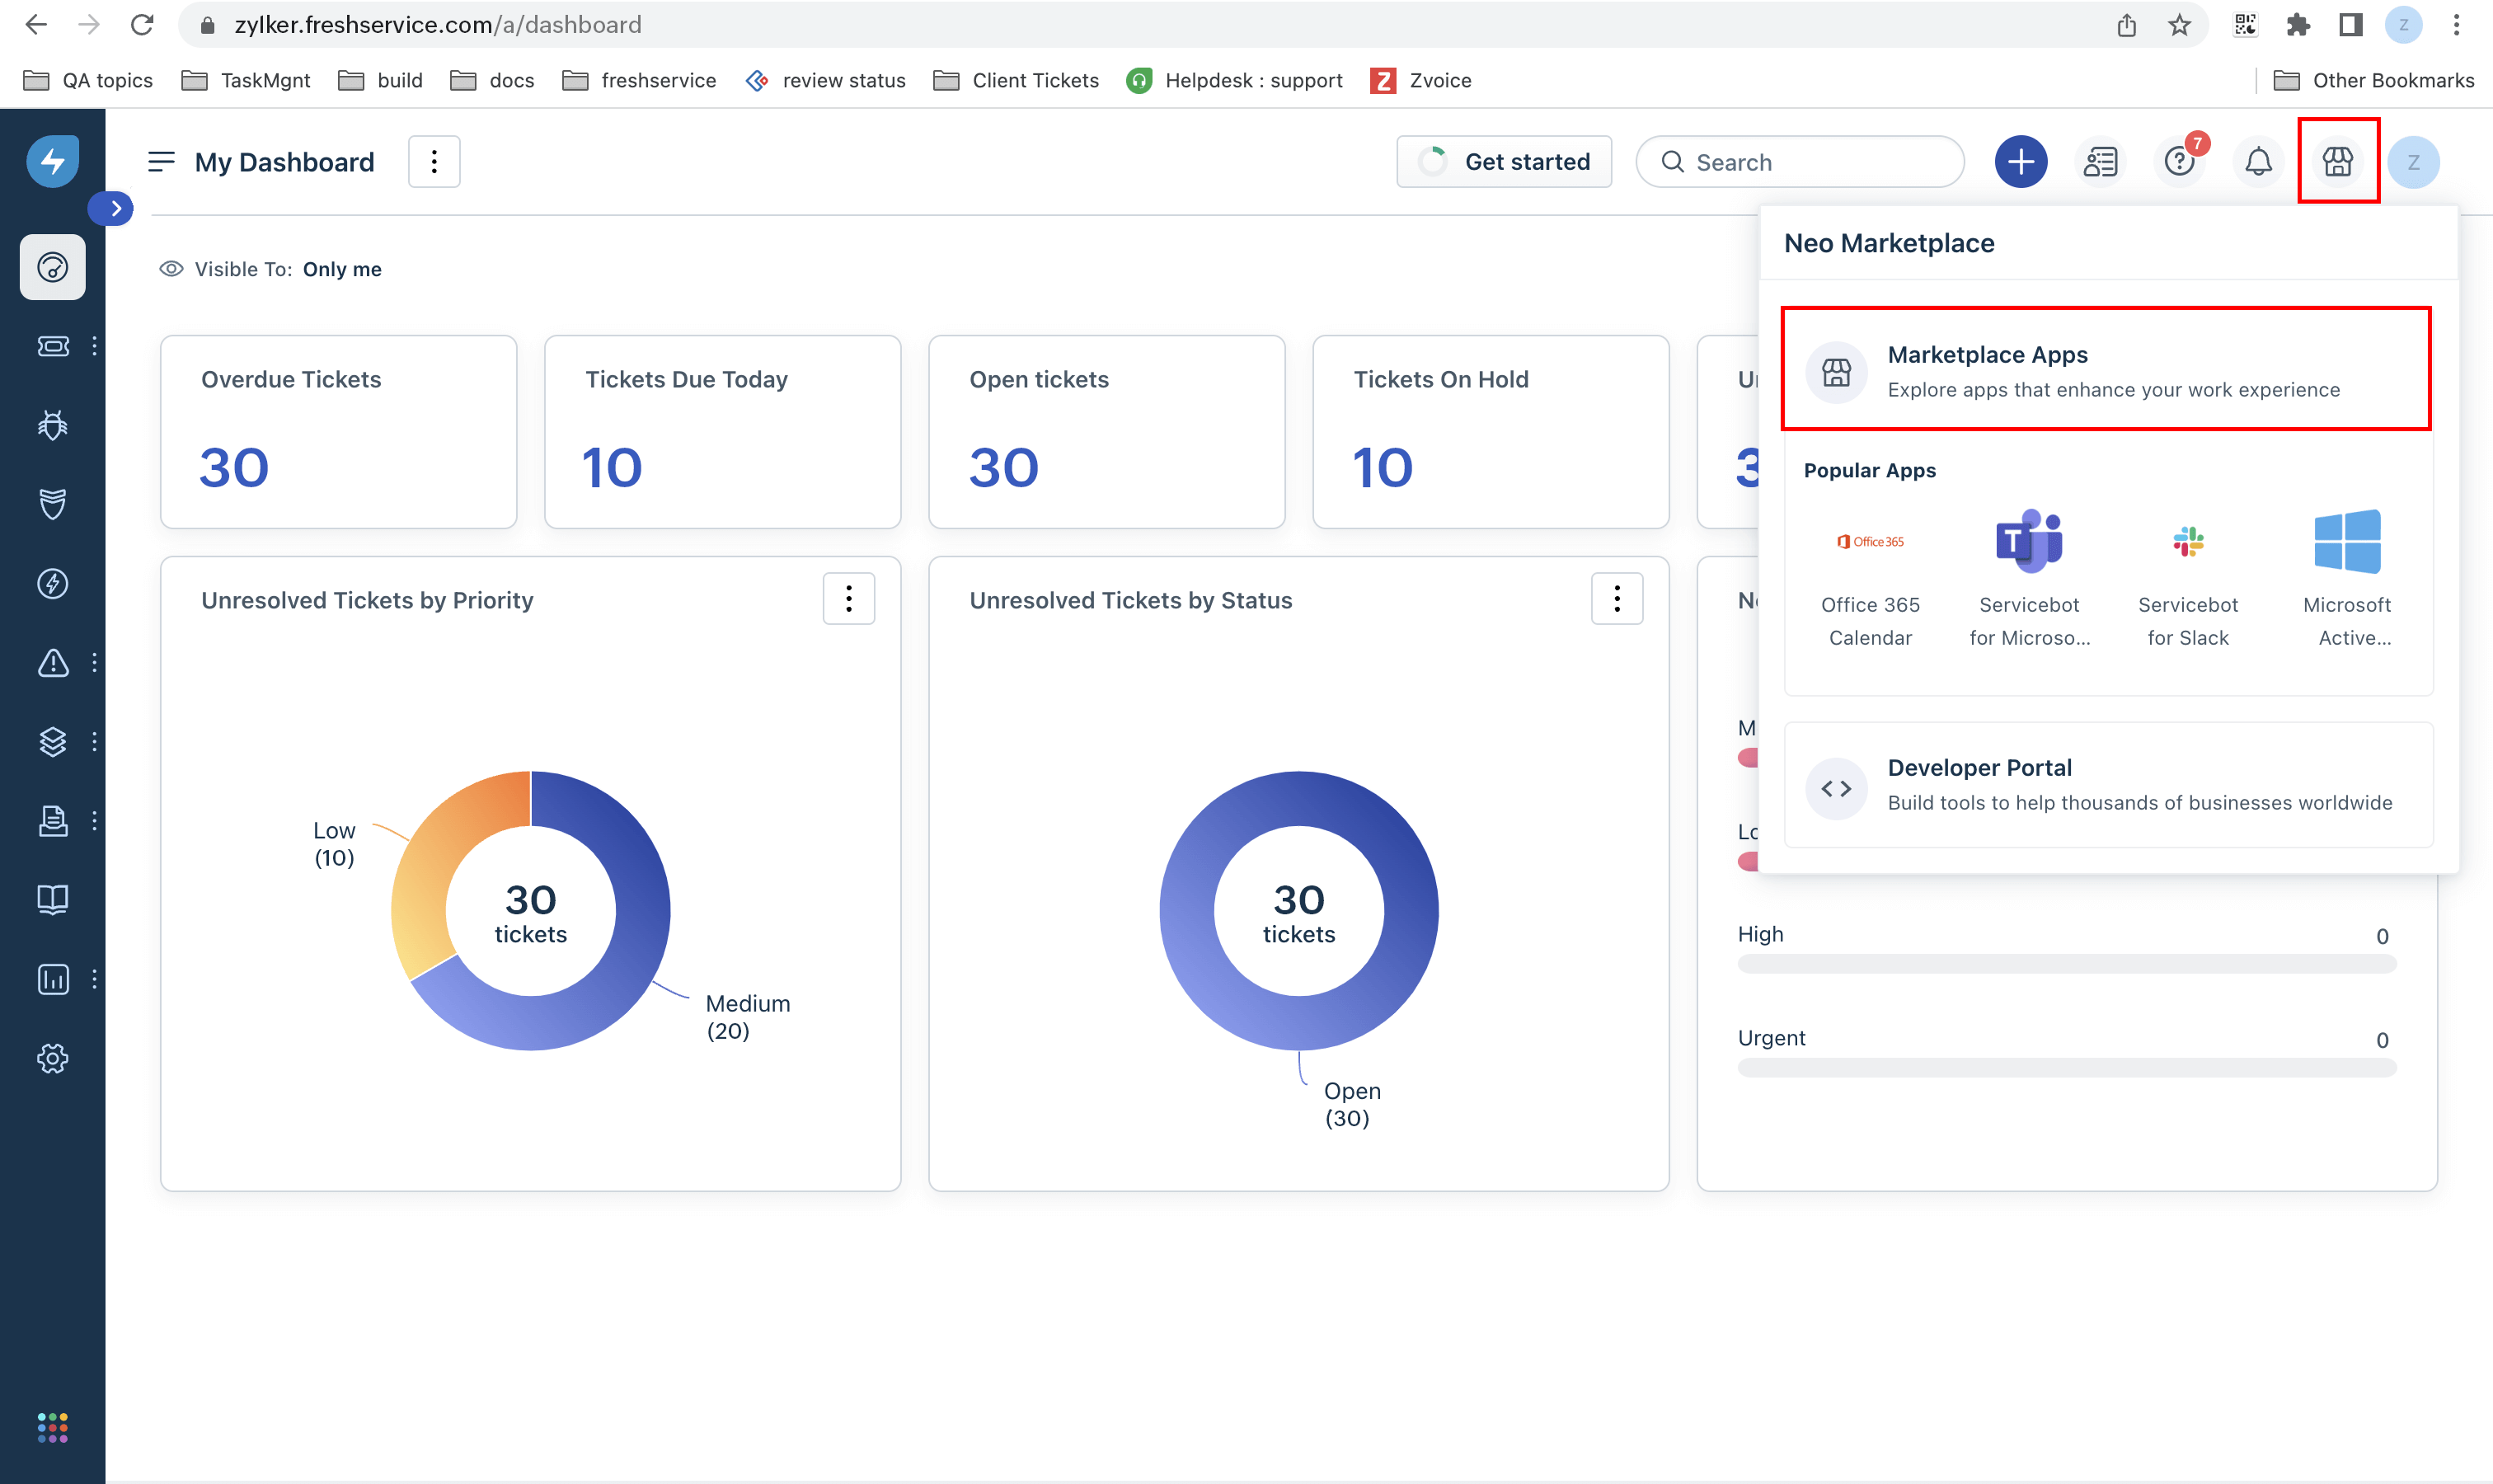
- Click on the Marketplace App icon located in the top-right corner and select Marketplace Apps from the drop menu.
- Click on the Filter by Categories option.
- Choose Agent Productivity from the list of available categories and look for the Zoho Assist app within the list.
- Select the Domain name that you have been using with Zoho Assist and click Install to complete the integration process.

To start or schedule a remote support session:
- Open the ticket you are working on. Log in using Zoho Assist credentials.

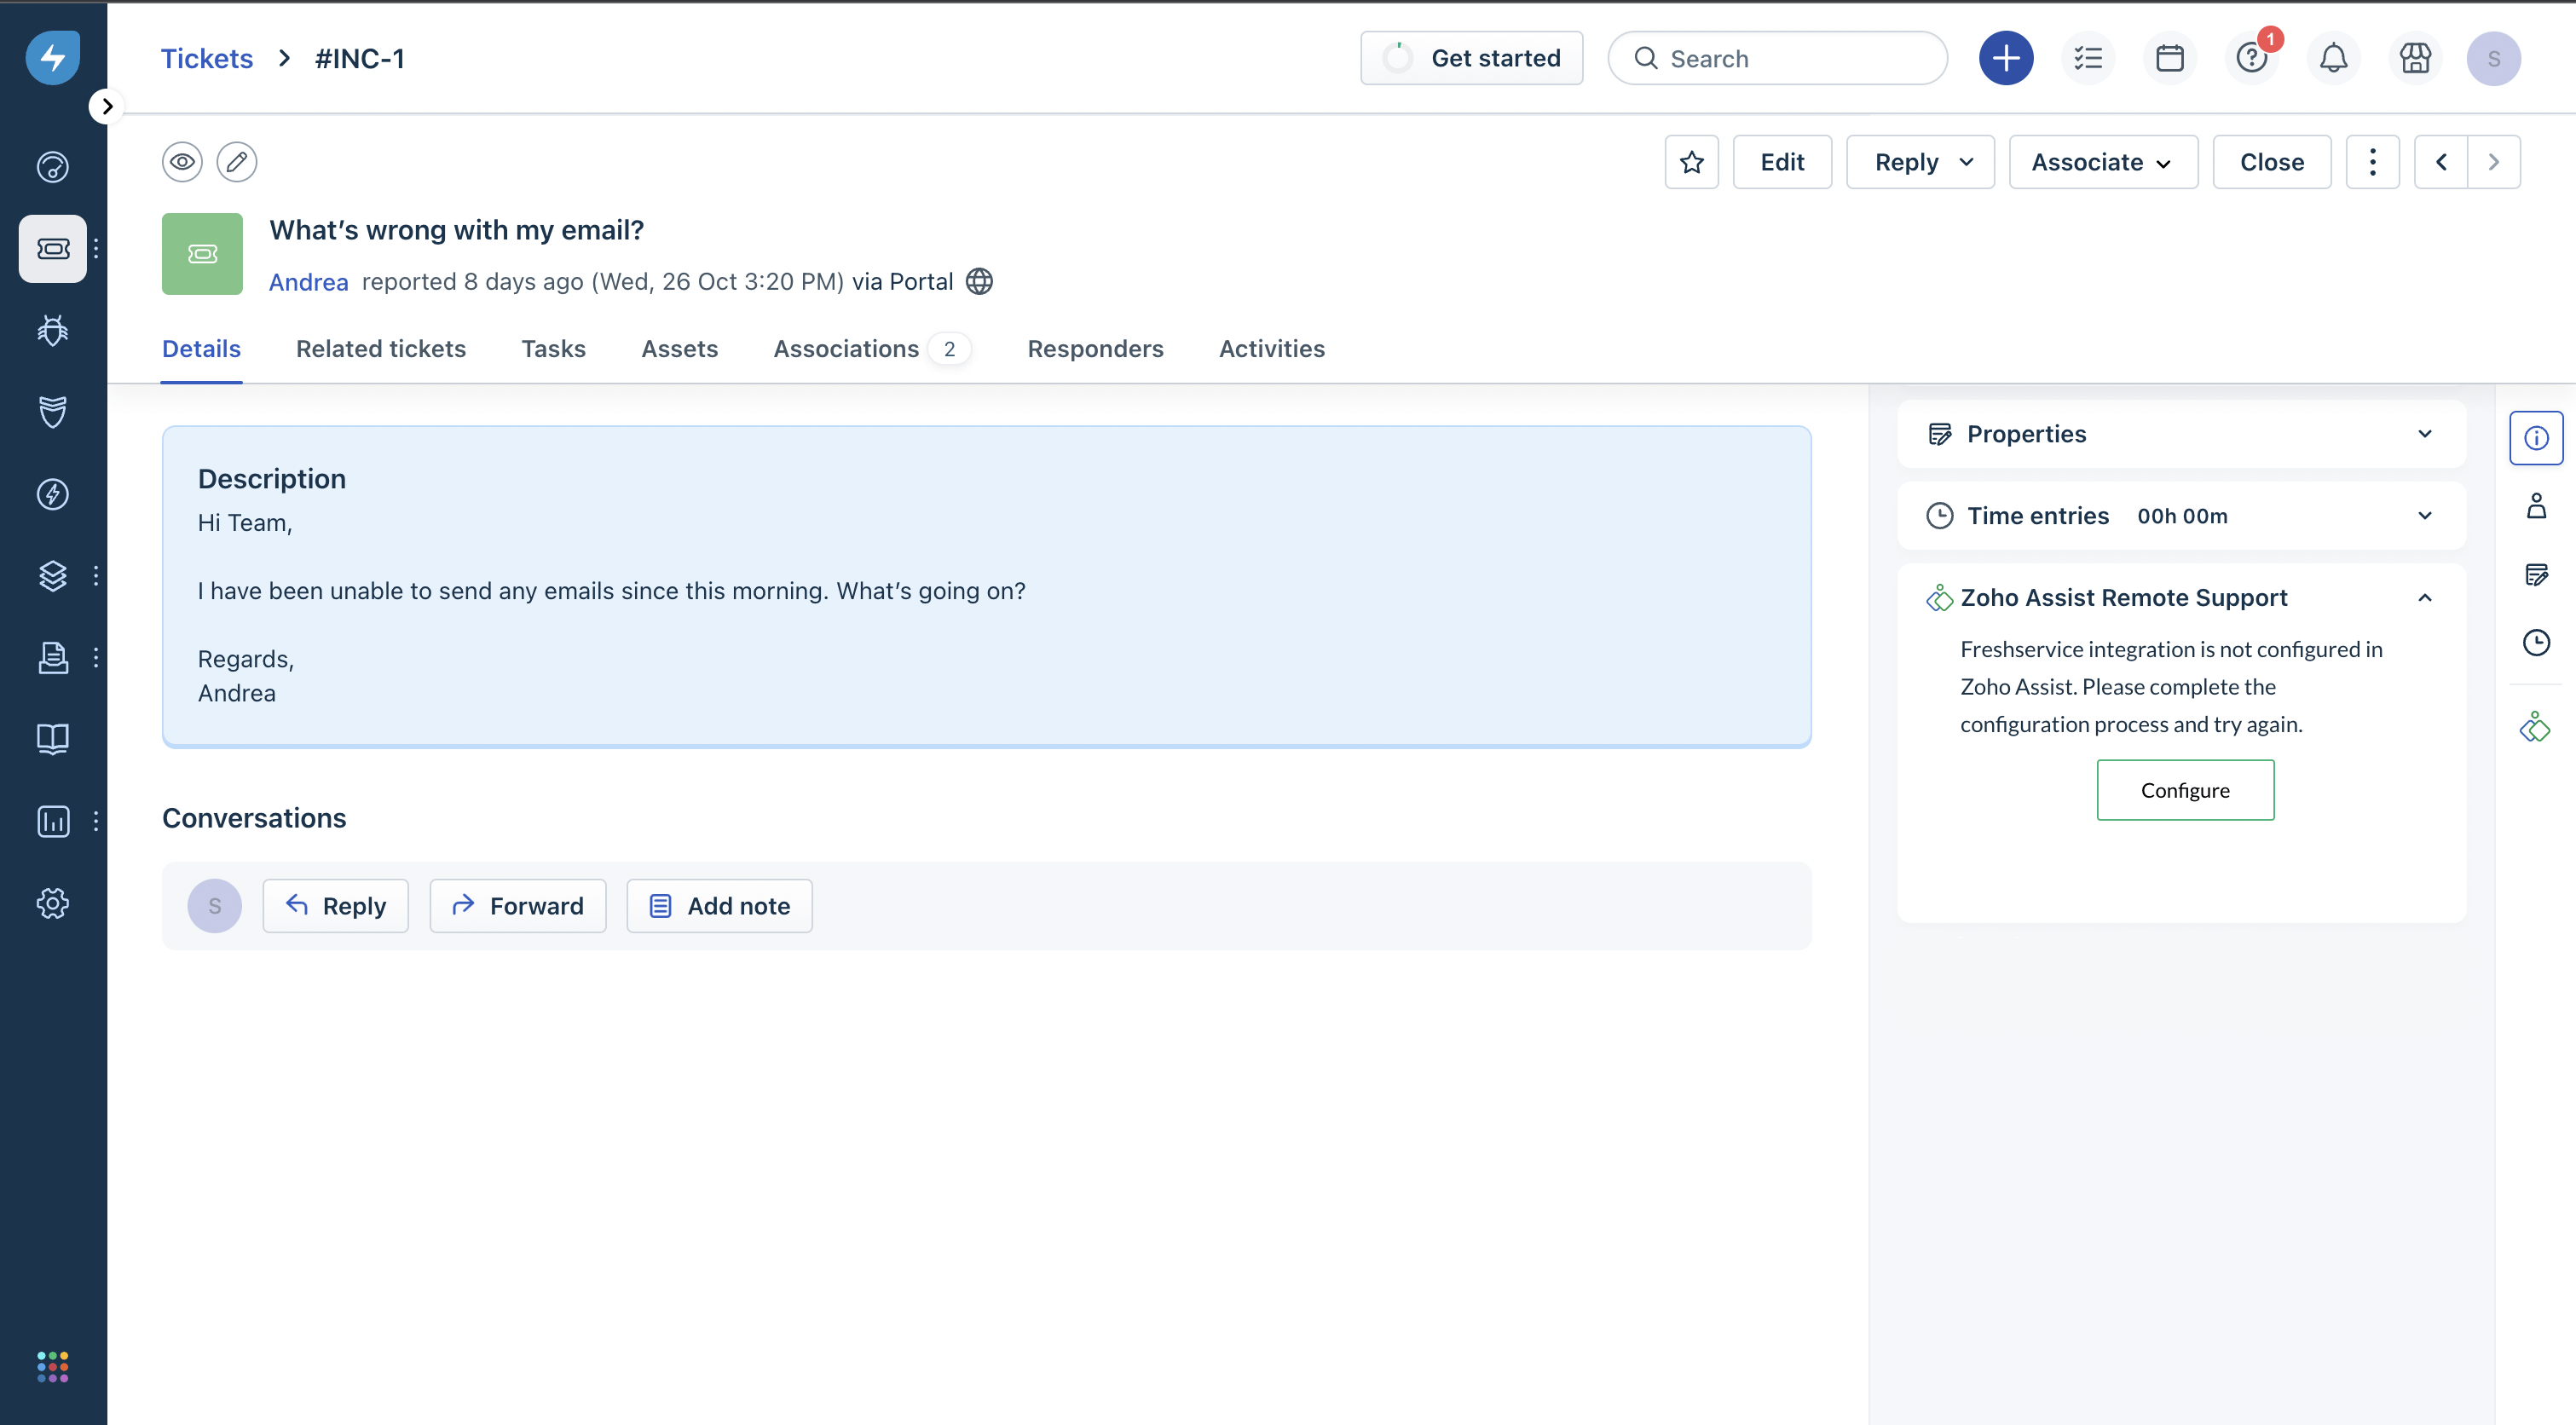
- Once logged in, you can also configure Zoho Assist from the Freshservice marketplace to initiate a remote session.
- Click START NOW or SCHEDULE in the ticket menu bar in the right pane to initiate an instant remote support session or a scheduled remote support session respectively.
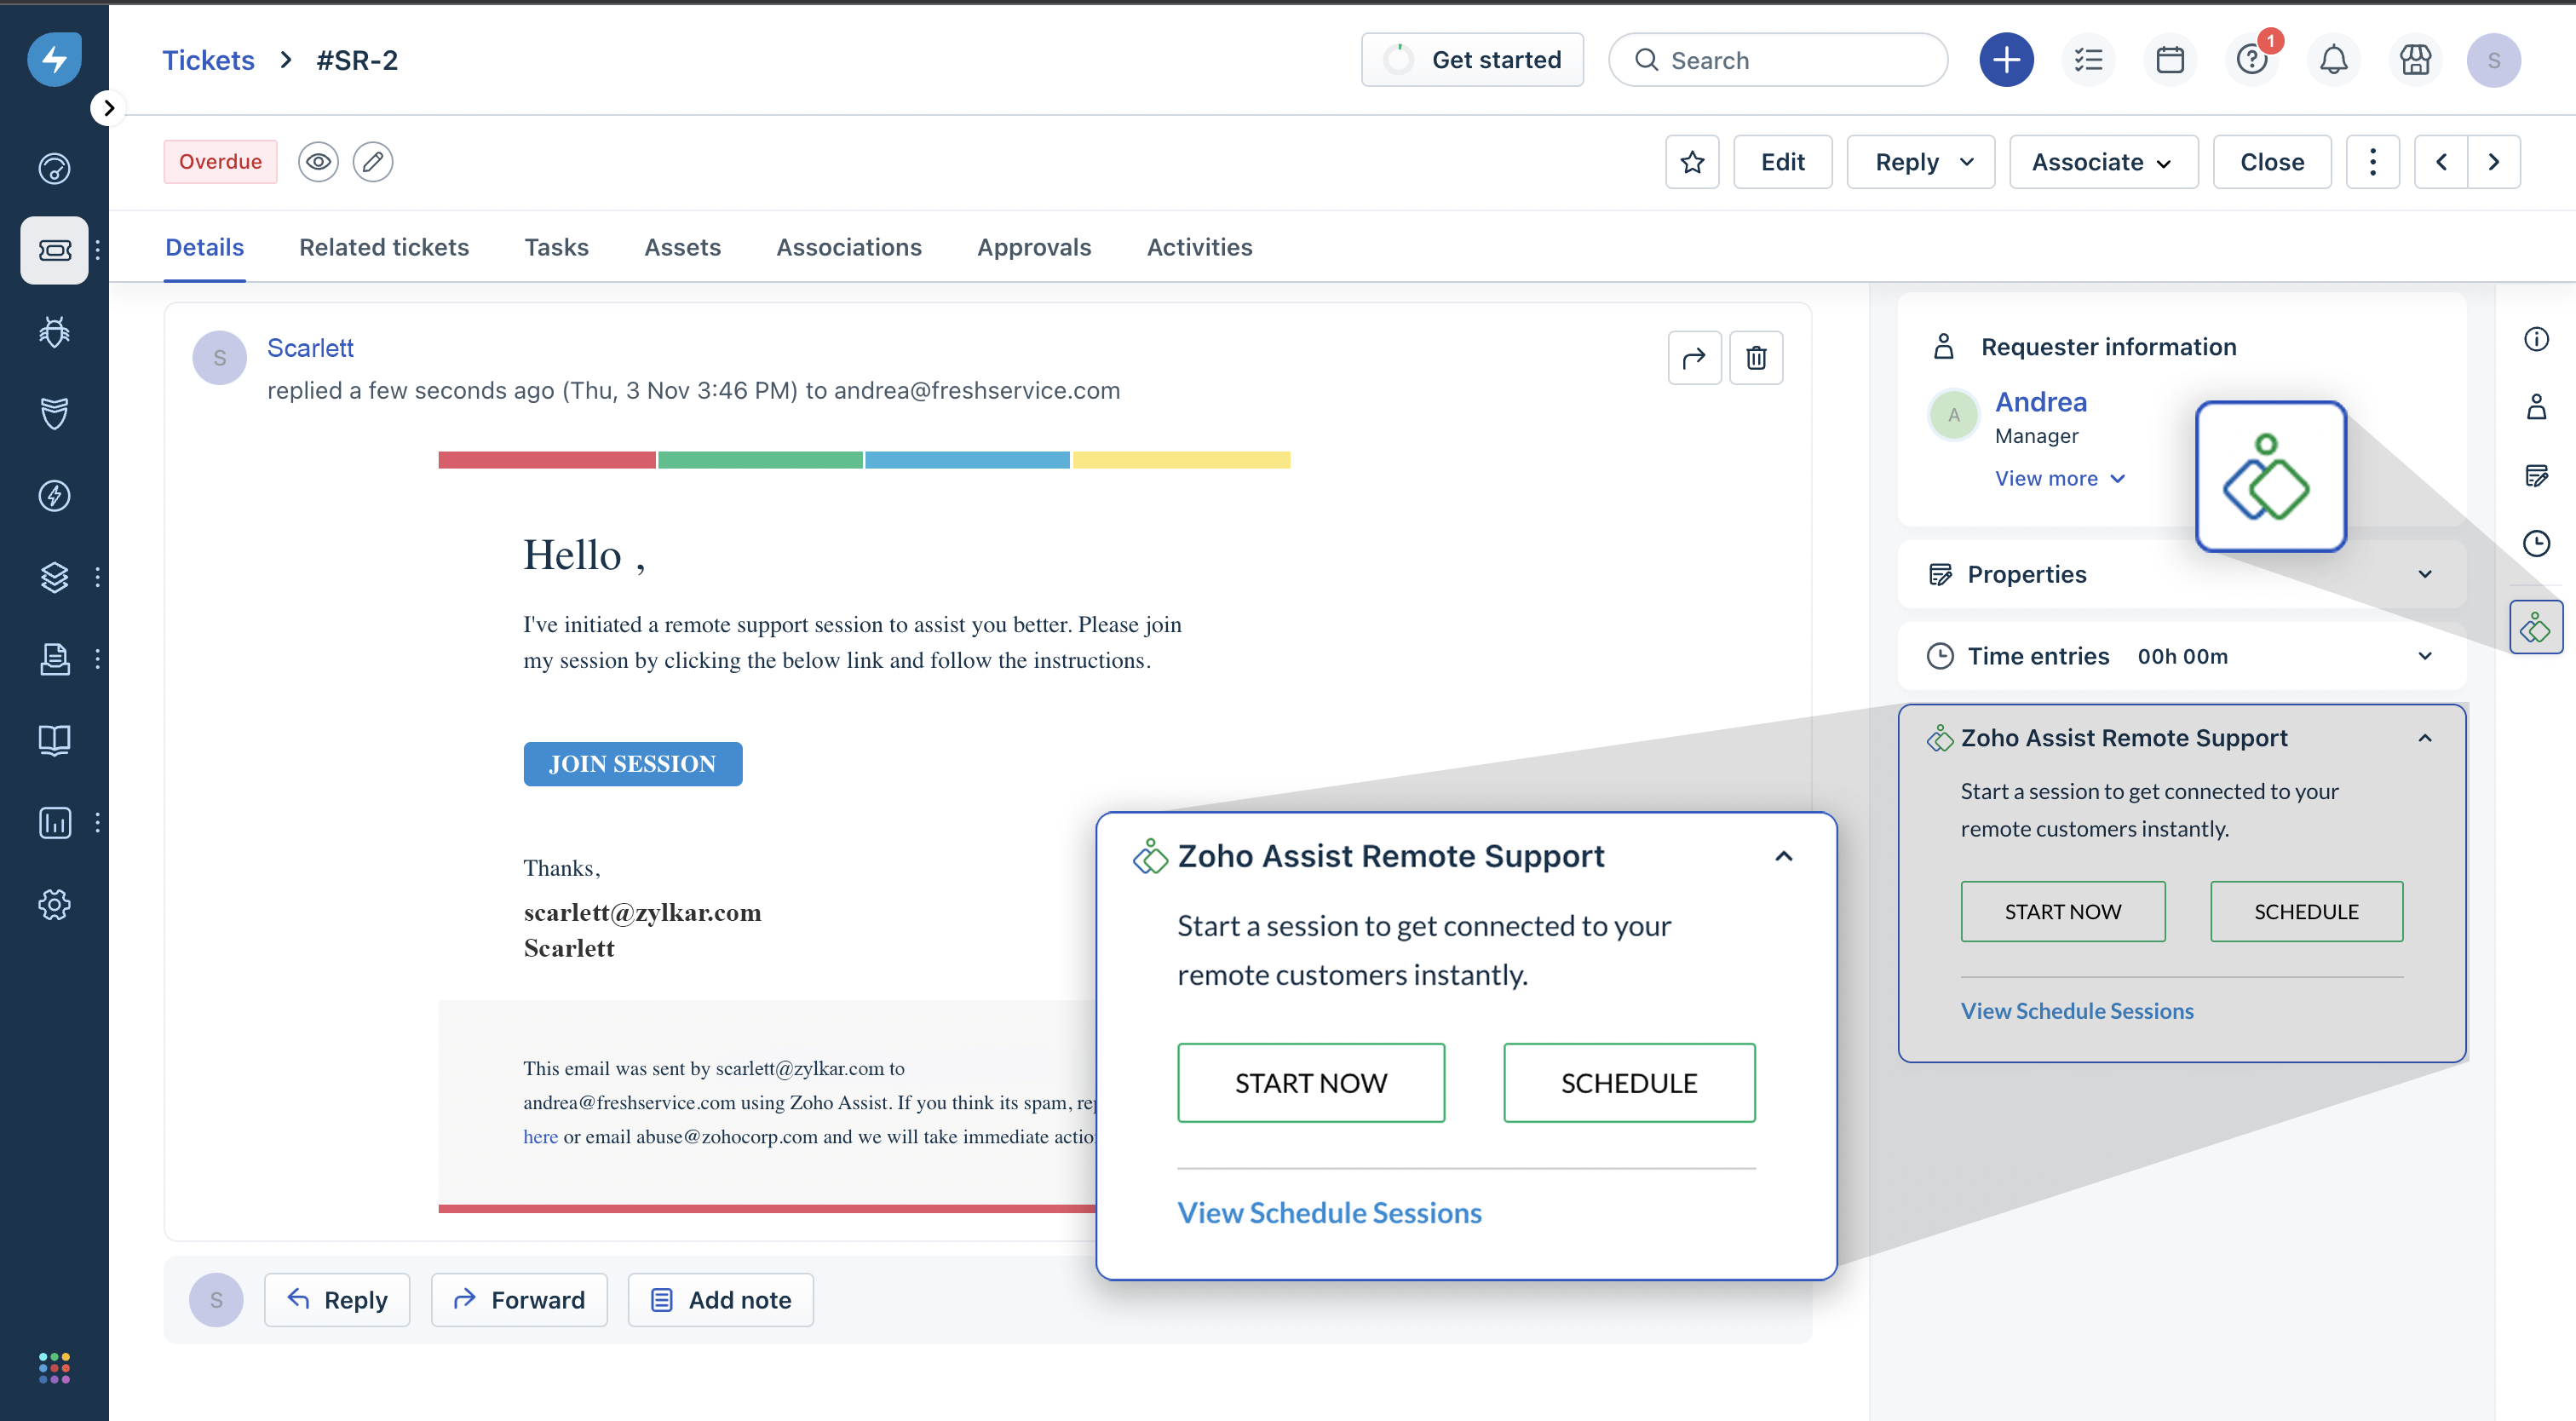
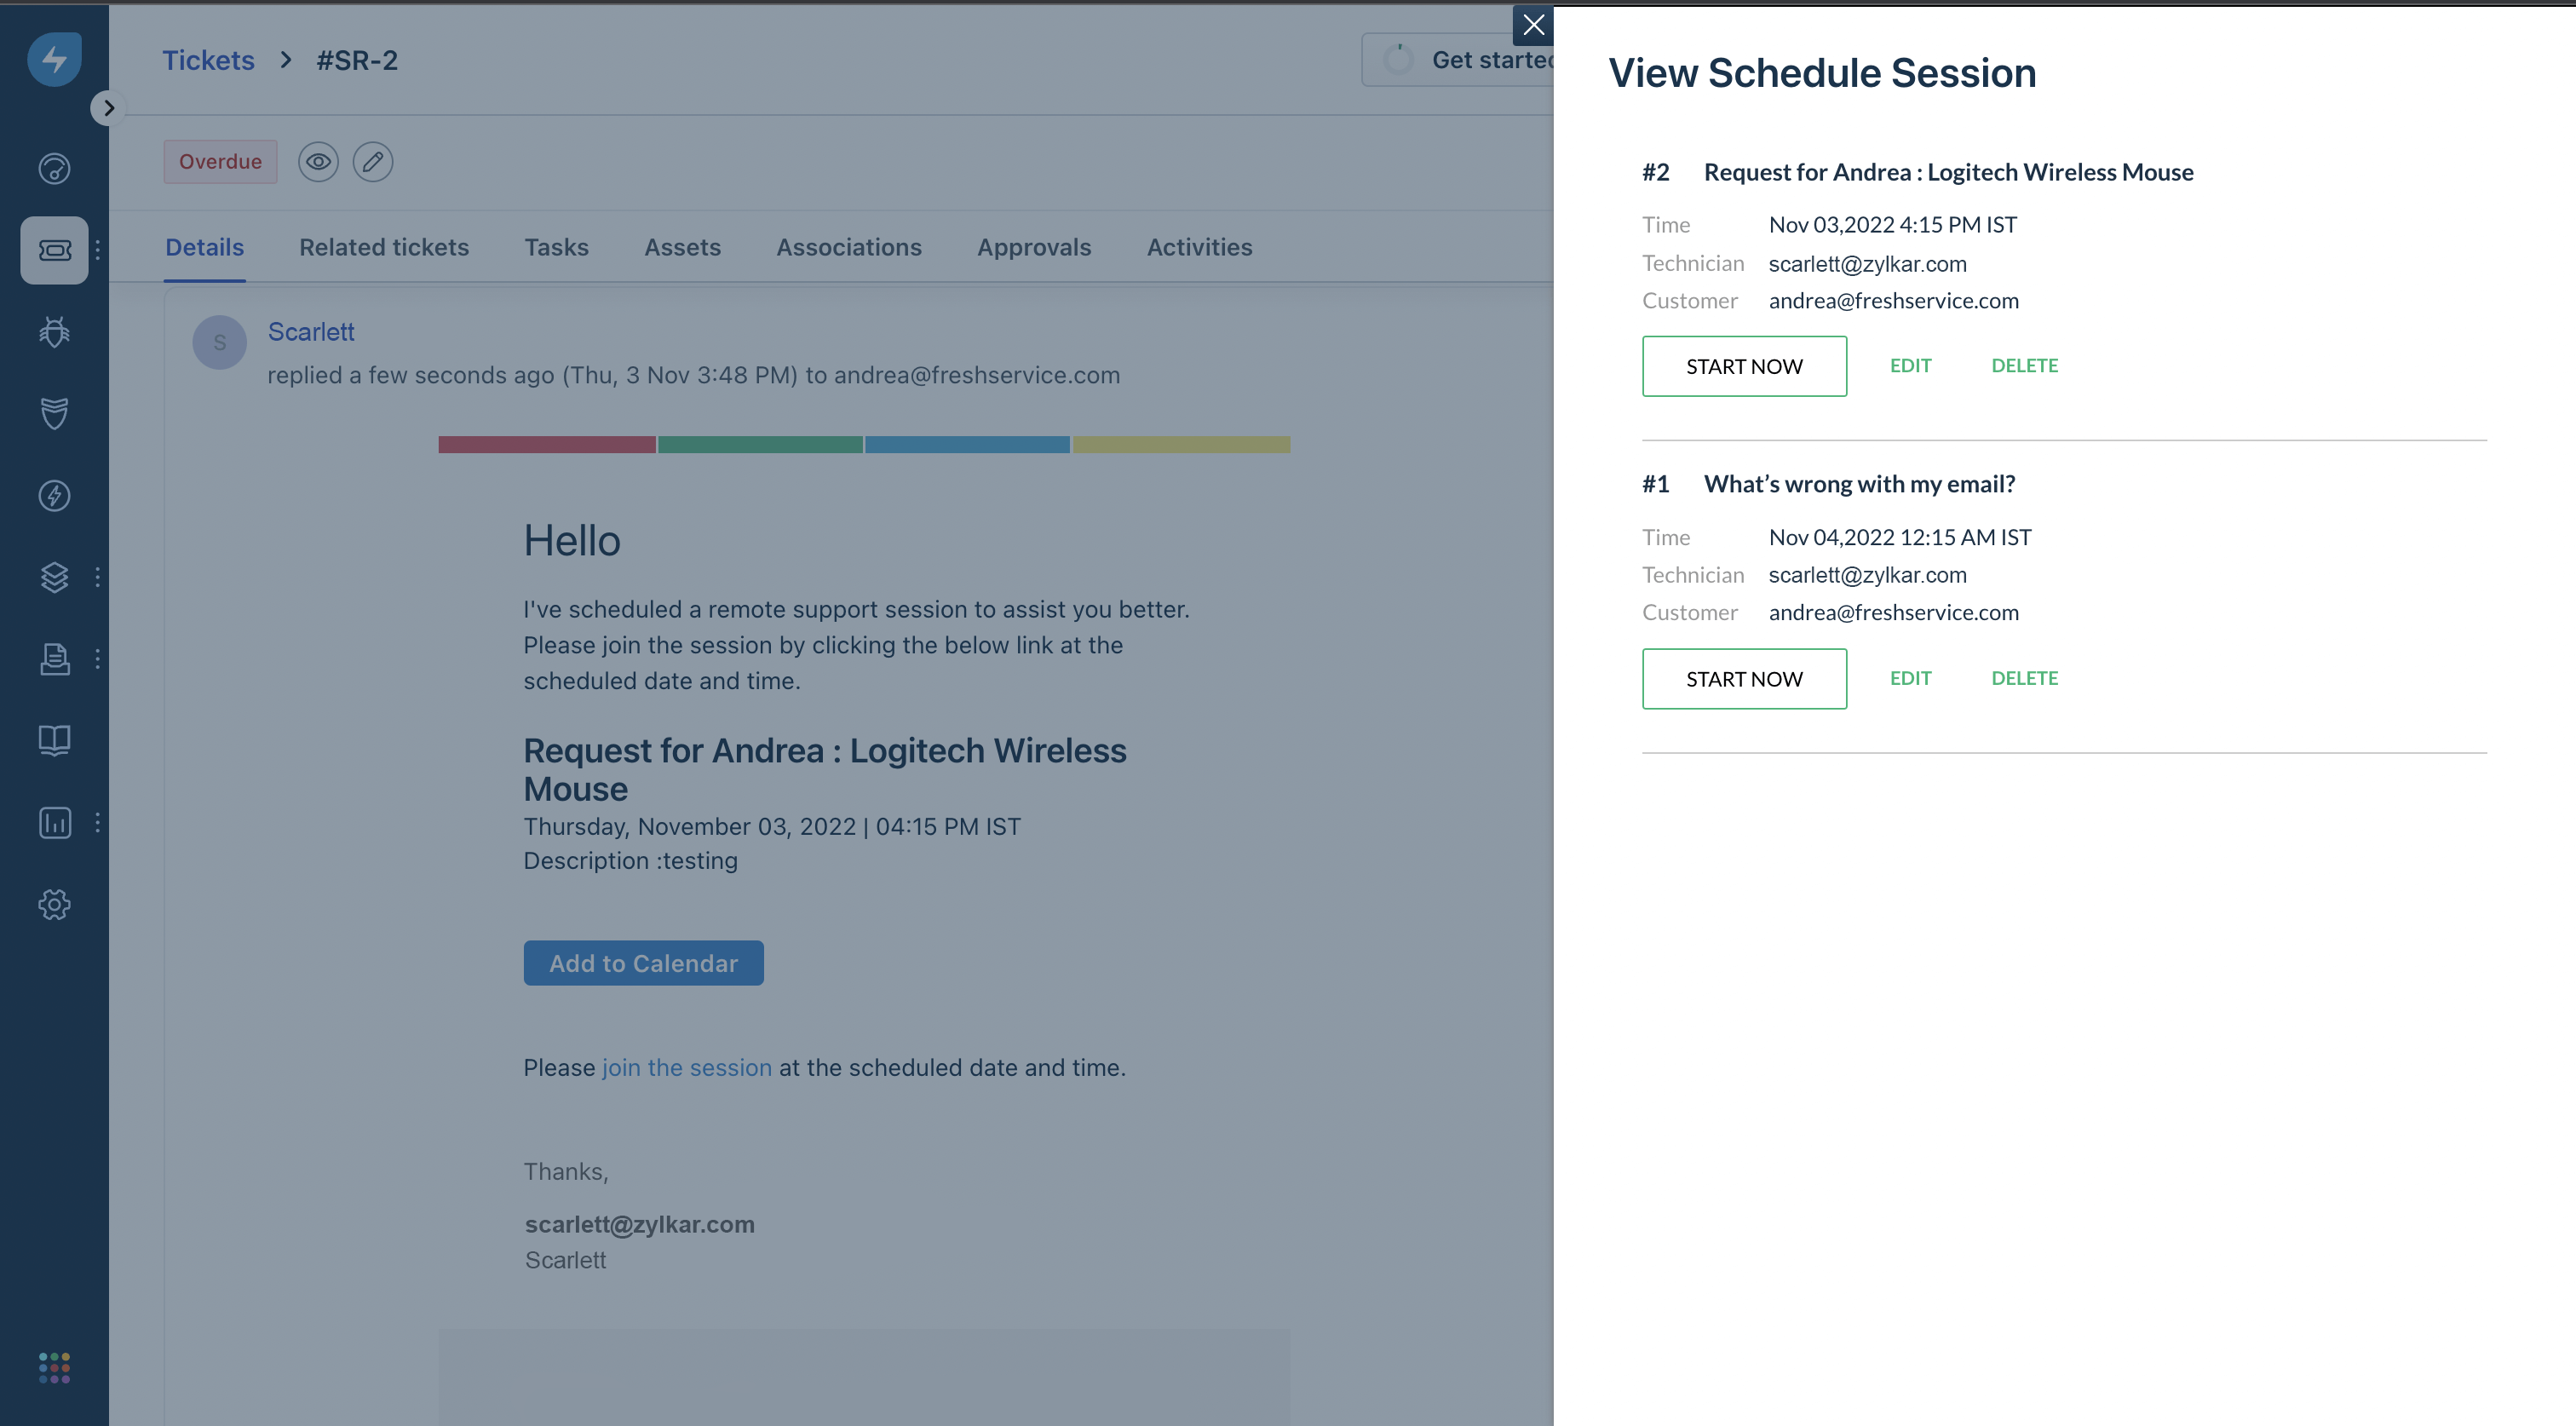
- The details of the scheduled session will be added as a comment below the particular service request. You can click on the comment to start the scheduled session anytime.
- To reschedule a session, click View Scheduled Session, then click EDIT below the session that needs to be rescheduled.
To update the Ticket Status
Once the remote support session ends, a dialog box will open. You can update the ticket status from the drop-down.
To Add notes and access the session recording
You can also add notes in the space provided and make it public by clicking on the checkbox beside Make public.
Remote sessions can also be recorded by enabling Session Recording feature available in Zoho Assist. These recordings and notes can be used by the technician for future reference.

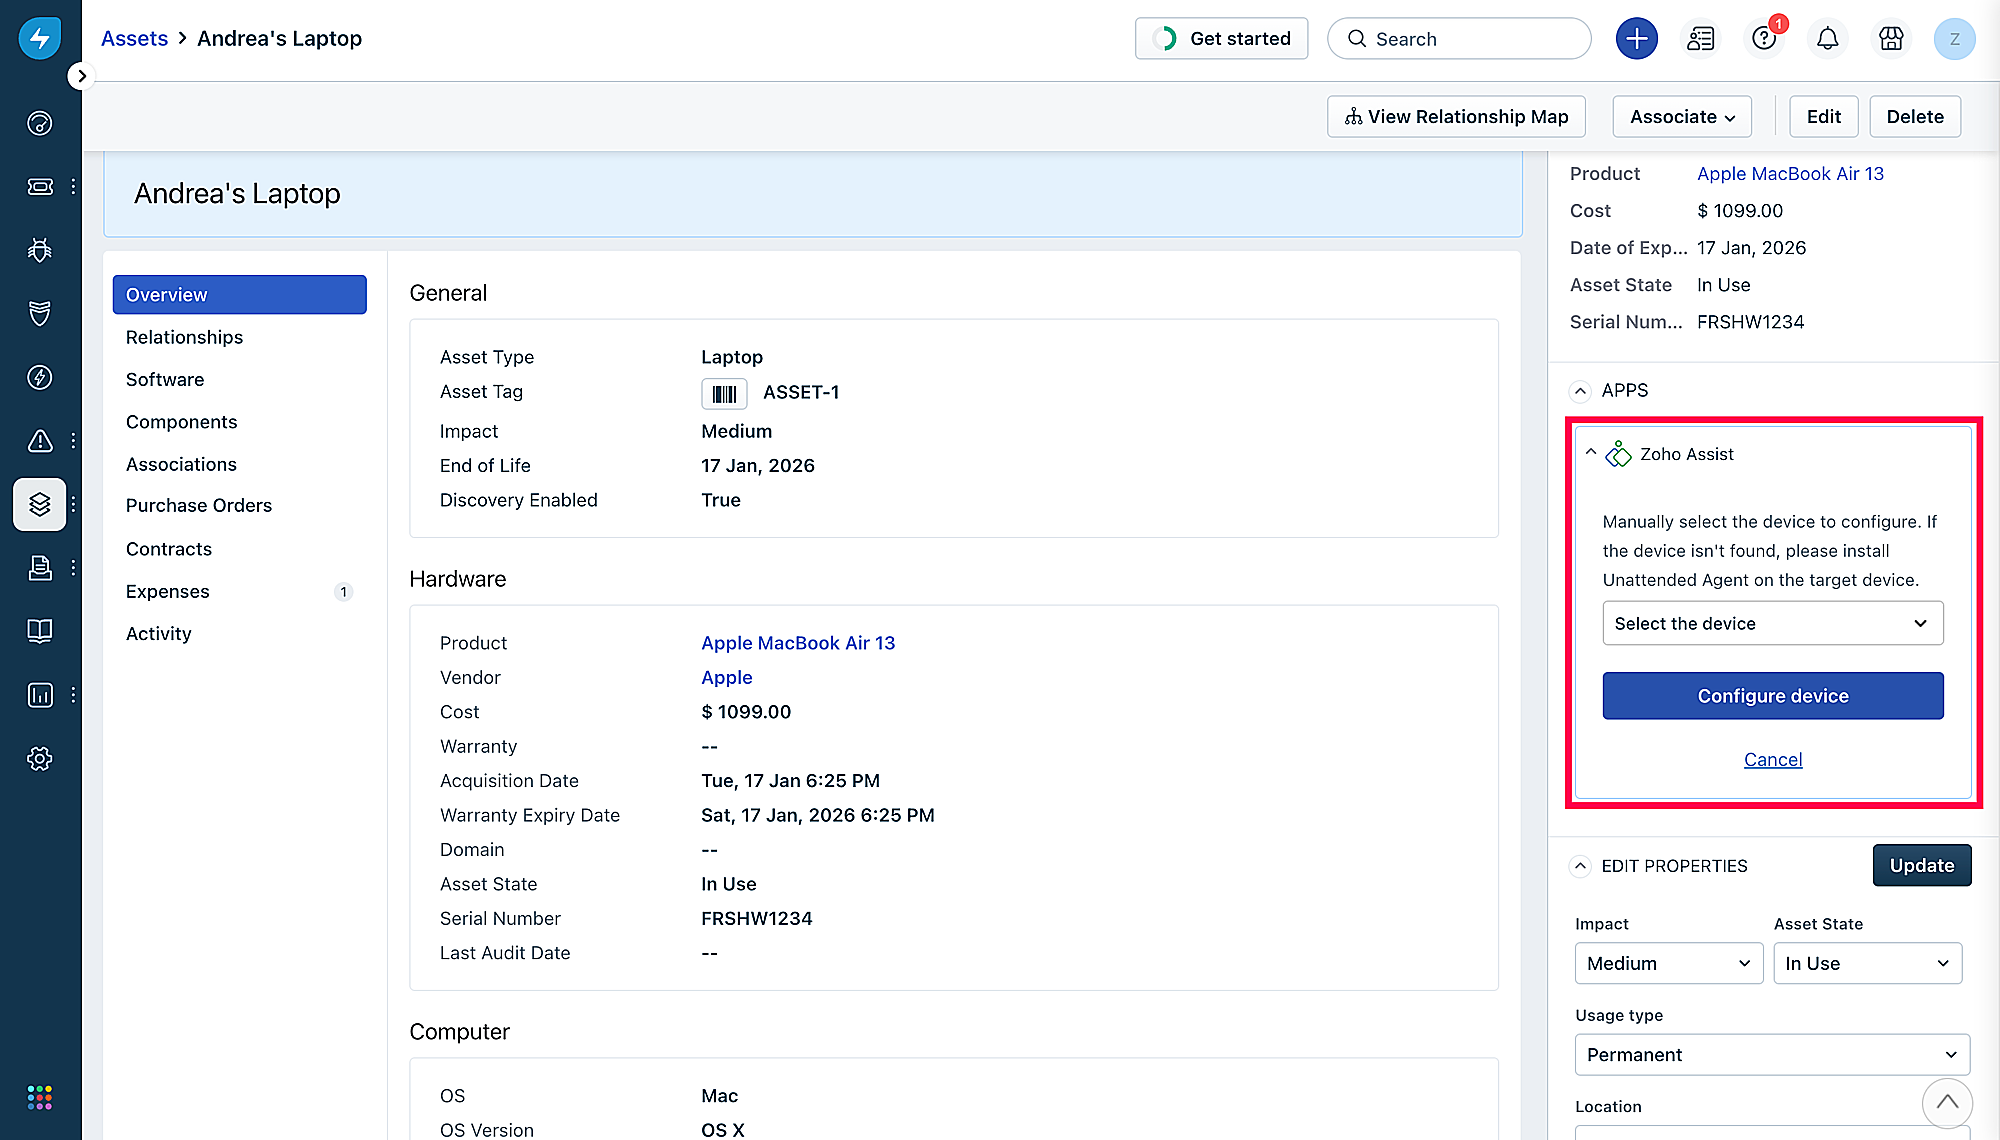
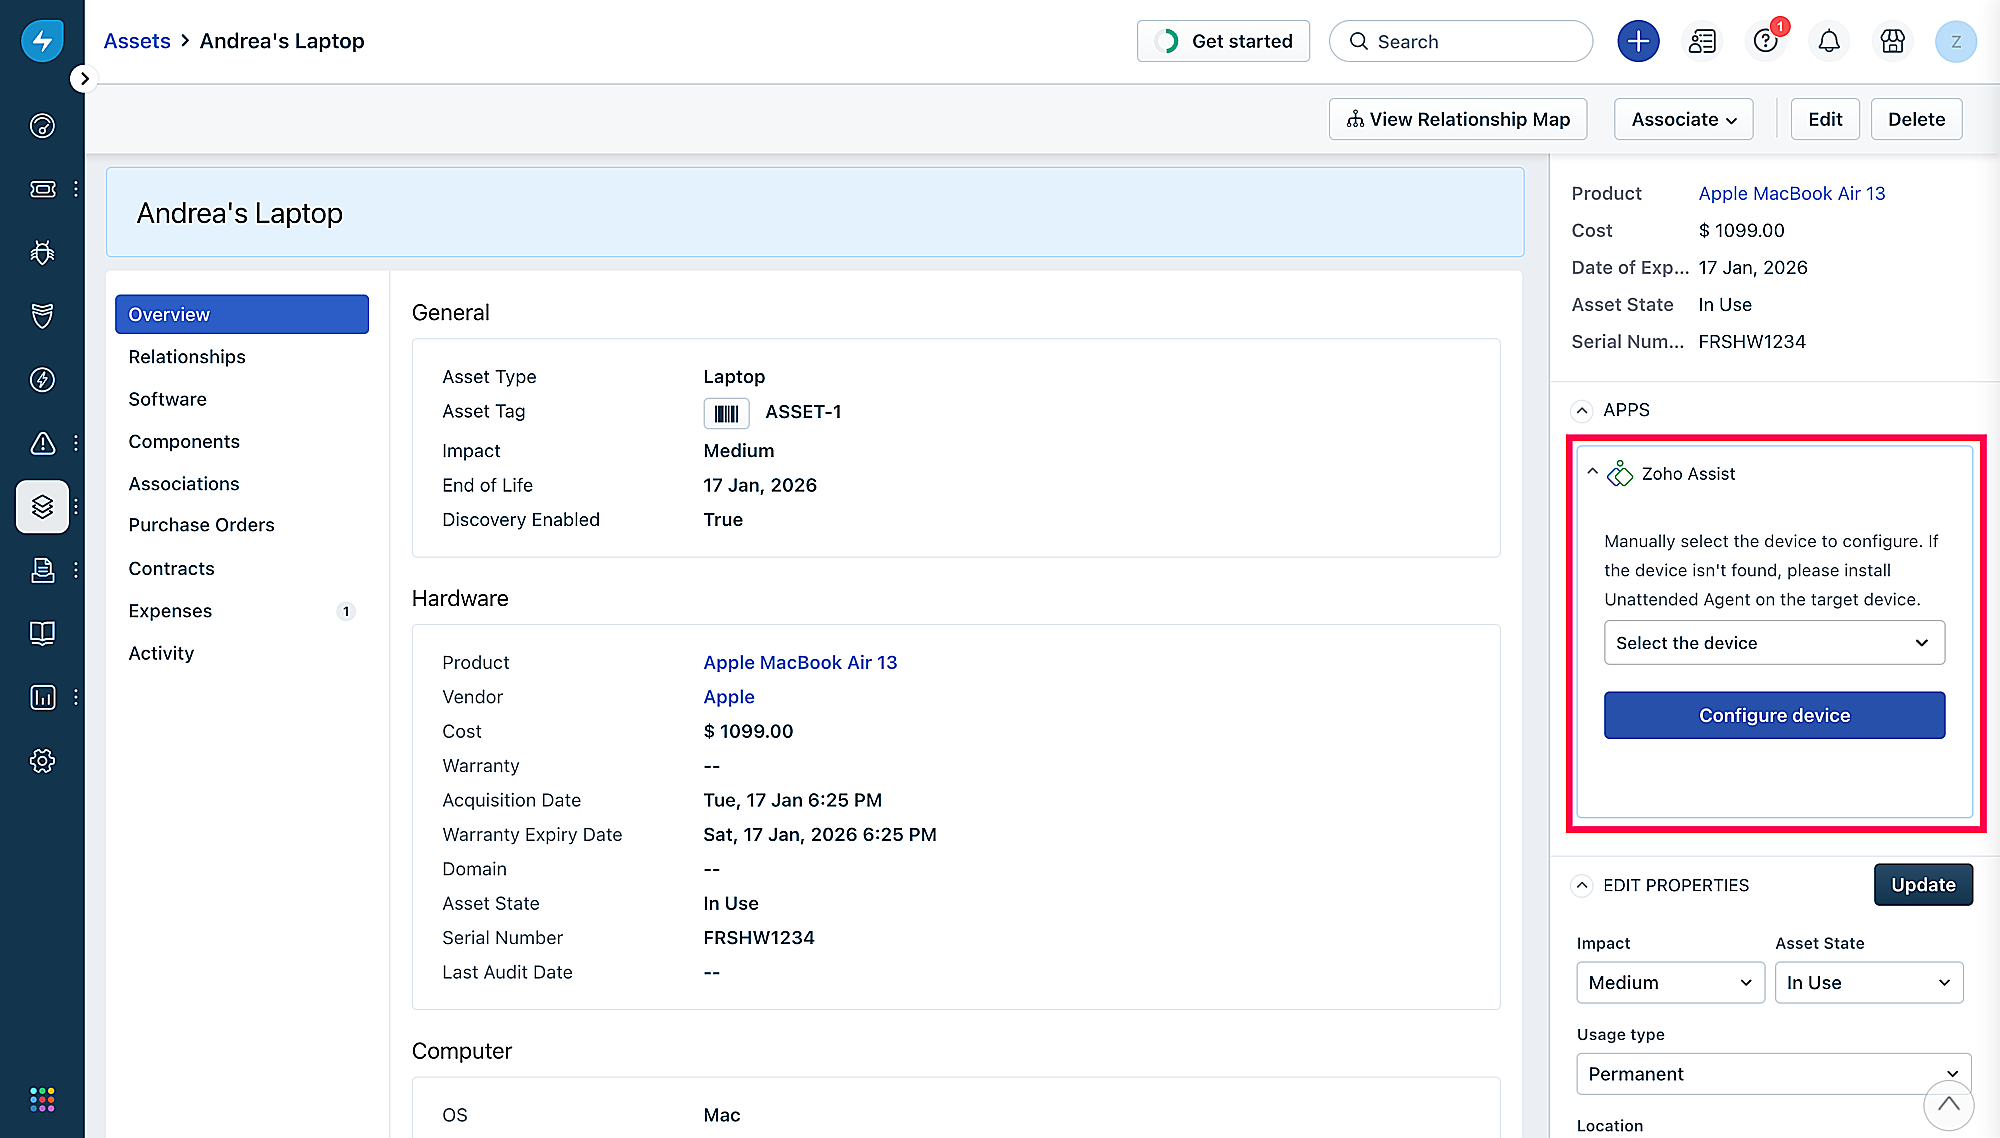
To remote access a device:
- Open Assets and log in using Zoho Assist credentials.
- Once logged in, you can configure devices from the Freshservice account to initiate a remote access session.
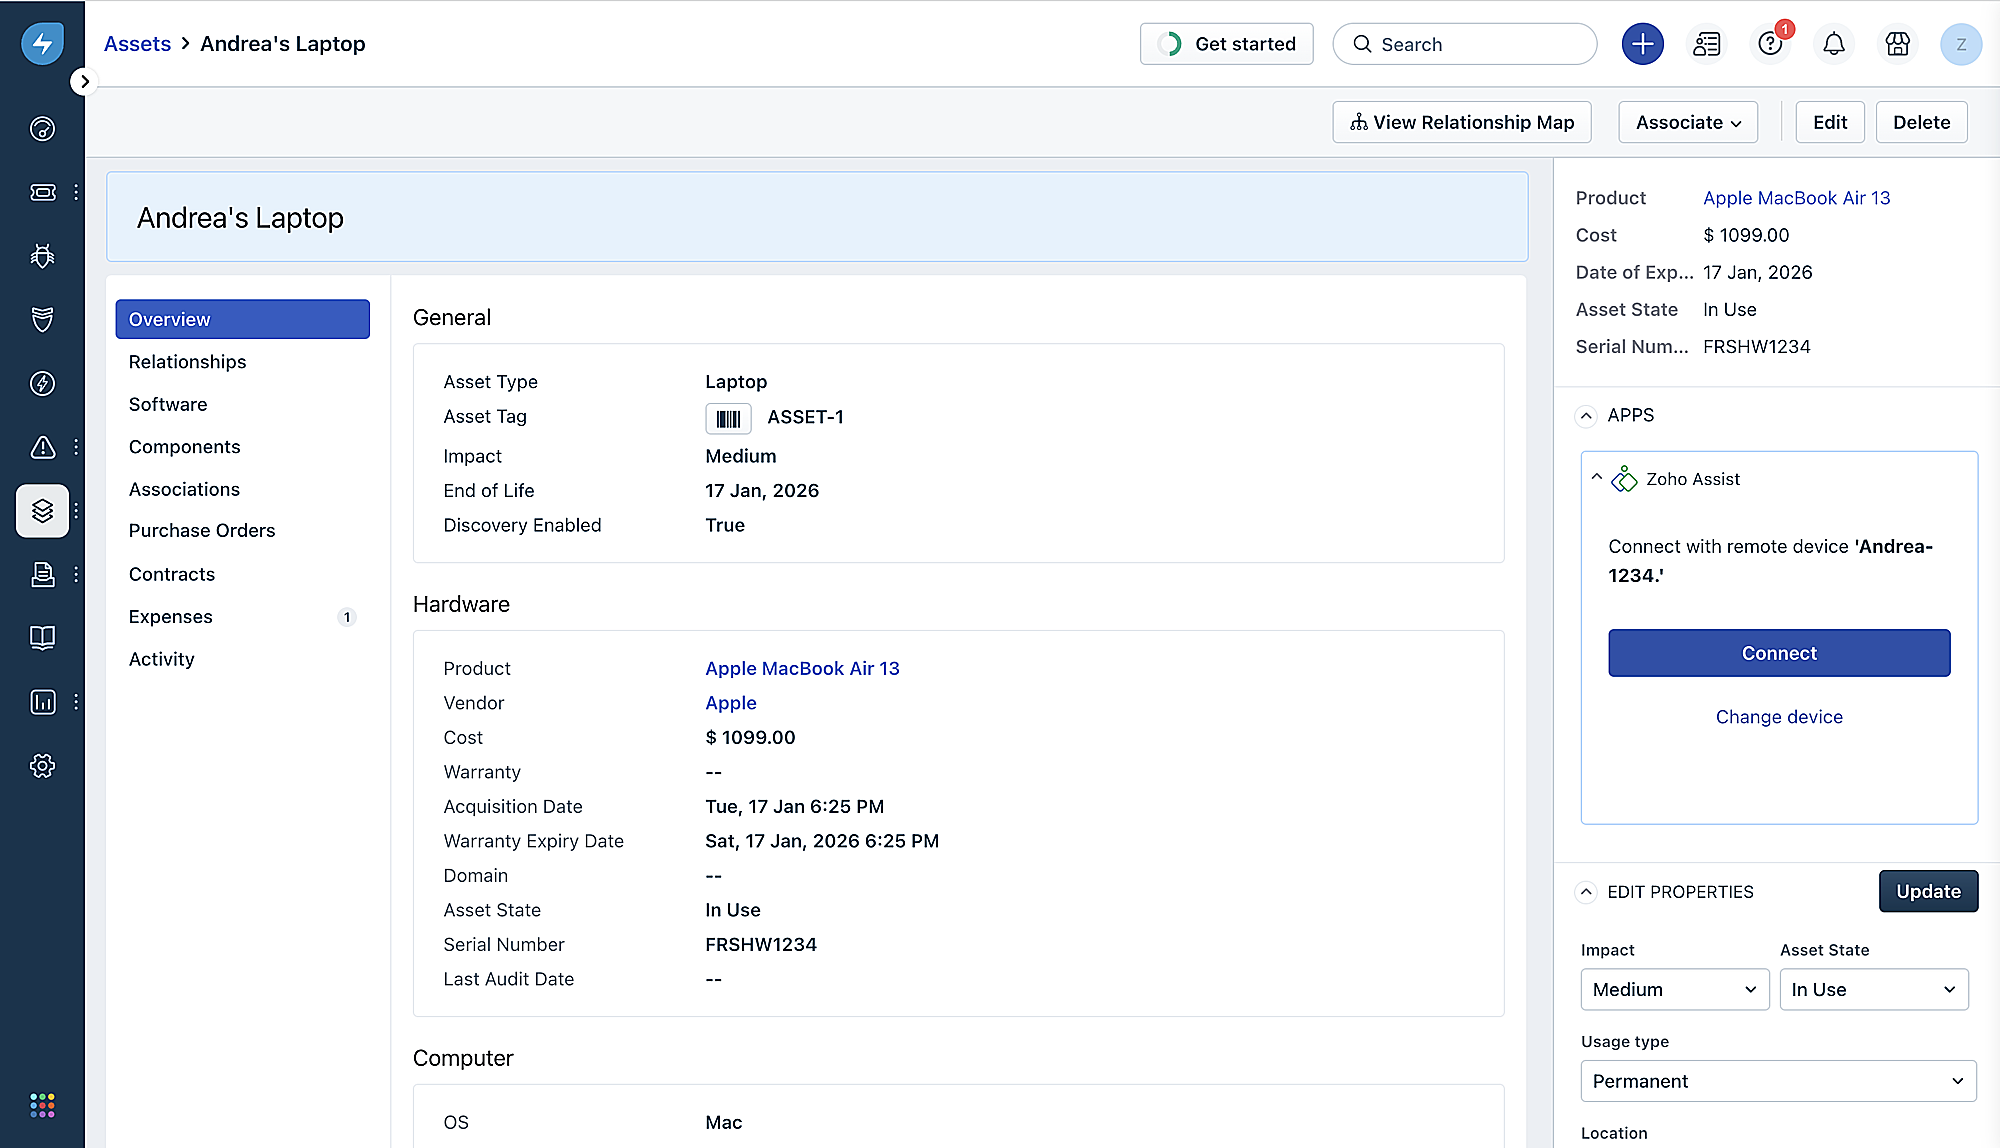
- To configure a device, select the device from the dropdown menu and click Configure device. After configuring the device, you can initiate a remote access session or join an existing one if the device is online.
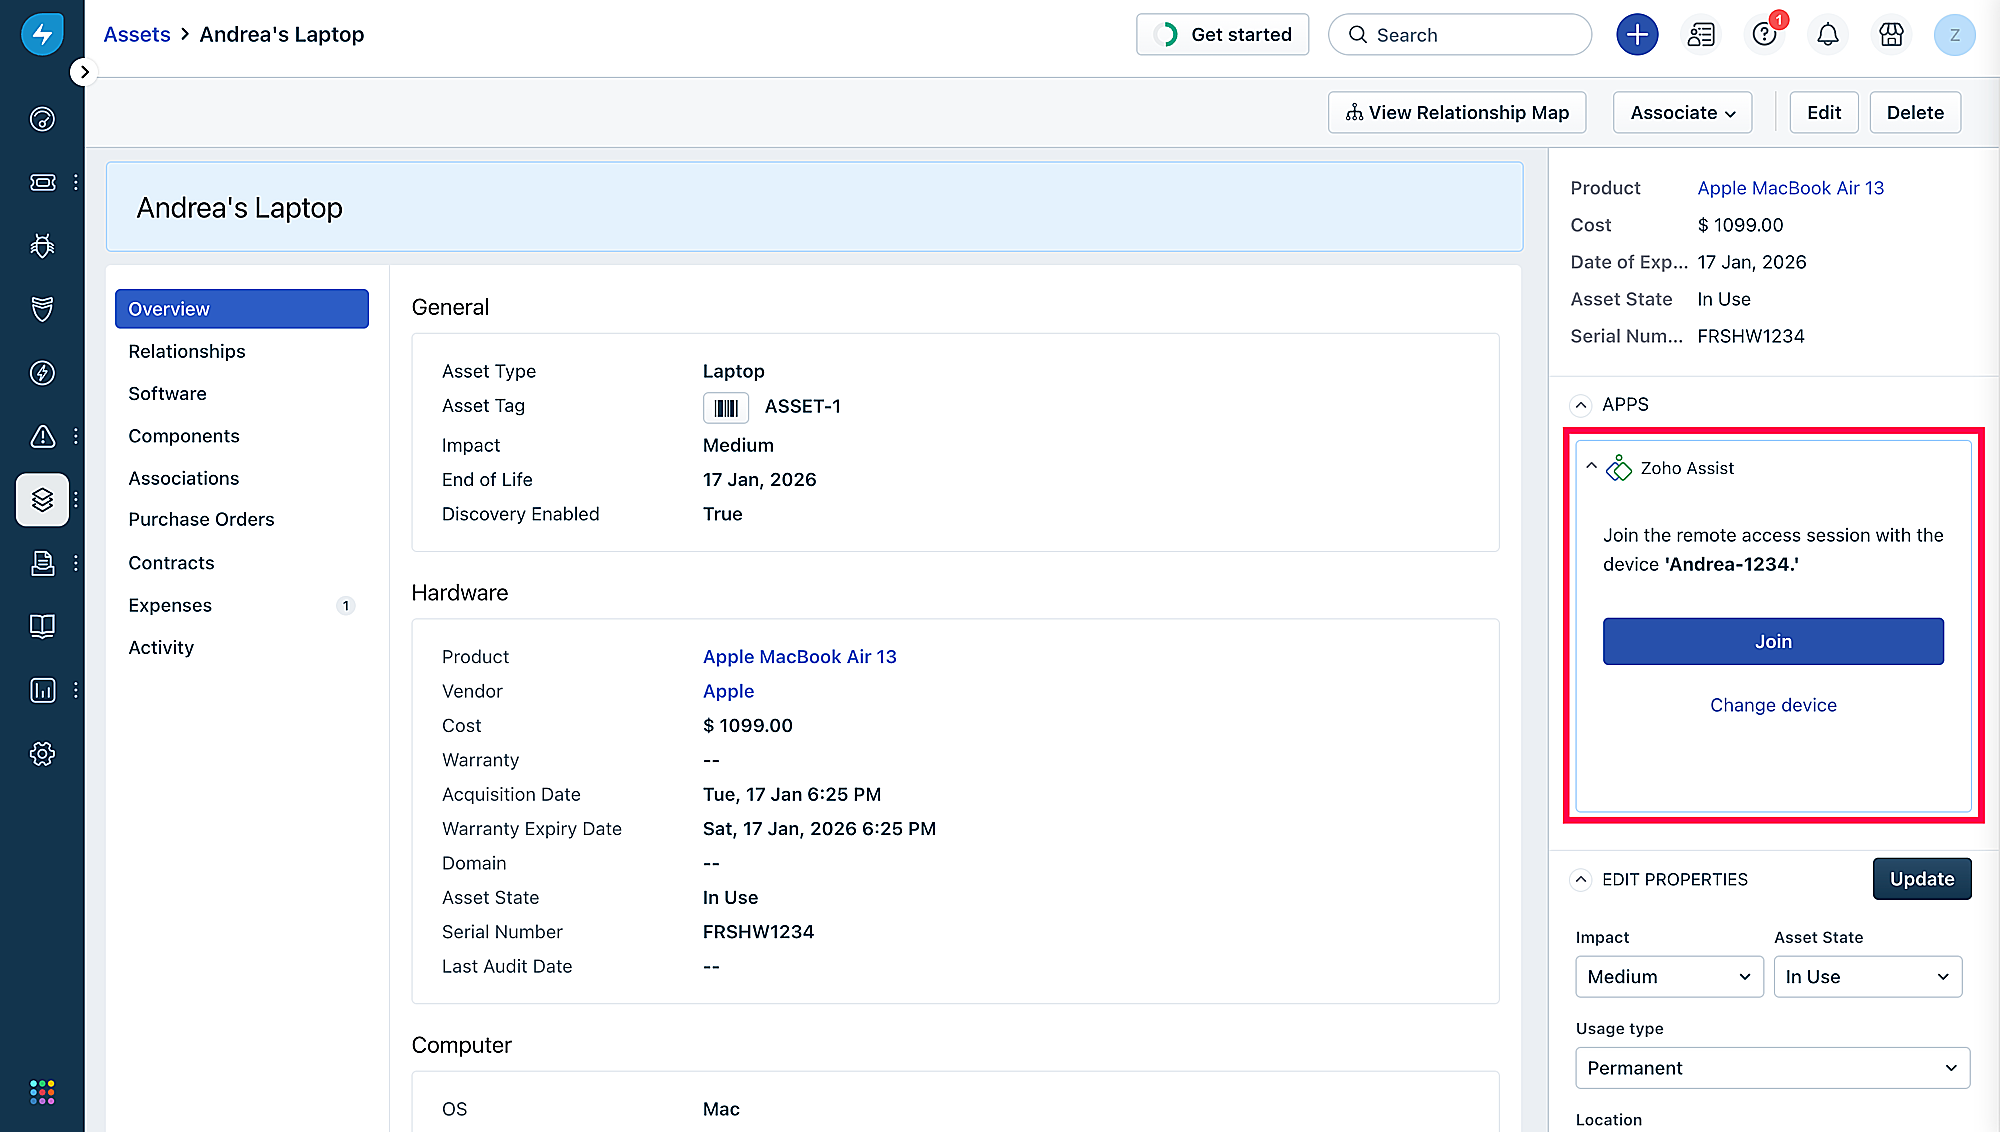
- To start a new remote access session with the configured remote device, click Connect in the prompt shown below.
- If another technician is already in a remote access session, a prompt will be shown allowing you to join the ongoing session. Click Join.
- If the remote device is offline, a prompt will be displayed indicating that the device is not available for remote access.
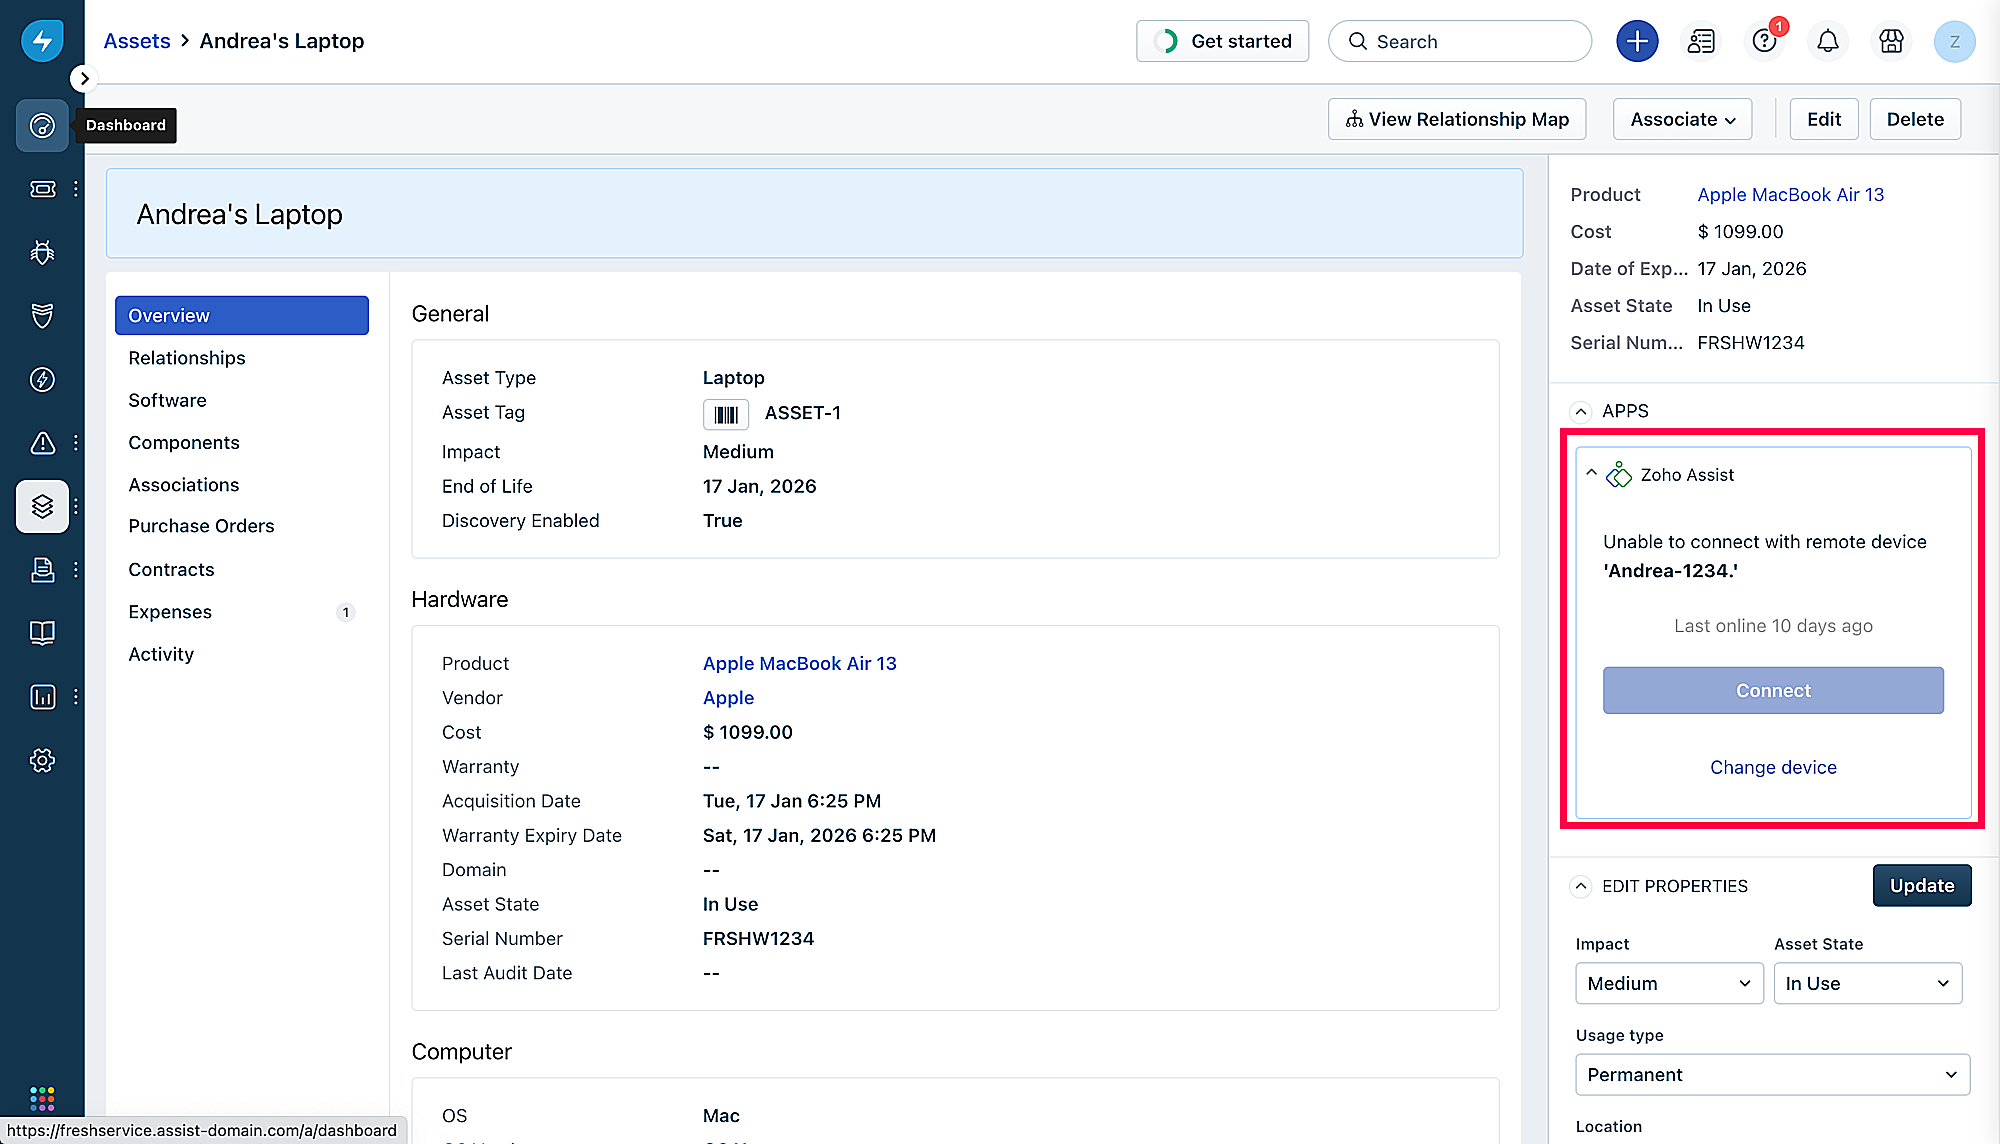
At any time, you have the option to switch to a different device by clicking Change device. This will trigger a prompt below, featuring a dropdown menu that allows you to select a different device or other available devices.